
How To Interior/Exterior :: Headlight Joey Mod How To


from what little I remember, I think the original person to do this idea was someone named Joey in a Mazda or Subbie forum many years back From there, it spread to Mini people... and there have been examples of "joey mods" on Coopers for ages.
Well done! Thanks for the picture share

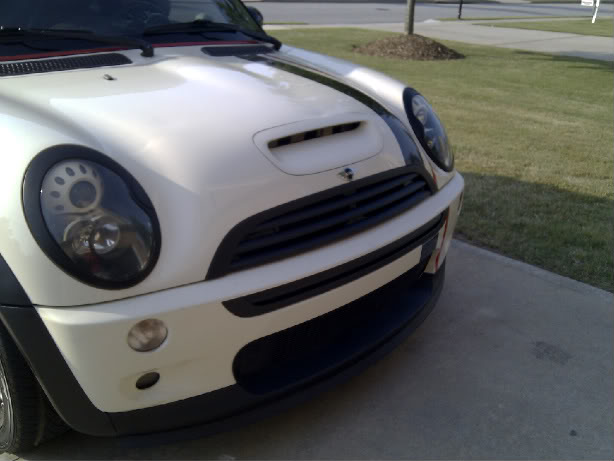


I bought an 05 headlight to practice dismantling ( it was broken ). edit.. I took it apart and it was way too easy lol. oh well, good practice.
I didn't even heat the light up at all. Just pryed slowly. It came from Colorado and it was 80 degrees plus here so maybe that
is why it seperated so easily. I think I'm going to paint just the surrounds to start and see if I like that.

I didn't even heat the light up at all. Just pryed slowly. It came from Colorado and it was 80 degrees plus here so maybe that
is why it seperated so easily. I think I'm going to paint just the surrounds to start and see if I like that.
Last edited by XXLil MickXX; May 13, 2011 at 07:25 AM.
Now I just need the door handles I ordered from Aesthetic Creations so I can paint the surrounds, door handles, gas cap and scuttles. Then I will stop the madness hehe yeah right.
S4!t I just found this old thread from Ninjae and I don't know that I really like the all white lol. Wow I am confuse :/

S4!t I just found this old thread from Ninjae and I don't know that I really like the all white lol. Wow I am confuse :/
Last edited by XXLil MickXX; May 13, 2011 at 08:53 AM.
Now I just need the door handles I ordered from Aesthetic Creations so I can paint the surrounds, door handles, gas cap and scuttles. Then I will stop the madness hehe yeah right.
S4!t I just found this old thread from Ninjae and I don't know that I really like the all white lol. Wow I am confuse :/
S4!t I just found this old thread from Ninjae and I don't know that I really like the all white lol. Wow I am confuse :/

I'm not sure if this has been added, but I wanted to mention it. When I was opening up my headlight I would heat with a heat gun the black housing and actually push down on the clear lens behind the ring. What I found was if you tried to work the black housing you would damage it and it wouldn't look "pretty". But since you were not heating the clear lens, it would not melt or deform when applying the pressure. It made for a clean open of the headlight. Just thought I would pass it along.
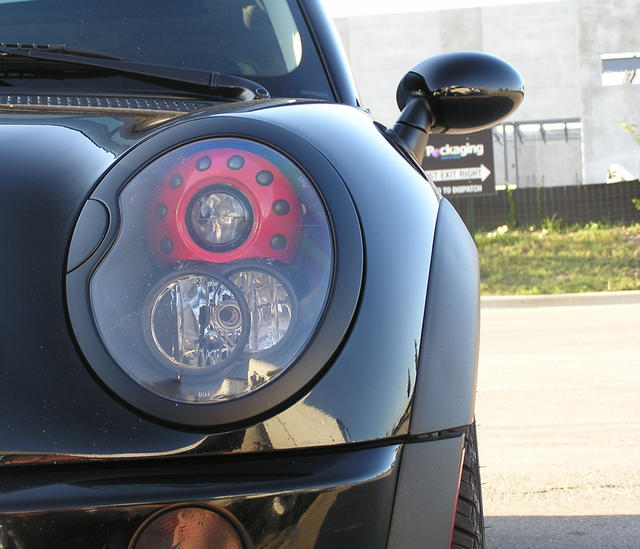
I have taken the xenon light apart several times. I noticed you can pop the lense out of the xenon and paint that little black ring you see inside the lense. I haven't done it yet but thought it was worth mentioning. Just a hassle to get the medal ring back on there but it's not too hard. So do it and post a pic hahaha
here is a good reference. the black ring in the lense inside the red part
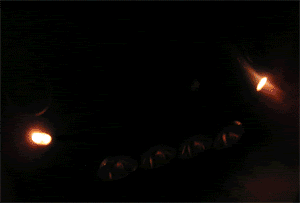
Wondering what it would look like with the lights on at night. probably not noticeable with the lights on..?
here is a good reference. the black ring in the lense inside the red part
Wondering what it would look like with the lights on at night. probably not noticeable with the lights on..?

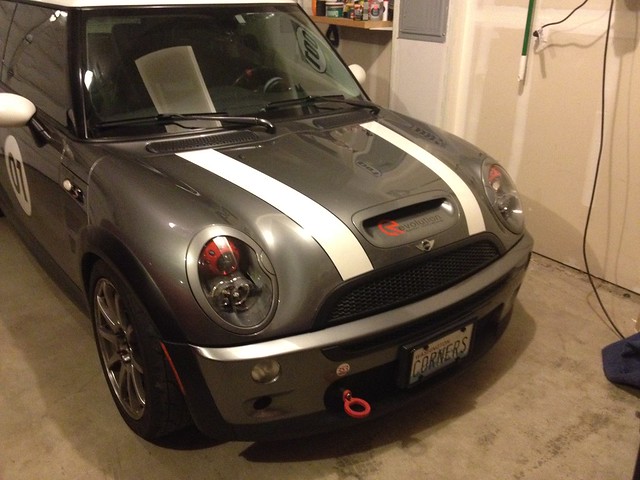
Thanks for the how to. I just did this on my car and it turned out great:
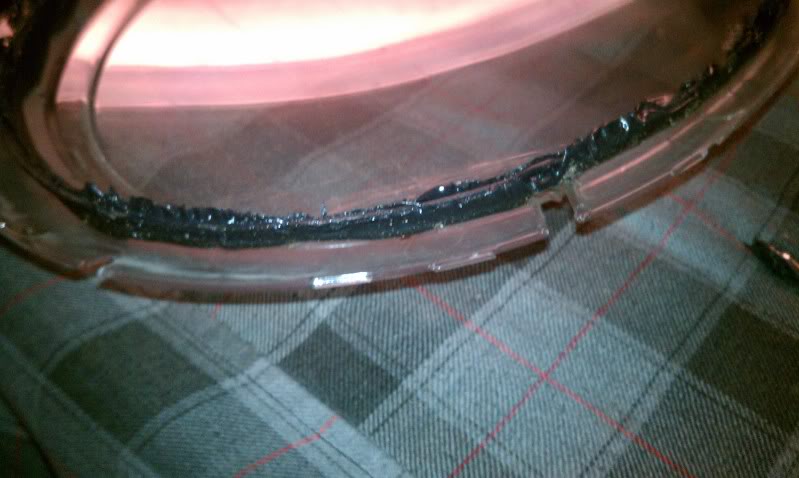
When reassembling, watch out for extra goo at the bottom of the lens and large interior reflector. this part will be visible above the chrome headlight ring. I had to take mine apart again on one side because there was visible goo.

When reassembling, watch out for extra goo at the bottom of the lens and large interior reflector. this part will be visible above the chrome headlight ring. I had to take mine apart again on one side because there was visible goo.
Last edited by CORNERS; Mar 10, 2012 at 04:05 PM.
I would like to say it was my original idea (I already have other red accents on the car making it an obvious option) but I am pretty sure I saw your photos before deciding, so credit is due where credit is due.
Last edited by CORNERS; Mar 11, 2012 at 09:50 PM.
6th Gear
Joined: Nov 2004
Posts: 2,607
Likes: 316
From: Arnold, MO.
Thanks to this thread I had the nerve to do this over the w/e, and because of this thread it was suprisingly easy, and yes I think the heat gun method is the only way to go, if you run into a trouble spot just add a little more heat there.
I also did the led addition as shown here:
https://www.northamericanmotoring.co...eadlights.html
And because of my car color I decided to keep the high beam surrounds chrome.
I did want to add some thing for those who are still a little leary about doing this, because honestly once you get one apart and actually see how it goes together it's really suprising easy, you basiclly just have to get over the fear of doing it.
See the lip in this pic.?
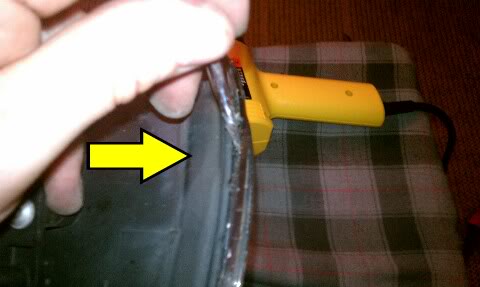
This lip runs all around the entire bucket, that is where you apply your heat, once it gets warm enough to sofften the "goo" you can take your screwdriver and start to seperate the lense from the bucket simply by twisting the screwdriver, not really prying on it, once it starts to seperate you can just do the rest by simply pulling it apart with your fingers. (if it doesn't seem to want to come apart, or you have a stubborn spot, odds are you just don't have enough heat yet)
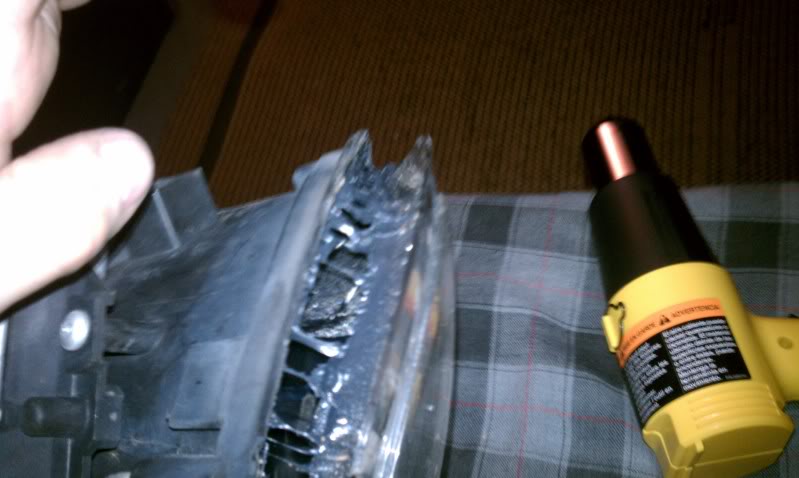
Here's another shot of what a seperated lens looks like with the goo all over the lip that gets inserted into the slot in the bucket:
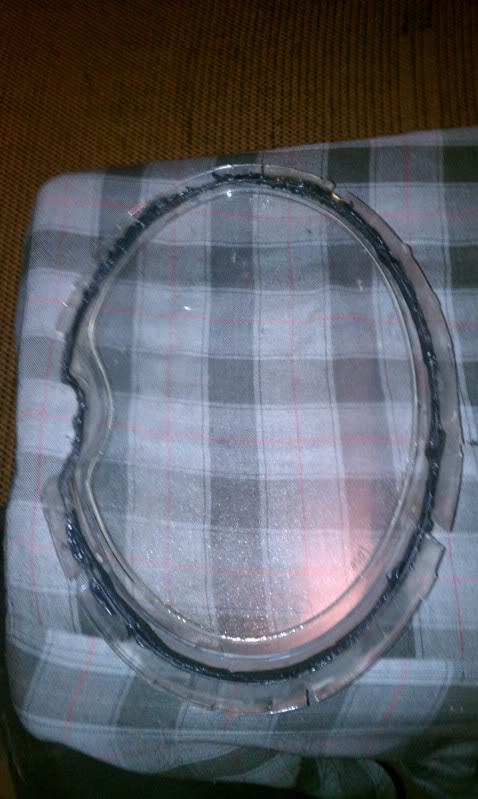
Have fun with it, it's not that bad & don't forget to work on something soft as to not scratch your lense.
And don't forget!
Don't go crazy & clean the goo off of either the lense or the bucket, you need all of it there for proper re-assembly.
I also did the led addition as shown here:
https://www.northamericanmotoring.co...eadlights.html
And because of my car color I decided to keep the high beam surrounds chrome.
I did want to add some thing for those who are still a little leary about doing this, because honestly once you get one apart and actually see how it goes together it's really suprising easy, you basiclly just have to get over the fear of doing it.
See the lip in this pic.?
This lip runs all around the entire bucket, that is where you apply your heat, once it gets warm enough to sofften the "goo" you can take your screwdriver and start to seperate the lense from the bucket simply by twisting the screwdriver, not really prying on it, once it starts to seperate you can just do the rest by simply pulling it apart with your fingers. (if it doesn't seem to want to come apart, or you have a stubborn spot, odds are you just don't have enough heat yet)
Here's another shot of what a seperated lens looks like with the goo all over the lip that gets inserted into the slot in the bucket:
Have fun with it, it's not that bad & don't forget to work on something soft as to not scratch your lense.
And don't forget!
Don't go crazy & clean the goo off of either the lense or the bucket, you need all of it there for proper re-assembly.
Last edited by BlwnAway; Apr 17, 2012 at 01:28 AM.