
What did you do to your mini today?
#3076
 05-10-2011, 07:53 PM


#3077
05-10-2011, 09:09 PM

2nd Gear
Join Date: Nov 2010
Location: Huntington Beach,CA
Posts: 121
Likes: 0
Received 0 Likes
on
0 Posts


#3078
05-10-2011, 10:19 PM

2nd Gear
Join Date: Jan 2010
Location: Las Vegas, NV
Posts: 63
Likes: 0
Received 0 Likes
on
0 Posts
#3079
05-10-2011, 10:44 PM

4th Gear
Join Date: Mar 2007
Location: Calgary, Canada
Posts: 563
Likes: 0
Received 0 Likes
on
0 Posts
It's more like "what did someone do to your MINI today" for me. I was washing him tonight, and noticed that someone had backed into his front bumper recently, scratching the bumper, cracking the paint and busting the lower mount for the indicator light housing. 
Does anyone know of an easy fix to get the indicator housing secure again? Right now it's just the top bolt holding it in.
Does anyone know of an easy fix to get the indicator housing secure again? Right now it's just the top bolt holding it in.
#3080
05-11-2011, 05:44 AM
2nd Gear
Join Date: Feb 2011
Location: Southeast Tennessee
Posts: 89
Likes: 0
Received 0 Likes
on
0 Posts
#3081
05-11-2011, 08:20 AM
Thanks for the compliments on my gauge install. The overall vision and design of the install was relatively simple in theory... Then there came the "Doing It" portion of the project. The sensors were not so bad. I'll elaborate more in a bit.. The difficulties were associated more with the routing of the wiring, finding proper grounding locations and fixing what I broke or jacked-up along the way. As a bit of a perfectionist, I felt like I wanted the install to be as much like something the factory might do, except with a few simple twists of common sense.
Here's a brief overview of my project:
The Water Temp Gauge sensor was installed in the upper radiator hose using an inline tap available from Deft Racing. It's a 34mm tap that allows the sensor to be easily accessable without any trouble. I also installed an inline disconnect in the event I'd need to remove the sensor (or the radiator hose)for any reason in the future.
The Oil Temp Gauge is run via the sensor mounted in a welded bung in the pan. Note the location immediately to the left of the oil drain plug in the pics. This was a huge convenience left over from the previous owner of this car. Most cars won't have this set up. If not, one could utilize the adapter available from Craven to install the sender in the oil drain plug. Also, I installed an inline disconnect in order to remove this sensor in the future without damaging the wiring.
The Oil Pressure Gauge sender is a remote mount using the Tapless Adapter from Craven. Using this adapter, you can maintain the relative location of the OEM idiot sender. When aligning the tapless adapter, be sure the 1/8" NPT points 90 deg. to the right so you can easily access the fitting and attach the remote line. Using No. 3 teflon/steel braided line, the remote line is attached to a -03 AN to 1/8" NPT union and run upwards from the tap location, through the drain at the base of the firewall cowling (immediately beneath the brakelines). A 90 degree elbow is attached to the line at the -03 AN fitting at the tap and a straight is used to attach at the sender.
The Boost Gauge is manual and picks up the vacuum from the line on the intake which supplies the fuel pressure regulator. This is done using the tee supplied from Marshall. I opted to purchase some heavier vacuum line (Gates 7/64) from the local O'Rielly store rather than use the lighter/clear tubing supplied with the gauge. Tapping the OEM vacuum line is a bit of a challenge. You will need a pair of 11"/45 deg. needle nose pliers to do complete this task.
All tolled, I have spent approximately 20-30 hours doing this install (5 or 6 just chasing parts). As a first (and probably only) time for doing this, I spent lots'a time just figuring out how to attain the results I had envisioned in the planning process. I was able to use a friend's hoist which made life easier at 54 years old. Let no one kid you, this is not a "Hard" project, but I'd say it's certainly a "Challenging" project. There's lots of parts removal in order to get in to places not normally accustomed to seeing daylight. Overall, I am very pleased with the outcome and am willing to assist anyone wanting to take on this project. Though I likely won't have any wrenches, wire cutters or cable ties in hand....... Purely a new-found plethora of information for someone to pick.
Motor On.......... Here's a few pics of the sending units for your viewing pleasure. Sorry about picture quality. I did what I could....
Here's a brief overview of my project:
The Water Temp Gauge sensor was installed in the upper radiator hose using an inline tap available from Deft Racing. It's a 34mm tap that allows the sensor to be easily accessable without any trouble. I also installed an inline disconnect in the event I'd need to remove the sensor (or the radiator hose)for any reason in the future.
The Oil Temp Gauge is run via the sensor mounted in a welded bung in the pan. Note the location immediately to the left of the oil drain plug in the pics. This was a huge convenience left over from the previous owner of this car. Most cars won't have this set up. If not, one could utilize the adapter available from Craven to install the sender in the oil drain plug. Also, I installed an inline disconnect in order to remove this sensor in the future without damaging the wiring.
The Oil Pressure Gauge sender is a remote mount using the Tapless Adapter from Craven. Using this adapter, you can maintain the relative location of the OEM idiot sender. When aligning the tapless adapter, be sure the 1/8" NPT points 90 deg. to the right so you can easily access the fitting and attach the remote line. Using No. 3 teflon/steel braided line, the remote line is attached to a -03 AN to 1/8" NPT union and run upwards from the tap location, through the drain at the base of the firewall cowling (immediately beneath the brakelines). A 90 degree elbow is attached to the line at the -03 AN fitting at the tap and a straight is used to attach at the sender.
The Boost Gauge is manual and picks up the vacuum from the line on the intake which supplies the fuel pressure regulator. This is done using the tee supplied from Marshall. I opted to purchase some heavier vacuum line (Gates 7/64) from the local O'Rielly store rather than use the lighter/clear tubing supplied with the gauge. Tapping the OEM vacuum line is a bit of a challenge. You will need a pair of 11"/45 deg. needle nose pliers to do complete this task.
All tolled, I have spent approximately 20-30 hours doing this install (5 or 6 just chasing parts). As a first (and probably only) time for doing this, I spent lots'a time just figuring out how to attain the results I had envisioned in the planning process. I was able to use a friend's hoist which made life easier at 54 years old. Let no one kid you, this is not a "Hard" project, but I'd say it's certainly a "Challenging" project. There's lots of parts removal in order to get in to places not normally accustomed to seeing daylight. Overall, I am very pleased with the outcome and am willing to assist anyone wanting to take on this project. Though I likely won't have any wrenches, wire cutters or cable ties in hand.......
Purely a new-found plethora of information for someone to pick.Motor On.......... Here's a few pics of the sending units for your viewing pleasure. Sorry about picture quality. I did what I could....
#3082
05-11-2011, 09:37 AM


#3084
05-11-2011, 06:40 PM

2nd Gear
Join Date: Jan 2011
Location: Poway, CA
Posts: 150
Likes: 0
Received 0 Likes
on
0 Posts
Passed my 1,200 mile break in YAY
Decided it was a good idea to roll over a nail BOO
Tested Mini dealership to see if they'd consider fixing it...nope BOO
Would be willing to sell me a brand new tire BOO
Discount Tire plugged and patched for free YAY
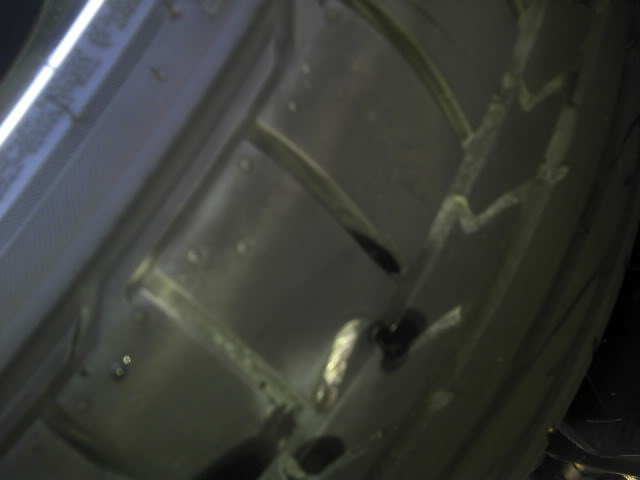
Blurry, Discount Tire Parking Lot Cellphone pic.
Decided it was a good idea to roll over a nail BOO
Tested Mini dealership to see if they'd consider fixing it...nope BOO
Would be willing to sell me a brand new tire BOO
Discount Tire plugged and patched for free YAY
Blurry, Discount Tire Parking Lot Cellphone pic.
#3086
05-11-2011, 06:57 PM

3rd Gear
Join Date: Apr 2011
Location: Bridgeport CT.
Posts: 180
Likes: 0
Received 0 Likes
on
0 Posts
#3087
05-12-2011, 04:17 AM
5th Gear
Join Date: Apr 2010
Location: Hell
Posts: 747
Likes: 0
Received 0 Likes
on
0 Posts
Passed my 1,200 mile break in YAY
Decided it was a good idea to roll over a nail BOO
Tested Mini dealership to see if they'd consider fixing it...nope BOO
Would be willing to sell me a brand new tire BOO
Discount Tire plugged and patched for free YAY

Blurry, Discount Tire Parking Lot Cellphone pic.
Decided it was a good idea to roll over a nail BOO
Tested Mini dealership to see if they'd consider fixing it...nope BOO
Would be willing to sell me a brand new tire BOO
Discount Tire plugged and patched for free YAY
Blurry, Discount Tire Parking Lot Cellphone pic.
Congrats on your break in. I just broke it in too. I'm thinking an oil change soon.


#3090
05-12-2011, 09:18 AM

6th Gear
Join Date: Feb 2011
Location: Maryland, USA
Posts: 1,575
Likes: 0
Received 0 Likes
on
0 Posts

#3092
05-12-2011, 09:23 AM
6th Gear
Join Date: Feb 2011
Location: Maryland, USA
Posts: 1,575
Likes: 0
Received 0 Likes
on
0 Posts

#3093
05-12-2011, 01:25 PM


#3094
05-12-2011, 02:10 PM


#3096
05-13-2011, 09:24 PM

#3098
05-14-2011, 06:42 AM
#3099
05-14-2011, 07:10 AM

4th Gear
Join Date: Dec 2010
Location: New York, NY
Posts: 450
Likes: 0
Received 0 Likes
on
0 Posts


Those are some slick wheels, are those Konig Illusions 18x8s? What does it say on the inner lip- Motor Rismo? pretty cool.
And may I ask, where you got them? Discount tire and tire direct have the 5-100 bolt patterns only in 18
Last edited by gothmdoc; 05-14-2011 at 07:20 AM.
#3100
05-14-2011, 08:25 AM

4th Gear
Join Date: Mar 2011
Location: San Jose, CA
Posts: 462
Likes: 0
Received 0 Likes
on
0 Posts
Passed my 1,200 mile break in YAY
Decided it was a good idea to roll over a nail BOO
Tested Mini dealership to see if they'd consider fixing it...nope BOO
Would be willing to sell me a brand new tire BOO
Discount Tire plugged and patched for free YAY
Blurry, Discount Tire Parking Lot Cellphone pic.
Decided it was a good idea to roll over a nail BOO
Tested Mini dealership to see if they'd consider fixing it...nope BOO
Would be willing to sell me a brand new tire BOO
Discount Tire plugged and patched for free YAY
Blurry, Discount Tire Parking Lot Cellphone pic.