Drivetrain My build thread.
#1
 12-11-2012, 01:43 PM


My build thread.
Well my my piston rings finally gave out so I am going to be rebuilding my motor. I figured there would be some of you interested in this. So all and any updates will be added here.
Car info: 2009 Cooper S
Updates:
1. 12/11/12- Just ordered a OS Giken LSD and GT clutch from Way Motor Works. Will post pics as soon as they get here.
2. 12/13/12- Supertech pistions are on the way. Will post pics when received.
3. 12/14/12- OS Giken GT clutch arrived in the mail. It came with some stickers and a t-shirt.

4. 12/14/12- Just spoke with Carrillo, H-beam rods are on the way.
5. 12/18/12- Rods and LSD showed up today.
The first item I have for you in the OS Giken LSD


I dont have much to say about this. I purchased it off of OS's reputation. It seems like a solid product.
Next I have the Carrillo H-Beam rods.


The first thing I noticed about the rods was the on the crank end. They are put together and torqued to spec, then they are bored and honed. It makes for an extremely smooth finish. Before they ship they spray the entire thing with WD-40, now it might just be me but I love that smell.
6. 12/19/12- Pistons showed up and everything is off to the machine shop.
Pistons- Supertech 10.5CR 77.5 Bore


Photo of my block before I dropped it off.

And of course the obligatory carbon buildup post. First the dirtiest one and then the cleanest one. A thing I did notice was that the one that was most dirty is directly above the PVC inlet on the manifold. Don't mind the fly not sure how he got there.


Now the good/bad news. I dropped everything off as the machine shop and since its the holiday season...... its going to take at least 3 weeks. So I wont have much for you till I get my turbo back from G-Pop.
7. 12/21/12- Turns out the pistons do not work with the rods. So the pistons are being returned and I will be ordering CP pistons.
8. 12/24/12- Received the DimSport MyGenius flash tool today.

9. 12/26/12- Ordered CP 77.5mm bore and 10.5:1CR pistons to replace the supertech ones.
10. 12/26/12- The cause of my engine problems was a clogged high flow cat. It caused a my EGT to rise and fry one of my rings.
11. 12/27/12- Installed the LSD in the transmission.
Stock dif / LDS

The gear on the right is reverse and those three little T shaped things were all the trouble.

Here is the inside of the gearbox, the spot on the bottom left is where reverse gear was supposed to stay, total pain.

One more of it all put back together.

12. 12/28/12- Pistons arrived today, CP 77.5mm 10.5:1CR
They are a little bit heavier than the Supertech ones but the quality is much much higher. The weight would be expected with a denser alloy. Other than that I am very happy with them.
Box

Inside

Close up

13. 1/3/13- Everything is off to the machine shop and the turbo will be sent back to me tomorrow.
14. 1/9/13- I decided to spruce up my under hood look a bit. Got the intake back today.
15. 1/9/13- Got my turbo back!
Old

New

Compressor

Exhaust

16. 1/10/13- For shitzingiggles here are a couple more pics.
Downpipe- with cat removed.

Heat Shield

17. 1/18/13- Head gasket came in from Cometic.

18. 1/21/13- Everything is back from the machine shop. Now I am just waiting for a few little things and it will be all back together in no time.

19. 1/26/13- Well bad news. While getting everything put together it was discovered that cometic sent me a gasket for the R53. So tomorrow I will have to call and get a new one. Now looking at the side by side pics of the block and gasket, it's obviously wrong.
20. 1/29/13- Serious bad news. Cometic doesn't make a gasket for the R56. Even worse, I can't find anyone that does. So as of right now this build is dead till I can find a gasket or get one custom made.
21. 2/4/13- Ok so got the head gasket and everything is on its way to being put back together.
Additionally here is my solution to the carbon buildup issue.
My solution to carbon buildup.
So after reading through all the posts about catch cans and our PVC system I decided this is the easiest thing to do.
First I contacted CZAR and purchased to of the caps from him.
First I removed to hose from the crankcase to the manifold and put in the two caps.
Then I went to the local auto parts store and picked up a neoprene plug and a breather filter (to substitute till I can get an appropriate length hose to run under the car)
This is the end result.
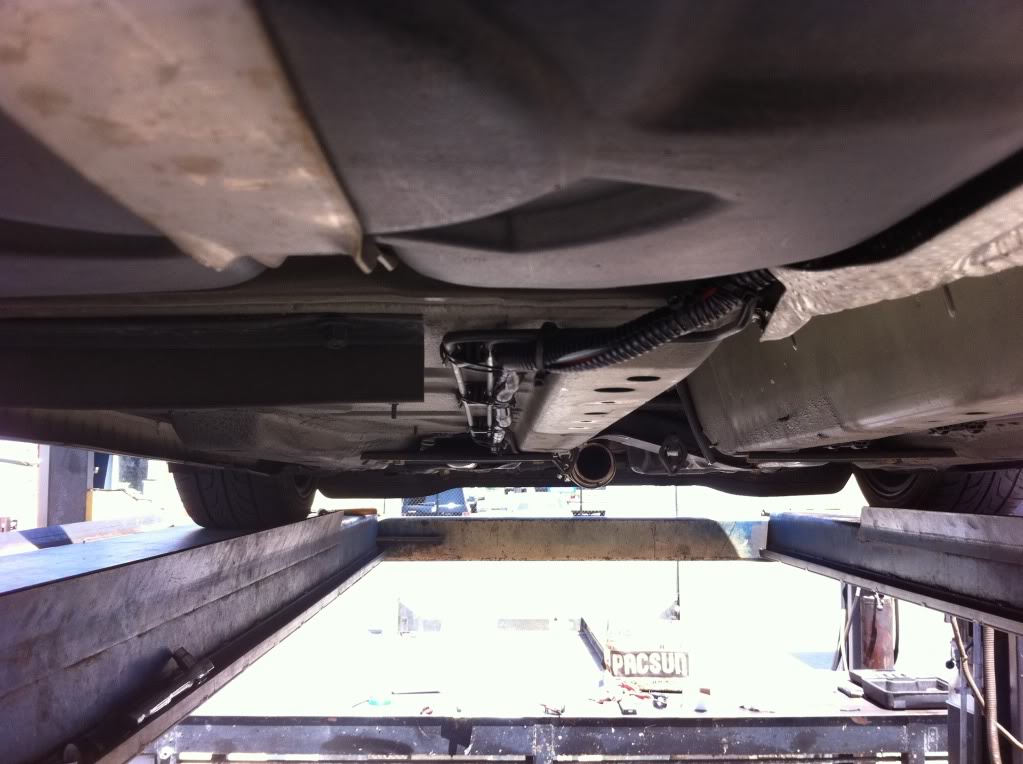
I have a longer hose now so all the crankcase gasses are come out of the front port and away into the air under the car. Not in my motor at all. If any of you are worried that this may cause positive pressure in your valve cover or crank case it wont. This is why,
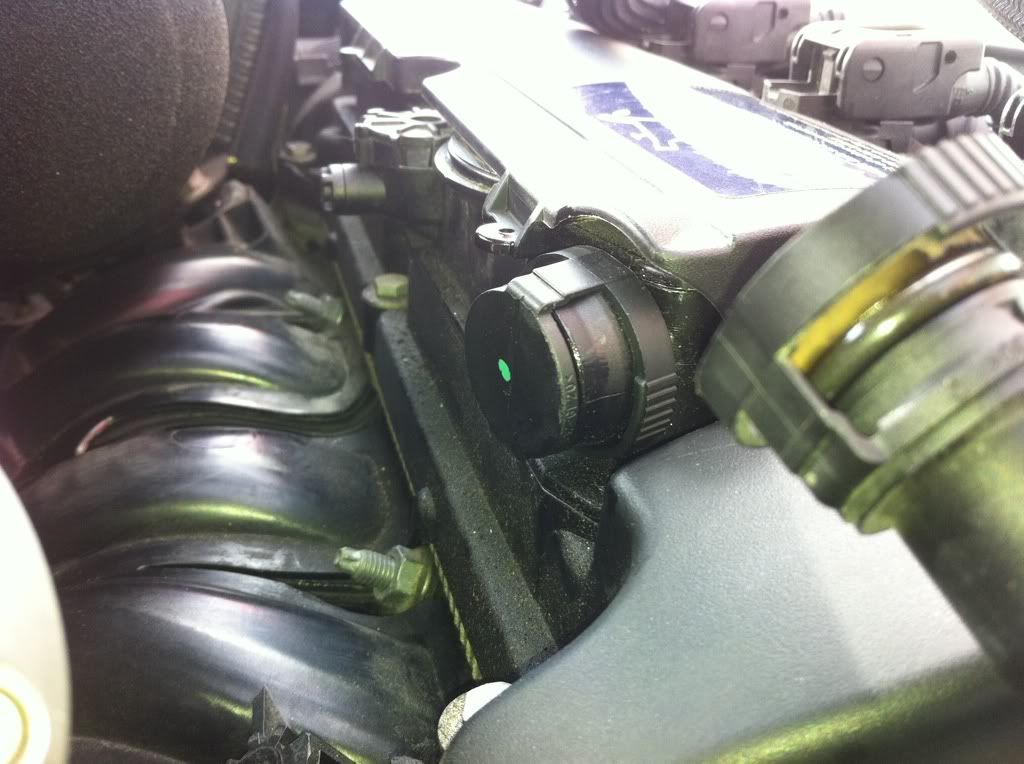
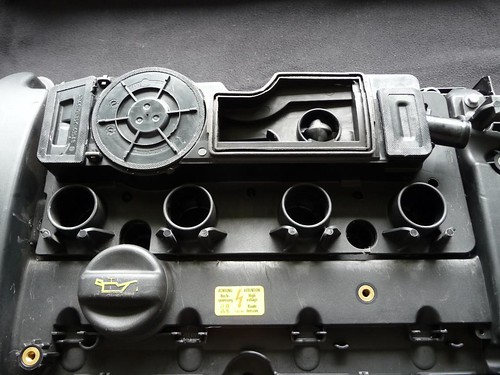
So after all this talk about the PCV system I decided to go grab my valve cover and do a little investigating. Thanks to CZAR for cutting apart one of his valve covers and taking a bunch of pictures (which I tactfully acquired), I can give an even more detailed explanation of what is going on.
Ok so first we have the underside of the valve cover. As you can see in the picture below there are two ways for air to enter/exit the valve cover. The orange circle is a one way valve that will only let air into the valve cover. The white rectangle is an open port that will let air in or out. Mainly this is for air extraction. The white is just a paper towel I stuffed in the port so it would be more visible in the picture.
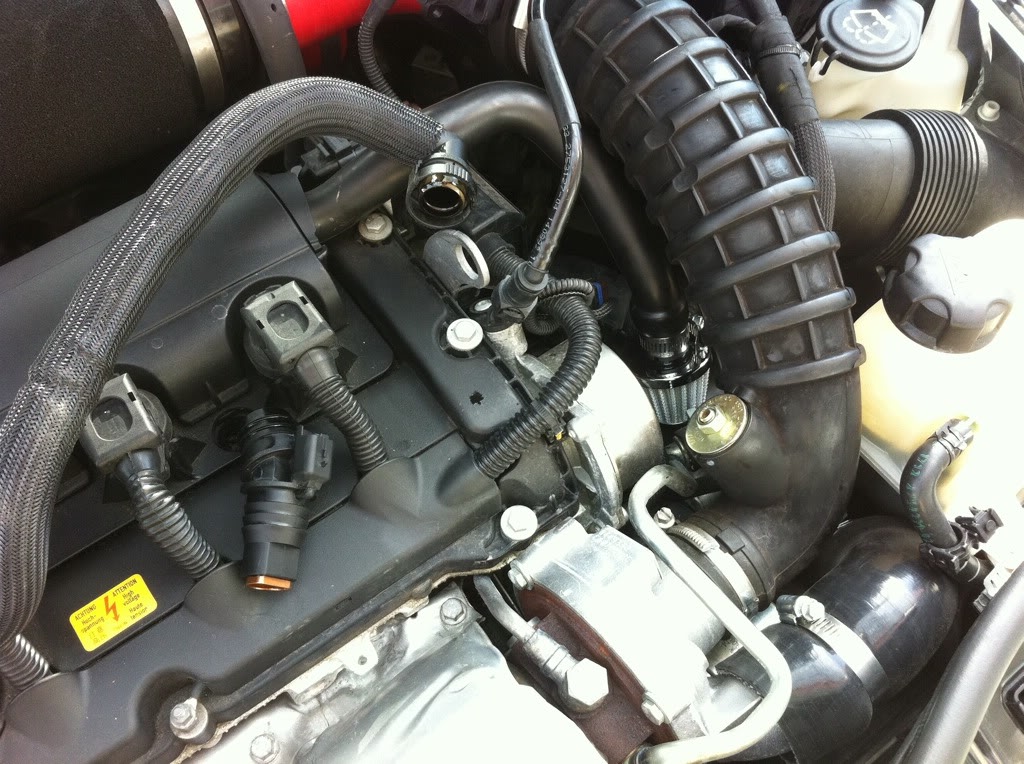
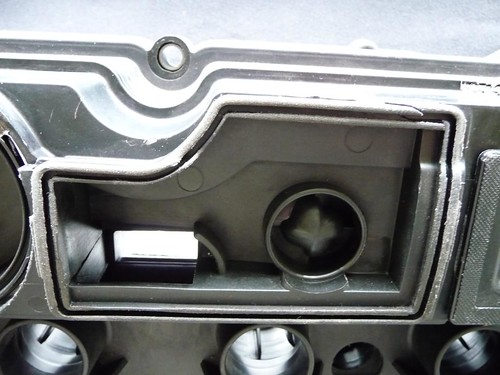
This is a picture of the extraction area of the PCV system
A view of the extraction port from the top side of the valve cover.
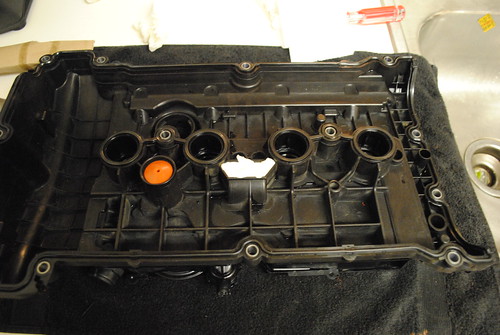
Open and closed flaps on the intake side of the PCV system.


Some pictures of this baffle thing.


Open and closed flaps on the manifold side of the PCV system.


Now that you have seen all the components, I will try to explain how this whole thing works. I sacrificed my lungs and braincells for this, so enjoy.
1. Either the rear or front PCV port can use vacuum to extract air from the valve cover. However neither port can force air into the valve cover.
2.When you block off one port the other is still able to extract air from the valve cover. The front port is more free flowing then the rear.
3.Blocking off the rear port will not cause pressure to build in the valve cover. The pressure will be able to escape from front port.
4.The orange one way valve is slightly confusing. It can only circulate air from the extraction port not air from outside. I think it is used as a way for oil to condense and drain back into the head. That way only fumes escape.
That pretty much sums it up. This should put all of the "PCV system" threads to rest. Questions? Ask away.
Additionally an explanation from CZAR
There you have it. No more carbon buildup.
22. 2/8/13- Surprise!!! Car assumably is done.


Now I'm much to tired to type much so enjoy the car ****.
23. 2/9/13- I also had to go out and purchased a used Netbook to run the Dimsport tool. Main computer is a mac.

24. 2/19/13- Car hit 200 miles today, I am now allowed to slowly start building boost a little at a time.
Also, Figured I would toss this in here since its already on my car.
Howerton Engineering prepared HFS-3 Water/Meth kit[/URL].
This wasn't to hard of an install. Took about 3 hours total.
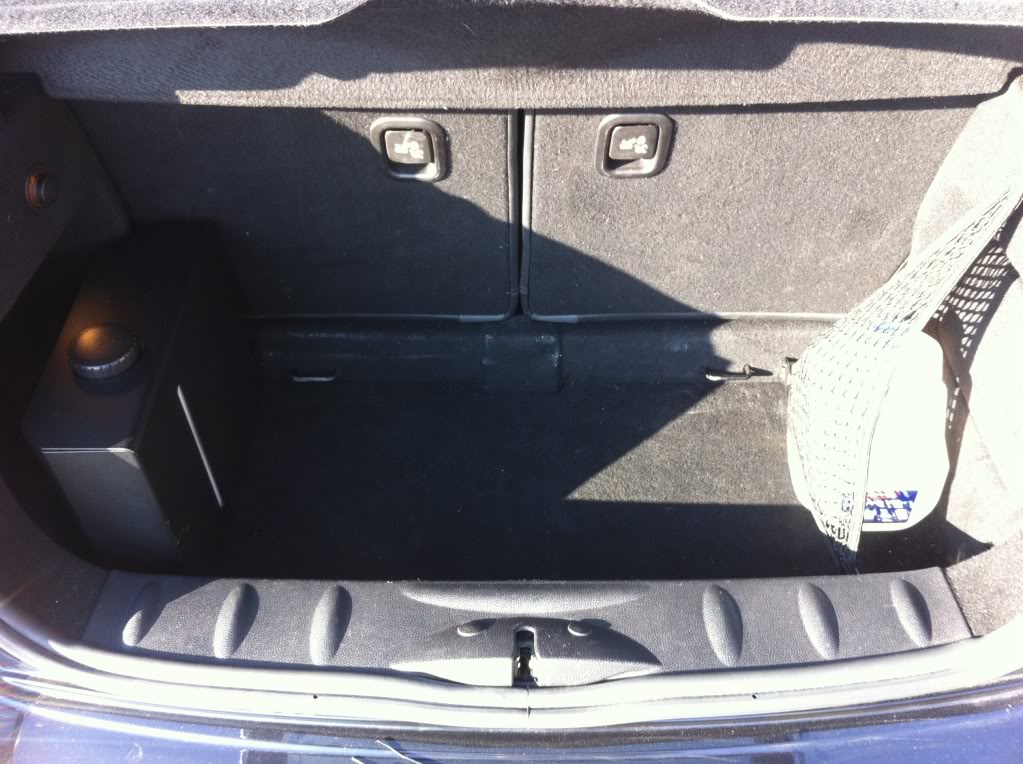
First I took the tank and mounted it, then ran tube and wires through one of the rubber grommets in the floor board.

Then trimmed the vent hose and put shielding around the bundle.

I ran the hose and wires along the break lines into the engine bay.

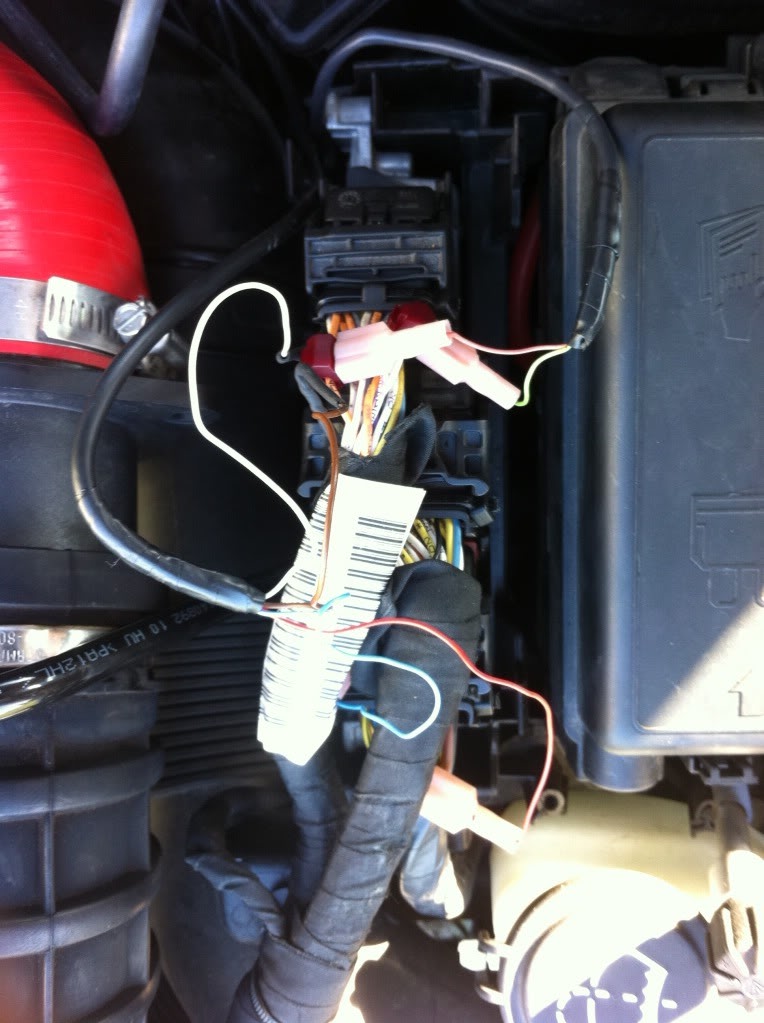
From there I put it into the area in-between the engine and fire wall. Connecting the FAV next to the battery.

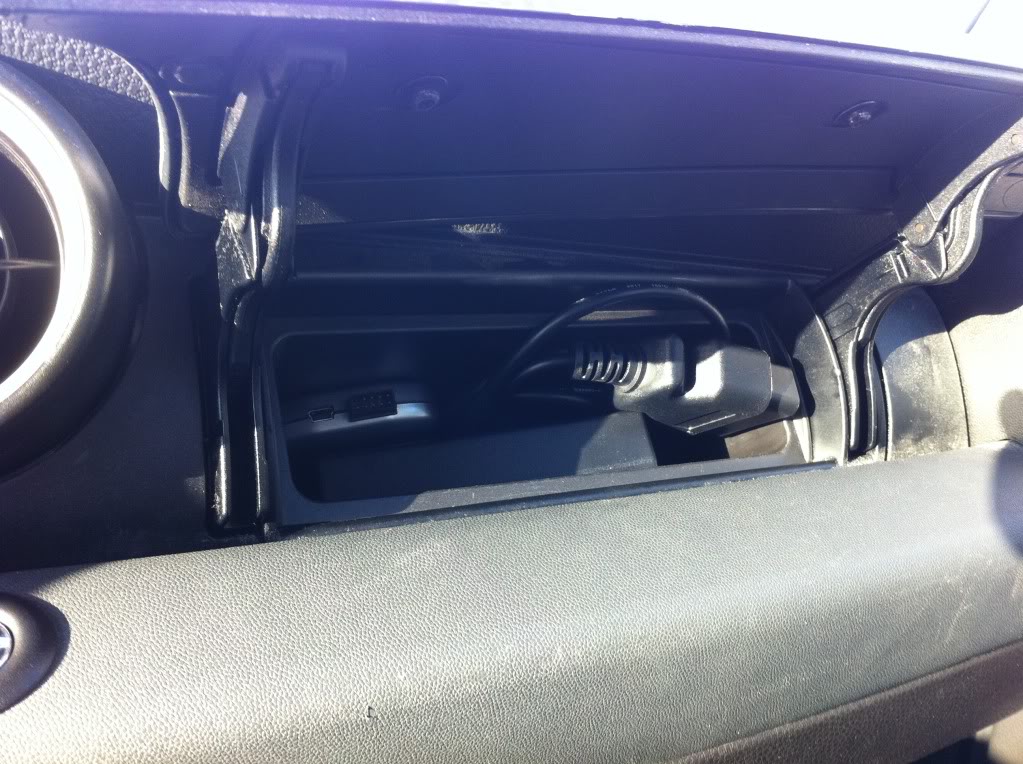
I ran the bundle of wires under the battery into the rubber grommet on the passenger side.

From there I ran it up to the "secret compartment". Popped out the plastic box and drilled a hole in it.

I installed the nozzle just before the Throttle body. (Has been moved further away since this picture)

I brought it in to Rush Motorsport's in San Diego to have the ECU wired. They tapped and soldered the wires.
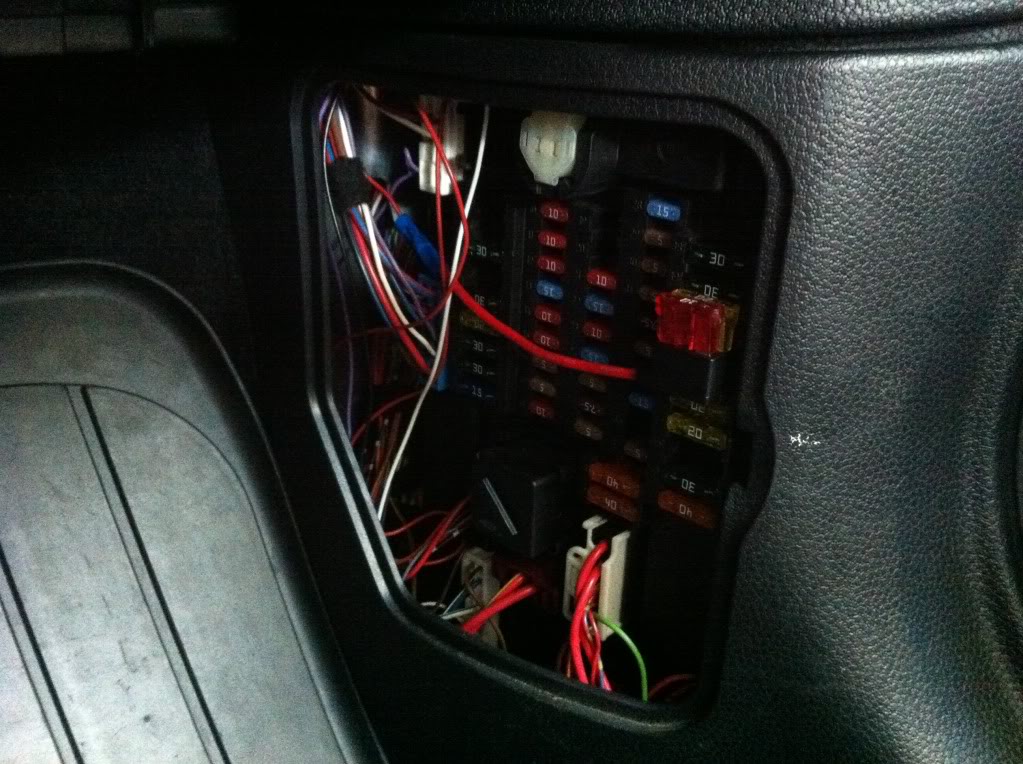
I cleaned up all the wiring and this is the final result.
My Old Dyno graph along with the information they posted along with it on their website
The following dyno was performed on an 09 MINI Cooper S. The car was equipped with an aftermarket intercooler, BOV and catback exhaust, and a Howerton Engineering/Aquamist HFS-3 System. The car was dyno tuned with three runs overlayed on the graph below. The baseline run (light red line) is the stock tune without the water/methanol system activated. The middle line (green) is a stage 1 flash with the methanol turned on. The highest run (dark red line) is a custom dyno tune with the methanol system activated.
[ATTACH=CONFIG]14627[/ATTACH]
You can see from 5000-6500Rpm, there is a 55lb-ft of torque gain and from 5500-6500RPM a 60hp gain from the stock tune. Where the stock and stage 1 tune start losing torque at 4000RPM, the combination of custom tuning and the superior delivery of the Aquamist hardware and our setup of the Aquamist system keep the torque nearly flat through 5200RPM.
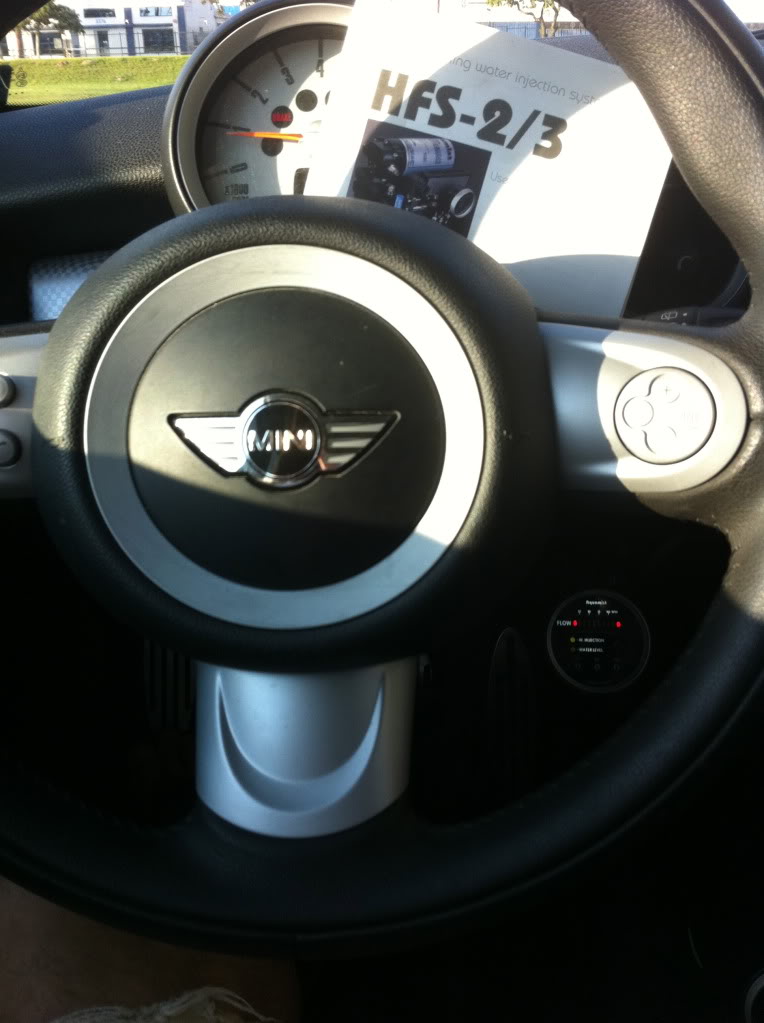
25. 2/25/13- Got this in the mail today, it is an awesome device.

26. 3/23/13- New NM Engineering Intake
So I got a new intake for the car. The NM engineering intake kit. It came very well packaged.

I havent had time to install it yet but it looks quality. I have not decided if I want to get the silver part powder coated green or not. But the carbon fiber looks great. Hopefully I will be able to get it installed soon.

27. 4/5/13- Installed my intake.
I actually have an update!!!
I have been waiting for it to warm up to install my new intake. I originally wanted just the NM Engineering Carbon fiber inlet pipe but decided to get the whole intake. First I would like to say that is well made and looks great on the car. Installation was pretty easy besides a few scrapes from having massive hands. It mounts nicely to the grommets and the supplied hardware keeps them from mushing out. Overall I am very happy with my purchase. The carbon fiber looks good.
Pics:


Car info: 2009 Cooper S
Updates:
1. 12/11/12- Just ordered a OS Giken LSD and GT clutch from Way Motor Works. Will post pics as soon as they get here.
2. 12/13/12- Supertech pistions are on the way. Will post pics when received.
3. 12/14/12- OS Giken GT clutch arrived in the mail. It came with some stickers and a t-shirt.
4. 12/14/12- Just spoke with Carrillo, H-beam rods are on the way.
5. 12/18/12- Rods and LSD showed up today.
The first item I have for you in the OS Giken LSD
I dont have much to say about this. I purchased it off of OS's reputation. It seems like a solid product.
Next I have the Carrillo H-Beam rods.
The first thing I noticed about the rods was the on the crank end. They are put together and torqued to spec, then they are bored and honed. It makes for an extremely smooth finish. Before they ship they spray the entire thing with WD-40, now it might just be me but I love that smell.
6. 12/19/12- Pistons showed up and everything is off to the machine shop.
Pistons- Supertech 10.5CR 77.5 Bore
Photo of my block before I dropped it off.
And of course the obligatory carbon buildup post. First the dirtiest one and then the cleanest one. A thing I did notice was that the one that was most dirty is directly above the PVC inlet on the manifold. Don't mind the fly not sure how he got there.
Now the good/bad news. I dropped everything off as the machine shop and since its the holiday season...... its going to take at least 3 weeks. So I wont have much for you till I get my turbo back from G-Pop.
7. 12/21/12- Turns out the pistons do not work with the rods. So the pistons are being returned and I will be ordering CP pistons.
8. 12/24/12- Received the DimSport MyGenius flash tool today.
9. 12/26/12- Ordered CP 77.5mm bore and 10.5:1CR pistons to replace the supertech ones.
10. 12/26/12- The cause of my engine problems was a clogged high flow cat. It caused a my EGT to rise and fry one of my rings.
11. 12/27/12- Installed the LSD in the transmission.
Stock dif / LDS
The gear on the right is reverse and those three little T shaped things were all the trouble.
Here is the inside of the gearbox, the spot on the bottom left is where reverse gear was supposed to stay, total pain.
One more of it all put back together.
12. 12/28/12- Pistons arrived today, CP 77.5mm 10.5:1CR
They are a little bit heavier than the Supertech ones but the quality is much much higher. The weight would be expected with a denser alloy. Other than that I am very happy with them.
Box
Inside
Close up
13. 1/3/13- Everything is off to the machine shop and the turbo will be sent back to me tomorrow.
14. 1/9/13- I decided to spruce up my under hood look a bit. Got the intake back today.
15. 1/9/13- Got my turbo back!
Old
New
Compressor
Exhaust
16. 1/10/13- For shitzingiggles here are a couple more pics.
Downpipe- with cat removed.
Heat Shield
17. 1/18/13- Head gasket came in from Cometic.
18. 1/21/13- Everything is back from the machine shop. Now I am just waiting for a few little things and it will be all back together in no time.
19. 1/26/13- Well bad news. While getting everything put together it was discovered that cometic sent me a gasket for the R53. So tomorrow I will have to call and get a new one. Now looking at the side by side pics of the block and gasket, it's obviously wrong.
20. 1/29/13- Serious bad news. Cometic doesn't make a gasket for the R56. Even worse, I can't find anyone that does. So as of right now this build is dead till I can find a gasket or get one custom made.
21. 2/4/13- Ok so got the head gasket and everything is on its way to being put back together.
Additionally here is my solution to the carbon buildup issue.
My solution to carbon buildup.
So after reading through all the posts about catch cans and our PVC system I decided this is the easiest thing to do.
First I contacted CZAR and purchased to of the caps from him.
First I removed to hose from the crankcase to the manifold and put in the two caps.
Then I went to the local auto parts store and picked up a neoprene plug and a breather filter (to substitute till I can get an appropriate length hose to run under the car)
This is the end result.
I have a longer hose now so all the crankcase gasses are come out of the front port and away into the air under the car. Not in my motor at all. If any of you are worried that this may cause positive pressure in your valve cover or crank case it wont. This is why,
So after all this talk about the PCV system I decided to go grab my valve cover and do a little investigating. Thanks to CZAR for cutting apart one of his valve covers and taking a bunch of pictures (which I tactfully acquired), I can give an even more detailed explanation of what is going on.
Ok so first we have the underside of the valve cover. As you can see in the picture below there are two ways for air to enter/exit the valve cover. The orange circle is a one way valve that will only let air into the valve cover. The white rectangle is an open port that will let air in or out. Mainly this is for air extraction. The white is just a paper towel I stuffed in the port so it would be more visible in the picture.
This is a picture of the extraction area of the PCV system
A view of the extraction port from the top side of the valve cover.
Open and closed flaps on the intake side of the PCV system.
Some pictures of this baffle thing.
Open and closed flaps on the manifold side of the PCV system.
Now that you have seen all the components, I will try to explain how this whole thing works. I sacrificed my lungs and braincells for this, so enjoy.
1. Either the rear or front PCV port can use vacuum to extract air from the valve cover. However neither port can force air into the valve cover.
2.When you block off one port the other is still able to extract air from the valve cover. The front port is more free flowing then the rear.
3.Blocking off the rear port will not cause pressure to build in the valve cover. The pressure will be able to escape from front port.
4.The orange one way valve is slightly confusing. It can only circulate air from the extraction port not air from outside. I think it is used as a way for oil to condense and drain back into the head. That way only fumes escape.
That pretty much sums it up. This should put all of the "PCV system" threads to rest. Questions? Ask away.
Additionally an explanation from CZAR
Firstly let me explain a little about the PCV, PCV is an acronym for Positive crankcase ventilation, inside the cam cover there are a few entrapment passages and direction chambers, which do their best to separate the suspended oil particles from the passing vapour, this vapour is then vacuum drawn from the cam cover passageways through a valve flap, the first direction is through the rear PCV line into the intake manifold, next, when the vacuum draw from the turbo (building boost pressure) is greater than the vacuum draw of the induction stroke from the pistons, the rear PCV valve flap is closed, as is the diaphragm in the cam cover, this then changes the direction flow of the vapour, and the vapour is vacuum drawn through the passenger side PCV valve flap into the air intake flow pre-turbo, once off boost and steady throttle is resumed then the vapour is once again vacuum drawn through the rear PCV line.
Now the actual valve flaps themselves are merely free falling self closing rubber diaphragms, there is no spring or piston actuation on either valve flap, however there is a sprung chamber diaphragm, which opens/closes under the vacuum draw from both the inlet manifold and turbo vacuum draw, this dictates the flow direction, and in the later re-designed cam cover allows excess pressure to vent through the inbuilt pressure release sprung valve.
Now the actual valve flaps themselves are merely free falling self closing rubber diaphragms, there is no spring or piston actuation on either valve flap, however there is a sprung chamber diaphragm, which opens/closes under the vacuum draw from both the inlet manifold and turbo vacuum draw, this dictates the flow direction, and in the later re-designed cam cover allows excess pressure to vent through the inbuilt pressure release sprung valve.
There you have it. No more carbon buildup.
22. 2/8/13- Surprise!!! Car assumably is done.
Now I'm much to tired to type much so enjoy the car ****.
23. 2/9/13- I also had to go out and purchased a used Netbook to run the Dimsport tool. Main computer is a mac.
24. 2/19/13- Car hit 200 miles today, I am now allowed to slowly start building boost a little at a time.
Also, Figured I would toss this in here since its already on my car.
Howerton Engineering prepared HFS-3 Water/Meth kit[/URL].
This wasn't to hard of an install. Took about 3 hours total.
First I took the tank and mounted it, then ran tube and wires through one of the rubber grommets in the floor board.
Then trimmed the vent hose and put shielding around the bundle.
I ran the hose and wires along the break lines into the engine bay.
From there I put it into the area in-between the engine and fire wall. Connecting the FAV next to the battery.
I ran the bundle of wires under the battery into the rubber grommet on the passenger side.
From there I ran it up to the "secret compartment". Popped out the plastic box and drilled a hole in it.
I installed the nozzle just before the Throttle body. (Has been moved further away since this picture)
I brought it in to Rush Motorsport's in San Diego to have the ECU wired. They tapped and soldered the wires.
I cleaned up all the wiring and this is the final result.
My Old Dyno graph along with the information they posted along with it on their website
The following dyno was performed on an 09 MINI Cooper S. The car was equipped with an aftermarket intercooler, BOV and catback exhaust, and a Howerton Engineering/Aquamist HFS-3 System. The car was dyno tuned with three runs overlayed on the graph below. The baseline run (light red line) is the stock tune without the water/methanol system activated. The middle line (green) is a stage 1 flash with the methanol turned on. The highest run (dark red line) is a custom dyno tune with the methanol system activated.
[ATTACH=CONFIG]14627[/ATTACH]
You can see from 5000-6500Rpm, there is a 55lb-ft of torque gain and from 5500-6500RPM a 60hp gain from the stock tune. Where the stock and stage 1 tune start losing torque at 4000RPM, the combination of custom tuning and the superior delivery of the Aquamist hardware and our setup of the Aquamist system keep the torque nearly flat through 5200RPM.
25. 2/25/13- Got this in the mail today, it is an awesome device.
26. 3/23/13- New NM Engineering Intake
So I got a new intake for the car. The NM engineering intake kit. It came very well packaged.
I havent had time to install it yet but it looks quality. I have not decided if I want to get the silver part powder coated green or not. But the carbon fiber looks great. Hopefully I will be able to get it installed soon.
27. 4/5/13- Installed my intake.
I actually have an update!!!
I have been waiting for it to warm up to install my new intake. I originally wanted just the NM Engineering Carbon fiber inlet pipe but decided to get the whole intake. First I would like to say that is well made and looks great on the car. Installation was pretty easy besides a few scrapes from having massive hands. It mounts nicely to the grommets and the supplied hardware keeps them from mushing out. Overall I am very happy with my purchase. The carbon fiber looks good.
Pics:
Last edited by MNIPWR; 05-05-2013 at 08:17 PM.
The following users liked this post:
aabcds (12-12-2018)

#3
12-11-2012, 01:56 PM
The car has 52,000 miles on it. I don't think the mods have much to do with it. I blame the mass producing of motors and pistons. Its why other minis have this issue. I talked to Mini about it and they said sometimes the pistons and block don't fit as tight as they should and cause premature ring wear.
Last edited by MNIPWR; 12-11-2012 at 02:02 PM.
#5
12-11-2012, 02:05 PM

The car has 52,000 miles on it. I don't think the mods have much to do with it. I blame the mass producing of motors and pistons. Its why other minis have this issue. I talked to Mini about it and they said sometimes the pistons and block don't fit as tight as they should and cause premature ring wear.
Haaaaaaaaaa. That's a good thing to admit to us

#6
12-11-2012, 02:17 PM
I know we have seen this many times and are always disappointed. I told myself when i rebuild my motor ill do it right for the NAM folks. Apparently that is a common thing among engine manufacturing. It is just more prominent in smaller turbo/supercharged motors due to the higher pressure.
Last edited by MNIPWR; 12-11-2012 at 02:41 PM.
#7
12-11-2012, 02:42 PM
Trending Topics

#10
12-12-2012, 05:05 PM
#12
12-13-2012, 05:40 AM

#14
12-13-2012, 10:18 PM

I hate to say this but this is a great thread only in that I know I too will one day (sooner than later) be going through the same thing so its good to get some input and insight on the matter. 50,000 miles engine work is incredible but damn I love this car and will somehow justify it by upgrading the internals at the same time, lol.
#16
12-14-2012, 01:20 PM
Clutch arrived in the mail today. It is a little special as it was put together just for me. I lucked out, they were out of stock but OS had all the parts laying around. So they put one together the same day and shipped it out. Good guys. Also, my Carrillo rods are on the way.
OS Giken GT
OS Giken GT
Last edited by MNIPWR; 12-14-2012 at 01:29 PM.

#20
12-16-2012, 06:57 AM
3rd Gear
Join Date: Jan 2010
Location: Plattsmouth, NE
Posts: 276
Likes: 0
Received 0 Likes
on
0 Posts

#22
12-16-2012, 07:46 AM

#23
12-16-2012, 08:59 AM
#25
12-16-2012, 10:08 AM
Pistons- Supertech 10.5 CR (+.5mm) 77.5mm bore.
Rods- Carrillo H-Beam
Bearing- Stock
Valves- Stock
Head- Stock
Cams- Stock
Turbo- T3/T4 hybrid form G-pop
Clutch- OS Giken GT
Differential- OS Giken Superlock LSD
I plan un upgrading to a thumper performance head as soon as I refill my coffers. This will include cams.
I Don't doubt it. Im one of the younger people on this forum. Well at least i think so anyway. It seems like the average age of mini owner is in the 40s
I have been trying to avoid posting this information. I don't want people saying that one of those parts is why my engine rings failed. It is an issue with some of there motors regardless of mods.