
Drivetrain Helix Wildebeest TurboKompressor Update


Thread Starter
|
Former Vendor
Joined: Feb 2012
Posts: 80
Likes: 0
Helix Wildebeest TurboKompressor Update
It has been a while since I posted any updates on the Helix Wildebeest however a lot has happened. I have found that the electric oil scavenge pump for the rear mounted turbo is unreliable. During a high speed run, the pump failed. As a result the excess oil being pumped to the turbo pushed past the turbo seals and exited out the exhaust. Engine Oil + Hot Exhaust = FIREBALL. Another unfortunate side effect is engine oil starvation. My cyl1 rod bearing had spun.
Since then I removed the engine and took it to my engine machine shop called Mardinly located in Broomall PA. Paul from Mardinly did a great job with regular updates, pictures during the process, informing me of any issues, and offering corrections for them. To top it off, the whole process took only 1 week. Below are some pictures of the machining and assembly process.
The head was decked, given a new valve job, new seals, and new guides. The
The
The crank was ground and polished to remove any blemishes. I
I
I chose to go with Weisco .020 oversized pistons, Pauter forged rods, and ARP studs. (Side Note: The Pauter rods had to be machined a few thousandths to clear the Weisco pistons).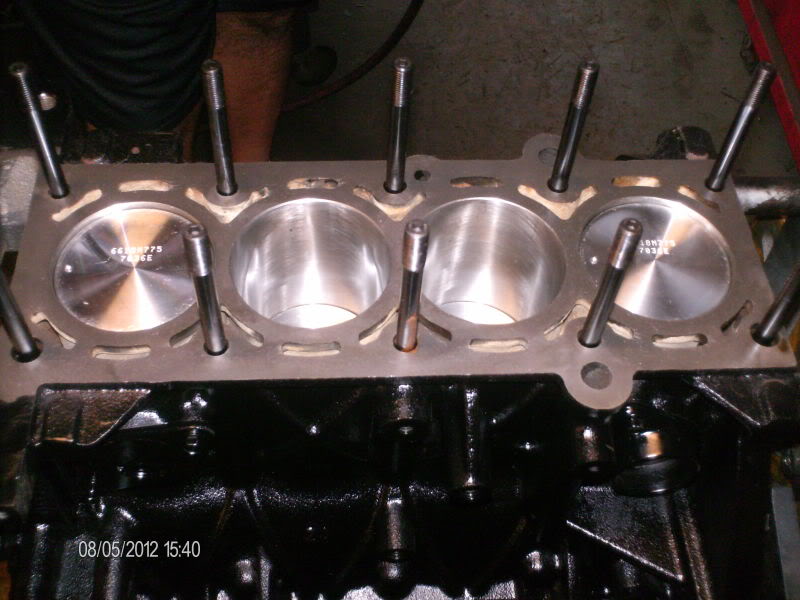 IZE=3]
I had chosen to relocate the turbo to a conventional location next to head. I also replaced the failed 60-1 turbo with a new GT2871R.
The Beest is hungry to get going NOM NOM NOM.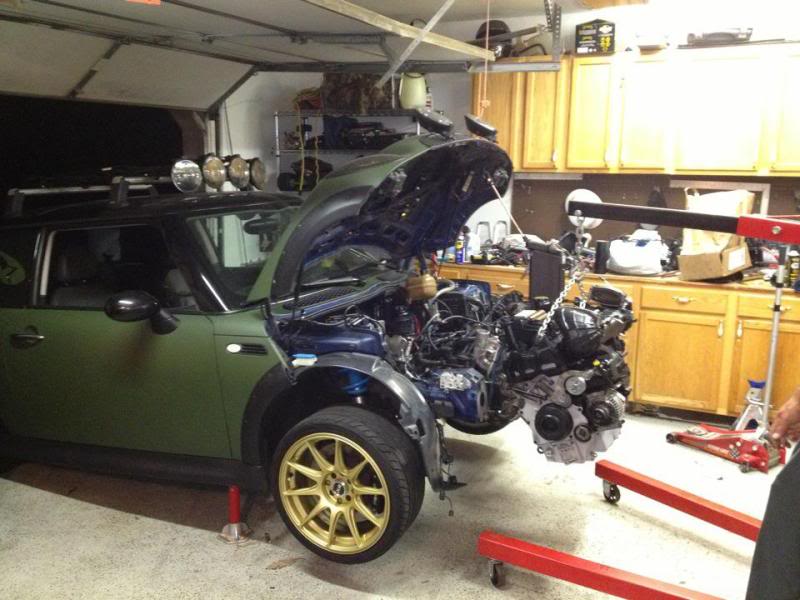
I wish I could say that everything was perfect after all of this, but it was not the case.
The turbo wastegate was not flowing enough and causing over-boosting of 28psi peak. I had to port the wastegate.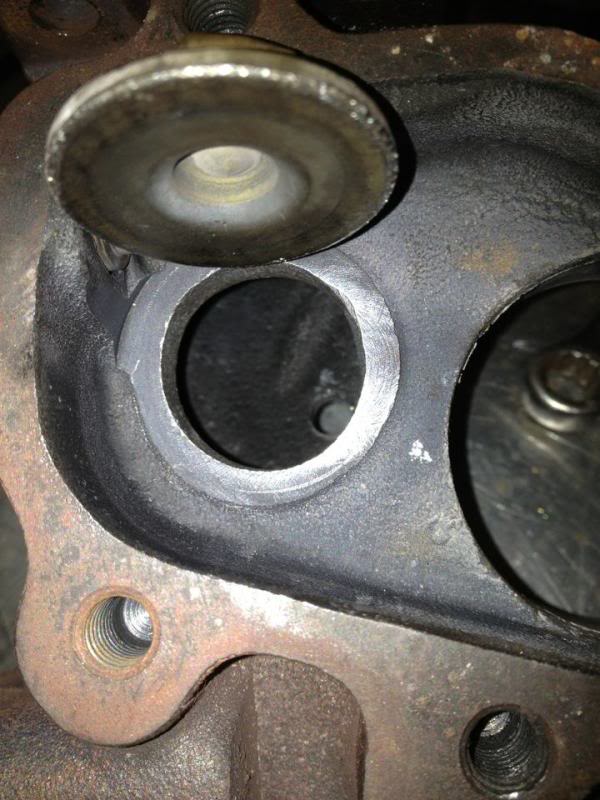
In this picture you can see the bell mouth porting I did on the wastegate port.
I also removed the divider on the downpipe. This will allow the wastegate air to exit through its own port as well as the primary tube.
I bell mouthed the sections of the downpipe tubes that did not mate with the turbo flange for good measure. I also belt sanded the flange flat.
As a result I now build and hold a solid 21psi of boost @ WOT and the car goes like a Raped Ape. I�ll be hitting the dyno soon to dial in the air/fuel ratios. For now they are around 10.9:1. I�ll update with the final numbers. Soon after that I will be doing an E85 tune with 28-30psi of boost. [/SIZE]
Since then I removed the engine and took it to my engine machine shop called Mardinly located in Broomall PA. Paul from Mardinly did a great job with regular updates, pictures during the process, informing me of any issues, and offering corrections for them. To top it off, the whole process took only 1 week. Below are some pictures of the machining and assembly process.
The head was decked, given a new valve job, new seals, and new guides.
The The crank was ground and polished to remove any blemishes.
I I chose to go with Weisco .020 oversized pistons, Pauter forged rods, and ARP studs. (Side Note: The Pauter rods had to be machined a few thousandths to clear the Weisco pistons).
IZE=3]I had chosen to relocate the turbo to a conventional location next to head. I also replaced the failed 60-1 turbo with a new GT2871R.
The Beest is hungry to get going NOM NOM NOM.
I wish I could say that everything was perfect after all of this, but it was not the case.
The turbo wastegate was not flowing enough and causing over-boosting of 28psi peak. I had to port the wastegate.
In this picture you can see the bell mouth porting I did on the wastegate port.
I also removed the divider on the downpipe. This will allow the wastegate air to exit through its own port as well as the primary tube.
I bell mouthed the sections of the downpipe tubes that did not mate with the turbo flange for good measure. I also belt sanded the flange flat.
As a result I now build and hold a solid 21psi of boost @ WOT and the car goes like a Raped Ape. I�ll be hitting the dyno soon to dial in the air/fuel ratios. For now they are around 10.9:1. I�ll update with the final numbers. Soon after that I will be doing an E85 tune with 28-30psi of boost.
[/SIZE]


Former Vendor
Joined: May 2012
Posts: 592
Likes: 83
Trending Topics
Thread Starter
|
Former Vendor
Joined: Feb 2012
Posts: 80
Likes: 0
As promised. The lower curve is the first pull. The car didn't make as much boost as it did on the street so we bumped it up (from 19psi to 21psi). We also leaned it out from very rich 10:1 to the now 12:1 AFR.


Thread Starter
|
Former Vendor
Joined: Feb 2012
Posts: 80
Likes: 0
The car has a stock ECU that was previously tuned by Jan for pulley setup. I am tuning with a piggyback ontop of Jan's flash tune. I am seeing a peak of 22 degrees advance @ WOT. I am running 650cc injectors. I am running 93 octane but I am also injecting denatured alcohol when I hit 9psi+. I need up upgrade the fuel pump so I can supply enough fuel for E85.
Thread Starter
|
Former Vendor
Joined: Feb 2012
Posts: 80
Likes: 0
Well the torque has some toll. My driver's side inner CV joint is spewing grease and the lower control arm front inner balljoint is shot. I ordered a new axle and ball joint for $100. Hopefully that will take care of that new vibration I've been having.


Thread
Thread Starter
Forum
Replies
Last Post
Drivetrain Helix | F56 Intercooler Testing
Helix13mini
Drivetrain (Cooper S)
22
Jul 27, 2016 06:29 PM
OutMotoring
Drivetrain (Cooper S)
5
Sep 8, 2015 06:27 AM