Mini Cooper 2007-Present: How to Replace the Tail Light Assembly
Removing your tail lights is actually a lot easier than you may think. Here is how you do it.
This article applies to the 2nd and 3rd Gen Mini Cooper (2007-Present).
Whether you want to replace your stock lenses or customize the originals, removing your tail lights is actually very simple. Stock tail light housings tend to be the choice object of complaint due to the orange lenses. Many owners tend to prefer the clear look, so the quickest solution is to find aftermarket lenses to replace them. Another solution to this issue is to tint the lights, which require placing a special film of the removed housings in order to change the overall look. While both these solutions depend on what the owner exactly wants, the process of removing the housings still needs to be learned. The good news is, this entire process can literally take under ten minutes to complete. Use these instructions to learn how to easily remove your stock tail lights.

Materials Needed
- Trim removal tool
- T15 Torx driver
Step 1 – Remove the trim piece
Before you can access the mounting screws, you first have to remove the trim piece that's covering it. This piece of trim is actually clipped in place, and can pop off using a trim removal tool. Just slide it in on the upper side of the trim ring, and gently pry around the headlight until it pops off.

Pro Tip
Make sure you are not putting too much stress on the ring, as it should easily pop off. If it's stuck, readjust the trim tool and try again.
Step 2 – Loosen the Torx screws
With the trim ring removed, you can now access the three Torx screws holding the housing in place. Loosen each Torx screw and make sure to place them in a safe place.

Step 3 – Remove and replace the tail light
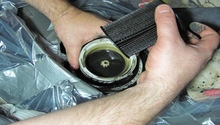
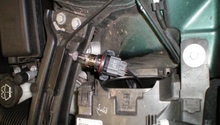
Now grab your trim tool again, and this time slide it in between the tail light and chassis. The weather seal will make this a little tough to remove, but if you continue to jiggle the unit from side-to-side, it should eventually break free. Once the tail light is completely out, disconnect the headlight plug. That's it. To install the light, just do the reverse of this procedure.
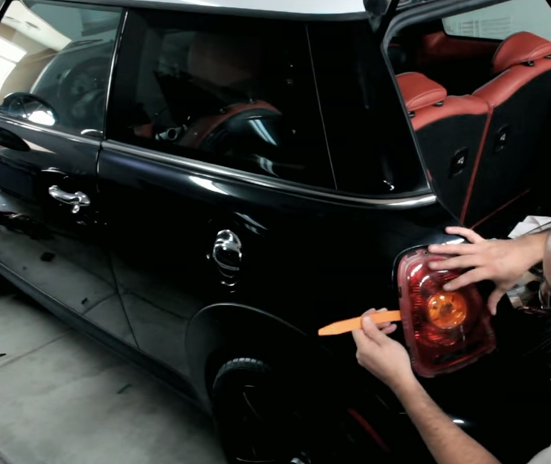
Figure 3. Gently pry out the tail light assembly. 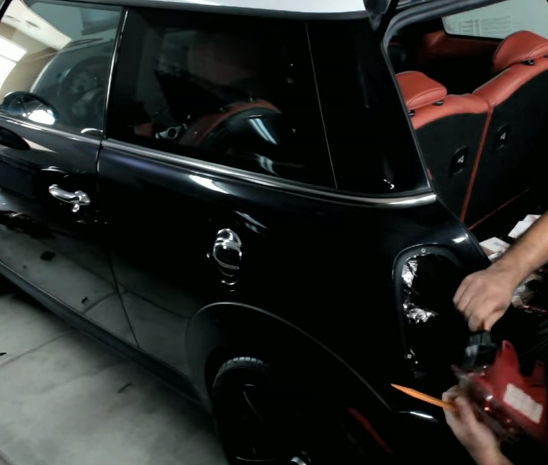
Figure 4. Disconnect the tail light assembly.
Featured Video: Tail Light Upgrade
Related Discussion
- Removing Tail Lights on an R56 - NorthAmericanMotoring.com