Mini Cooper 2001-2006: How to Replace Power Steering Hose
Power steering fluid routes through more than six feet of hoses and lines in your engine bay. All these hoses and connections make prime areas for leaks to develop. In this how-to, you'll be shown where the hose connections are and what tools you'll need to complete the job.
This article applies to the Mini Cooper R50 and R53 (2001-2006).
Power steering lines must maintain high amounts of pressure. The combination of heat, wear, and clamps that loosen over time result in a common problem experienced by most Mini owners. While some owners find that replacing clamps with screw type styles work to fix the leak, this fix is often only temporary. Owners report being quoted over $500 for this repair, making it a great way to save cash if you handle it yourself.

Materials Needed
- Floor jack with at least 2 jack stands
- 3/8" ratchet with 3" and 6" extension
- Metric socket set (8mm-22mm)
- Hose clamp pliers
- Drain pan
- Fluid evacuator
- Vacuum cap and hose compression pliers (optional)
- Flat head screwdriver
- Diagonal cutting pliers
- Screw type hose clamps
- Impact wrench or breaker bar
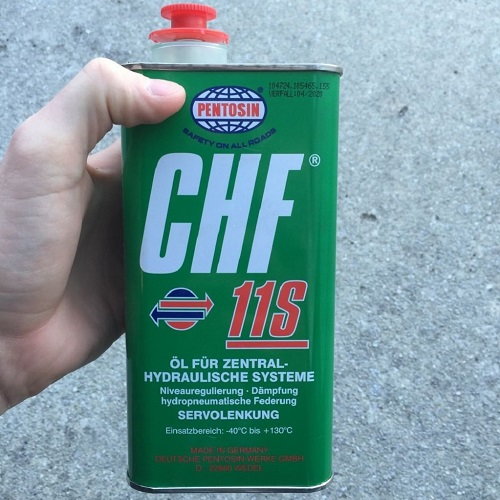
- 2 liters of Pentosin CHS-11S power steering fluid
- Rubber gloves
- Safety glasses
Mini, like most European vehicles that have hydraulic power steering, are filled from the factory with Pentosin CHF-11S power steering fluid. Most auto parts stores do carry this on the shelf. Mixing power fluids is not advised.
Step 1 – Raise and support the vehicle
You'll need to remove the front driver's side wheel in a later Step. If you don't have an impact wrench, loosen the lug bolts with the wheel on the ground with a 17mm deep socket and a breaker bar. Set the front end of the car on jack stands and then pull the wheel off.
(Related Article: How to Jack Up Your Car - NorthAmericanMotoring.com)

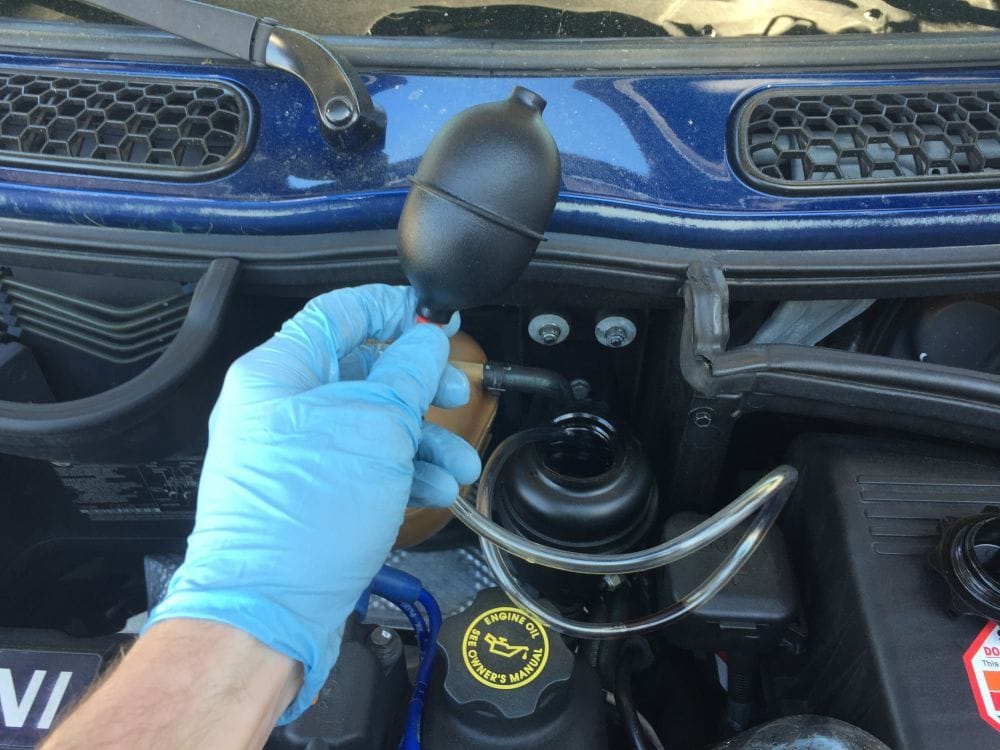
Step 2 – Remove the power steering fluid
Use a turkey baster, fluid transfer pump, or fluid evacuator to remove the fluid from the reservoir. The more fluid you get out, the less will drip on you when you remove the hoses.
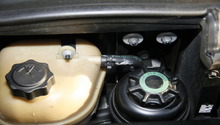
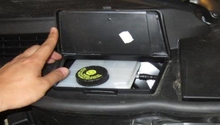
Step 3 – Unbolt the power steering reservoir
- First, remove the hose from the coolant overflow tank by squeezing the metal clamp with pliers.
- Remove the three 10mm bolts holding the reservoir to the bracket and firewall.

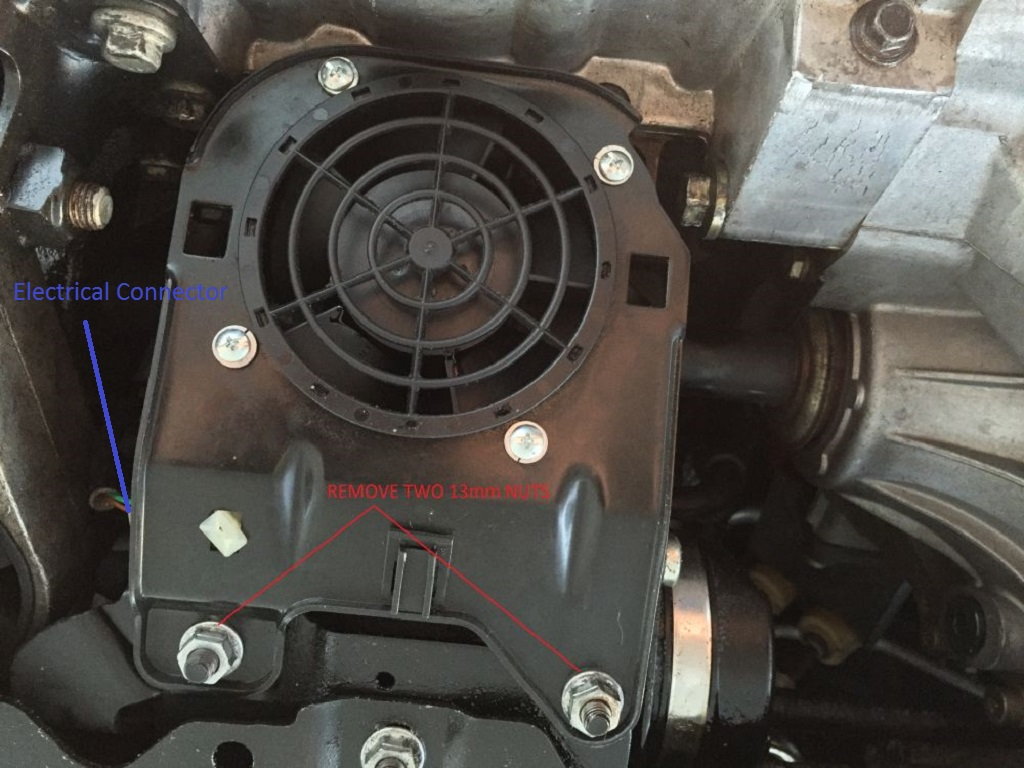
Step 4 – Remove the power steering fan
- Move underneath the vehicle and locate the fan.
- Remove the two 10mm bolts holding the fan to the frame.
- Unplug the electrical connector from the fan.
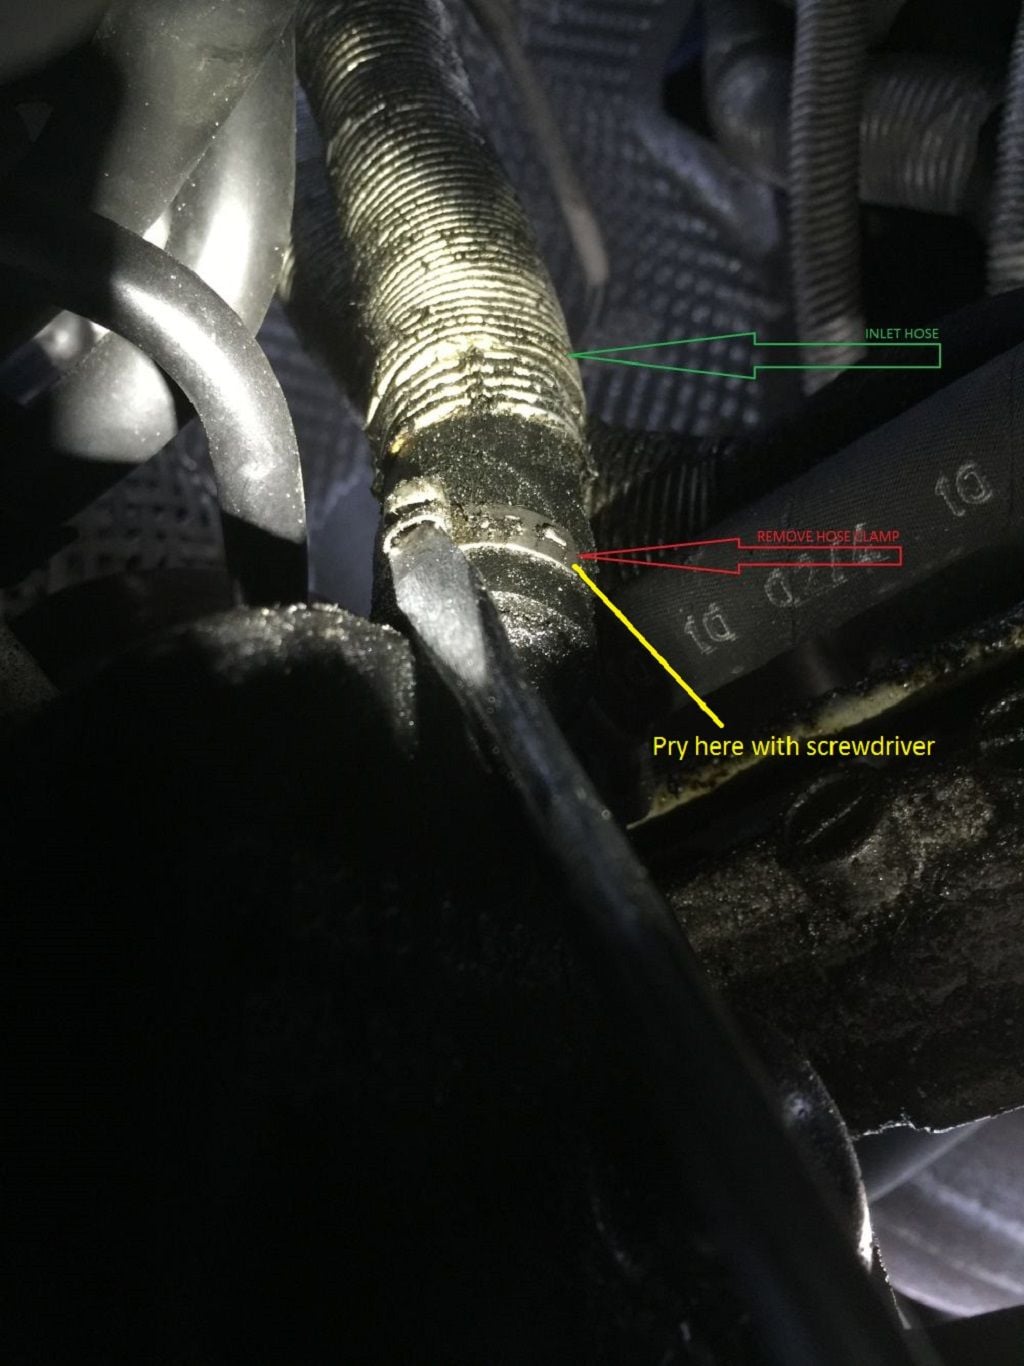
Step 5 – Remove inlet hose from power steering pump
- To reduce the mess that will be created when the hose is removed, have a vacuum cap and hose compression pliers ready.
- Squeeze the inlet hose near the pump with the pliers.
- Using a flat head screwdriver and diagonal cutters, remove the Oetiker clamp from the inlet hose.
- Pry the end of the clamp away from the hose to release the tension.
- It's o.k. to use screw style clamps when installing the new hose.
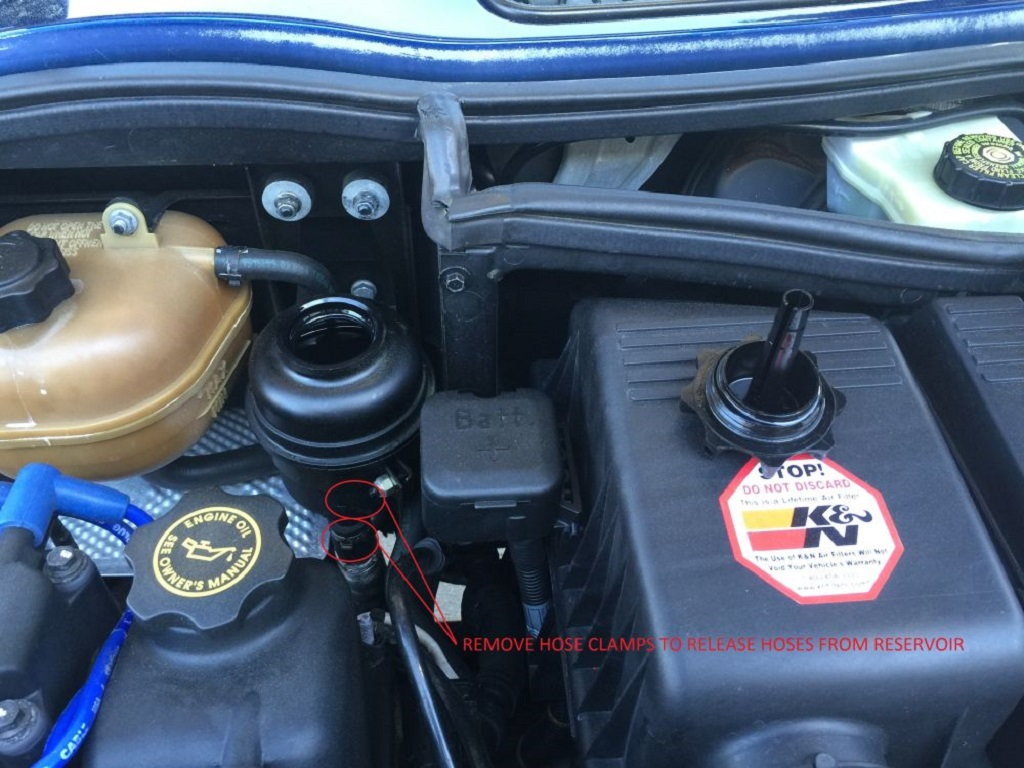
Step 6 – Remove the hoses from the reservoir
- The reservoir hoses use the same style clamp as Step 5.
- The inlet hose is closer to the engine.
- Remove the front driver's side wheel.
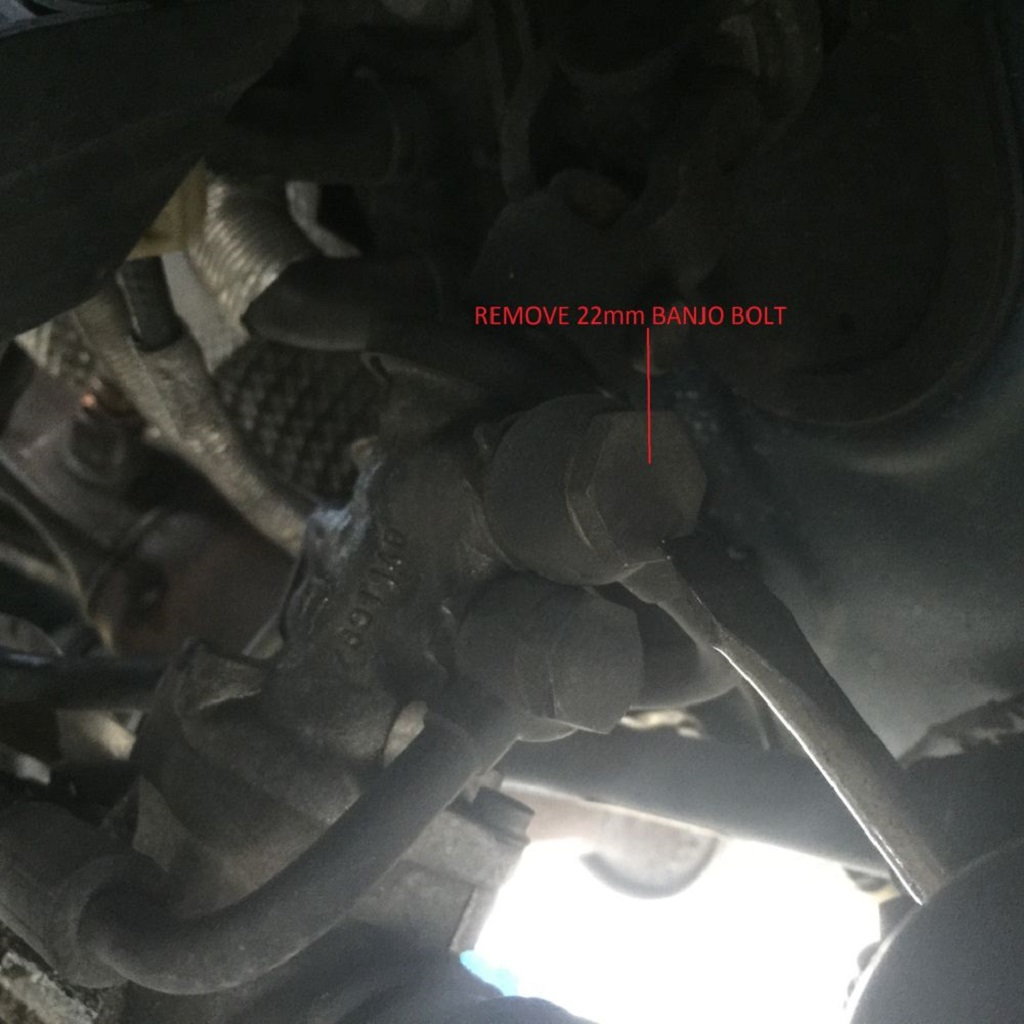
Step 7 – Remove fluid return pipe from the steering rack
- Look between the fender well and strut to locate the return pipe.
- Remove the 22mm banjo bolt holding it to the steering rack. It's the upper most bolt.
- There will still be some fluid in the line. Have a drain pan ready.
- You may need an extension and swivel.
- These bolts strip easily, so use care while installing/re-installing.
Step 8 – Install new return pipe to the steering rack
- Follow the diagram in Figure 9 to correctly install the return pipe to the steering rack.
- Make sure the line's position matches position of the line in the Figure.
- Once the banjo bolt is tightened, position the inlet hose near the power steering pump. More space should be available when starting above the engine. Use the notch in the heat shield while routing the line.

Figure 9. Installing the new return pipe the power steering rack. 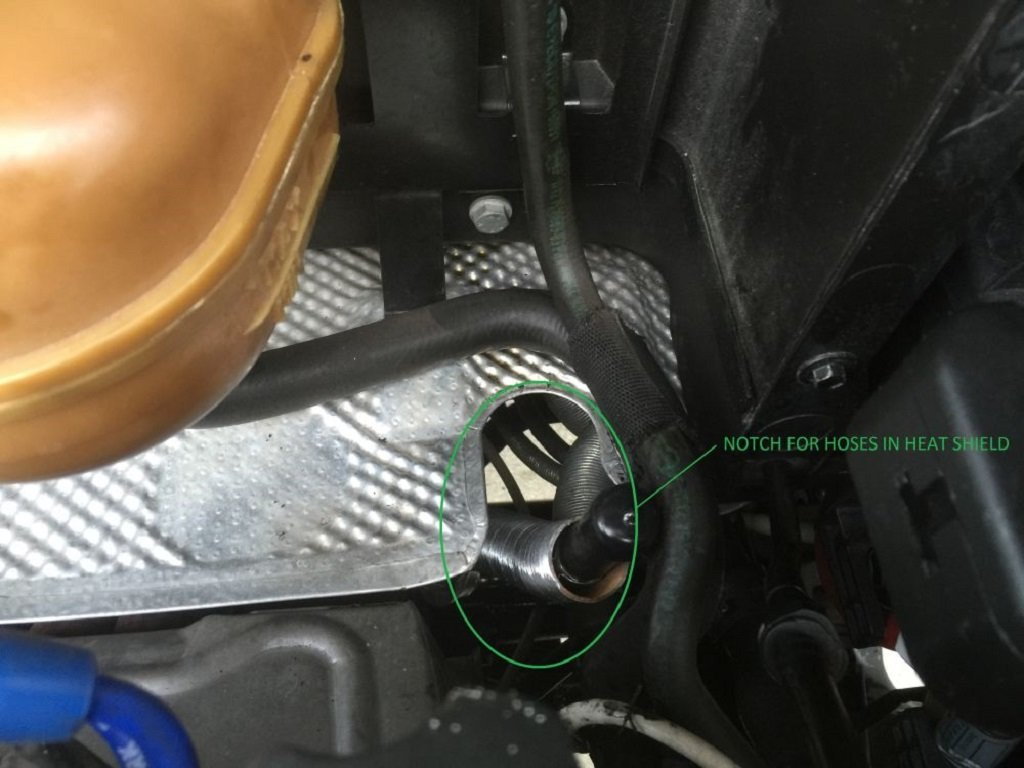
Figure 10. The heat shield notch.
Step 9 – Install the new inlet hose to the pump
Slide the hose onto the male end of the pump. You can use a screw type clamp, if that is your preference.

Step 10 – Install the power steering reservoir
- Install clamps onto your inlet and outlet lines, then slide them onto your reservoir. The inlet hose mounts closest to the engine.
- Route the coolant overflow tank hose through the reservoir bracket (refer to Figure 4) and re-install the reservoir into the bracket and onto the firewall.

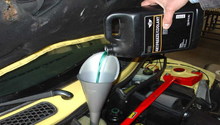
Step 11 – Bleed air from the power steering
- Fill the reservoir to the full mark with your Pentosin CHS-11S.
- With the reservoir cap off and the wheels still in the air, turn the wheel lock-to-lock five or six times at a moderate speed.
- Remember to re-install your power steering fan.
- Install the cap and repeat the process with the engine running. It is ideal to hold the wheel against the stops for one to two seconds with light pressure after each wheel rotation. If the pump begins to "shriek" or "wine," that's an indication of air in the system or low fluid level.
Related Discussions
- Power Steering Inlet Hose Pipe Replacement - NorthAmericanMotoring.com
- Replacing Power Steering Return Hose - NorthAmericanMotoring.com
- Oozing from Power Steering Hose - NorthAmericanMotoring.com