When you click on links to various merchants on this site and make a purchase, this can result in this site earning a commission. Affiliate programs and affiliations include, but are not limited to, the eBay Partner Network.
Since the recall is now being issued for some of us R53 owners I decided to go ahead and replace the old inlet hose/return pipe before taking the car in as this is not covered under the recall. Or if someone is just looking to do this for general maintenance down the road hopefully this will help. There are a few DIY's done for the pump itself but none for the hoses specifically, so that's what I will be covering.
Anyone with a jack/jack stands and some basic tools can complete this job in a few hours depending on how well your old hoses are willing to compromise considering they've probably spent upwards of 10 years on the car. Keep this in mind when dealing with your power steering reservoir or any other plastic pieces you may encounter and they can become brittle with time.
Please ensure you have the tools and ability before taking on this job. I am not liable for any damage you may cause to you or your vehicle in the process.
So lets begin.
Step 1: Jack your car up and put it on jack stands. You don't need to have all 4 corners up but it will make things easier if the car is level.
Step 2: Locate the power steering reservoir and remove as much of the fluid as possible with a fluid transfer hose if you have one; A turkey baster will work also. This step will keep PS fluid from leaking on any components when you remove the reservoir.
Step 3: Remove the radiator overflow tank hose. This can be done by compressing the metal clip with pliers and simply sliding away from the tank, allowing the hose to be removed. Next, remove the 10mm bolt holding the reservoir to the bracket, then the two 10mm bolts holding the reservoir bracket to the car. Remove the bracket completely and set it aside. Your reservoir should now move freely. We're now moving under the car to gain access to the pump side of the hose.
Step 4: Locate your power steering fan and remove the two nuts hold it to the car. Unplug it and set it aside.(If it is is covered in dirt and debris, this would be a good time to clean it)
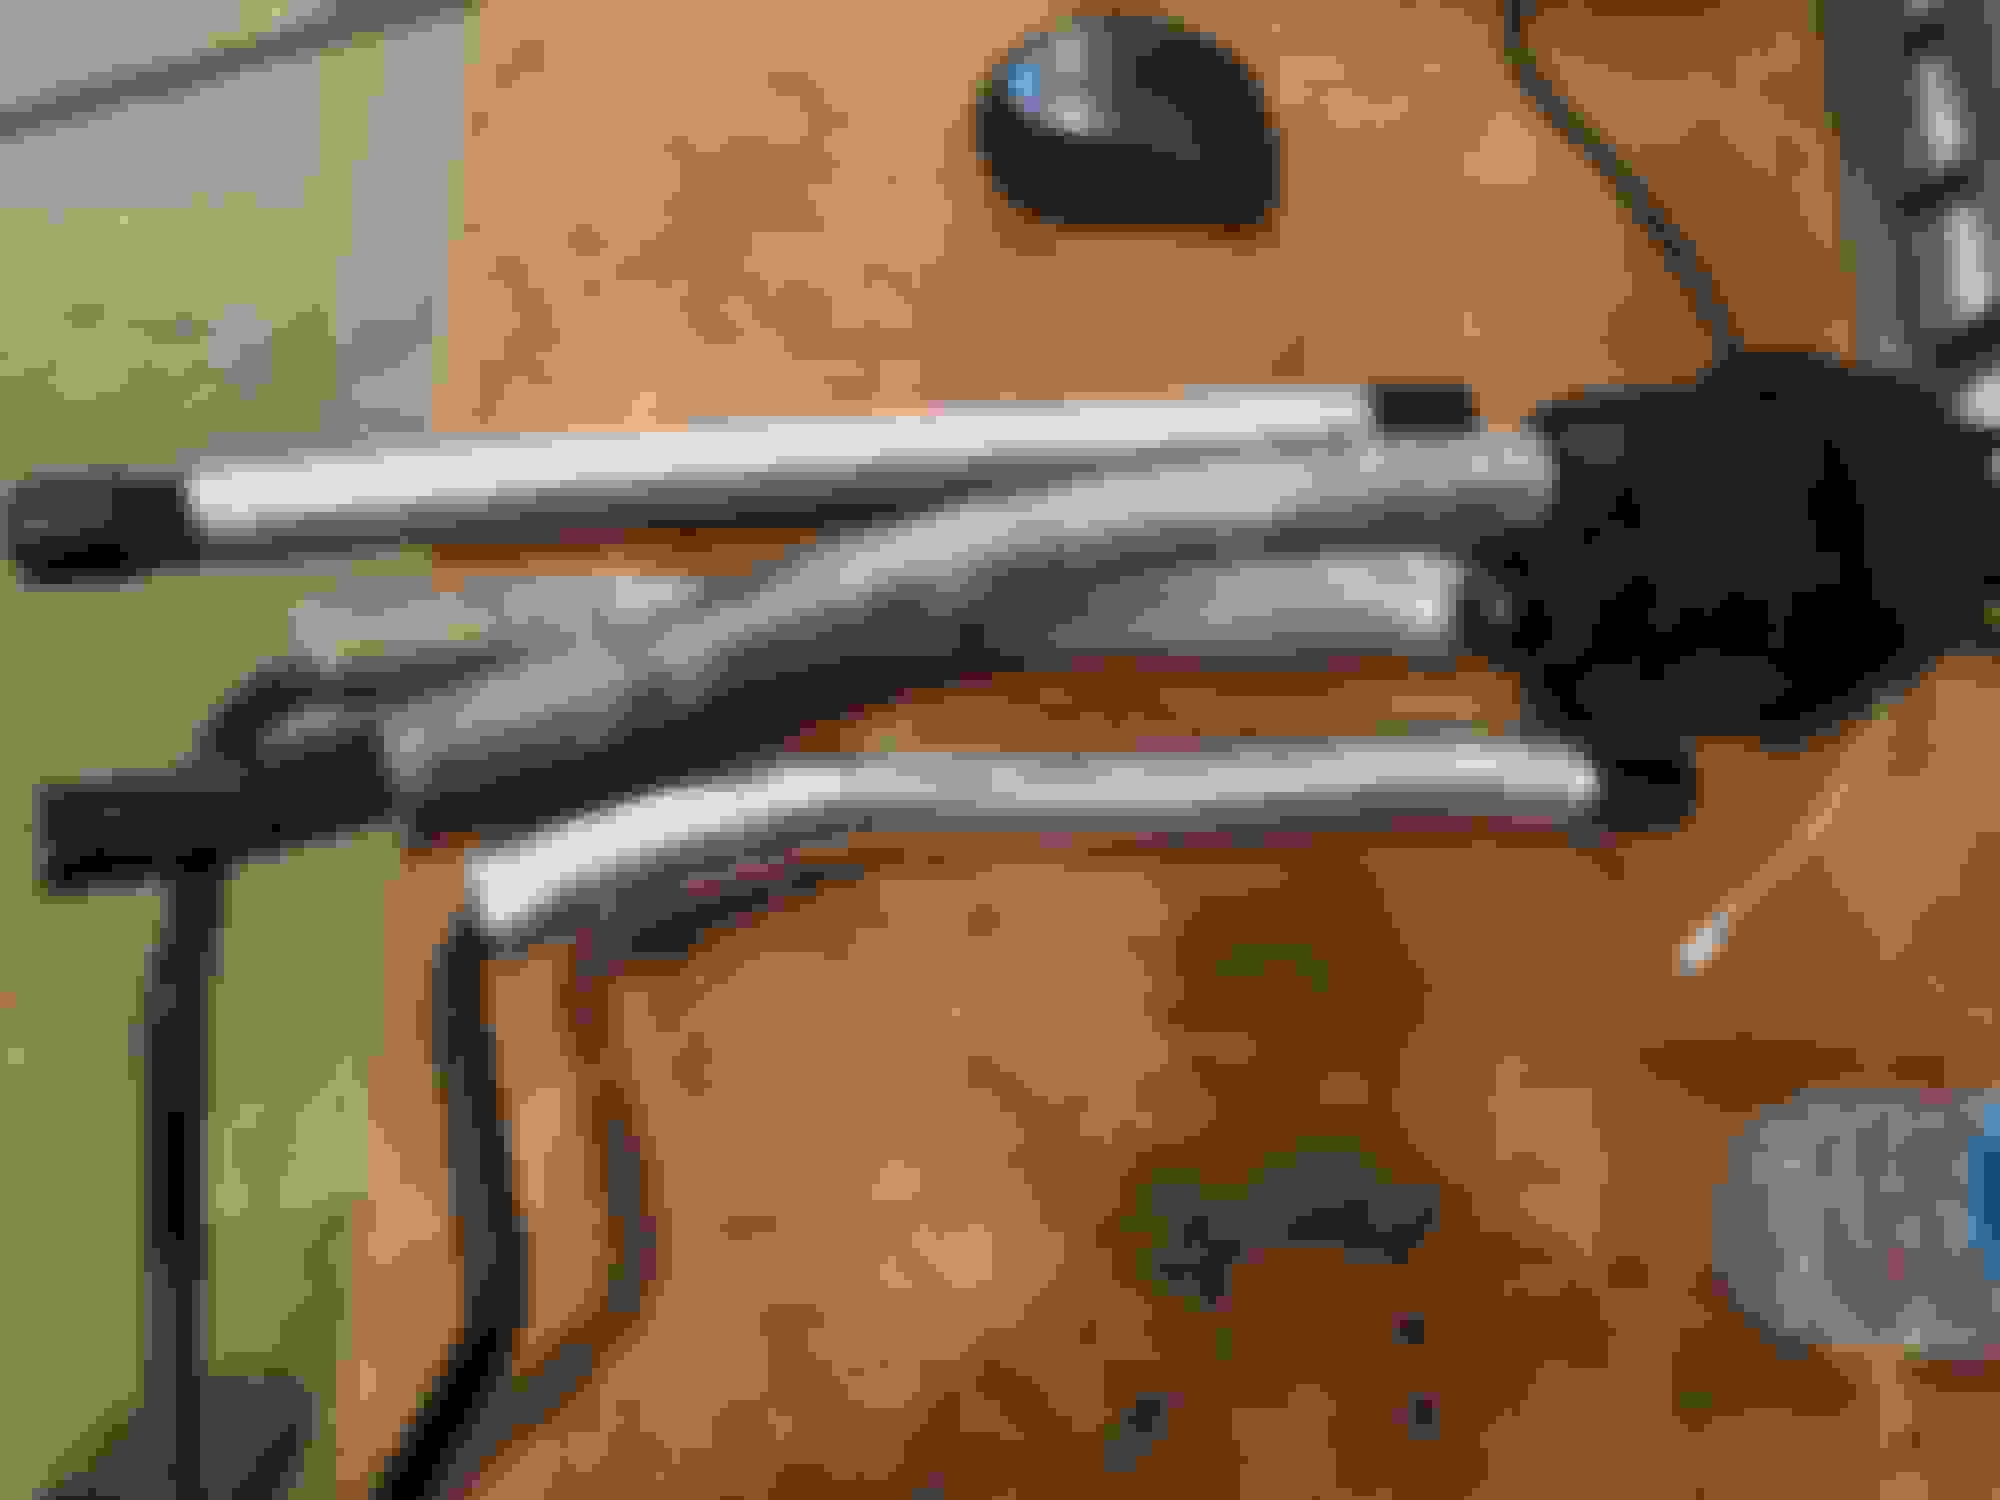
Step 5: Once you have access to the pump you will be able to see the bottom of the inlet hose. There is still fluid in the line so you will need a bucket to catch the fluid that will run out when you disconnect the hose. These hose clamps should not be re-used so don't be afraid to pry on them to get them loose.(If you bought a kit you should have replacements) I used a mixture of flat head screwdrivers and needle nose pliers. Mine were stuck on pretty good so it took me probably 30-45 minutes for this part alone, be patient and keep at it. Once the clamp is off the the hose needs to come off. Like I said earlier this can be tricky with how long these hoses have been on the vehicle. If you have some hose pliers that would be preferable. If not just use your hands or needle nose pliers if needed. And remember some fluid will be coming out when you pull the hose so don't be directly under it(Reference Photo 1).
Reference Photo 1: Inlet hose removed from pump.
Step 6: Back up topside we can now remove the PS fluid reservoir from both hoses. The hose clamps are the same as the one you just removed from the bottom of the inlet hose so the same things apply. Remove the front hose first(inlet hose), and the rear second(return pipe). Once the reservoir is removed you can clean the remaining fluid out with a clean cloth and set it aside. The next step will require you to remove the front driver side wheel from the car to gain access to the return pipe banjo bolt. This should be self explanatory so once you have the wheel removed continue to the next step.
Step 7: With the wheel removed look in between your shock and the fender well. You will see these 2 bolts pictured below. The return pipe banjo bolt is the top one. It will take some maneuvering to get access to it but I will show you what I used below(Reference Photo 1). It's a 22mm bolt so anything you can fit that is 22mm will work. Remember, the return pipe still has fluid in it so try to catch as much of it as possible. You will find this is much easier said than done but there are not any electrical components to damage in this area so it's less of an issue. Simply unscrew the bolt and the return pipe can be removed(Reference Photo 2).
Reference Photo 2: I used my electric impact/swivel/22mm shallow socket.
Reference Photo 3: Banjo bolt and return pipe removed.
Step 8: This is where we get to start re-assembling. Thread your new return pipe so that the hose side is sticking out of the top in the correct place(Reference Photo 4). With your new return pipe you should have a new banjo bolt and 2 washers. The order is bolt - washer - pipe - washer as pictured below. Once you have tightened the banjo bolt, thread the inlet hose from the top so it is resting on the pump for the next step. Back underneath the car we go.
Reference Photo 4: Remember the return pipe(pictured) is in the rear, inlet hose in the front.
Step 9: Slide the hose over the male end on the pump that you removed the old hose from and secure it with a new hose clap. I used the screw on type rather than the ones provided since they can cause issues over time but this is entirely up to you. Now that our new inlet hose and return pipe are installed, back up to the top of the car again!
Step 10: Ensure you have hose clamps on and grab your PS reservoir for re-installation. Remember it's very important that the return pipe is in the rear and the inlet hose is in the front as this is how the system was designed to work. The hoses as well as the nipples on the reservoir are a bit different in size so just make sure you're matching them up correctly. Once you have both hose clamps secured on the reservoir you can now re-attach the reservoir bracket to the car, and the bracket to the reservoir. Remember that the overflow tank hose goes in between the bracket so thread it through before tightening everything down. Refer back to the step 6 photo to ensure everything is placed correctly.
Step 11: Almost done. Once everything is good and tightened down up top you can add fluid to the system and begin bleeding it. The fluid used in these cars is Pentosin CHF11S(Reference Photo 5). Keep the car jacked up for this. You need as little resistance as possible when turning the wheel and if you have a leak you need to address it immediately. Fill the reservoir until the lines are filled and it is at the fill line. You don't need to start the car, you can just turn the key to accessory. With the reservoir cap still off, turn the steering wheel all the way to left lock and back to right lock 5 times. This should get the air out of the lines. Check the fluid level and refill as necessary. You can double check that you've removed all of the air by turning the wheel 1-2 more times both ways if you would like. Screw cap back on and you're set.
Once you're sure everything is tightened down and there are no leaks you can put your wheel back on and that's that. You can now get your MINI off of the jack stands and take em' for a test drive!
Reference Photo 5: You can source this online or you local auto parts store. Call around before you make the trip though. They had to do a store transfer for me to a more local one but they did have it in stock luckily.
Please feel free to ask any additional questions that you may have. I do ask that you keep them in this thread rather than a PM so that the answer can be public for anyone looking to do this work that may have the same question.
Any critiques are welcome as for the formatting or more that you would like to see from future DIYs such as tools/parts etc.
Last edited by -=gRaY rAvEn=-; Mar 28, 2016 at 05:40 AM.
Thanks again mate.
With the return hose, did yours have two clamps on it close to the reservoir? I just saw this on mine so I removed all the clamps and intend to replace them with hose clamps like yours.
What is this second clamp for? Can we do without it or should we replace it with a normal hose clamp?
I'm pretty sure I remember mine having 2 on it. The lower one I couldn't see though since mine had the heat shield over it so I don't think I touched it. If your replacement has one there and you remove it, go ahead and replace it. If not, don't worry about it.
I'm pretty sure I remember mine having 2 on it. The lower one I couldn't see though since mine had the heat shield over it so I don't think I touched it. If your replacement has one there and you remove it, go ahead and replace it. If not, don't worry about it.
I just wanted to comment on Jimmy's question about the extra hose clamp. If I'm not mistaken, there's a fluid restrictor in there and that clamp is probably holding it in. I learned this from my BMW 3-Series a few years ago. So yeah, I'd say it's necessary.
Just replaced hoses on my daughter's 2004. Your pix and write-up helped a lot. I made a couple of tweaks. I didn't remove the hoses from the bottom of the tank. Instead, after removing the hoses under the car, I snaked them up and out still connected to the tank. Once I had the tank/hoses out, I noted orientation and removed and installed new hoses on the comfort of my workbench. Then I snaked the hoses back down through the top, while already connected to tank. This was easier for me then trying to connect hoses to bottom of tank while bent over car.
On my 2004 I was able to access inlet hose on pump without removing pump fan.
Finally, there was a fluid restrictor on my return hose (the old and new one). That IS what the extra clamp is for that others have asked about. Bit of advice when reconnecting the return hose to the rack, align the banjo bolt carefully, this will aid you in getting the bolt started in the threads. (This was the hardest part of my job.)
Here's the tank with old hoses still connected. I noted orientation then installed new hoses in same position.
Regarding ensuring you connect proper hose to proper tube on bottom of tank: my tank had indicators for fluid flow and the tubes/hoses are different sizes.
My tank has indicators on fluid flow to aid in proper hose attachment.
Different suppliers/brands for the hoses, its in the descriptions. These things are so popular we have to have multiple suppliers/kits as we sell out of the one kit, we have to have a back up for the other. We do that on many things.
The bottom clamp on the inlet hose gave me some trouble. I took a 10" hacksaw blade and sawed the nubb off of the clamp. Just the blade so I could get into the small space. Then the hose came off fairly well with some offset needle nose pliers.
I used a dremel on the top clamps.
Lastly, a heat gun on the hoses helps to get them off of the reservoir.


 There are a few DIY's done for the pump itself but none for the hoses specifically, so that's what I will be covering.