Mini Cooper 2001-2006: How to Replace Brake Fluid
Replacing the brake fluid on your Mini Cooper S ensures your brake system is operating at full potential.
This article applies to the Mini Cooper and Mini Cooper-S (2001-2006).
The brake fluid is not designed to last forever in the Mini Cooper S. Brake fluid is hygroscopic, meaning that over time it is prone to attracting water, which lessens its boiling point, or the point at which the fluid loses its performance. Boiled brake fluid can result in a soft feeling brake pedal, and in the case of a hard braking maneuver, might lead to insufficient brake force. Replacing the brake fluid isn't a hard process, but it does took a bit of time, and possibly a willing assistant. BMW/Mini says to service the brake fluid once every two years. If you don't remember the last time you've replaced the brake fluid, the time is now. The brake system's operation is critically important to your safety and your passenger's safety. So grab some gloves, some tools, and read on to learn how to replace the brake fluid in your Mini Cooper.

Materials Needed
- Turkey baster
- Wrench
- Hose
- Bottle
- Brake fluid
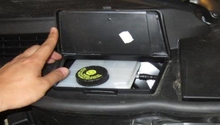
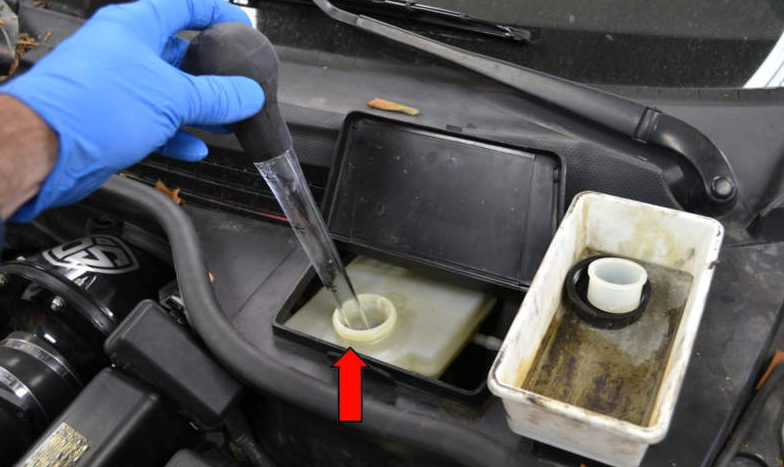
Step 1 – Siphon old fluid and refill
Using your turkey baster, suck the old brake fluid out of the brake fluid reservoir. Leave a thin layer of fluid in the reservoir, this prevents any air from going into the system. After this, refill the reservoir with fresh fluid, to just below the max line.
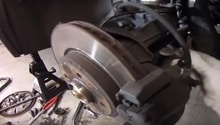
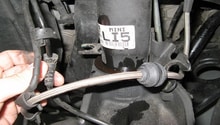
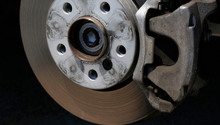
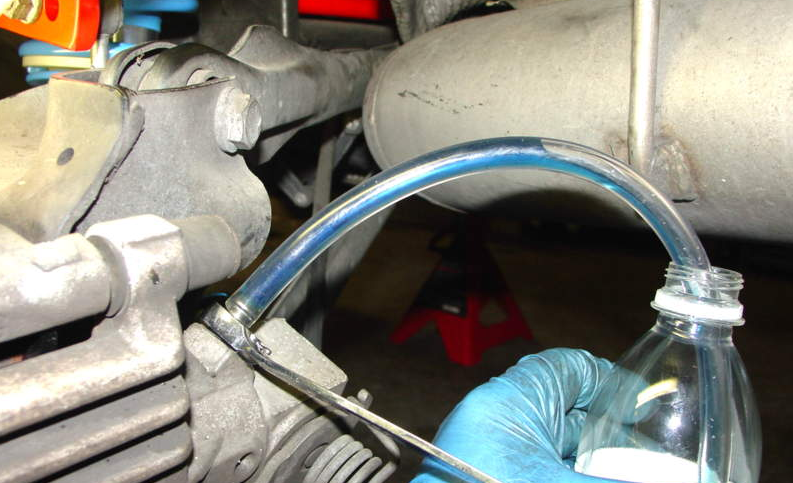
Step 2 – Bleed the brakes
Many manufacturers require the brakes to be bled in sequence, and your Mini is no exception. When draining the brake system of fluid, you want to do so in the following order: passenger-rear, driver-rear, passenger-front, and ending with the driver-front. The goal is to start at the point furthest from the master cylinder and work your way towards it. Locate the bleeder screw on the back of each caliper, then connect the clear hose to it. Connect the other end of the hose to an empty bottle. Ask a friend to pump the brake pedal a few times, then keep it pressed all the way in. Loosen the bleeder screw to drain the fluid; once you notice the fluid coming out is fresh, clear, and free of any bubbles, tighten the bleeder screw first, then let go of the brake pedal. You will likely have to do this process of pressurizing the pedal and the opening/closing the bleeder several times to get all of the air bubbles out of the system. Make sure your assistant does not lift their foot off the brake pedal with the bleeder open, this will induce air into the system and you'll have to start all over again. Repeat the process in the rest of the calipers, but be sure to refill the brake fluid reservoir between each caliper.
Featured Video: Mini Cooper S - Bleeding the Brakes
Related Discussions
- Brake Fluid - NorthAmericanMotoring.com
- Weak Braking - NorthAmericanMotoring.com
- Brake Fluid Change - NorthAmericanMotoring.com