When you click on links to various merchants on this site and make a purchase, this can result in this site earning a commission. Affiliate programs and affiliations include, but are not limited to, the eBay Partner Network.
Stock Problems/IssuesDiscussions related to warranty related issues and repairs, or other problems with the OEM parts and software for MINI Clubman (R55), Cooper and Cooper S(R56), and Cabrio (R57).
Sorry, i made a mistake, The main port that is capped on the winter is used (open) on the normal intake. The one port is sealed, and the third one (middle size) is for the fuel tank breather connection.
Sorry, i made a mistake, The main port that is capped on the winter is used (open) on the normal intake. The one port is sealed, and the third one (middle size) is for the fuel tank breather connection.
Additonal tips on removing & installing engine on auto R56 Mini Cooper S N14 engine
Ladies,
I have a few tips and thoughts to share if you're gonna be removing and replacing your N14 engine based upon my experience doing this for the first time on my 2008 R56 Cooper S, N14 engine, automatic. I'm just a shade tree mechanic like you guys. I'm no expert. I have no formal training in these matters. Also, these aren't exhaustive instructions.
I used my photos as a guide for writing so this isn't organized in perfect sequence so read through it completely before you begin. Additionally, I didn't cover every step and my parts list below and in the previous post is quite solid but perhaps I missed a few things. That being said, every car will have some variation in parts it needs for the swap. Mine has a lot of miles on it (153k) so I changed more parts than may be necessary for you.
There is some detail below on the automatic transmission, and nothing about the swapping a clutch, but the rest will be the same. The automatic has an important detail necessary for its proper installation.
Give yourself 6-7 days of garage-time to do this job the first time. If you rush you're going to make mistakes. Be prepared to have to order parts midway through when fasteners break or you come upon unanticipated issues. The second time you'll do it twice as fast. I promise. That's the learning process.
I had to make 3 unanticipated trips to the Mini and I had to put a new shop crane together.
Prepare to Clean and Flush
I cleaned lots of parts and the engine bay. Cleaning takes time but while the engine is out, it is the perfect opportunity. Have plenty of carb cleaner ready (cheapest at NAPA I find). At least 6 cans of it.
Also have degreaser for the transmission etc and some plastic bristle brushes. ZEP purple concentrate degreaser from Home Depot is very strong and cheap. The concentrate will burn your hands and eyes. Be careful. Dilute it.
Both the intake manifold and the flapper door on my throttle body were filthy. Get some engine cleaning brushes, like Moroso 61820 Engine Brush Kit, and 3 cans of carb cleaner spray to clean out your intake manifold and throttle body.
I also cleaned the AC condenser, intercooler and radiator with 2 cans of spray-type AC coil cleaner from Home Depot on the outside and flushed the radiator, automatic transmission cooler and all the coolant lines. I flushed the intercooler with carb cleaner to get out engine oil.
I have a wire wheel on a bench grinder which I use to quickly clean the threads on old bolts before I reinstall them. I use it all the time. You can use a small metal brush for sure if you don't wanna spend the money for this.
You don't need air tools but they sure do come in handy for disassembly. I didn't use them for assembly.
Aside from the typical array of ratchets, sockets, extensions, wrenches and Torx sockets/bits and an oxygen sensor socket, you REALLY need 1/4, 3/8 and 1/2 inch torque wrenches. Don't guess. You need to do a lot of precise torquing. Get torque wrenches.
Scotch Roloc or equivalent to clean all mating surfaces of rust and old gasket material.
Loctite blue or equivalent. Anti-seize copper for exhaust fasteners. Anti-seize silver for all other fasteners. Axle grease, transmission fluid or gear oil for your trans.
I used electrical connector cleaner/protector spray on all connectors before I reattached them.
I found that Mini likes 13 mm bolts so be prepared with regular and deep sockets and wrenches. They also use lots of torx fasteners as you likely know. You therefore need this:
12 inch needle nose pliers are SUPER handy. I use my Matco set all the time. I love them. They are good for hose clamps, small hoses, and stubborn connectors.
These are also super handy because they are long, one side ratchets and the other side is for high torque and this side is deep so you can access slightly recessed bolts. You'll love them.
This is a big job and there is a chance you might need to clean up a bolt's threads with a die or retap the threads on a threaded hole. I needed to do so for the AC compressor bracket. Having a metric tap and die set handy can save your butt. Its saved mine many times over the years. If you buy a set, get a name brand like IRWIN. Cheap tap and die sets are not worth taking a chance on. Consider buying one.
You can also make a cheater tap for damaged threads in a hole, using the matching bolt. You slice the bolt along its length to create a space for the filings. Google it.
Labeling Parts, Fasteners, Connectors
Do yourself a huge favor and label everything with tags, and/or mechanic's markers, and take pictures. Use ziplocs and sharpies to label all parts. You will forget where things go and this will save you so much time and aggravation when putting everything back together.
When you pull bolts of different lengths or types for the same part (like the transaxle, aka the "tranny" or "trans" and the starter), make note where the long one's are used.
I used 80 tags and 50+ ziploc bags of large a medium size.
Avery #11011 reinforced-hole shipping tags worked well, but will come off if you don't tie them on tight.
Engine Removal Options
The mechanic at Mini insisted that he always pulls the engine out from the bottom after removing the subframe, onto a table. You just need enough clearance for the height of the motor, but you will need that plus a tire or a wooden stand on which to balance that motor. The new motor comes on a wooden stand and pallet which would work but my dealer needed it when I provided the old motor. If you take the new motor and return the core after, you can use that pallet/stand.
That option saves you from having to remove the bumper, fan, AC condensor, intercooler, radiator, and engine cooling fan and part of the intercooler plumbing. I mean this section pictured below and the bumper, fan, AC condenser, intercooler and radiator:
I think my scissor lift would have allowed that but I liked being able to have the motor in the air to swap parts and I wanted to clean out the radiator and intercooler anyway.
So if you're not gonna drop the engine from the bottom you'll need a shop crane or two very strong friends that can help pull and carefully angle the engine/tranny out. The engine and tranny together must weigh approximately 220 pounds. Its not obscene.
$160 minus 20% coupon at Harbor Freight.
You need the load leveler for sure. It allows you to tilt the engine and trans for easier removal and replacement. Plus it has the chains to attach to the engine.
The new engine comes with two hooks for hanging the engine (one on each side). Here is the second hook. I though about leaving it on, bit it interferes with the intercooler pipe on the passenger side. I suppose that's why it says to remove it, in German.
You can use the passenger side engine mount for the old engine's removal which will be attached to the engine leveler with a bolt from the engine mount.
Like so:
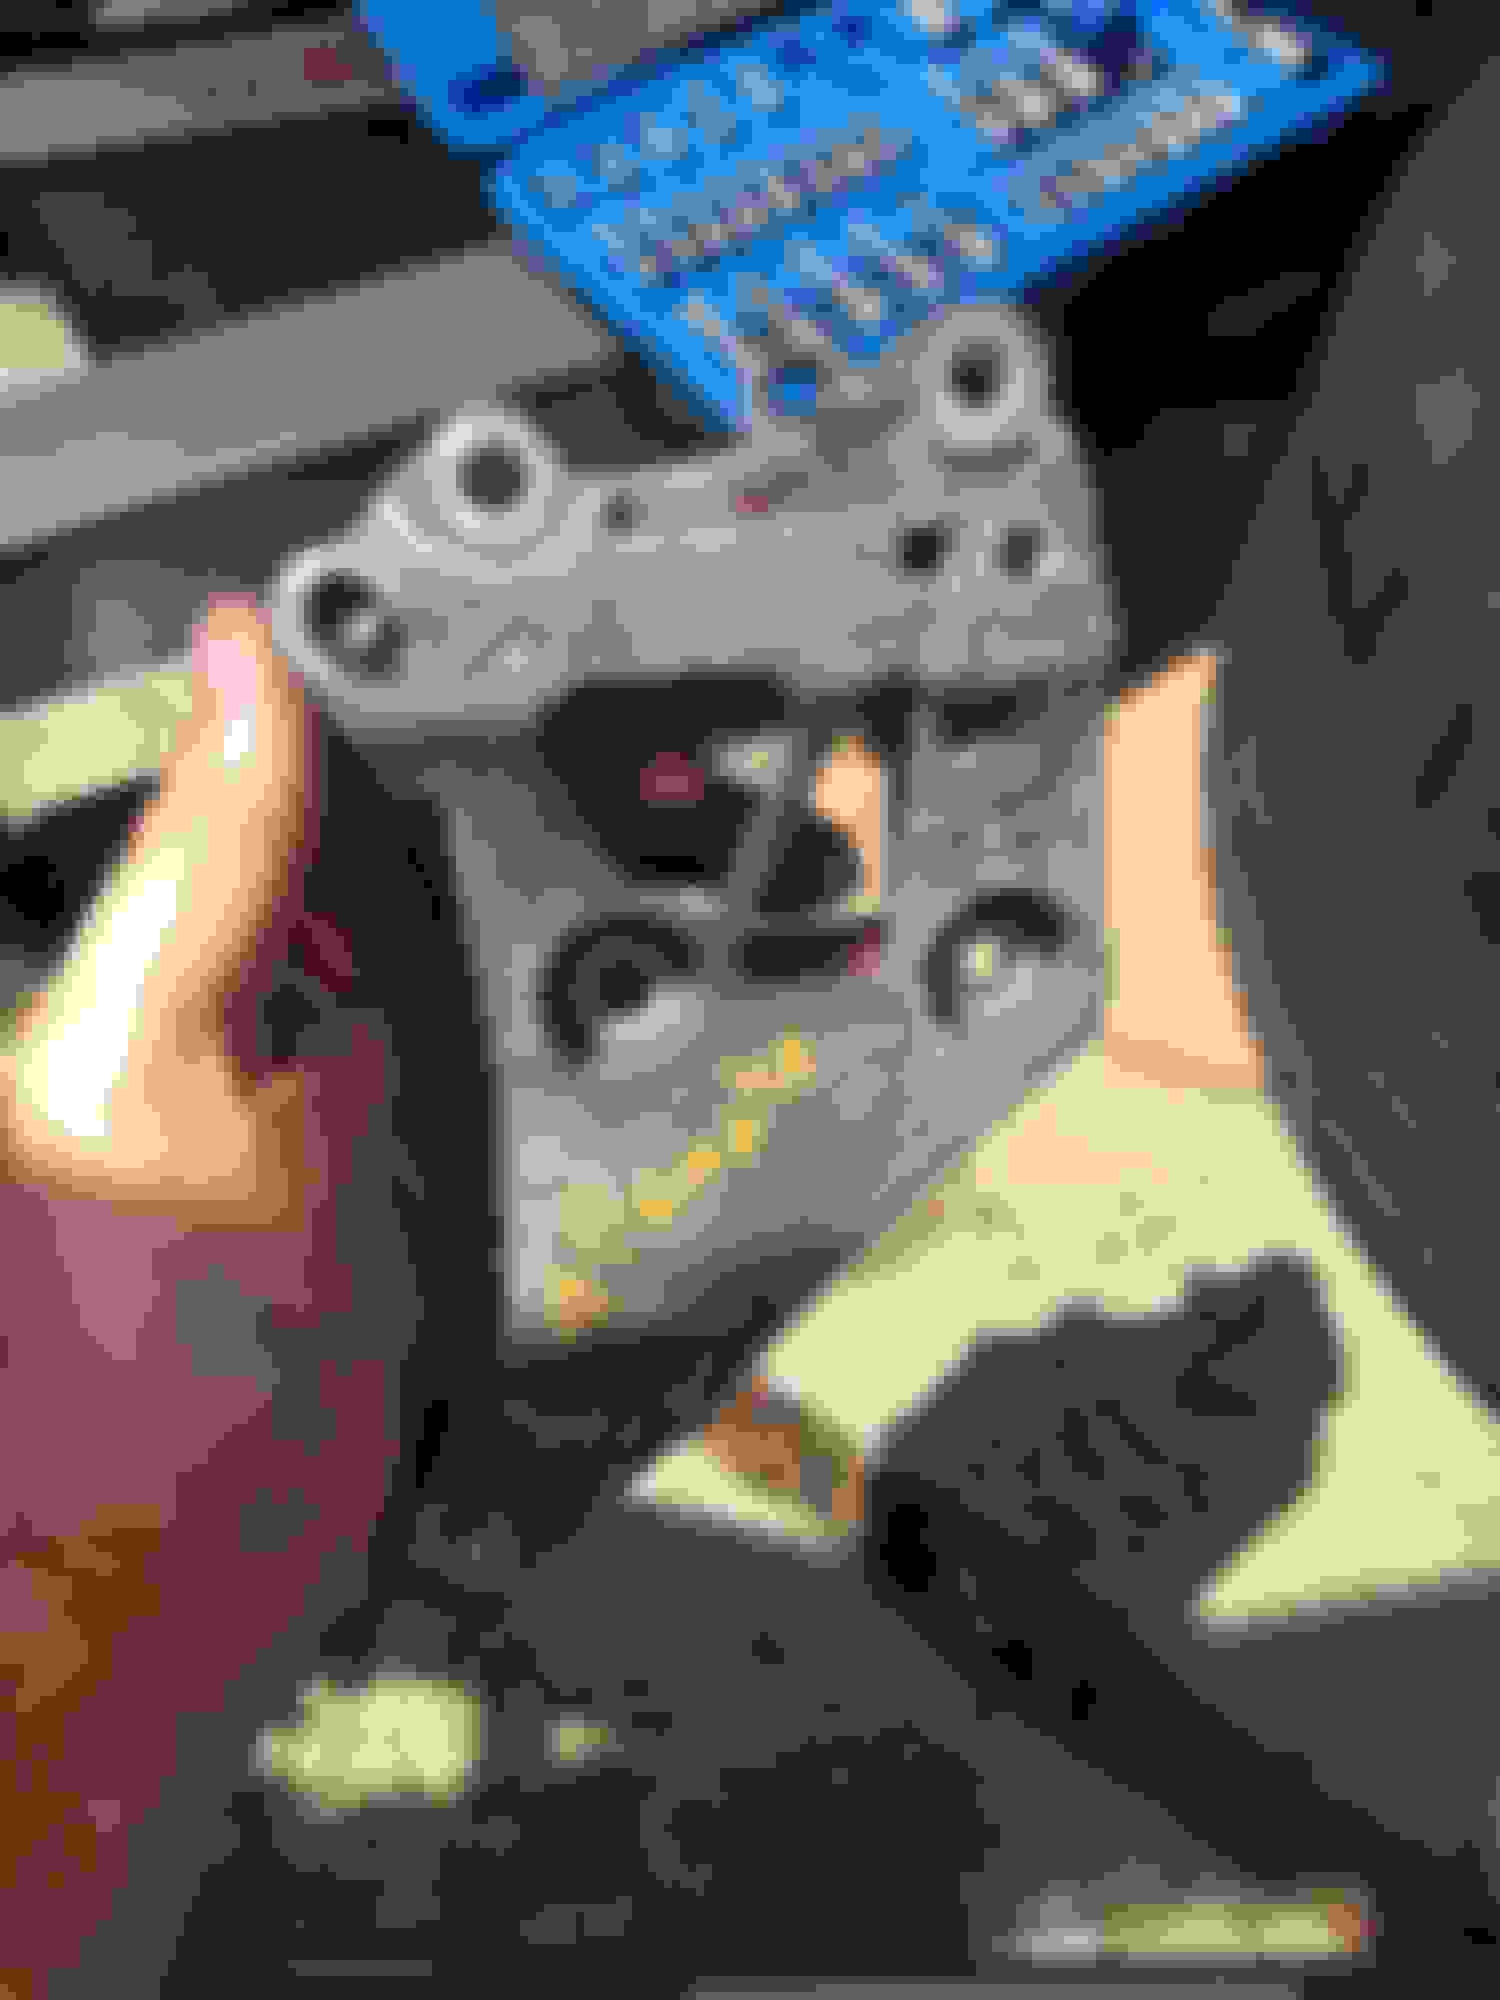
I think you could remove the engine from the top without removing the bumper, lights, radiator etc but you still need to separate the AC compressor and pull it away from the engine (DON'T disconnect the AC lines or you'll cause yourself a major headache) and the driver's side transmission mount support bracket:
Parts
Mine has 153k miles so I took advantage and replaced the alternator, starter, auxiliary water/coolant pump for the turbo, the turbo, both 02 sensors, the injectors, friction wheel and belt tensioner.
Now is a good time to replace or upgrade your turbo as you're gonna be spending $100 in studs, bolts and gaskets for the exhaust side of the engine. None of the fasteners, studs or gaskets should be reused.
Its also a good time to change the turbo oil down pipe (thick, foil covered line) or at least its o-ring (Mini sells the o-ring separately) and the turbo oil feed line (skinny line). That stuff is a nightmare to access so change it now if you have more than 50k miles on your car.
I mean this stuff:
If your replacement engine is a new engine, the oil cooler is preinstalled. If yours is a used motor, CHANGE THE GASKETS UNDER THE OIL COOLER/oil filter now and between the oil filter housing and cooler! That job is a messy nightmare otherwise. Very very annoying. I've done it twice. It sucked.
Change the water pump, or at least its gasket, and the thermostat. Change the black water pipe 0-ring. Etc.
I bought a new engine which came with parts listed in earlier posts. If you're putting in a used engine you'll have to adjust your parts lists accordingly as well as according to the mileage/age of your peripheral parts.
Dowels
The parts lists in earlier posts include dowels. You need those dowels. 1 for the starter, 2 for alternator, 1 for the belt tensioner which fits onto the alternator bracket, at least for 1 for the AC compressor, 2 for the automatic transmission (not sure how many on manual tranny, but I assume 2 of them as well). They are not optional. The starter in particular will rotate when you go to start the car, if you don't have the dowel in place. Some dowels you can reuse, some will be rusted on and you will ruin them trying to get them out.
The NEW engine comes with the 2 large dowels for the transaxle/motor.
Here is the dowel for the belt tensioner (other dowels are shown below):
Lastly, when you have the old engine in front of you its easier to see if you've missed something. I handed mine in when I picked up the new one so I didn't have that option. I'd hold on to the old motor if you can, until your'e done.
Where to Start!?
- The car needs to be on jack stands at the very least, so you can slide under it. The higher the better, obviously.
- Disconnect and label every connector. TAKE PICS!!!! Even if you don't think you will need them. You will not remember how things were routed days later. Trust me.
- TRIPLE check that all connections to the motor are free before you start pulling it out.
- Don't forget to disconnect the crank position sensor under the transmission where the engine and tranny meet.
- Disconnect battery or the starter will zap you real bad when you disconnect the lines.
- Disconnect the computer, its ground strap and pull it out. The fuse box stays connected. Strap it to the firewall.
- Disconnect the second ground strap on the passenger side rear of the engine on the aluminum mount.
- Drain coolant and disconnect all coolant lines into the radiator and automatic transmission cooler.
- Disconnect the shift cable bolt and the little clamp under which are on top of the tranny at the end of the shift cable (note the position of the the connector on the cable, mark it). Make sure you reconnect it the same way you took it off and the position shifter on the tranny (not in the car) is in PARK.
Bolt in #4 here, or even better, #5, less stuff to lose and this way you to mess with the shifter's adjustment:
- Either pull the axles completely or pull them out of the tranny and tie them back and out of the way. The passenger side axle has a support bracket you need to unbolt. See pics below. I removed it completely. The shorter driver's side axle I pulled out of the tranny and simply tied it to the front sway bar.
- There is nothing to disconnect on the steering rack. The tie rod ends may need to be unbolted from the steering knuckles depending on if your'e gonna remove the axles from the hub or move the axles to the side.
- Remove the bumper cover.
- The clips that hold the plastic wheel arches always snap so buy some on e-bay.
- Remove the crash bar behind the bumper. Its pictured here in front of the AC condenser. I think its held in place with 6 shallow headed bolts which face the engine.
- Disconnect the tiny hose that goes into the windshield washer bottle on the driver's side. There is a barbed connection midway between the hood hinge and the bottle. Pull it apart.
- Disconnect the fog lights, side marker lights and horns.
- Disconnect the headlights and their washer lines if you have that option on your car.
One of the outside bolts for my headlights was spinning in place. Best way to get it out is spin it super fast with an impact gun or drill until is starts smoking and completely breaks free. You'll need to replace that plastic piece that accepts the bolt and the maybe the bolt too.
This part:
- Disconnect the hood release cable which is inside the shallow black plastic box on the driver side to the left of the driver's side headlight. Just open the plastic box and disconnect the cable.
- Remove the 4 large/long bolts under the car at the very front of the subframe. 2 on each side.
- Disconnect the downpipe/catalytic converter from remainder of exhaust.
- Remove the intercooler and radiator. Remember how those brackets held it in place? Here they are for reference for when you're putting it back together.
- Remove the entire front section (radiator support) that held the radiator/condenser/intercooler while supporting the AC condenser. There are 2 bolts on each side near the firewall, facing up, very prominent, that hold it in place. Sorry I have no pic.
Here I've pulled it forward:
- Have someone support the AC condenser while you pull this large plastic section (radiator support) away from the AC hard lines.
- Support the AC condenser from flopping forward:
- Support the AC compressor and unbolt it from the engine. I used mechanic's wire. (Ignore what I'm pointing to with the pen in this pic)
- Set it aside:
- Make sure this black plastic AC hard line hose support is removed on the passenger side near the oil pan gasket before you pull the engine. You risk tearing it off otherwise and wait until the engine is back in to reinstall it as it tends to get snagged on the way in.
- Unbolt the 3 motor/trans mounts.
- Remove the transmission mount support bracket (picture above)
- Have someone pull the cables etc away from the back of the engine as you lift the engine out.
Intake Manifold
-Remove the intake manifold bolts: The intake has a bunch of stuff connected to it so you need to pull it up and away and begin disconnecting sensors and tubes under it before it will come free.
Get the 4 orange gaskets for the intake and the 1 throttle body gasket from RockAuto. They are cheap.
Intake gaskets pic:
You can reuse the intake manifold studs and bolts. The new engine comes with the studs installed. Use Loctite Blue if you install studs. I like the "chapstick applicator" type.
Also, if your motor is used you may need to remove some of the 8mm studs, particularly on the exhaust side of the engine. The new engine had one stud that needed removing at the AC compressor. Ill show that later. You will need an 8mm stud remover tool, or you can use vice grips and destroy it during removal or two bolts, one as a jam nut, and back it out. An 8mm remover will work for all the studs on the N14.
-The rear passenger side of the engine has a black box which is a vacuum canister. It has two tiny rubber hoses going into it. I dont know if it matters which goes into which hole, but paint the hose and the nipple it fits onto before you remove it so you put it back like you found it.
One of the tiny lines that go into the vacuum canister:
-You're gonna need an old tire and blanket or tarp to stand the new engine in and protect the the oil pan from getting dented or scratched when you have the engine on the ground.
Once you've disconnected all the lines under the intake manifold, pull the manifold free.
Automatic transmission: How not to destroy it during reinstallation
Ok, this is super important guys. The Bentley manual has a little info on measuring the depth of the torque converter inside the bell housing of the transaxle before mating it to the engine. That's because the shaft of the torque converter has two slots in it which mate to the ears in side the tranny.
You MUST set the torque converter into the tranny until the ears and slots match or you will break off the ears and your tranny's pump will not spin, never mind the floating metal bits, because those ears spin the fluid pump inside the tranny. In fact if you take the oil cooler off the transmission (very easy) and spin the torque converter, after about 5 seconds, tranny fluid will pump out. That will verify your pump works.
Spin the torque converter until it settles. It will settle twice, usually, before its in its correct/final position (ears inside slots), where the ears and slots have mated. Note that it will spin freely whether in its correct position or not so don't use that as an indicator.
Correct depth
INCORRECT Depth and the end of your transmission
This is the tricky part: the tranny has to be tilted back so the torque converter doesnt move forward off those ears inside the trans when your'e mating it to the engine.
Again, the torque converter goes onto the transmission, the flywheel gets bolted to the engine, and then you join them.
If you try and mate the engine and the tranny together and the ears (or tabs or whatever you wanna call them) and slots haven't matched up, you'll break them and your'e screwed.
Here are the slots I refer to in the torque converter shaft:
The ears are inside of here:...you can see one of them inside at 6 o'clock.
BTW, here you can see the dowels in the tranny's bell housing at 5 o'clock and 11 o'clock (The tranny is tipped over in this pic. The dowels sit at 2 and 7 o'clock with it upright):
Here are the original dowels on the old engine at 2 and 7 o'clock:
(now I know where my other oil leak was....look at all that oil)
The Bentley Manual also shows where the dowels go.
BTW you might want to have 1 bottle of tranny fluid handy just in case, but unless you tip the tranny on its side, almost no fluid is going to spill out. A little will spill out of the torque converter.
Automatic Shaft Seal
Update: I don't recommend you change the shaft seal if it wasn't leaking previously. After speaking to a Mini specialist in Maryland (http://www.einsteinsauto.com) and a super cool mechanic at Passport Mini of Alexandria VA, I was told this seal almost never leaks and it can be impossible to get new seals to function in an older trans. Both guys told me this. This new seal leaked quite actively after I got the car running. Why? I have no idea. It was an OEM seal. Total nightmare. This led me to install a newer used transmission rather than remove and try and put in another seal into my original trans with 155k miles on it.
I changed the shaft seal while I was at it. Only available from Mini as far as I know. $30.
If you push it too far in or it ends up cocked/angled a little, you can carefully pull it towards you without damaging it unlike the axle seals, to seat it better. Be gentle.
Lube the outside faces where the new seal touches the tranny with a little tranny fluid so it slides in smoothly.
Note the depth of the original seal. I cleaned the oil and marked with a thick sharpie or paint pen, like so (this is the axle seal btw, I'm just using it for demonstration purposes):
Mini has a tool to set the exact depth. I don't know what it costs but I'm sure it isnt cheap. The mechanics at Mini have a drawer full of them. I wish....
The Axles
The driver's side seal in the trans was so dry that the splines had rusted to the trans. I guess that this part of the trans never sees any oil. It was bone dry.
Generously grease the splines with axle grease before you install!!!
Grease the other end of the axle as well, especially the perpendicular faces that touch the hub face (I refer to the other end of the axle near the brakes). Those can make a clicking noise when you drive from a start if you don't grease the faces.
I changed this seal but it really wasn't necessary. I also changed the tiny o-ring inside the trans. I got these parts from Mini or ECS. I couldn't find them aftermarket although I'm sure they exist.
Here I'm putting in the new OEM seal with 2 inch PVC pipe. Again, note/mark the depth of the old one before your remove it. UPDATE: If your axle seals arent leaking on your automatic AISIN WARNER transmission, dont change them. I changed both of mine as a precaution and they both leaked afterwards. I have no idea why. I cleaned everything and made the sure the axle shafts were smooth as well as the mating surfaces. I used both OEM and aftermarket seals and both leaked. As per my comment above about the input shaft seal, dont change them unless they are leaking. This is what the independent mechanic and the Mini mechanic tod me as well. Im not sure if this advice applies to the manual transaxle as well. I've done seals on other cars without any problems but apparently these Aisin Warner units are a little more "particular".
Here I'm pointing to the axle shaft o-ring. One on each side. Very easy, Just pull out with a pick or small scewdriver, lube and replace them. $1+ each from stealership.
#12 here: https://www.realoem.com/bmw/enUS/sho...diagId=24_1063
If you cant get the driver's side axle out of the trans, just pull the inner CV joint out of the cup. That's what I did. You can pull the the remainder of it out of the trans after you get the trans out. The dust boot has a reuseable band clamp on it which you can release with needle nose pliers.
Get some StaLube cv grease at Pep Boys or RockAuto for $4 (its not easy to find at the typical parts stores) or any other brand so you can add a little extra CV grease in case some falls out.
Cover the stub in a plastic bag to prevent contamination of the grease.
When you put the axles back in, note that the passenger side axle doesn't need go in quite as far as it seems. It only needs to go far enough so that the support bracket holes align to the holes in the block. I refer to this silver bracket:
Here is the axle entering the tranny. Use the bolt holes on the bracket as your guide for how far to push the axle in.
Impulse Sending Wheel and Flywheel
Don't forget to take the impulse sending wheel off the crank of the old engine!Your car wont fire without it. I forgot mine on the engine and 2 days later on the mechanics at Mini noticed it and they called me. Luckily I hadnt put the motor back in. (WOW!)
It also has a hole for the dowel on the new engine's crank shaft. Those little fingers on the impulse sending wheel are read by the crank position sensor. Make sure to get it on correctly and torque to spec.
Note the orientation of the fingers into the engine.
The fly wheel gets installed over the impulse sending wheel. You need to either get new flywheel bolts or clean off the old ones and add Loctite blue to them. They get torqued in 3 stages. The final 90 degree turn called for in the Bentley Manual seemed like too much to me. I was afraid I was gonna snap a bolt.
That being said, use a Sharpie and mark the bolts each time you torque them so you know which has been torqued and then use the mark to know when you've achieved the additional 90 degrees.
The flywheel also has a hole for the dowel in the crankshaft of the motor which orients the impulse sending wheel underneath it.
Take your time with this part. Pay attention to what your'e doing and how parts go on.
Joining the Motor and Trans
Its critical that you join the motor into the trans when that trans is tilted back so that the torque converter doesn't slide forward. You'll need a friend to help you angle it. This is where the load leveler helps tilt the engine down to meet the tranny.
The tranny and engine should mate together FLUSH before you put any bolts in. DON'T USE THE BOLTS TO PULL THEM TOWARDS EACH OTHER.
Remember that the 2 dowels need to go into their respect holes.
At the same time you need to be lining up the studs in the torque converter to go through the holes in the flywheel! This is where 2 people is very helpful.
The bolts should all easily go in by HAND almost all the way in with little resistance. Don't be crossthreading!
Don't forget to install the 2 new large dowels before you start. The Bentley Manual shows where they go nut when you're tired that drawing isn't the friendliest to interpret.
2 of the bolts that hold the engine and trans together are LONGER. I forgot to make a note of that and I lost a lot of time trying to figure out where they went.
Here is where the long bolts go:
And near where the lower O2 sensor will be. This bolt sticks out/pass through. I don't know why they opted for the longer bolt there if it sticks out.
After you have the motor and trans together, you tighten the torque converter to the flywheel through the space where the starter fits. Sorry I have no pics of this. You cannot do this part with the starter installed so leave the starter alone for now.
Note that you have to put a large screwdriver in the flywheel teeth to stop it from spinning while tightening the nuts and then use the same flywheel teeth to rotate the flywheel and torque converter around so that each subsequent stud is exposed though the "starter hole" and then tightened to spec.
Use Loctite blue. I reused the original nuts.
I suggest you mark each nut with a Sharpie after its torqued so you know when you've done them all.
The Starter
I put in a new Bosch (from ECS Tuning, core return required) starter in because that starter is hard to get to and I didnt wanna have to ever think about it again.
Install it AFTER you get the engine and trans together because you need that space to access the torque converter studs as I mentioned aboveand because it has a standard hex bolt which comes in from the TRANNY side. The other two are torx bolts and spin into the trans from the engine side.
The starter MUST have one dowel in it!!!! Here it is:
Here is me removing that hex bolt because I put the starter on before the tranny was mated to the engine (duh!) That bolt needs to go through the trans as well.
The starter has three bolts...2 from the engine side, one from trans side as shown here:
The AC Compressor
In case its not obvious, you must not disconnect any parts of the AC system or you will need to evacuate it and add new R-134a. That's a very annoying job requiring a vacuum pump.
As I mentioned above, you have to support and protect the compressor and the condenser during the engine swap.
There is one bolt on the damn compressor which is held captive by one of the hard lines. It doesn't come out. You'll need to use a 13mm open ended wrench to loosen it and pull the compressor out at the same time. That bolt cost me hours of work to get back in because its very hard to thread the bolt because the compressor resists facing straight to the block. I ended up damaging the first few threads in the bracket and had to pull the bracket off and tap the threads.
The compressor sits on this bracket (it erroneously says "alternator" on it in yellow. Ignore that). *Note the old skinny DOWEL on the left side facing out.* I reused it.
And the AC compressor bracket has a an inward facing small dowel that goes into the block:
Here it is inside the bracket before I install it.
If you can get a friend to help you hold the compressor so its parallel with the block while you feed the bolt into the bracket it will prevent you from cross threading. Its much faster to screw it in with your fingers than with a open ended wrench, 1/2 a turn at a time. But you can only do that if someone is holding the compressor straight, otherwise the friction is too much for your finger strength.
Here it is being uninstalled from the old motor:
The new engine comes with a stud installed that you need to remove with the 8mm stud installer or two bolts (one as a jam nut) before you install the AC compressor to the bracket. A regular bolt you took off the old engine will replace that stud. You can see it at the bottom of the bracket in this pic:
Here is the stud I refer to and original bolt you will replace it with:
Make sure you clean all mating surfaces before you install gaskets! Such as:
I use these but if you don't have air tools use the pad version.
The Turbo
Install the turbo to the exhaust manifold BEFORE you install the manifold to the engine otherwise you wont have space for a torque wrench and you wont be able to torque the bolts to spec. I made that mistake and had to tighten the bolts with a long box wrench and guess the correct torque.
The Alternator
I put in a new 150 amp BOSCH AL0888N New Alternator (AMAZON, no core required) vs 120 amp for original.
Perfect fit:
The alternator also has 2 dowels. See one here in the block, at the bottom bracket of the alternator:
Here are the the holes in the block that accept the upper part of the alternator:
And the 2nd dowel for the alternator:
Belt Pulleys
Consider changing the belt tensioner and friction wheel if your car has over 100k miles. Both have bearings in their respective pulleys which can fail. Its not a high priority because they aren't hard to access once the motor is in. The friction wheel does turn the water pump however...so its super important. I don't know the failure rate on those however.
The pulley for the water pump has no bearings so just put the original on the new motor.
High Pressure Fuel Pump and Fuel Injectors
At 153000 miles my HPFP has already been changed once. Its an easy part to access so no need to do so just because you're swapping motors but you may wanna change the HPFP o-ring (cheap on RockAuto) if it has a lot of miles on it.
Its easy to get the fuel rail and HPFP off as one piece. Just unbolt the 3 HPFP torx bolts and the fuel rail bolts and pull them out as one unit. You'll need to remove one (the large) connection into the pump by putting a nail into the hole in the connector and pulling it back. 1/4 cup of fuel will drip out so wrap in a plastic bag.
The other small fuel hard line can stay on if you take the fuel rail off with the HPFP attached. Sorry I dont have a pic. Its the small hard line that goes between the fuel rail and the HPFP.
I put in new BOSH injectors (cheapest by far on Rockauto).
The new injectors come with seals. You just need reuse the metal clips and lube the white seals on the tips with a little motor oil and slide them in. Those clips just limit the depth the injector can go int and hold it taught to the rail. They don't clip on. They just fit over the injector.
If you're reusing your injectors, ECS tuning has the Bosch seals for $6 per injector but you'll also need their special tool to install the seals. Its like $60 (more than the cost of one new injector).
Important Update:
My passenger side axle seal started leaking so I went t change it and quickly realized that the replacement motor had a casting which prevented me from putting another seal in. In the picture you see a a seal and a metal nub at around 3 o'clock. This blocks the seal from being pushed in place when the engine is mounted to the AUTOMATIC trans. Not sure about the manual transaxle. BEFORE you put the motor in, grind this nub down while the engine is out. I had to do it with a metal cutting wheel and then a dremel tool with the engine in place. Very annoying. I spoke to a Mini mechanic about this and he explained that this is why Mini pays mechanics 10 hours to change the passenge side seal on automatic transmission Mini's!
Most mechanics just file a couple of millimeters off this nub so they dont have to drop the entire trans but they charge the 10 hours.
The nub is just below where I'm pointing in this picture. The metal nub with the characters stamped on it. I had installed the axle seal before I joined the engine to the trans. The metal section actually blocks the axle seal by a few mm. You need to shave this down. No idea why Mini screwed this up.
Or you'll be stuck doing it like I had to...should you need to change the axle seal in the future.
Here is the seal partially installed seal after I shaved the protruding aluminum section. If you dont shave the nub you wont be able to put a 2 inch pipe on the seal to seat it.
Also, National brand axle seal 710619 DOES NOT FIT the AISIN automatic transmission. Rockauto has the incorrect info from National. Corteco 24277560915 sold by ECS Tuning is the correct axle seal for both sides of the Aisin automatic.
If I had to do it over again, I would have put in all new coolant hoses. Its expensive but if you have a lot of miles on your car like I did, it will save you some aggravation.
I chased coolant leaks for weeks in addition to the elbow under the coolant bottle (Elbow under coolant bottle) which leaked easily when the bottle was moved out of the way. When I had my old engine in the car I was always needing to add coolant and I thought the old engine's solid water pipe in the back of the motor was the culprit or perhaps the thermostat. After I put in the new engine I still had leaks. It would have been nice to rule out any hoses.
Of course it could always be the radiator leaking but that's easier to change after the fact than the hoses.
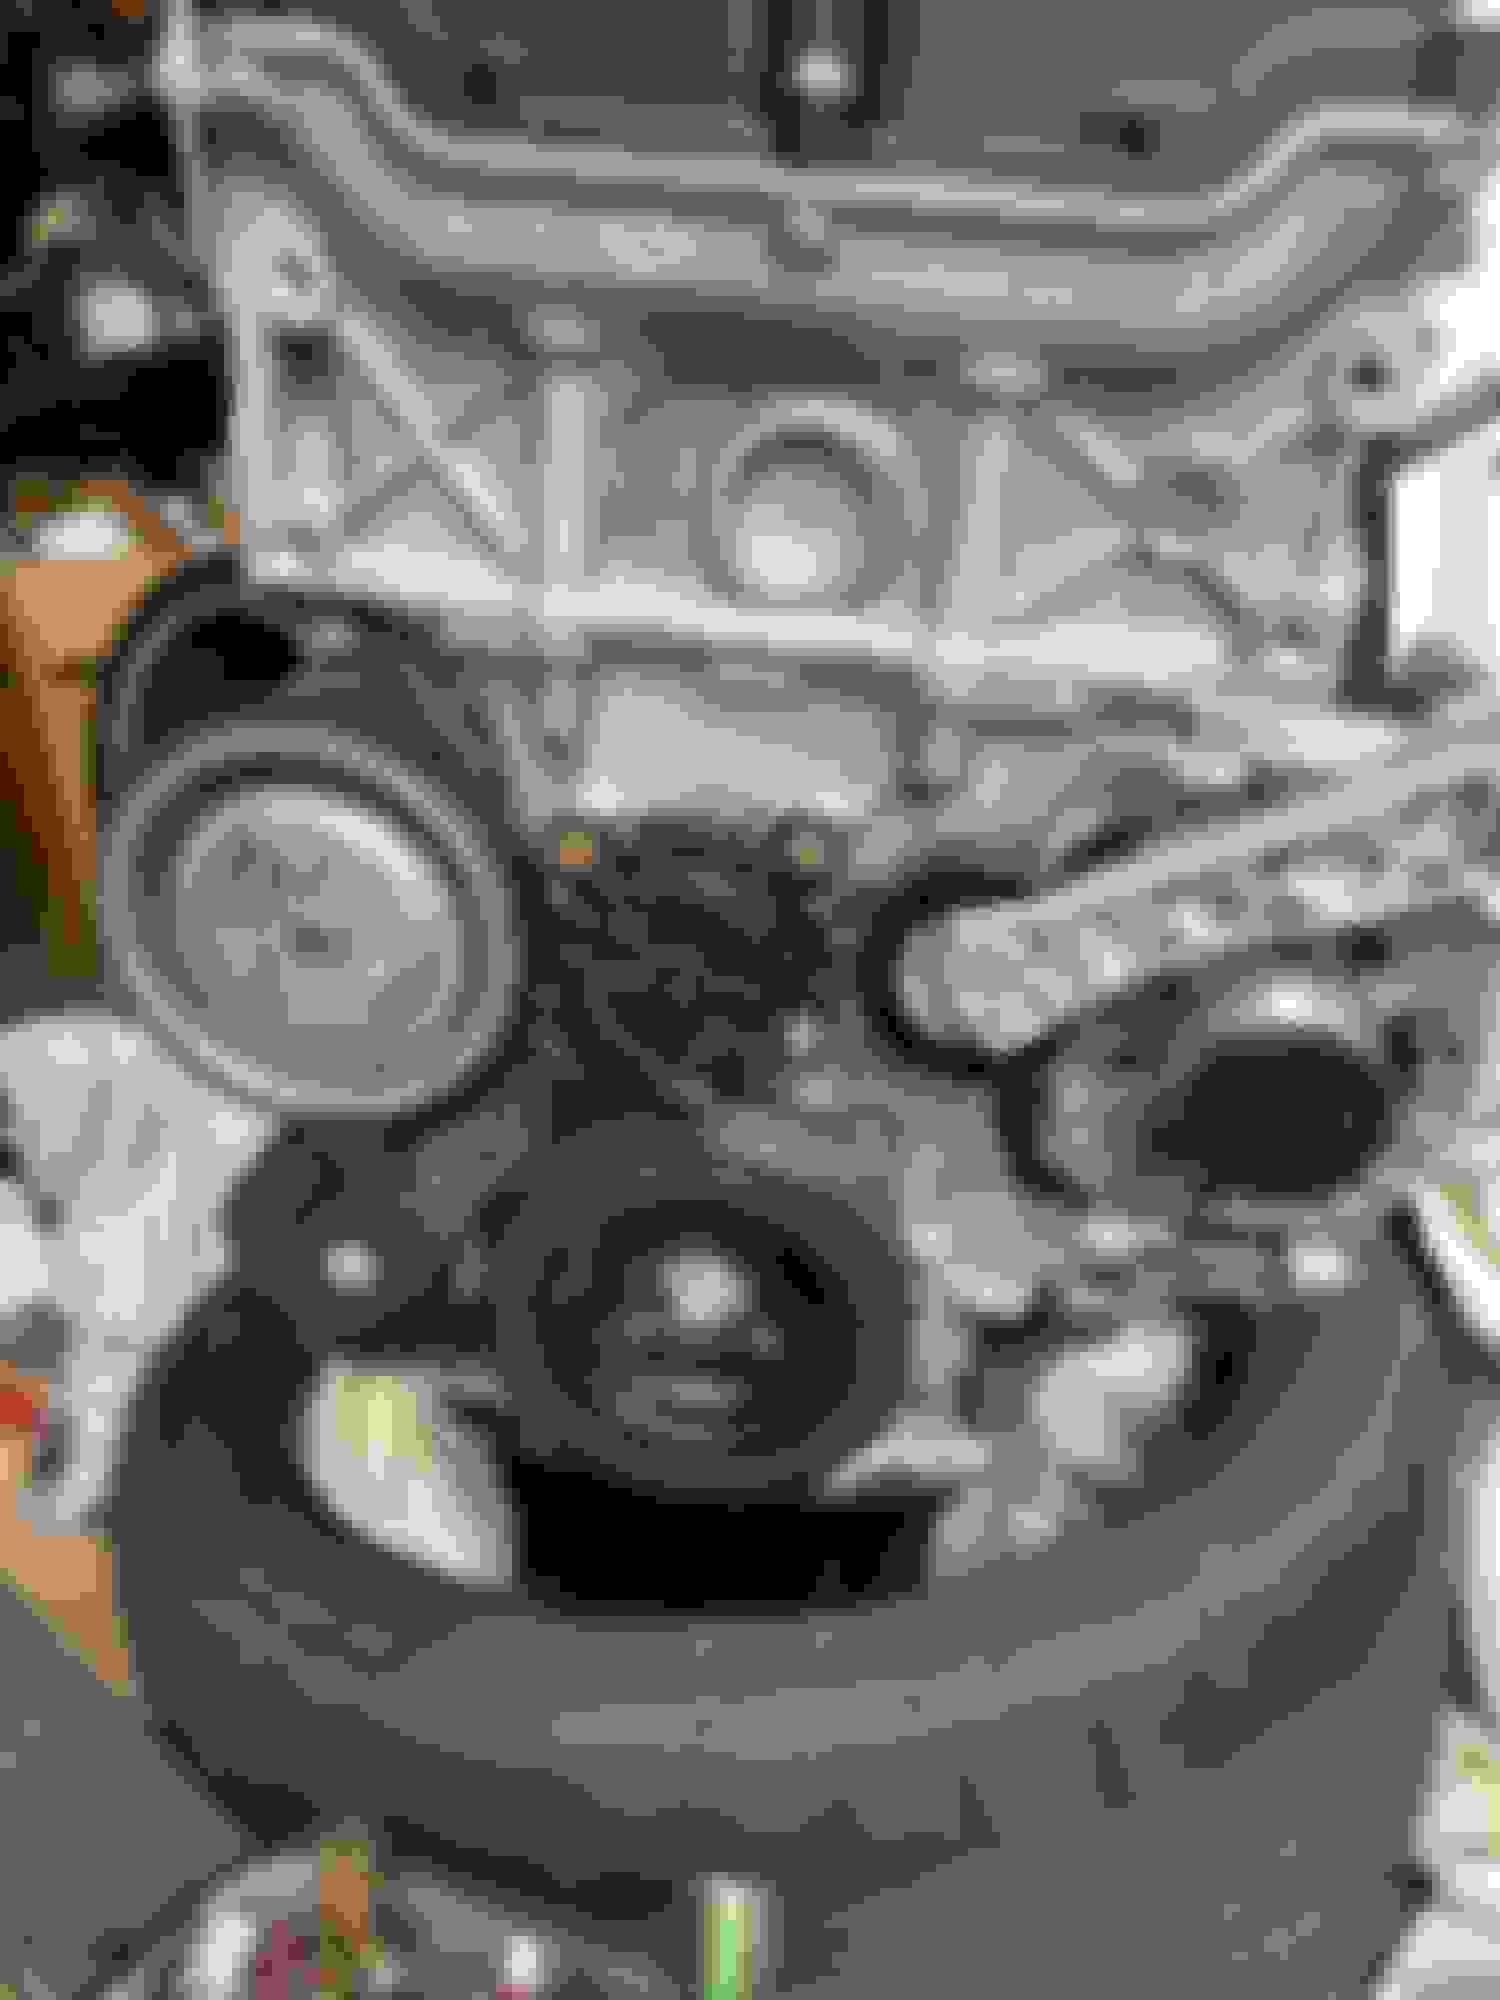
looking at your pics im intrigued by something. in the lower portion of the block there is a hole for the oil pump solenoid wire to pass through for an N16 application. did you make that plug or did it come with it? it looks like the regular plug with the wire missing. apologies if this was covered already. I called mini parts and asked if they had something to block that hole and five different dealerships said no. so im curious. I ended up using a 24 mm steel frost plug with some permeated ultra black. to about six hits with a hammer on a socket to seat it. fingers crossed!
looking at your pics im intrigued by something. in the lower portion of the block there is a hole for the oil pump solenoid wire to pass through for an N16 application. did you make that plug or did it come with it? it looks like the regular plug with the wire missing. apologies if this was covered already. I called mini parts and asked if they had something to block that hole and five different dealerships said no. so im curious. I ended up using a 24 mm steel frost plug with some permeated ultra black. to about six hits with a hammer on a socket to seat it. fingers crossed!
Hey Mr.,
Can you point me to the exact part you're referring to?
Change the water pump pulley when you change your motor
Another word to the wise. Change all the old stuff out of your car if it has high mileage.
I got lazy in some instances and didnt change some of the old parts with 140k miles on them like the water pump pulley which just started chunking apart. $40 aint cheap for this simple part but $40 plus having to get the old one off now that motor is in is much more work.
If this is the original one, as I suspect, it has 160k + miles on it.
Back in and making progress! I am so ready for this damn thing to be done and running lol.
Came across this thread as I am just undertaking this task in my 2010. Props to the posters on this as the pictures help tremendously and gives me a lot of information as I begin to dig in.
However these mount brackets look fantastic. Are they powder coated or did you buy them from a site? Great addition!