
Interior/Exterior Removal of Side Scuttels

3rd Gear
Joined: Aug 2008
Posts: 179
Likes: 4
From: Philadelphia,Pa
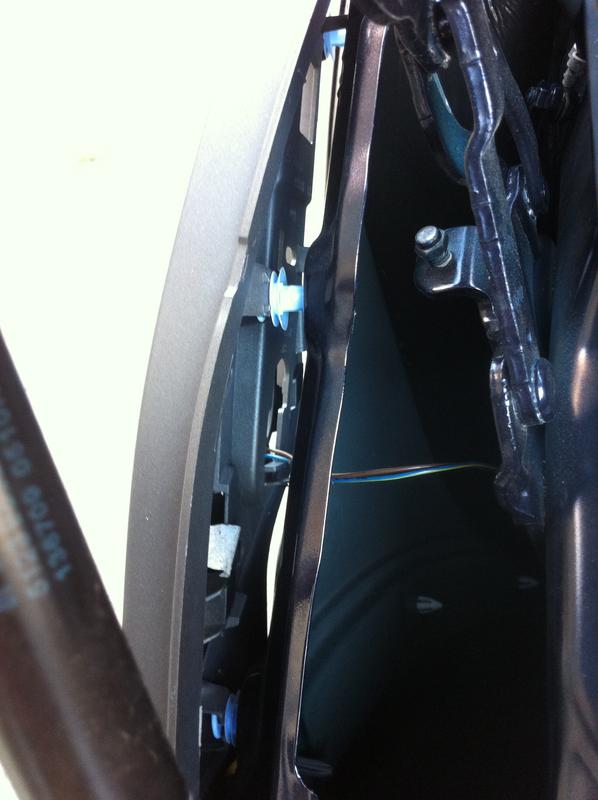
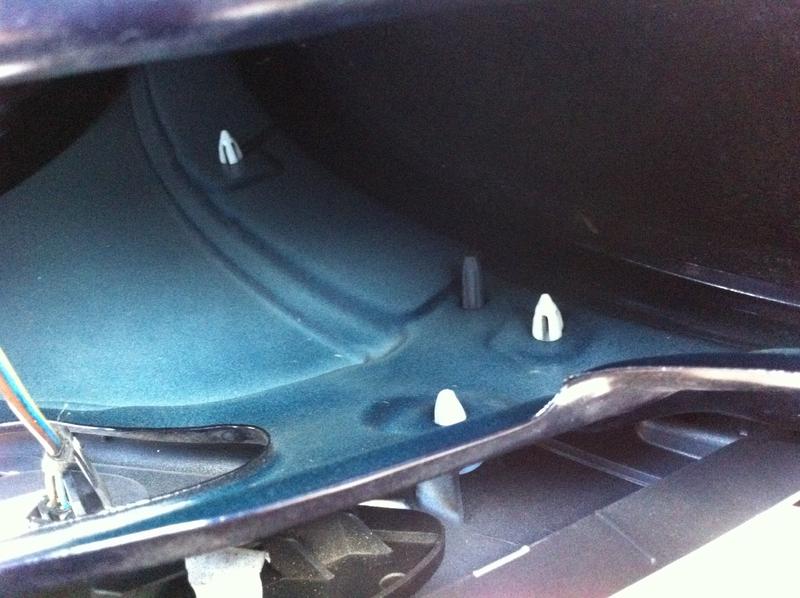
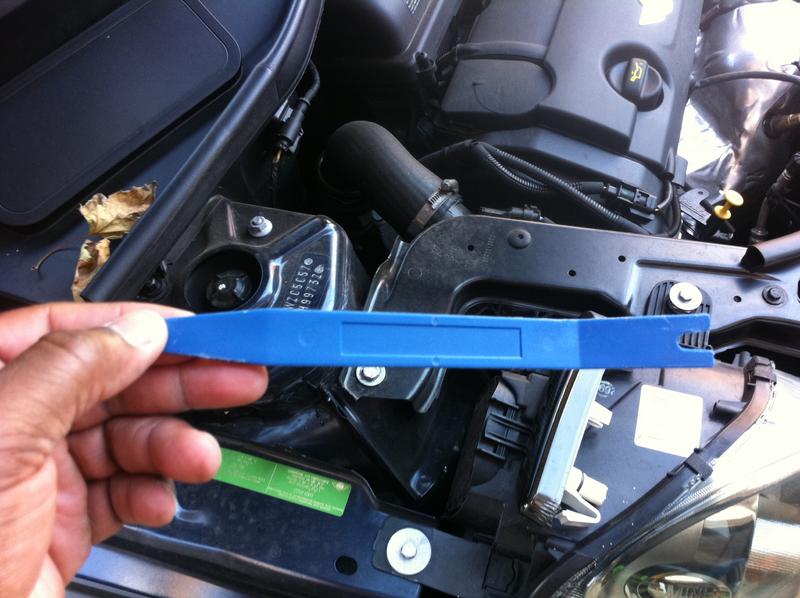
Open hood...Then using some kind of prying tool or your hand you have to pull up on the trim piece above the scuttle. Its a little hard to get to come up but it can be done, using the prying tool helps alot. Now remove the light by pressing the white tabs, if you get one out, the lower tab the top will follow. Now disconnect the light and set that to the side. Look down in the compartment you should see several white nylon fastners. These are tricky using your trim tool or what ever you have to pry with, gently pry the top from the outside. You will here some cracking but its the fastners coming loose. Repeat until you have them all out. Theres one at the very bottom along with a long piece of plastic that's attached to the scuttle. To get at that piece and free the scuttle you have to pull back the cars trim a little. After you do that wrap on. Hoped that helped a little. The trim tools I purchased from Harbor Freight, if your going to do alot of work on your car these are a must. It prevents alot of maring

Thread Starter
|
3rd Gear
Joined: May 2011
Posts: 286
Likes: 0
From: Dallas, TX
These are awesome, if a bit intimidating looking! Thanks a ton, I am actually having the wrap done, and the guy was asking me about removing the scuttle. This will help agreat deal! Thanks again..
Thread Starter
|
3rd Gear
Joined: May 2011
Posts: 286
Likes: 0
From: Dallas, TX
Thanks Less2 as i got them off for my guys to wrap them,,,,good tips and great pics, knew right where to apply pressure...it was a bit scary hearing all the cracking sounds but all is good!
3rd Gear
Joined: Aug 2008
Posts: 179
Likes: 4
From: Philadelphia,Pa
Glad it worked out and the cracking noise is a little alarming. That's why I gave you a heads up. What color you wrapping them in? Please post pics when he's done.
Trending Topics


2nd Gear
Joined: Jun 2012
Posts: 142
Likes: 0
From: Maryland
These instructions worked great! It took just a few mins to get each one off. By the way, a plastic bicycle tire changing tool worked perfectly for prying.
My scuttles are now drying after their first coat of plastidip...
My scuttles are now drying after their first coat of plastidip...

5th Gear
Joined: Nov 2011
Posts: 1,073
Likes: 2
Open hood...Then using some kind of prying tool or your hand you have to pull up on the trim piece above the scuttle. Its a little hard to get to come up but it can be done, using the prying tool helps alot. Now remove the light by pressing the white tabs, if you get one out, the lower tab the top will follow. Now disconnect the light and set that to the side. Look down in the compartment you should see several white nylon fastners. These are tricky using your trim tool or what ever you have to pry with, gently pry the top from the outside. You will here some cracking but its the fastners coming loose. Repeat until you have them all out. Theres one at the very bottom along with a long piece of plastic that's attached to the scuttle. To get at that piece and free the scuttle you have to pull back the cars trim a little. After you do that wrap on. Hoped that helped a little. The trim tools I purchased from Harbor Freight, if your going to do alot of work on your car these are a must. It prevents alot of maring
I see 6 blue fasteners that must be squeezed to release plus at least 1 white fastener. I can't for the life of me see how you can get all those to release without them popping back in to place as you work on each one.
EDIT: all it took was for me to write that frustrated post to turn around and figure it out. Lol!
Last edited by TerminalVelocity; Jul 30, 2013 at 07:32 PM.


4th Gear
Joined: Jan 2013
Posts: 460
Likes: 1
Thanks for the write up! Second one was much easier once I realized how much effort I needed to release the panel. One problem I have is that 2 of the clips on my '14 CM slid off the trim panel instead of pulling off the frame, so now I need to find a trim tool to remove and replace them. FML.

4th Gear
Joined: Jun 2007
Posts: 553
Likes: 0
From: Texas
Sorry to revive an old thread, but I cannot get the bottom pieces out for the life of me, It's stuck behind the trim pretty far it seems and I feel like I am going to break the wheel trim off from the car trying to pry it.
Any suggestions?
Any suggestions?
4th Gear
Joined: Jun 2007
Posts: 553
Likes: 0
From: Texas
I tired pulling the trim back but they seems fairly anchored in by two more of the connectors like the white ones in the pictures here. I'm afraid to break any fasteners that hold the wheel well trim on :(

2nd Gear
Joined: Apr 2013
Posts: 81
Likes: 0
From: Orlando, FL
This did it for me. Got in there and it popped right off after days of worrying what to do.
http://m.harborfreight.com/5-piece-a...not%20provided
http://m.harborfreight.com/5-piece-a...not%20provided
3rd Gear
Joined: Nov 2015
Posts: 213
Likes: 21
From: Mifflinburg, PA


Great write up!!! Made it so easy. I know most people tend to black out their MINIs. I like a little additional (plastic, yes) chrome. Next is brake ducts. Just don�t know yet if I want the ones with the LED DRLs or without.
Last edited by Rich Rodichok; Dec 2, 2017 at 11:57 AM. Reason: Spelling


2nd Gear
Joined: Oct 2017
Posts: 57
Likes: 3
From: Las Vegas, Nv
this helped get the first parts going; I went super lazy and instead of putting stress on plastic parts I just took a razor knife to the clips- At $0.67 from outmotoring I figured who cares. Ive had the clip holders on the part brake way too many times, or once getting it back in after struggling and the clip going in and out of the mount hole a dozen times (which is what was happening yesterday) the part ends up rattling because the clip lost its rgidity.
so, plasti-dipping the parts today,
thanks for showing the steps, its super easy to do
so, plasti-dipping the parts today,
thanks for showing the steps, its super easy to do


1st Gear
Joined: Feb 2015
Posts: 36
Likes: 2
From: Sammamish, WA
I recently removed mine and sprayed them in Anthracite plastidip. TO remove the clips easily, use a 1/4" breaker bar with an 8MM socket. Place the socket over the pointy end of the clip and press gently. The socket will squeeze the tab on the clip so it pops out very easily. Start at the top. you can then use a 6MM to free the two clips you can reach holding on the fender flare. Finally, once I removed the first scuttle, I trimmed the 1" long locating pin under the fender to 1/2" so that I needed far less movement in the fender flare to refit the scuttle. For the second one, I used a loose hacksaw blade that I bent slightly to again trim the pin length to about 1/2" BEFORE I removed it to make removal and replacement much easier on the fender flare.
Last edited by ItzNeil; Apr 20, 2020 at 11:28 PM. Reason: typo