

R56 Home made Scan Gauge II mount


Thread Starter
|
6th Gear
Joined: Aug 2011
Posts: 2,064
Likes: 15
From: Silly-con Valley
Home made Scan Gauge II mount
Here are some pics of my home-made Scan Gauge II mount. I didn't want to pay $100 for a ready-made mount, especially when I figured I could make my own for far less than that.
Counting the materials, it cost me a total of about 50 cents to make this. I got a scrap piece of ~1/8" ABS plastic from my local "Fantastic Plastic Place" for FREE! "Just take it, it's not worth the bother of ringing it up." One side has texture that doesn't really match the dashboard, but isn't that far from it.
I traced a template on paper of the back of the tach, and the three screw locations. I then drew out where I wanted the arm sticking out that held the gauge to be (low and to the left). I traced the shape onto the ABS with a pen, then cut it out with a little saw and a Dremel. A drill took care of the three mounting holes, which I made slightly oversized in case I had gotten the measurements wrong a little bit.
I bought longer screws because I was pretty sure the stock ones were too short; they sit down in recesses when there isn't a piece of plastic in the way! The plastic flexes so it conforms (more or less) to the curve on the back of the tach, which I had thought was flatter than it really is. I wound up loosening the left side screw a ways to get the gauge back further from the turn signal stalk. I also cut the right-side screw shorter because access to the back of the tach is really very tight! Even with my offset ratcheting screwdriver, it was difficult to really get at that one.
When I got the mount on, I realized that the wire coming out of the right side of the gauge didn't have room to go around the tach easily. So I decided to cut a square hole in the arm that holds the gauge so the wire could pass through it and plug into the socket on the back of the gauge. I used the drill to make closely-spaced holes, then a razor knife to cut between the holes and clean up the edges. It now fits quite nicely!
Anyway, here are the pictures:
This is a top view, taken through the windshield:

Here is a view of the arm that the gauge mounts to, showing the hole that the wire goes through:

Here is the view from the driver's seat:

I hope this is of interest to someone!
Counting the materials, it cost me a total of about 50 cents to make this. I got a scrap piece of ~1/8" ABS plastic from my local "Fantastic Plastic Place" for FREE! "Just take it, it's not worth the bother of ringing it up." One side has texture that doesn't really match the dashboard, but isn't that far from it.
I traced a template on paper of the back of the tach, and the three screw locations. I then drew out where I wanted the arm sticking out that held the gauge to be (low and to the left). I traced the shape onto the ABS with a pen, then cut it out with a little saw and a Dremel. A drill took care of the three mounting holes, which I made slightly oversized in case I had gotten the measurements wrong a little bit.
I bought longer screws because I was pretty sure the stock ones were too short; they sit down in recesses when there isn't a piece of plastic in the way! The plastic flexes so it conforms (more or less) to the curve on the back of the tach, which I had thought was flatter than it really is. I wound up loosening the left side screw a ways to get the gauge back further from the turn signal stalk. I also cut the right-side screw shorter because access to the back of the tach is really very tight! Even with my offset ratcheting screwdriver, it was difficult to really get at that one.
When I got the mount on, I realized that the wire coming out of the right side of the gauge didn't have room to go around the tach easily. So I decided to cut a square hole in the arm that holds the gauge so the wire could pass through it and plug into the socket on the back of the gauge. I used the drill to make closely-spaced holes, then a razor knife to cut between the holes and clean up the edges. It now fits quite nicely!
Anyway, here are the pictures:
This is a top view, taken through the windshield:
Here is a view of the arm that the gauge mounts to, showing the hole that the wire goes through:
Here is the view from the driver's seat:
I hope this is of interest to someone!


Thread Starter
|
6th Gear
Joined: Aug 2011
Posts: 2,064
Likes: 15
From: Silly-con Valley
Go for it!
The screws are just sheet-metal screws, not machine screws. So they don't have to be metric, they're just (AFAIK) threading into plastic, probably plastic tubes inside the tach if it's like other electronics I've mucked with.
The ratcheting offset screwdriver was what made this possible. It looks like this:
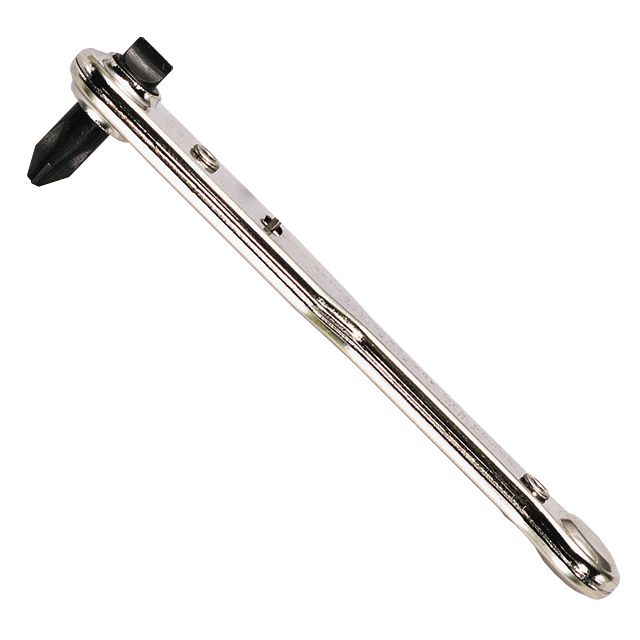
The right side screw is still tough, even with that, because of the vent on the dash there. The left side one was relatively easy, and the top one was very easy. If you think it will look OK, it will definitely be easier to just use those latter two screws to hold the bracket on.
The screws are just sheet-metal screws, not machine screws. So they don't have to be metric, they're just (AFAIK) threading into plastic, probably plastic tubes inside the tach if it's like other electronics I've mucked with.
The ratcheting offset screwdriver was what made this possible. It looks like this:
The right side screw is still tough, even with that, because of the vent on the dash there. The left side one was relatively easy, and the top one was very easy. If you think it will look OK, it will definitely be easier to just use those latter two screws to hold the bracket on.
Trending Topics

Thread
Thread Starter
Forum
Replies
Last Post
tylewis
R56 :: Hatch Talk (2007+)
4
Aug 18, 2015 06:53 AM
PSIChocolate
Stock Problems/Issues
1
Aug 13, 2015 12:46 PM
dyeLucky
MINI Parts for Sale
3
Aug 7, 2015 07:10 AM