When you click on links to various merchants on this site and make a purchase, this can result in this site earning a commission. Affiliate programs and affiliations include, but are not limited to, the eBay Partner Network.
From: Portland, OR *currently in a temporary email address
Originally Posted by megaDan
Is there a trick to removing these? I've found that using the least amount of pressure when reversing is best, but its still fails plenty. I thought there were only 4 screw locations, turns out there were a dozen or so.
Yes! Screwdriver in one hand, needlenose plyers in the other! Hold the outside ring in place with the plyers, and gently unscrew the central part with as little pressure as possible. However, if you broke a few, have no fear! They're like $0.30 apiece at MINI (and if you ask the right employee nicely while buying other stuff too, I've found that they sometime will throw in a baggie for free). Just don't tell them I told you that
Originally Posted by megaDan
Exactly! Thank you! Which is why I asked for 'objective evidence'. SHOW ME where it was an issue. Lots of fear mongering, but despite plenty of searching I saw no failure even remotely associated with a pulley. There has been talk of 'extra wear on bearings' at the time of a motor build, but who's to say what is extra? Also, not a failure.
I have 100k+ miles with a lightweight crank pulley on various other motors, but those don't have the same fear about pullies that the Mini does. Hell, we got at least 5000 track only miles, on a motor with a 170k on it, that had been running a LW pulley for 80k miles prior. And when it finally gave up the ghost it wasn't due to anything remotely pulley or bearing related.
As far as this, I agree with your thinking. However, I personally haven't had the guts to go with an undampened pulley. A couple things to consider (engineering types, please correct me if I say something incorrect):
These motors are inherently imbalanced at the crank. Since the pistons are moving only vertically, there's lateral forces that occur due to the shape of the crank, which are transferred into the components it is in contact with--the bearings. Apparently, at around 3k RPM, there's some destructive vibrations that occur in the crankshaft because of this. BMW/MINI didn't just make up the concept of a crank damper out of thin air--the manufacturer runs rigorous testing (way more than any of us could ever do) before taking the motor into production, and these cars are just one model of many, many, many cars that come equipped with crank dampers from the factory.
The "hype" period with these cars is long past. There were a lot of people running these things back in the day, but what's the likelihood that someone would go against the advice of a bunch of people, and then come back afterwards and admit their expensive mistake? Especially if the cars dropped in value considerably over their period of their ownership, it's likely they would just move on after such an experience.
At the end of the day, I think it's just a difficult judgment call, but one for you to make. A lightweight dampened pulley costs an arm and a leg for something you would never know saved your crank/bearings. There's a lot of things to consider--how long do you plan on owning the car; how much time will it spend at high RPM; what's the current condition of the internal components; do you plan on rebuilding the motor at any point?
Either way, if you decide to go for it, please post updates! I'd be really interested to see some empirical evidence on this, as well.
I made a survey about this about a year ago, following another discussion on this topic that can be found here. Good luck, in any case! The car will be fun to drive no matter what you do
Last edited by sarom058; Jul 14, 2017 at 03:37 PM.
Spent this last weekend on the lakefront at the air and water show. Totally worth it. Beautiful weather and a spectacular show. Only 3 of the Blue Angels were out on Saturday so it was kinda meh, but they brought 5 on Sunday. IMPRESSIVE! I brought our DSLR along for practice and ended up with some decent shots.
One hell of an entrance.
*insert Top Gun reference here*
The wife wasn't feeling good last night and a storm was rolling in so I found more time to work in the garage! Last time I was out there it was 80F+ and I could barely see I was sweating so much. Last night was super comfortable.
Before I started working I was greeted by a surprise from the postman (and user sarom058)! Glad I have the tools, but really starting to get annoyed with my german 'specialty' tool collection between this and my TDI.
Pulley puller and tensioner tool!
I started by removing the passenger side fender liner. Used a more delicate touch and only destroyed one of the plastic rivets. Got the liner out much faster than the previous one.
Yey.
Despite previous encounters with dead things and now lots of spiders, I managed to gather up enough courage to stick my arms and face under the car to remove the splash guard and associated hardware necessary to get the bumper cover off. In the process I discovered my AC compressor is either shot, or has a leak in the lines directly attached to it.
Green!
The battery is disconnected at the moment, but does anyone see any reason I shouldn't start the car as-is? I'll reconnect the A-pillar to prevent any surprise airbag firings. I figured before I get too far along I should really scrub the condensor, start the car with the AC on, and determine the source of the leak so I don't have to do it after the car is put back together.
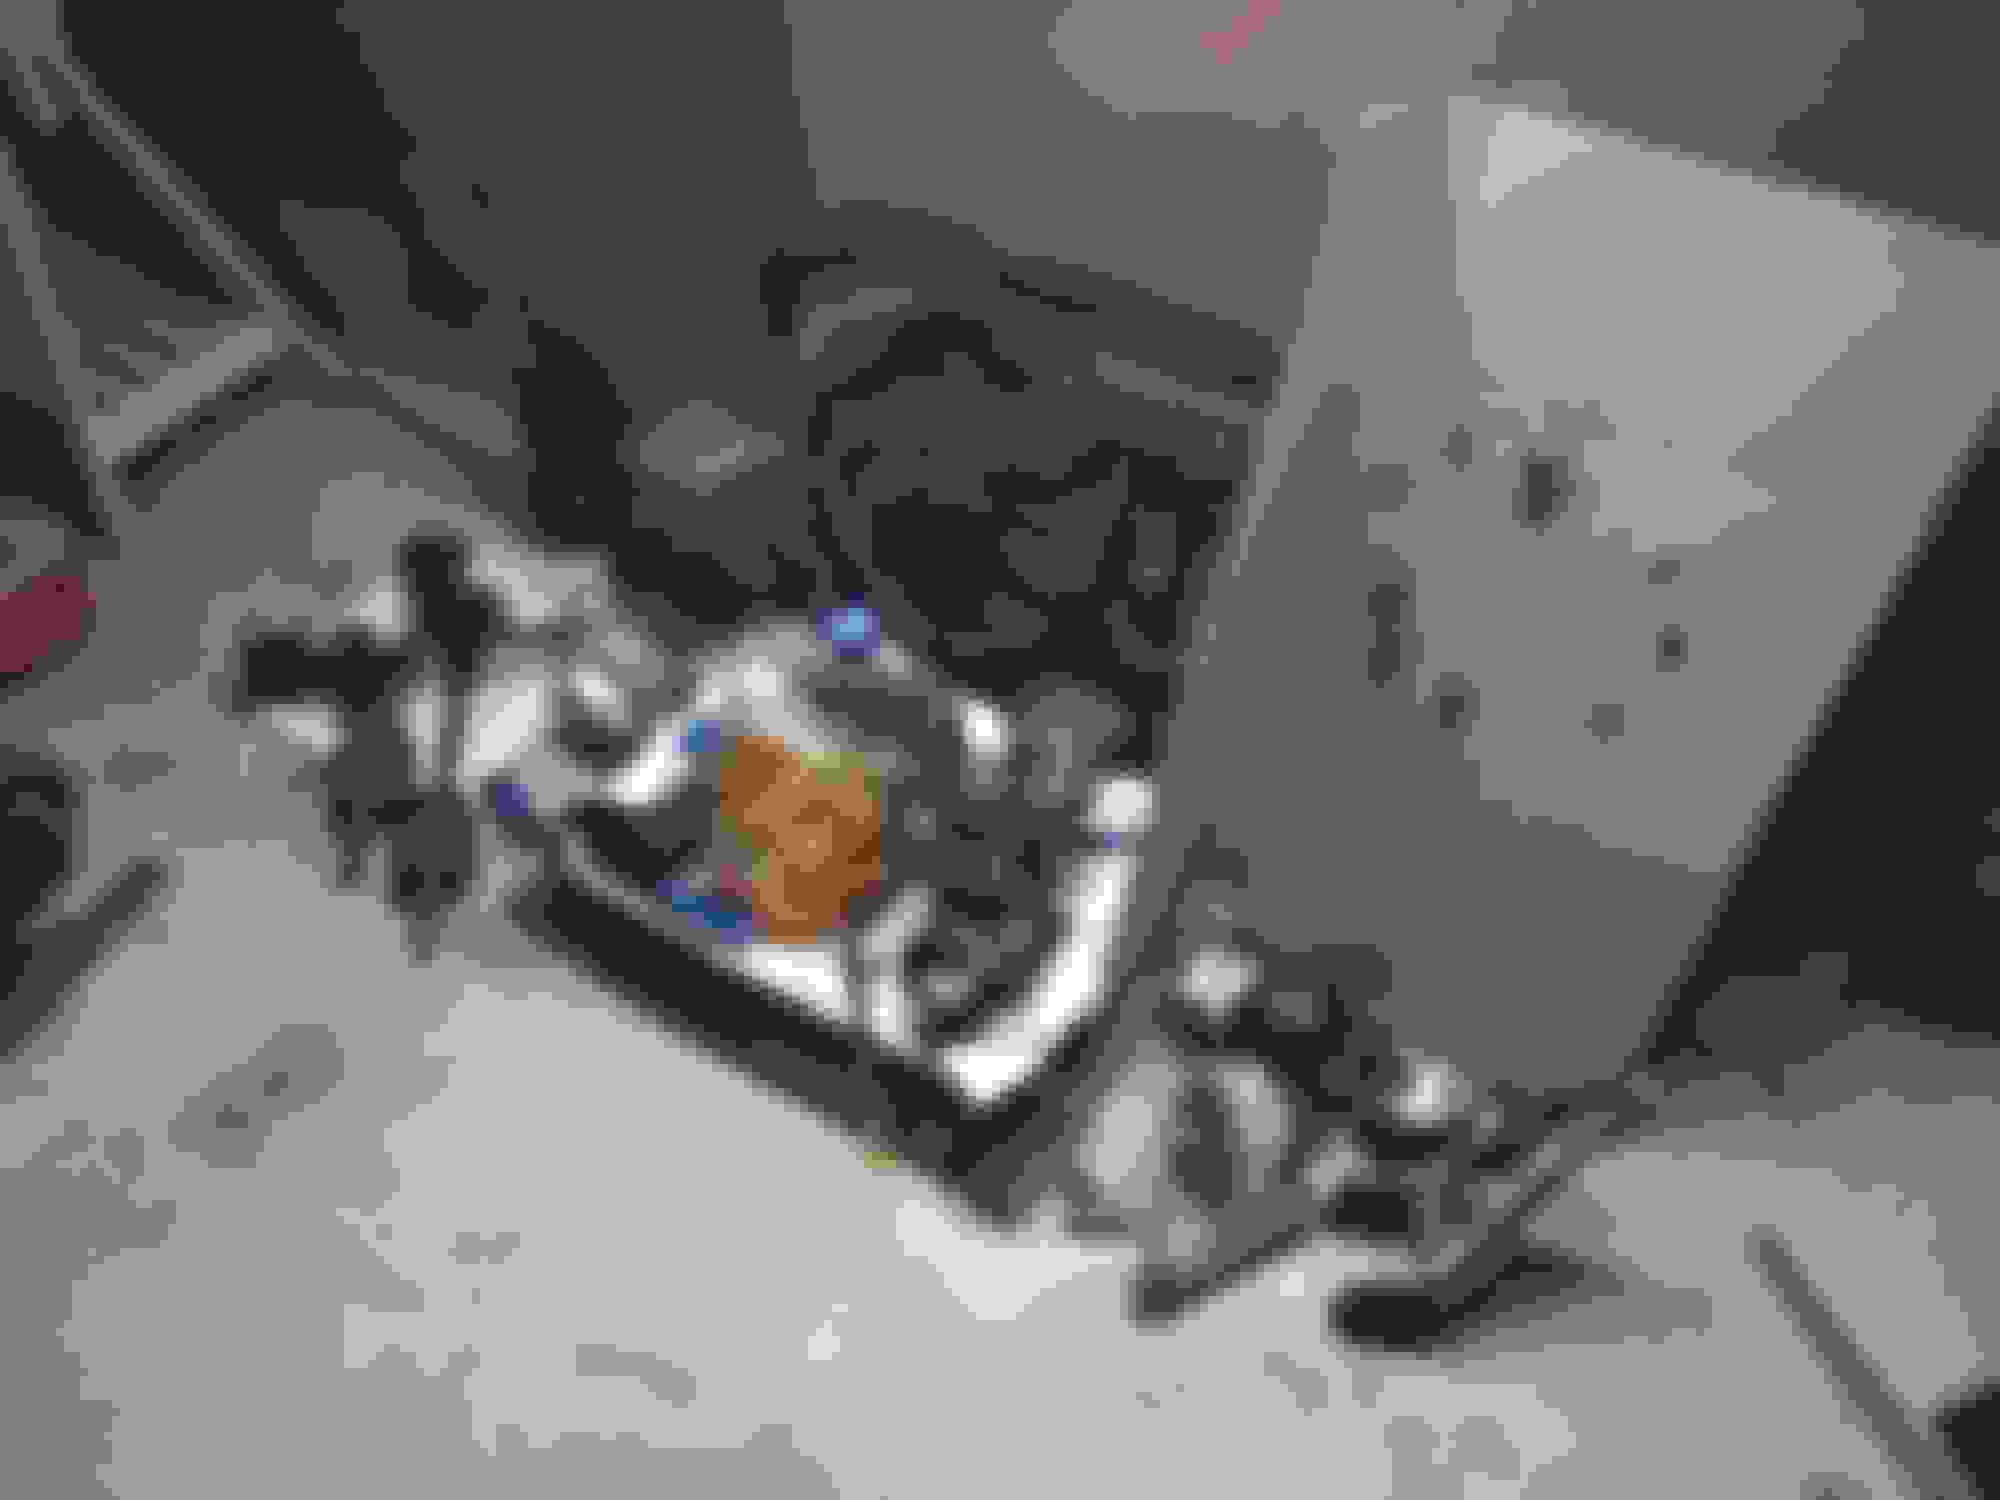
I broke the black spring-like clip on the far sides of the bumper as the 10mm bolts were seized to the 'body nut' if you will. Anyone know where to get replacements for these? Shitty pic for reference.
My finger is on the broken part. Need 2 of these.
After a little prying, I got the bumper cover off. Found that the DS fog light mounts are busted so it was just rattling inside the bumper. The 'body nuts' (I dislike that term) that hold the lower splash shield on were junk and will need to be replaced. And the head of the drivers side T30 that holds the bumper cover on popped off. A few rust issues. Luckily the larger fasteners have held up thus far.
Time to pause again for 24 hours while the PB blaster does its thing.
I called it a night when I realized I've got another dozen or so fasteners to go before I can take the crash guard off. I soaked all of those in PB blaster and will hit them again today before I attempt to remove them. The two bolts on each side that hold the crush tubes on are pretty gnarly looking, so those got a good coating also and will probably require some vinegar also. The first time I saw them I really hoped I wouldn't have to remove them. Looks like I won't be so lucky. I'll probably spend more on fasteners than I will on replacement components.
Oh well, so far so good. I should give thanks to PelicanParts.com for the awesome tech articles. I followed the bumper cover removal guide which was mostly spot on. Apparently there are minor build differences in the minis which result in different fastener sizes and locations.
Last edited by megaDan; Jul 25, 2017 at 05:34 AM.
Reason: condensor != compressor
i am hoping you are addressing the brake lines asap
Poop. I was hoping to avoid that as long as possible. The ABS system is what causes the hesitation. I've done some researching and haven't found anything concrete. Does ABS need to be activated via the ECU in order to fully bleed the system if it runs dry? Any major brake line work will likely result in a dry master cylinder.
I made a bit more progress on Friday. The bumper came off with relative ease, but I took my time with the crush tubes. This is what the fasteners looked like before I started:
healthy coating of rust
And this is what they looked like after some vinegar and a few taps with a screwdriver.
vinegar and a flathead screwdriver
I wanted to get as much rust off the surface of the threads as possible so they wouldn't chew up the threads on the captured nut of the crush tubes or have them seize up during removal. About 10 minutes of soaking and scrubbing was all it took. All 4 bolts came out with ease. I'll soak them in vinegar and see what they look like afterwards before I determine if I'll replace them or not. The crush tubes themselves may get powder coated. It would probably look like crap given the rest of the subframe won't be (yet) but I have access to free powdercoating as long as I want black.
I got held up at the condenser. One of the captured nuts was seized to the bolt that holds it to the radiator. I had to drill it out, but the condenser is off. Tonight I'll drain the coolant and pull the entire front radiator housing clip thing off. Anyone know what that massive piece of plastic is called?
Almost there!
Next weekend the wife is out of town so I intend to have everything fully disassembled so I can understand the health of the important components and place my parts orders. I found a 19mm RSB in the classifieds for a fair price, so I hopped on that. Ideally that will be the last aftermarket part purchase as I want to keep total cost as low as possible. Everything I have read states the 19mm RSB is as good as a modification of a supercharger pulley, and multiple sources say 19mm is perfect for a setup with IE fixed camber plates. For $100 I couldn't say no.
I will be in need of a driver's side fog light. Does anyone have a spare sitting around they're not using?
Radiator drained, removed, and REAL disassembly has started (kinda). I got the intercooler off last night and stopped there. The wife is taking a road trip this weekend so I was doing double duty last night getting her oil changed and ready to go. I'm ready to make great progress this weekend on the mini.
So far I like what I see, don't see any major issues. A little oil inside the intercooler, mostly trapped in the couplers. Not more than a few CC's in total. Today I'll brush up on the procedure for what to do next. From what I understand the next step should be to remove the serpentine belt and supercharger. I'm excited to see what it ends up looking like. If its still got oil in it I'll consider myself lucky, change it, and it will get reinstalled. If it doesn't....I won't think about that yet.
If you need/want a really good (better than PB Blast'r) penetrant, try this:
Take a plastic spray bottle, fill it with a mixture of Automatic Transmission Fluid and Acetone. You can get both at any Auto Parts Store. Mix equal amounts of each and shake it well. When you spray it on your stuck/frozen/rust bolts the ATF will be thinned out enough that it will creep into any small holes or cracks or voids between the threads with a capillary action. After it is down into the threads the Acetone will evaporate leaving the ATF behind. It works VERY well if you make sure the mixture is mixed well. It's cheap too!
From: Portland, OR *currently in a temporary email address
First things first--holy rust. You're lucky that you have access to powdercoating, I have no idea what I would do in your situation. Huge props for immense perseverance in light of adverse conditions.
Other stuff--oil pan looks caked in oil (great time to replace oil pan gasket and crank sensor o-ring), and A/C compressor is green? The rust behind/below the supercharger also makes me think that you should replace the water pump flange o-ring, and inspect the water pump for any leaks.
Originally Posted by megaDan
Anyone know what that massive piece of plastic is called?
I think the plastic thing is called a radiator support! Check realoem.com for the part number!
Originally Posted by megaDan
I will be in need of a driver's side fog light. Does anyone have a spare sitting around they're not using?
I'd check your friendly local auto wreckers, or the for sale section! Look through a few pages, there's always a few hidden partouts and such.
No work on the car yet. The H&R rear sway was delivered!
Also, I found a screaming deal on a Valeo single mass flywheel conversion kit. I hadn't planned on ordering anything until I had the car in pieces, but ECS had a 'scratch and dent' kit that I had to jump on. I paid about $40 more than I would have paid for just the clutch disc and pressure plate. Chances are the DMF would have needed replacing anyway, so I don't feel too bad about jumping the gun.
Originally Posted by sarom058
First things first--holy rust. You're lucky that you have access to powdercoating, I have no idea what I would do in your situation. Huge props for immense perseverance in light of adverse conditions.
This is mostly typical for cars in the north. I hate salt :( I suppose this is mostly typical for MINI's in the north. From what I understand they are known to rust even in gentle climates. It will be a pain to deal with, but it will be worth it in the end. There's a reason I'm going through all this work: I wanna drive a mini again
I won't be powdercoating everything, but the plan is to take care of 'sensitive' items or items that can be easily and fully removed.
Originally Posted by sarom058
Other stuff--oil pan looks caked in oil (great time to replace oil pan gasket and crank sensor o-ring), and A/C compressor is green? The rust behind/below the supercharger also makes me think that you should replace the water pump flange o-ring, and inspect the water pump for any leaks.
Yep. Oil pan gasket and CPS o-ring will be done because its cheap and easy. Well, CPS for sure, and oil pan gasket if there's even a hint of it leaking. Water pump will be replaced as a 'while I'm in there' item. I should probably come clean here; I do not anticipate using many, if any, OEM mini parts. This is a budget build and will be using 'oe equivalent' parts. I expect flak for this. So be it. I simply can't justify $140 for a MINI water pump when an acceptable equivalent is $40.
Originally Posted by sarom058
I'd check your friendly local auto wreckers, or the for sale section! Look through a few pages, there's always a few hidden partouts and such.
Haven't had much luck with partouts yet, and we don't have any good salvage yards within what I would consider driving distance. I'm hoping someone will stumble on the thread and find a quick sale of some items that wouldn't normally be in demand.
Originally Posted by Filmy
Acetone eats (dissolves) plastic. I don't know where this idea came from, but it sounds...
Good point! I did some investigating into this and found enough instances of people promoting it, but they were all citing information from the same single location. No additional anecdotal information. PB Blaster has always worked great for me; I'll stick with it.
Clutch kit showed up! Unfortunately I'm a bit unhappy with what I received. I'll hold off on my review until customer service has a chance to respond.
I'm building quite the collection of fun bits. Ready and waiting thus far:
15% SC pulley
IE Camber plates
19mm RSB
Alta crank pulley
Single mass flywheel conversion
Next orders will be all the boring parts: supercharger oil, bushings, motor mounts, booooo
Looking forward to tonight. I expect to get all the accessories off the engine and really start to get a feel for the condition of the drivetrain. Weather should be perfect and the wife is out of town. Going to be very productive!
/Vent begin
I am slightly frustrated. I wish I would have had more time to drive the car before I took it apart. I want to do as much as 'while-I'm-in-there' as I can, but I'd also like to stick to budget. The car felt firm during the drive home, but its got 107k miles on it. Struts/shocks aren't THAT expensive, but they're about 1/5th of what I expect to put in the car. I'll have to carefully review every part as I remove it and determine if its worth replacing it now while its easy, or wait for it to fail.
/Vent end
I like the direction your going. I would look into putting in performance parts where needed, sometimes oem is better than any aftermarket part (swapping out known engine part issues with better parts than oem) brake pads and lines, shocks and springs (something adjustable). Maybe look into the forged pistons.
If this is going to be a daily driver, stick with the oem balance wheel, If this is just for ***** and giggles (track, weekends...etc) then by all means go unbalanced/lightened. There seams to be a debate about balance vs unbalanced. You'll feel more vibration and see more wear if used as a daily driver and It adds unnecessary stress to bearings and seals as a daily. As a track car the wear is "lessened", I'm no expert but from what I understand it has to do with running at higher RPMs.
Changing out the seals everywhere if not for anything other than peace of mind. Especially the valve cover seals
Don't know if you got the answer with bleeding the brakes. There's a kit you can get from one of the sponsors (ecs, wmw, miniparts) it's a manual pump/vacuum that allows you to change the brake fluid with the car off. Obviously you need to do the final adjustments with the car on.
I would look into putting in performance parts where needed, sometimes oem is better than any aftermarket part (swapping out known engine part issues with better parts than oem) brake pads and lines, shocks and springs (something adjustable). Maybe look into the forged pistons.
Originally when I started this, I figured I would replace everything made sense as a "while I'm in there" type deal. I quickly realized that if I went that route this would no longer be a budget build. After reading a few meaningful posts last week I've taken a step back and rethought my plan. This is my 3rd car. It doesn't need to be running at all times. I need to do the minimal required to get it on the road, and enjoy it. When I find that something breaks or needs replacing, I'll address it then. My scope has gone from replacing all gaskets, struts, wheel bearings, etc while the car is in pieces; to only replacing things that break during disassembly, pieces that are heavily worn, or items that TRULY WILL fail. IE supercharger oil change and crank dampener.
Unfortunately this weekend didn't go so well, so the list of broken parts has expanded
Originally Posted by MannyJimenez
If this is going to be a daily driver, stick with the oem balance wheel, If this is just for ***** and giggles (track, weekends...etc) then by all means go unbalanced/lightened. There seams to be a debate about balance vs unbalanced. You'll feel more vibration and see more wear if used as a daily driver and It adds unnecessary stress to bearings and seals as a daily. As a track car the wear is "lessened", I'm no expert but from what I understand it has to do with running at higher RPMs.
As I mentioned above, its really for ***** and giggles. It's a car that doesn't cost much, and I can do whatever I want with. If everything goes well it will see road trips, track days, and hopefully some snowy road rallies.
Originally Posted by MannyJimenez
Don't know if you got the answer with bleeding the brakes. There's a kit you can get from one of the sponsors (ecs, wmw, miniparts) it's a manual pump/vacuum that allows you to change the brake fluid with the car off. Obviously you need to do the final adjustments with the car on.
I think you're referring to a power/vacuum bleeder. I have a vacuum bleeder, but I'm not sure that is sufficient for getting potential trapped air out of the ABS actuator. With my limited experience in bleeding these they need to be electronically actuated with some sort of proprietary software.
I made good progress this weekend...but not good enough. I'll start my update with a question, and then move onto the details.
Question: HOW THE HELL DO YOU DISCONNECT THE LOWER STEERING U-JOINT FROM THE RACK!??!
Ugh we fought with that for a half hour yesterday and finally called it quits. It's the only thing keeping the subframe up. Do I need to remove the pinch bolt pin or not? Its just round at the end, so I assumed it was welded or pressed into place. Anyone?! Please!? I'm stumped.
Okay. I had a friend show up Saturday afternoon and we got right to work. (After he delivered the steelies/snow tires he picked up from forum member ministrater in Chicago. THANKS MINISTRATER) All accessories came off with ease. Trying to remove the knuckles on either side was less easy. We stripped the threads on both outer tie rods even with the use of an impact. Broken parts #1 & #2. Outer ball joints took some good hammering, but they came out also. Both front sway bar end links broke as we attempted removal. Broken parts #3 and #4. We removed the knuckle and strut assembly as one piece. We were dirty and on a roll so I forgot to take pictures. Getting the intake air plumbing and coolant hoses was a bit of a PITA. Whoever reassembled everything last time kindly left all the hose clamps on the wrong side of every hose. Much time wasted in this area also. We thought we left the car Saturday evening in a good place to get the transmission down on Sunday. Not to be :(
Sunday we removed the drive axles, starter (30 minutes for that damn top bolt), and slave cylinder. During removal of the slave, the hose closest to the slave bent and broken open. Curse you rust! Need to find a replacement from a part-out. We unbolted the transmission and attempted to wiggle it loose. Couldn't figure out for the life of us how to get it out. We didn't realize the subframe had to be dropped first. So we dropped the subframe with the engine and transmission about an inch apart. The floor jack was under the transmission and a jack stand under the engine. My crappy spare floor jack was used to support the subframe during removal. This is where I got scared. With the amount of visible rust on the subframe components I was terrified of stripping internal threads somewhere on the car. Everything came out with ease!! Yehaw. Except that effing lower steering Ujoint. The subframe is basically being suspended from that joint. The nut is off and I've tried prying open the joint, hammering on it to brake the rust loose, hitting it with PB blaster, and hammering on it more. It doesn't look like the pinch pin is supposed to come out. Is it!? We're stuck.
I had 8 or so man-hours of help, and we couldn't get it done. Major failure. I think the toughest part is we are used to working on VWs, Nissans, and Mercedes. Each of them has their quirks, but we've never dug into a mini. Got hung up on electrical connectors, drive axles, supercharger inlet connections...everything. Now that I've seen it all, it should go faster in the future. I didn't expect this much of a learning curve. I also should have expected how tight everything was going to be. It's going to be a struggle to learn where everything gets reconnected and routed, even with the labeling I've done. Oh well. I keep telling myself it will all be worth it.
Time to clean up my mess and figure out what to do with the Ujoint.
The car as we left it Sunday afternoon. What a mess.
It took a lot (LOT) of hammering, but the pin on the steering Ujoint finally popped loose.
U-joint removal tool
I stuck two long 3/8" extensions together and used that combined with a 3lb sledge to get some force onto the pin. Even with that it took a good 5+ minutes of beating to get it to pop.
Once the pin dropped, I spent some time trying to figure out how to pry the steering pin out of the Ujoint. During one of my attempts I realized that the Ujoint pivoted away from the pinch opening. I used my hammer to pop it backwards away from the steering pin and the whole rack dropped. I didn't have to deal with trying to pry or slide the steering pin out. See pic.
Note how the pinch joint is behind the steering pin.
I've heard getting the steering joint reconnected is the worst part of reinstalling the subframe. I plan to use the same technique, but in reverse.
Once I lowered the subframe, it was another 3 minutes until the transmission was on the ground. No assistance was needed. I cracked the bleed valve on the floor jack and used a hand to balance the transmission as it came down. Super easy. I was pleased to find I hadn't missed any connections on the subframe or the transmission. We did a great job of thoroughly disconnecting everything.
Woo!
I need to get to work disassembling the rear of the car and I can finally start ordering parts!
Nice pictures of the event-do you have any more like that? I am Coast Guard those pics are awesome!
Thanks dude :-)
Please excuse the quality. First experience using a new lens with fast moving objects. Definitely an amateur photographer. Gotta keep practicing.
Since photobucket took a dump I've been saving everything in google photos which I'm not sure how to share en masse. Here's another handful of shots from the show.
Friday evening I worked for another hour or so. I dragged the front subframe out from under the car and put it in a slightly more accessible location. The control arms moved up and down with no resistance, which seemed odd to me. Got a flashlight on the bushings....
Might wanna replace these.
Removed the control arms with ease.
Once the ball joint was unbolted I was able to wiggle the control arm out of the bushing with little work. They didn't feel this bad when driving it home, but I was definitely taking it easy. Yikes.
Partially disassembled subframe.
I've got a trusty 3lb sledge I use with gusto to pop ball joints loose. I planned on using it to tap the inner and outer ball joints out....big mistake. I used the weight of the hammer only to tap on the end of the threaded section, and it deformed immediately. This is probably the softest steel I've ever seen used on a car.
Made of plastic apparently.
I saw I deformed the first few threads on the first ball joint, so I figured I'd thread a nut onto the other one and tap that. Nope. That was even worse. I have NEVER seen this happen before, and I've had to use a LOT of force in the same manner. Looks like I'll be replacing all 4 ball joints. Probably a good idea, but still a shock to see how soft these were. I had issues getting the outer BJ's out until I locked them in a vice and hit it with my purse.
I removed the control arms, but the bushing carriers themselves were good and stuck as I never hit them with penetrating oil while they were in the car and I've since run out. Need to pick up more oil today. I'll be replacing the inner and outer tie-rods as well, so those are next on the disassembly list.
Taking over.
I spent 15 minutes in the garage yesterday even though I didn't really want to. Got the flywheel off and....called it a day. The sun had finally come out and a friend stopped by just as I was complaining about being in the garage. So we went out by the pool and relaxed instead. Yay Sunday.
I had planned on ordering all parts at once, but now that I've got the clutch off its time to put the front end back together so the engine isn't floating around so precariously. I'll be starting with the RMS, input shaft seal, release bearing, upper motor mount and a few other items. Enough to at least put the transmission back on. Any other suggestions for what to replace while I'm here?
Has anyone depowered their mini power steering rack? I'm not talking about looping the lines, I'm talking about removing all fluid entirely and greasing the rack and pinion. I'm not sure I want to deal with potential power steering pump failures or leaking lines. We did the same on our racegolf, and the amount of effort required from looping the lines to just greasing the rack dropped substantially, to the point I would be comfortable with it as a daily. Anyone have a spare steering rack?
At about four different times last night, I thought I was in for a world of hurt.
As I mentioned earlier, I want to get the first round of parts ordered so I can start to put some of this back together. The plan for last night was to remove the throw-out bearing, inspect the input shaft guide tube, and check the oil in the supercharger. If no oil was present, I'd have to explore other options.
Step 1: Remove water pump. Went off mostly without a hitch. A very low profile 10mm box wrench is needed here as there is no clearance between the bolt head and the casting in one area. The rest of the bolts came out easy and a few taps were needed to work the waterpump loose.
Step 2: Why is the supercharger leaking oil? It turns out that the end plate of the supercharger is held on only by the water pump bolts. What sense does that make?? So when I tapped the water pump loose, it created just enough of a gap at the end of the supercharger to let that nasty stinky oil start weeping out. I didn't notice for a while. Smelly oil everywhere.
Oil leak after water pump removed
I re-inserted the water pump bolts with spacers so I could torque them down and it stopped the leak. Phew. Thought I cracked the housing somehow.
Step 3: Drain oil. Both of my drain plugs were slightly stripped so when I attempted to use a 5mm hex key, I slightly stripped them more. Dammit. Swapped to SAE and managed to crack them both loose. Phew again. Thought I was going to have to drill them out.
I started with the water pump side and didn't get much oil. But a bunch had leaked out previously and this is supposedly the side that doesn't contain much oil. See below. Super clean looking, but I'm assuming this side is much cooler and doesn't see much wear and tear. I thought that the oil had already been changed it looked so clean.
Water pump side.
I flipped the supercharger around, set it up on an angle with the drain port at the lowest point. I removed the plug, and got 1 drop of brown oil. Panic again! It's dry! I need a new SC! Noooooo! I picked up the supercharger and held it perpendicular to the drain pan....and oil started burbling out. Phew x 3. This oil was clearly used, but I didn't see any metal shavings whatsoever.
Pulley side.
I don't see any major concerns here. Aside from how stanky that oil is. Ugh. The garage is gonna stink for a while.
I also removed my release bearing, and noticed that the fork does not swing open and closed freely. Is it supposed to? Should it move with resistance? I've done a bunch of searching but haven't found any answers. I ran out of carb cleaner last night too, so I wasn't able to clean out the bushings and see if that helps.
Clutch kit showed up! Unfortunately I'm a bit unhappy with what I received. I'll hold off on my review until customer service has a chance to respond.
I suppose 4+ weeks is enough time. The email I got after initial communication stated that "a Customer Service Representative will contact you shortly for assistance". That was July 28. It is now August 22. I provided ample time for resolution, and received none. I'll be sharing this information to let others know the experience I had dealing with a forum vendor.
All of the information below is taken from an email I sent to ECS tuning after receiving my clutch kit.
Positive comments first: Online chat tool was helpful. I placed the order on a Monday. It arrived on Thursday. A+ for quick order turnaround.
Now for the negative...
1. External Packaging - The packaging was not appropriate for the product. The box was falling apart when it was delivered and three of the 4 tape joints had released. The clutch kit inside the box was not secure (air cushions are not sufficient) and was able to move around significantly.
Inadequate packaging
Only one joint left, holding on for dear life!
2. Internal packaging - The tape job on the Valeo box was much better, but the internal packaging was terrible. The flywheel, clutch, and pressure plate were not secure and were able to move around significantly. Enough movement occurred that one of the pressure plate locating dowels snapped off (now that I review the pictures of the product, it looks like this was already broken as only two are visible...which means that someone took the time to throw the broken piece of the dowel into the box). All mounting hardware was loose in the box, they were not segregated or protected.
I will let you evaluate this pack job
3. Product description - The product description is highly misleading. The first line is 'scratch and dent - damage disc' The second line lists kit contents. Additionally, the bottom of the product description lists a conflicting content list including release bearing. Nowhere in the product description is it listed that the flywheel is damaged or the release bearing is missing. Unfortunately I did not notice this until I had issues with my order.
A close observer may have noticed that it was not evident in the picture, but that should not be required.
Product description from website at time of purchase
There you have it. I did my best to withhold judgement and just provide facts. You make the determination as to whether or not this is something you would be happy with. I have not yet installed the clutch. I have made other purchases from ECS in the past without issue, but this experience will cause me to look elsewhere when possible.
Shortly after my previous post, ECS Tuning contacted me regarding my comments. They have offered to make things right and refund the purchase price of the release bearing I purchased after one was missing from the kit I bought.
I do appreciate that I was made whole, but I don't appreciate that it took an email, a month of waiting, and an angry forum post to be contacted.
In the end, it was a bit of frustration but nothing lost. I do expect the clutch kit to work fine (haven't installed it yet) and I do think it was a good price now that the condition is understood. Hopefully they do a better job with product descriptions and email answering going forward.
A bit of an update on my project: Nothing.
Getting ready for the European wedding has been much more work than I expected. I haven't touched the car in over a week and don't expect to be in the garage until mid September. The good news is I have about a dozen boxes of parts waiting for me!
And I may or may not have picked up another R53 with the help of some friends...don't expect a $750 MCS build thread. One is enough :-)
Well, 2017Q4 has been a whirlwind. Trip overseas for the Barcelona wedding was unbelievable. The wedding went off without any major issues and exploring Barcelona was much more fun than I was expected. Our stop in England was only partially marred by me forgetting my backpack with our DSLR on the train and losing it forever. We spent a day in Bath and a day at Goodwood. Goodwood was UNBELIEVABLE. This needs to be a bucket list item for any car enthusiast. It was rainy and cold pretty much the entire day, but even my wife had a great time. What an incredible experience. I've been itching to return to Iceland since we got back. It's like being on another planet. The landscape is unreal.
Goodwood was incredible
I don't normally use filters, but it seemed appropriate for these.
So many GT40's!
I've wanted to see the northern lights forever.
Iceland was unlike any place I've ever been.
I got to work on the mini almost as soon as we returned, and thankfully I had a pseduo-unemployed buddy move back home who had plenty of time to lend a hand in the garage. We typically spent one night a week (3 or so hours) and one weekend afternoon (4+ hours) in the garage from September - November. Most everything went smoothly. I wasn't able to remove the control arm bushing carriers, so I had to replace them on the subframe. The harbor freight bearing press worked flawlessly for this. Snapped a SC pulley bolt during install, but no issues with just 3 and loctite. It's 'pressed' on, its not going anywhere. Clutch/flywheel/transmission went back on without issue. We disassembled the inner CV portion of the axles to replace the inner boots. Neither of us had done that before, but the process was pretty much straightforward. All new tie rods, control arm bushings, and ball joints up front.
We had to pause work in September for a trip to Cleveland for more wedding activities, LA for work, October in Cleveland for a marathon, and Road America (because racecar). In November we traveled to North Carolina and purchased a V70 Volvo for the wagon for the wife and got it polished/sealed before the snow fell. It's been a busy busy year, somehow still got the car done in a reasonable amount of time.
Road America in the fall.
The other fun car.
The only REAL hangup we had was with brake calipers which wasn't remotely expected. The front carriers needed to be replaced, and the rear PS caliper was shot. Took a while to source replacements. We used a steering wheel puller bolted to the slave to fully compress the cylinder to fully bleed the clutch. Brake bleeding was pretty straightforward also.
Test drive!
The test drive was nearly perfect. The only issue (of any kind whatsoever) was we found the inner and outer ball joints on the PS side were just slightly loose. Torqued those up and after 200 miles everything is going strong. No leaks, drips, vibrations, anything. I am THRILLED with how this turned out. I've slowly been working on thoroughly detailing the interior, and everything is coming out like new. For an $800 purchase I hit a home run. When I purchased the car the stereo didn't work. I picked up a HK amp from an E46 and with modification got it to work. On Monday I installed an aux input and CD player phone mount.
All that is left is installing the fender liners, removing the packing tape from the roof, figuring out the reason for 23mpg, and getting a good wash/wax. Its got snow tires on it now, but I'm hesitant to drive it in the snow/salt until I get the paint protected. With it sitting for 18 months or so before I bought it, I'm sure there is nothing on it now. Trying to find a warm location as the temps have been in the teens lately.
For those that are interested in numbers:
Total time: ~51 hours. This is my time, I didn't account for my buddy's help. With his time, probably closer to 80 hours total.
Total cost: $2540. This includes EVERYTHING, including $100 in calipers from CL that ended up being ****. Tax, title, license, the car itself, pulley puller, fluids, and a couple miscellaneous tools I didn't own.
I am so excited to drive this on a regular basis. The car handles great, stereo sounds awesome, and the supercharger wine is addicting. Its everything I was hoping for. Please feel free to reach out with any questions. There's a lot I did to the car or small things I learned while tearing everything apart that may be of use to someone at some point. It just doesn't make sense to document everything here. I'll keep this thread updated from time to time with mini related activities. The plan is to get this onto the track sometime next summer, and take it to NC next fall for a mountain road road trip.
As far as your mileage goes, I suggest simply starting with plugs and your o2 sensor. When I bought mine, I was averaging about 17. Plugs helped slightly, but putting in a new o2 sensor was where I found the difference. I'm told that 26-27 highway is about normal so beyond that I'm hoping a custom tune will help.