When you click on links to various merchants on this site and make a purchase, this can result in this site earning a commission. Affiliate programs and affiliations include, but are not limited to, the eBay Partner Network.
What size is your current battery? The Costco is an H6/48 battery which is 10-15/16" long and the 94R/H7's are 12-3/8" long, so you need to check what was factory installed, so it will fit properly in the battery tray. Less about the reduction in CCA and more about proper fit in the tray. I am pretty sure my '17 had a 94R version of the Duralast Platinum, but would have to check my records to confirm size.
Thanks for the input. Yeah, odd that Costco says H6/48 is right, but OEM is definitely H7/94R so that's the route I went.
My research said that the H7 is bigger, stronger, and possibly longer lasting.
If you do a search on the major parts stores for batteries for our cars they list both sizes, but typically note to verify your installed battery before purchase. I wonder if Mini installed the H6/48 in certain region vehicles (i.e.- warmer southern climate?) where they don't see colder weather and need the higher cranking amps for sub-zero temps? Not sure, but in any case it is better to confirm your stock size before 'blindly' following a parts store search result. Good to hear you were able to get a new battery in your ride.
The H6 and H7 battery are nearly the same size, except possibly the most important dimension - the H7 battery is longer than the H6 battery by over two inches.
With some cars (my old Civic, my R52 S) you can fit a different size battery because the battery is held down by an overhead clamp - as long as it fits the tray, no big deal.
But with the F54, there's a clamp that holds the battery in lengthwise, by the base - so length is the most important dimension for battery fit:
I'll put my whole battery install here, but the battery slides forward and out when you remove this clamp, so the length is important.
I'd stick with the size you have.
The kicker is this:
Some F54 came with H6 officially. Only some trims (I have the JCW) came with the H7.
You have to measure yours if yours doesn't say it. I was able to measure mine by removing the cowl and measuring under the remaining trim panel, hooking the battery with the hook on the tape measure, and measuring back towards the firewall. H6: 10.9" or 11" long H7: 12.4" or 12.5" long
I don't know if this is true or not, but I zoomed in on a photo that I took of my battery tray with the battery removed:
I circled the one bolt hole where you can see from the dirty marks, where my clamp was held by the bolt.
What appears to be about two inches above that in the photo is another hole that I also circled. It does NOT seem to have a metal threaded insert like the other circle, but it seems coincidentally roughly in the right spot, and coincidentally the same size hole.
Is this maybe for the H6 battery?
Or possibly the F54 variants with the H6 battery had an entirely different battery tray with that bolt hole in the H6 location instead?
I don't know the answer - I'd measure your battery before shopping. Not hard to do once you remove the cowl trim, which is easy.
I took a bunch of pictures to show the battery replacement
Also, doing the battery coding / registration with the car's computer is pretty easy, but you do need a compatible Bluetooth OBDC adapter and the Bimmerlink app installed on your phone.
Once the new battery is in place, it's simply connecting with the app, going to "Battery" and then Battery Registration (or Battery Coding?) I didn't take a screenshot, but it's no harder than tapping that on the screen.
But that's after installing the battery.
Replacing the battery is definitely a more surgical operation than most cars, but it is pretty clever packaging and not too difficult. Tools:
8mm socket – battery terminals
10mm socket – trim fasteners & intake snorkel bolts
Start by removing the weatherstripping that holds the bottom edge of the cowl trim to the engine bay trim. I didn't take a picture but I've done this a ton of times, it's easy - once you remove that trim, you can lift that edge of the cowl trim up easily, and pull it forward - in the direction of "over the engine". Pay attention to how it slides into a groove at the windshield end. It's just pressed in here after, replacement is the opposite of removal. No screws or bolts, very easy.
Next, you need to remove the airbox and intake snorkel that goes to the grille.
This intake snorkel is just held on by two 10mm nuts which I'd unfortunately already removed before I thought to start taking pictures
Then, it connects to the lower airbox simply by this little clip - you simply press it in towards the airbox, it will release the snorkel. Really easy, and remove it.
The top of the airbox opens just like if you were replacing the filter - three easy-to-see T20 Torx screws. Just loosen them, they stay in the lid.
I loosened the 7mm tube clamp on the intake side of the airbox going to the motor, and simply rotated the upper lid out of the way and placed the filter to the side while I replaced the battery.
That leaves the bottom of the airbox, which has to be removed.
In the lower right of this photo is a vacant hole you see I already removed the bolt from - again, before I thought to take photos, but that one bolt is all.
The back bottom of the airbox is held in by two rubber grommets - so you just pop out the airbox bottom after removing the bolt. It comes out easy, set it aside.
So... MY battery cover piece here is cluttered up by a battery shutoff that I installed, and a large circuit breaker for a heavy power wire for an amplifier I added to the car. Ignore that stuff, your car won't have it.
But this is the next piece you want to remove- there's a few 8mm bolts here, and one 8mm or 10mm nut - I forget. You'll find them: They are easy to see when you don't have all this clutter on top
ALSO-
The vertical wall that this top cover is held up by also needs to be removed. You see there is a 13mm bolt at the top right by the strut, and lower left bottom of the panel.
Remove those bolts, and this wall comes right out:
Then you can start to see the battery - again my top panel is held in place by a few extra wires here, but even mine I just moved to the side.
Yours will simply come off, easy. Set it aside and your battery will be exposed.
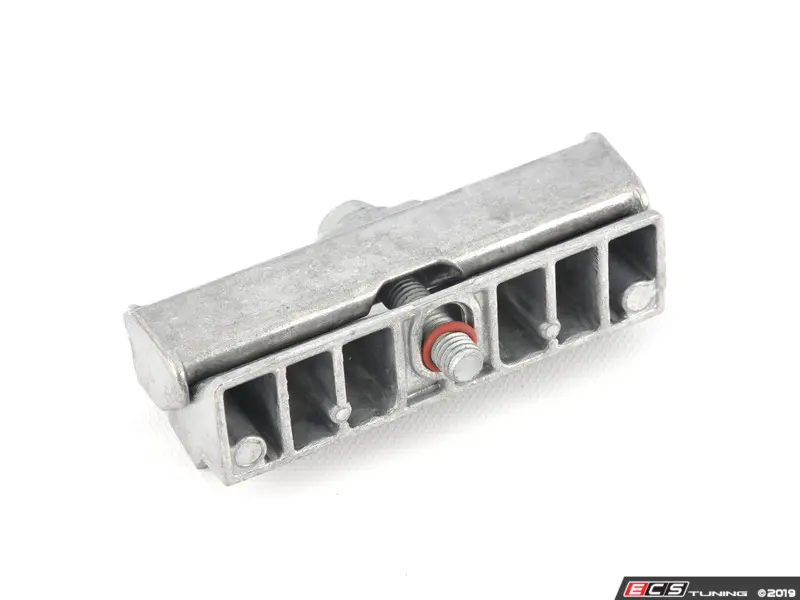
Next you remove the clamp bolt, and remove the clamp.
Remove the ground first - that's safest.
I used an 8mm on an extension, they angled the battery clamp so that you can reach it from this angle. Nice!
Then the positive cable - again, I had a few extra things going to this positive post, but even you will need to remove this wire that comes up from the engine bay area, and then you can remove the battery terminal clamp to lift it off the battery:
Then you remove the 8mm battery clamp from the positive terminal, now that that engine power wire isn't holding it down:
And the battery slides forward and out - nothing holding it in at this point! Lift it out of your engine bay.
This is the vacant space you'll see, where your new battery will be installed into:
...actually, yours won't look this ugly, because you won't have any of that pearl white rectangular power wire that i have cluttering things up and requiring that i bungee it out of the way!
One final thing-
My battery that I replaced had this vent, and there's a factory tube that goes to it:
My new battery, the replacement - does not have any such vent.
I don't know if it's right or wrong, but I assume my new battery is sealed and so doesn't have/need a vent - so I left that grey hose that goes to it disconnected. No harm, I'm sure.
Then for real - installation is the reverse of removal.
Put the battery back in.
Attach the clamps onto the battery terminals, and I used a wrench extension to tap them solidly onto the battery, then tighten the claimps.
Reattach that positive wire headed to the engine bay from below.
Reattach the battery clamp.
Then the vertical wall and bolts.
The top cover and small bolts and nuts
Put the airbox bottom back in - it'll pop in those rubber grommets, then the one bolt.
Put the snorkel back in place, click it in then the two nuts.
Put the filter back in the airbox and swivel it back over the top. Tighten those T20 screws and 7mm clamp bolt.
Slide that cowl trim back in the slot until it fits nicely behind the engine bay trim.
Reinstall the weatherstrip holding that piece on.
More steps than removing the battery on dad's old truck, but not too bad really.
Oh - and now's when you plug in your bluetooth OBDC adapter, fire up your Bimmerlink app, and go to Battery, and Battery Coding to do the registration of the new battery to reset all the battery stats so your car TREATS it as a new battery. Apparently, it changes how it charges and discharges the battery as the battery ages, so make sure you don't skip this step.
Perfect thanks. It's been 4 years since I had to do a battery install on our Clubman S All4. contemplating bringing my tools to Costco tomorrow and installing the battery in the parking lot to get my core charge back faster. I've done this before with my Honda, but that install is WAY easier.
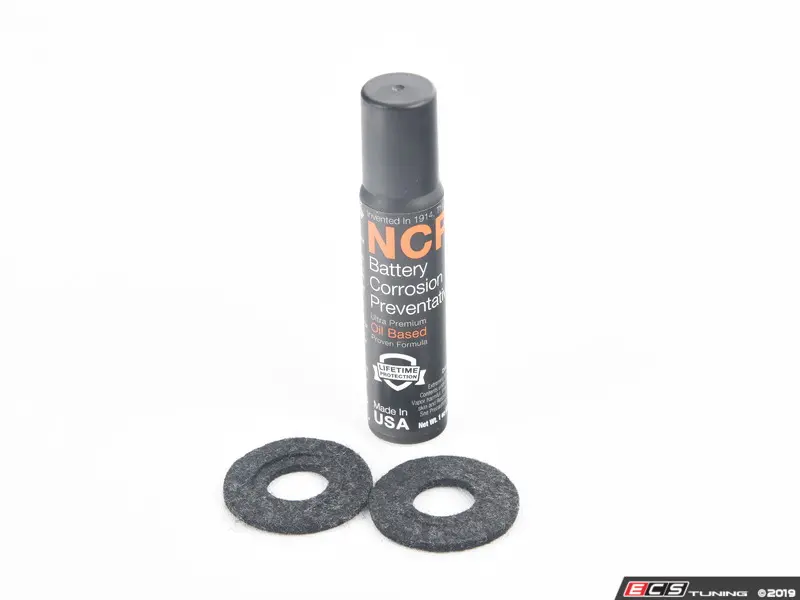
Also i would use anti seize on the bolts that go into the rivnut on the mounts. Gen 1 and Gen 2 MINIs have the same issues on the box and the nuts stick.
Autozone Duralast Platinum AGM Battery BCI Group Size 94R 850 CCA H7-AGM, 1000 CA $270
Batteries Plus Duracell Ultra Platinum AGM 800CCA BCI Group 94R $299
Don't want to get an inferior product, but would hate to waste a Benjamin if I wouldn't miss the 40CCA
TIA for any input/info
Same year/model I got a costco/interstate battery less than a month ago, and I'm happy enough. Comes with a 3 year warranty. I'm pretty sure I ended up with the H7, same cost, because they don't really know what you need for sure sometimes in those online configurators. I think there were like 4 different options to choose from. If possible, bring in the actual battery when you buy if in store. Not only for the core charge, but to verify it's correct. Also, don't forget to make sure you get the little hose elbow out of the vent hole... Ask me how I know. Have fun!
Wow - great job with the instructions and the pictures. BUT� why do they design a car that is so ridiculously complicated to do what is usually an easy job? I love my MINI Clubman but some of the details like this - and the inability to easily check the oil - are infuriating and illogical, and needlessly add to the expenses of owning the car.
I agree.
Like the guys above, I used to be a Honda guy, and before that - I've had a bunch of cars.
But I do love both my R52 S (sadly in winter storage) and my F54 JCW daily driver. There's more fun, more personality, more luxury.
On EVERY other car I've owned even my R52 S), battery replacement was always as simple as "remove the battery bracket that goes over the battery by loosening a nut or two, remove the battery terminals, and pull the battery up and out". There was no disassembly, there was no "coding". I agree it seems unnecessary.
I don't know who installed the battery I replaced, or when it was installed - I took ownership 2 years ago. But you can see all that leakage - it doesn't seem like the fancy algorithm that I'm told the car adjusts the charging level seemed to help that battery at all. Pointless. Unnecessary complexity.
I'm always highly suspect of brands that do things to create the appearance that you need to bring your car to a stealership for simple things.
Proprietary fluids, proprietary bolts - hell, even "triple squares" and E-torx are unnecessary.
Hell, if the Japanese (who actually listened to Deming unlike the 'Murican "big three") implemented TPS/quality/Lean, with Process Value Stream Mapping, and pushed reliability and serviceability to record levels in bulletproof quality cars as a result, it just makes it all the more blatant for these European manufacturers that they are just doing this stuff as a scheme to sponge money out of their customers (who already paid more to begin with).
So I'm more than glad to document this stuff and show that it's not that hard to DIY, even with their Rube Goldberg overcomplicating of simple things.
Last edited by geolemon; Dec 26, 2025 at 06:04 PM.
Reason: clarity