
R60 Rally Armor Mud Flaps


Thread Starter
|
2nd Gear
Joined: Nov 2011
Posts: 120
Likes: 0
From: Bergen Cnty New Jersey
Rally Armor Mud Flaps
Anyone on here have the RallyArmor mudflaps on their R60? I saw a white R60 on Route 80 here in New Jersey with red ones mounted. Wonder if the person posts here or not.
Those who do, how easy were they to mount? What hardware did you need?
I had them on my 04 WRX and with my quest for mudflaps it's boiled down to the OEMs and these.
Those who do, how easy were they to mount? What hardware did you need?
I had them on my 04 WRX and with my quest for mudflaps it's boiled down to the OEMs and these.

3rd Gear
Joined: Aug 2011
Posts: 242
Likes: 0
From: N. Muskegon, Mi
Anyone on here have the RallyArmor mudflaps on their R60? I saw a white R60 on Route 80 here in New Jersey with red ones mounted. Wonder if the person posts here or not.
Those who do, how easy were they to mount? What hardware did you need?
I had them on my 04 WRX and with my quest for mudflaps it's boiled down to the OEMs and these.
Those who do, how easy were they to mount? What hardware did you need?
I had them on my 04 WRX and with my quest for mudflaps it's boiled down to the OEMs and these.
I don't have any install pics, but I have some pics of them after.
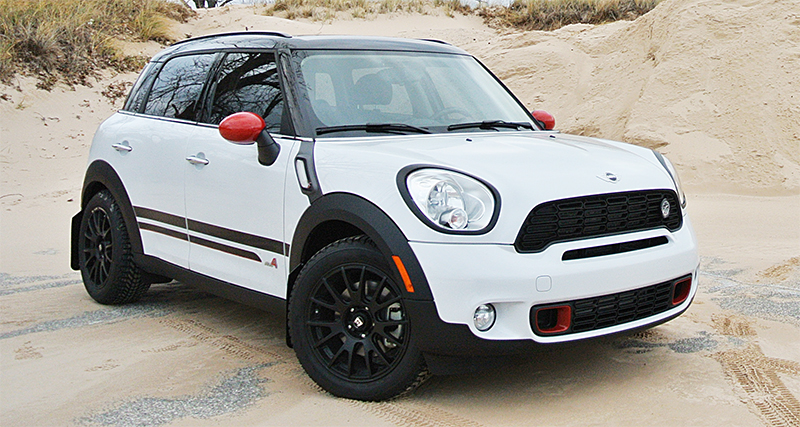


They do stick out a little bit in the back because of curve of the rear bumper.

I went down a bunch of dirt roads to test them out


The dirt on the doors is bc I went through puddles. The mudflaps did a great job of keeping the mud off the body of the car
Last edited by MSPRO; Dec 10, 2012 at 11:41 AM.
Thread Starter
|
2nd Gear
Joined: Nov 2011
Posts: 120
Likes: 0
From: Bergen Cnty New Jersey
looks good. thanks for the pics and mini-review. Did you have to trim both the front and rear? Would I be asking too much if you can take pics of where the bolts get mounted?
3rd Gear
Joined: Aug 2011
Posts: 242
Likes: 0
From: N. Muskegon, Mi
I will try to get some pics tomorrow since the car is somewhat clean again.

3rd Gear
Joined: Aug 2011
Posts: 242
Likes: 0
From: N. Muskegon, Mi
Did you do the rears too? What did you do about the excess material that is in the wheel well? I didn't want crud getting trapped behind it which is why I trimmed them a little. I am a bit of a perfectionist and wanted to make sure they would stay in place so I added extra attachment points.

2nd Gear
Joined: May 2012
Posts: 104
Likes: 0
From: Walnut Creek, CA
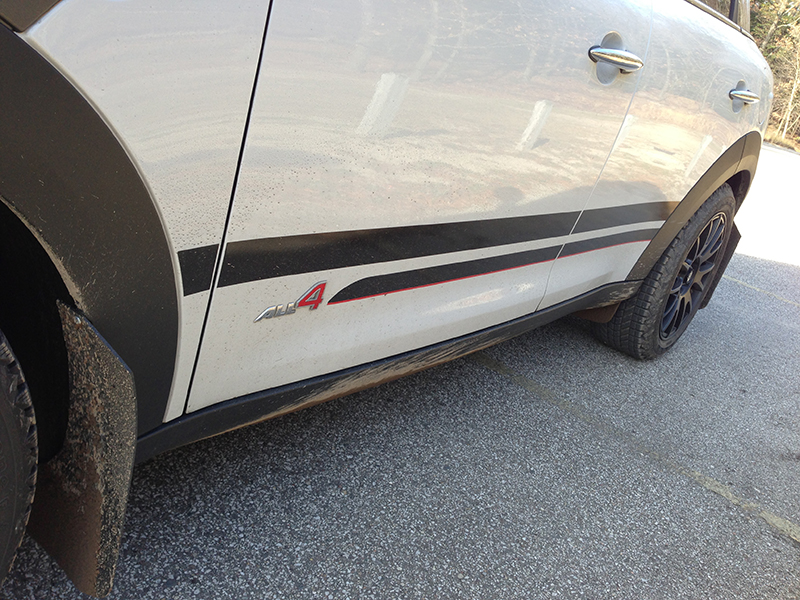
Don't mean to thread jack, but MSPRO...what wheels and tires are those including specs? They are sweet looking. Like the addition of the red accent to the side stripes.
Trending Topics

1st Gear
Joined: Sep 2012
Posts: 33
Likes: 0
I didn't do the rears, nothing can help the rears stay clean. The fronts are attached with 3 screws and a clip, not coming off. They form around the curve pretty well and a quick spray of water cleans them front and back. The excess material in the wheel well, well, is just that, excess material. Can't see it, can't do damage. Its plastic on plastic.
3rd Gear
Joined: Aug 2011
Posts: 242
Likes: 0
From: N. Muskegon, Mi
I didn't do the rears, nothing can help the rears stay clean. The fronts are attached with 3 screws and a clip, not coming off. They form around the curve pretty well and a quick spray of water cleans them front and back. The excess material in the wheel well, well, is just that, excess material. Can't see it, can't do damage. Its plastic on plastic.
Thread Starter
|
2nd Gear
Joined: Nov 2011
Posts: 120
Likes: 0
From: Bergen Cnty New Jersey
very nice car. reminds me of my old WRX.
3rd Gear
Joined: Aug 2011
Posts: 242
Likes: 0
From: N. Muskegon, Mi
Nope it does not come with the hardware. I used stock bolts and some stainless #10 3/4-1" screws. I don't really like how they look b.c they are silver, so I am trying to find some screws that are more OEM looking.
3rd Gear
Joined: Aug 2011
Posts: 242
Likes: 0
From: N. Muskegon, Mi
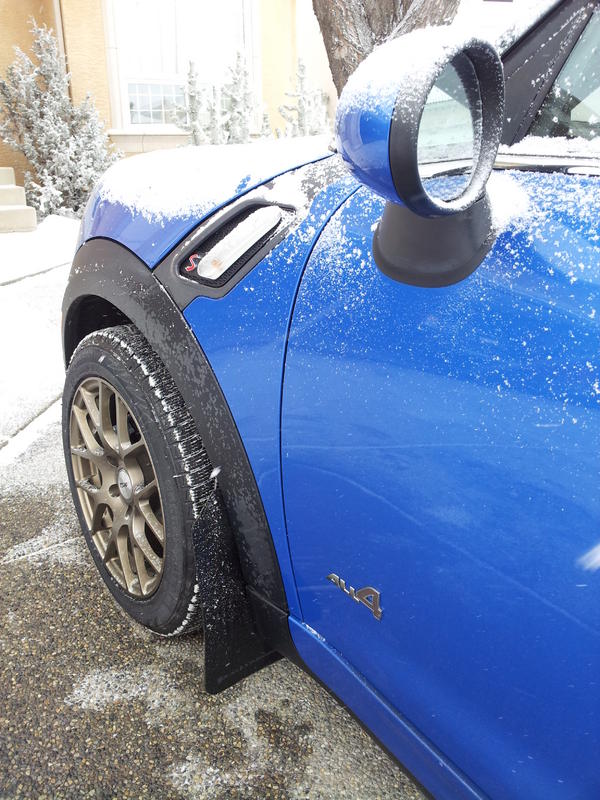
Front -You can see the factory clip just above the mudflap.

Rear - I also mounted these a bit lower than the factory ones. I made mine line up with the crack in the bumper below the rear reflector. It is hard to tell, but the wheel well is not as deep in the rear as in the front so I had to notch out the inner part of the flap to fit.

3rd Gear
Joined: Aug 2011
Posts: 242
Likes: 0
From: N. Muskegon, Mi
That is a great idea. Thanks.

1st Gear
Joined: Oct 2012
Posts: 23
Likes: 0
Thanks for posting your pics and for talking through fitment and attachment options. I just added some rally armor mud flaps to my CM ALL4 S using the OEM attachments, which work great, except for the lower clip in the fronts. I cannot get them to stop popping back out of their mounting holes. Luckily the top ones seem to hold very securely. All the same, I would feel better about it if the lower clips also would hold securely. Any suggestions? Thanks.
2nd Gear
Joined: Mar 2005
Posts: 123
Likes: 0
From: Longmont Colorado
Reviving an old thread hoping to get more pics and inputs.
I'm looking at getting the Rally Mspec ones for my JCW R60. First snow of the season has really taken it's toll on the JCW Aero side skirts. It's red so I'm want to quickly find their black with red writing.
Anyone got more to show???
I'm looking at getting the Rally Mspec ones for my JCW R60. First snow of the season has really taken it's toll on the JCW Aero side skirts. It's red so I'm want to quickly find their black with red writing.
Anyone got more to show???

Joined: Jun 2020
Posts: 2
Likes: 0


Just installed these today. Used only factory anchor points except for the inner rear which attaches to the inner liner. No holes punched in metal/mouldings etc.
Overall, pretty happy with how they look.

Thread
Thread Starter
Forum
Replies
Last Post
Nine Plan Failed
1st Gen Countryman (R60) Talk (2010-2015)
2
Oct 14, 2015 11:50 PM
daviday
R50/R53 :: Hatch Talk (2002-2006)
1
Sep 25, 2015 01:31 AM
user 739030
MINI Owners of New Jersey (MONJ)
3
Sep 16, 2015 06:03 PM