

How I Painted My Wheels On The Cheap (DIY)


Thread Starter
|
2nd Gear
Joined: Mar 2011
Posts: 60
Likes: 0
How I Painted My Wheels On The Cheap (DIY)
Hello folks! Let me start off by saying I'm not a professional, and everything I did to paint my wheels I learned by googling. That said, let's get to it!
My recently acquired R53's wheels were in really bad shape from the previous owner (college girl), so I decided to fix them up a little bit. Here's what I used:
300 pack of index cards from Wal-Mart, $1.24
Two cans Dupli Color Self-Etching Primer in green from Advance, $5.32
Six cans Dupli Color Graphite High Performance Wheel paint from Advance, $6.09 a can
Three cans Dupli Color ClearCoat High Performance Wheel paint from Advance, $5.92 a can
Imperial WetDry 400 grit sandpaper from Lowe's, $3.27
One scrub pad with the yellow and green sides
Some Dawn dish detergent
Firstly, take a big bucket, pour some dish detergent in it and get some warm water going.
Take your scrub pad and clean the heck out of your wheels, front and back.
Use the same water to wet sand it. You can also just dry sand if you wish - the whole purpose is to rough up the entire surface of the wheels, and knock loose any chipping paint.
Rinse out the bucket and scrubber.
Fill the bucket up with clean, warm water, and wash down your wheels.
After that, use a dry towel to dry off your wheels. Once that's done, you can start inserting index cards. By the time you're through with that the wheels should be dry enough to start priming.
IMPORTANT EDIT: Firstly, once you're done painting the wheels make SURE to scrape all the paint off where the lug nuts/bolts meet the wheel, otherwise they WILL work loose! Secondly, roll the wheels as you spray them to ensure even coverage. I didn't do this on the first two, and as a result I will have to respray them this coming weekend because I missed the inside of several spokes.
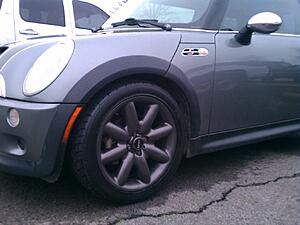
Here's what my wheels looked like to begin with, after being sanded a bit
My girl helping me
Inserting the index cards, I ended up standing the tires upright so I could do both sides:
After three LIGHT coats of primer
To ensure a smooth finish, wet-sand the primer with 600 grit. I neglected to do this and have some rough spots.
30 minutes later, I sprayed two light coats of Graphite, ten minutes apart
If you have time, and want the best finish possible, LIGHTLY wet sand ten minutes after each coat with 1000 grit.
Then a medium coat, ten minutes later a heavy coat
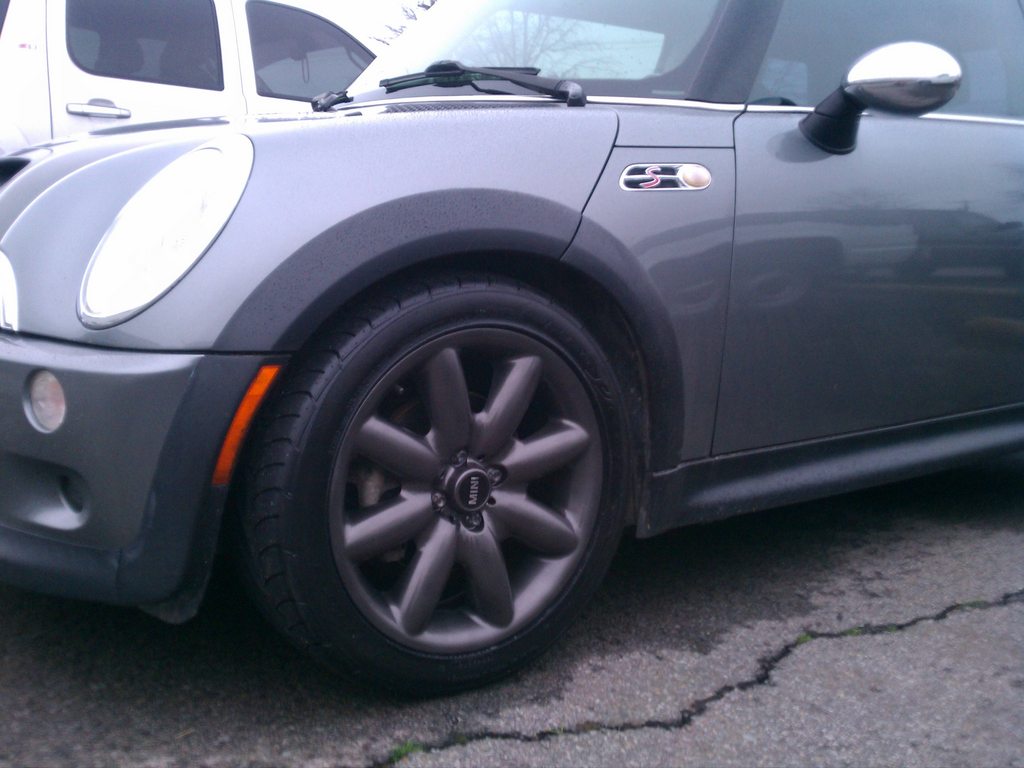
Ten minutes later, a light coat of Gloss, then a heavy coat of gloss ten minutes after that gives me the final result
Final Result #2
If you are extremely patient, lightly wet sand ten minutes after each coat if there's any trash in the paint with some 1000 grit. I kind of blew through this, and as a result missed a couple spots, and had two runs I had to fix.
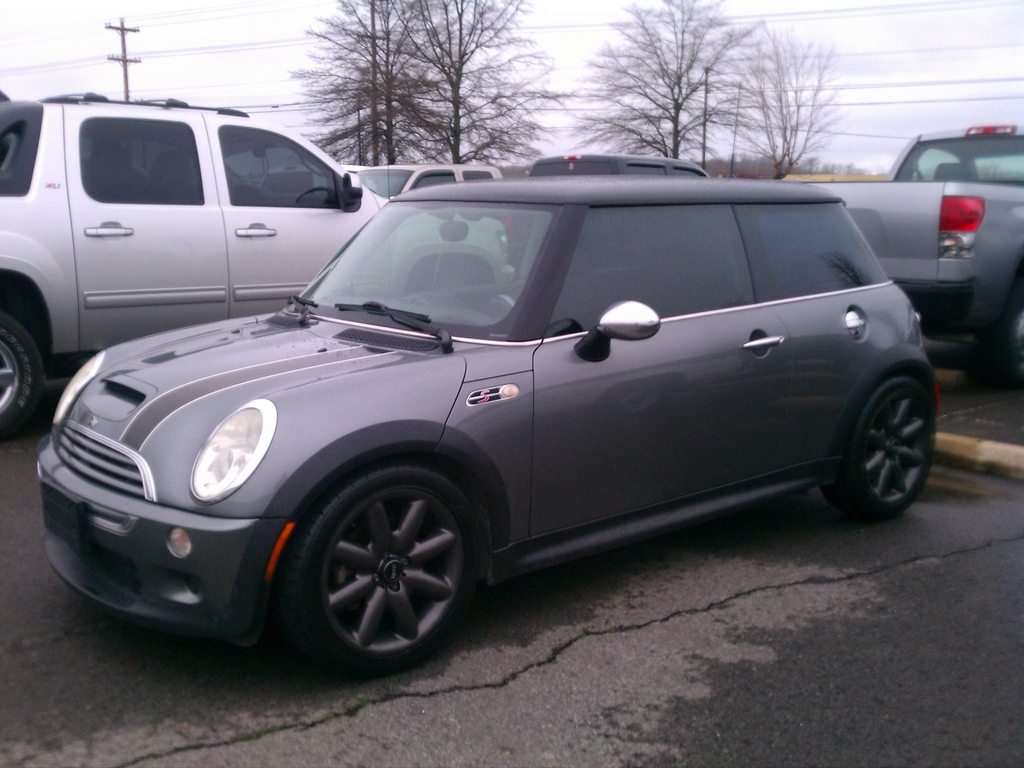
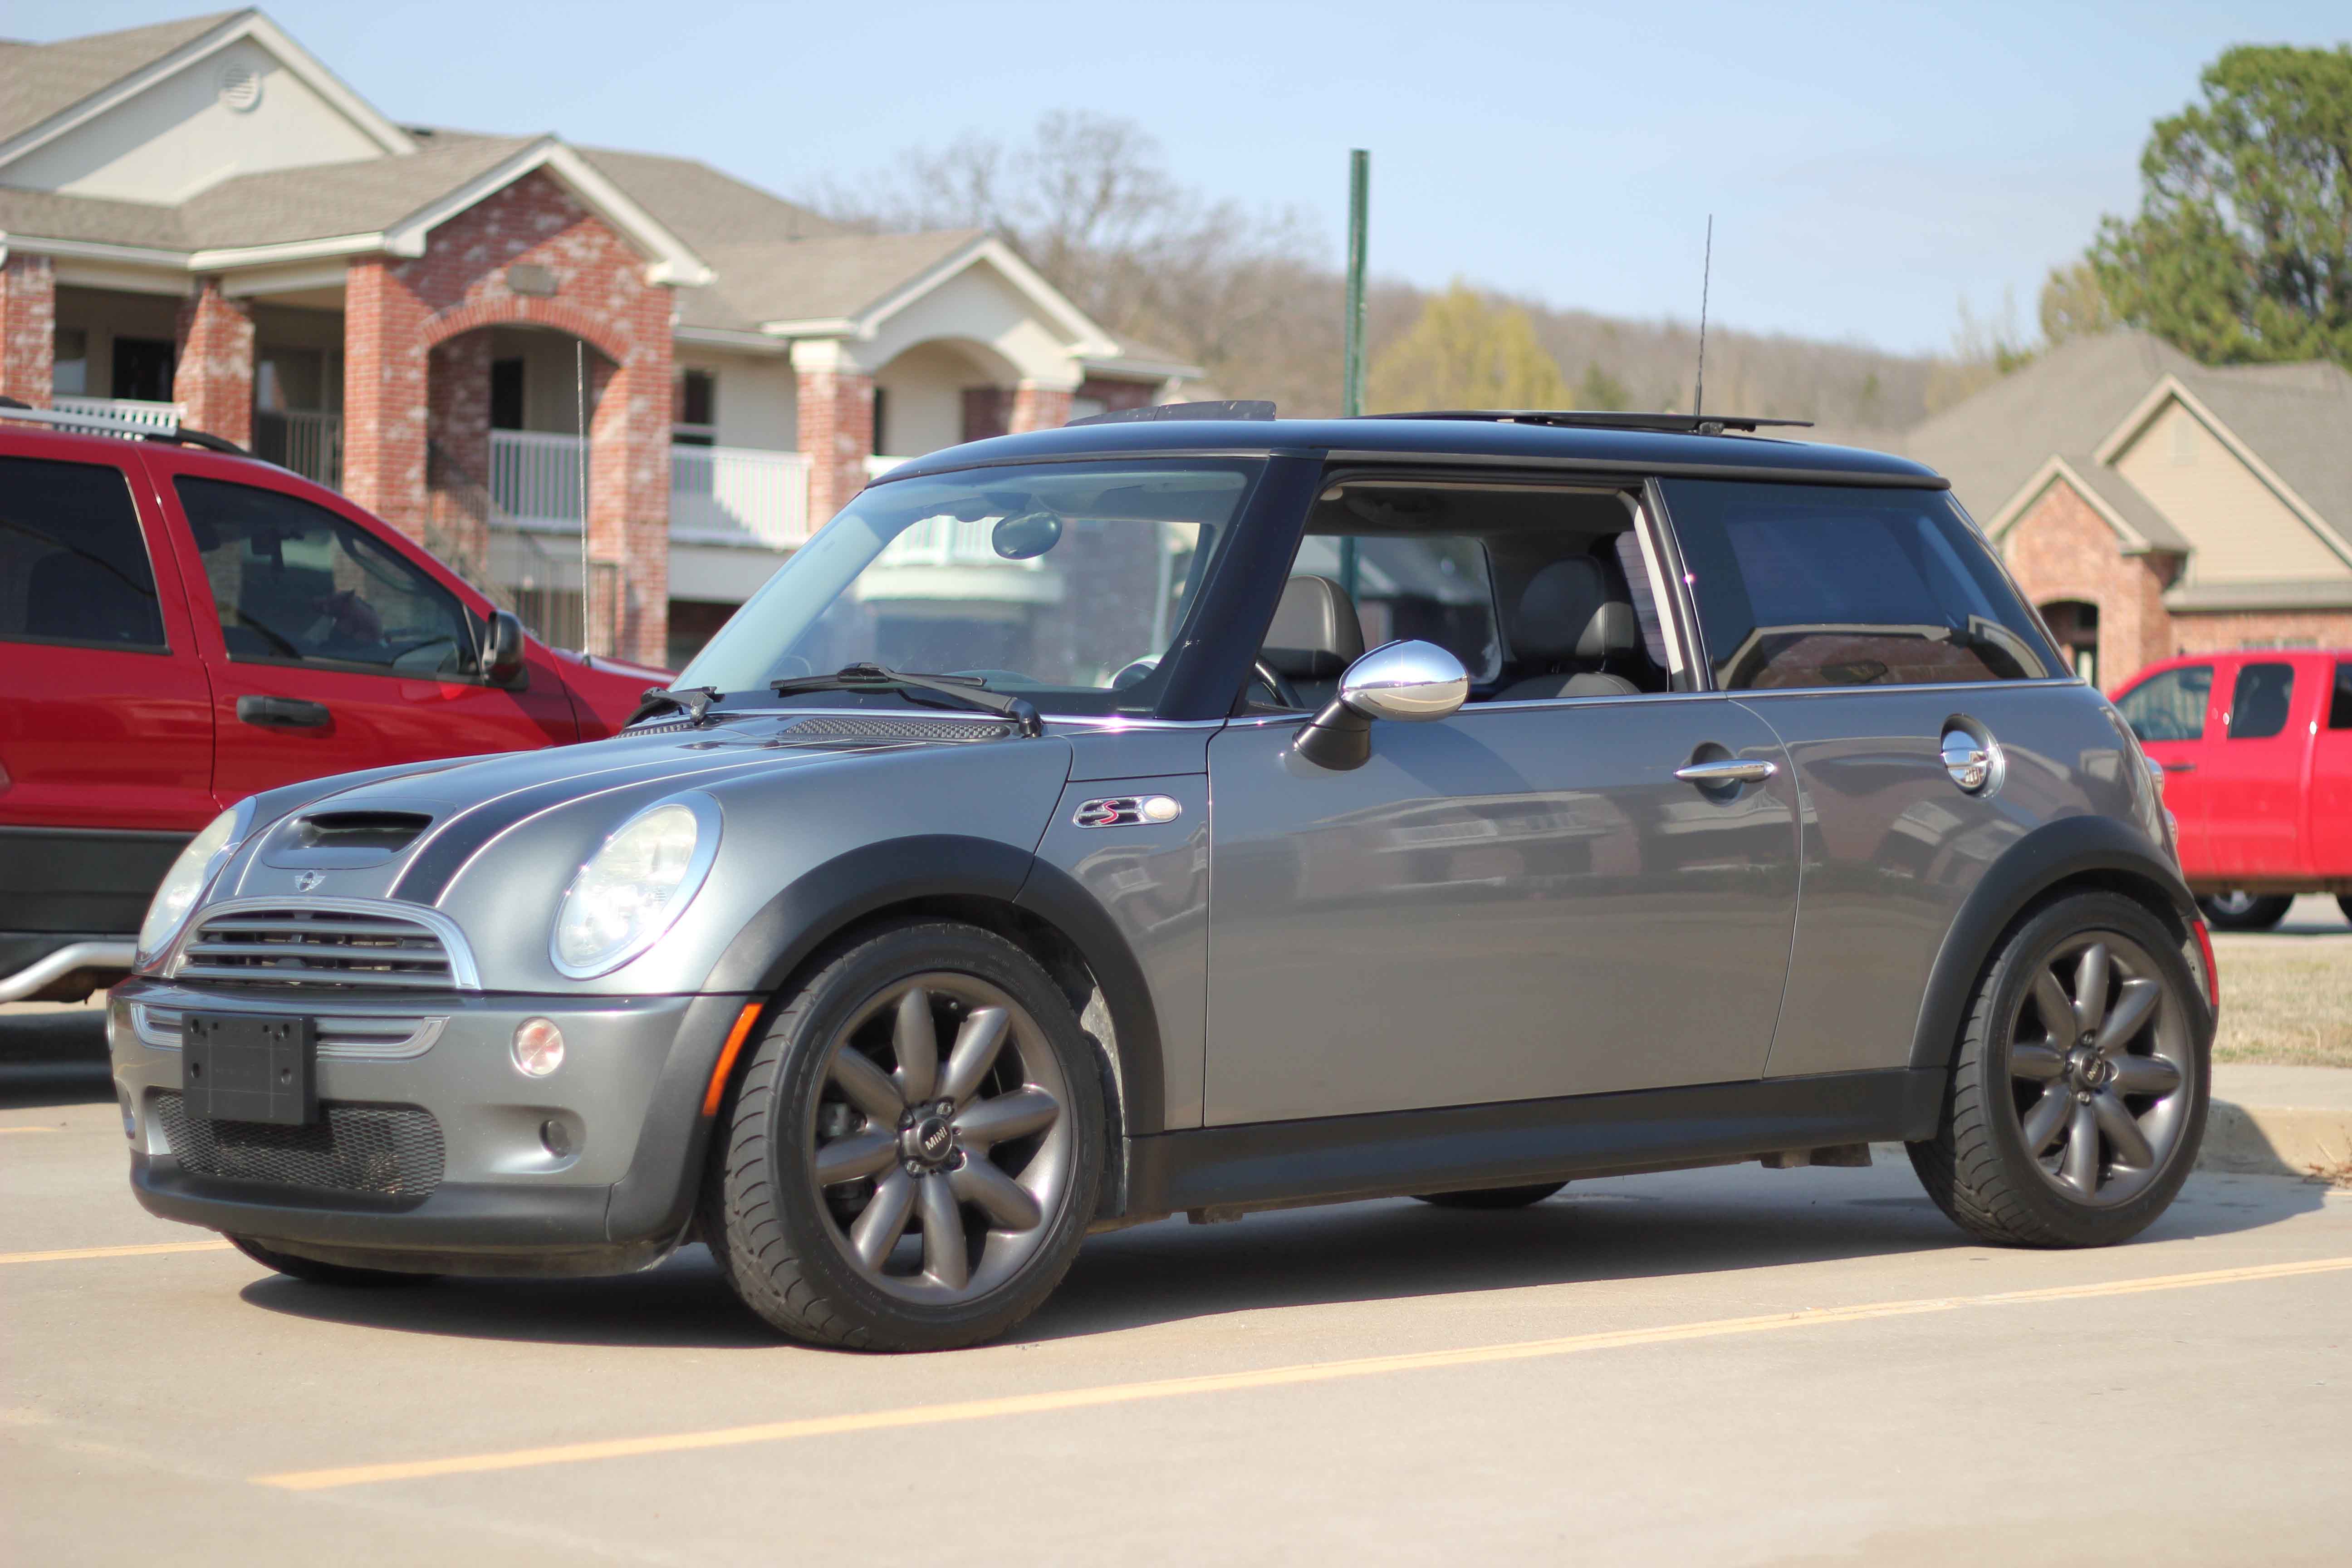
Quick cellphone pics of the rims back on the mini, I'll upload 'professional' pictures tomorrow:


Overall, took me six-seven hours, mainly because I could only do two wheels at a time. Not enough jack stands :P
My recently acquired R53's wheels were in really bad shape from the previous owner (college girl), so I decided to fix them up a little bit. Here's what I used:
300 pack of index cards from Wal-Mart, $1.24
Two cans Dupli Color Self-Etching Primer in green from Advance, $5.32
Six cans Dupli Color Graphite High Performance Wheel paint from Advance, $6.09 a can
Three cans Dupli Color ClearCoat High Performance Wheel paint from Advance, $5.92 a can
Imperial WetDry 400 grit sandpaper from Lowe's, $3.27
One scrub pad with the yellow and green sides
Some Dawn dish detergent
Firstly, take a big bucket, pour some dish detergent in it and get some warm water going.
Take your scrub pad and clean the heck out of your wheels, front and back.
Use the same water to wet sand it. You can also just dry sand if you wish - the whole purpose is to rough up the entire surface of the wheels, and knock loose any chipping paint.
Rinse out the bucket and scrubber.
Fill the bucket up with clean, warm water, and wash down your wheels.
After that, use a dry towel to dry off your wheels. Once that's done, you can start inserting index cards. By the time you're through with that the wheels should be dry enough to start priming.
IMPORTANT EDIT: Firstly, once you're done painting the wheels make SURE to scrape all the paint off where the lug nuts/bolts meet the wheel, otherwise they WILL work loose! Secondly, roll the wheels as you spray them to ensure even coverage. I didn't do this on the first two, and as a result I will have to respray them this coming weekend because I missed the inside of several spokes.
Here's what my wheels looked like to begin with, after being sanded a bit
My girl helping me
Inserting the index cards, I ended up standing the tires upright so I could do both sides:
After three LIGHT coats of primer
To ensure a smooth finish, wet-sand the primer with 600 grit. I neglected to do this and have some rough spots.
30 minutes later, I sprayed two light coats of Graphite, ten minutes apart
If you have time, and want the best finish possible, LIGHTLY wet sand ten minutes after each coat with 1000 grit.
Then a medium coat, ten minutes later a heavy coat
Ten minutes later, a light coat of Gloss, then a heavy coat of gloss ten minutes after that gives me the final result
Final Result #2
If you are extremely patient, lightly wet sand ten minutes after each coat if there's any trash in the paint with some 1000 grit. I kind of blew through this, and as a result missed a couple spots, and had two runs I had to fix.
Quick cellphone pics of the rims back on the mini, I'll upload 'professional' pictures tomorrow:

Overall, took me six-seven hours, mainly because I could only do two wheels at a time. Not enough jack stands :P
Last edited by toxictv; Mar 21, 2014 at 09:09 AM.


Thread Starter
|
2nd Gear
Joined: Mar 2011
Posts: 60
Likes: 0
Nope, just sprayed right over them

Trending Topics


3rd Gear
Joined: Aug 2010
Posts: 258
Likes: 0
From: San Jose
I love the index card idea. I've been trying to figure out how to do something like this without spraying or dismounting my tire. Awesome.
Maybe if you get some jack stands you can fix the curb rash on that rim too
Maybe if you get some jack stands you can fix the curb rash on that rim too
Last edited by Nick5811; May 1, 2011 at 07:02 PM.

2nd Gear
Joined: Apr 2011
Posts: 92
Likes: 0
From: Shelby Township, MI
@toxixtv
+1 on the job and thoroughness
+100 on getting your girl to help. Sometimes I can get my little sister to help. Nothing better than a little female manual labor
Where do you get the metal filler at? Autozone?
+1 on the job and thoroughness
+100 on getting your girl to help. Sometimes I can get my little sister to help. Nothing better than a little female manual labor
Where do you get the metal filler at? Autozone?

6th Gear
Joined: Feb 2011
Posts: 1,575
Likes: 0
From: Maryland, USA
OMG! Thanks so much for these instructions. They look AWESOME. I have the 16" 5 star blaster chrome wheels and really thought changing them out , but it would be sooooo expensive and really silly since the car is new!! LOVE the black wheels, and will look great on my HzB Clubbie, as she has a black roof, etc. 
2nd Gear
Joined: Mar 2011
Posts: 88
Likes: 0
From: Washington
Thanks!
Thanks for posting this! I didn't realize wheels could be painted and look good LOL Thinking of doing this on my Countryman - I really wanted dark wheels on it but it came with silver wheels. Wonder if the wheels could be painted without taking them off of the car? Hmm...
Thread Starter
|
2nd Gear
Joined: Mar 2011
Posts: 60
Likes: 0
I did for thoroughness, because you'll be able to see through the spokes to the rest of the rim.
Thread Starter
|
2nd Gear
Joined: Mar 2011
Posts: 60
Likes: 0
Thanks for posting this! I didn't realize wheels could be painted and look good LOL Thinking of doing this on my Countryman - I really wanted dark wheels on it but it came with silver wheels. Wonder if the wheels could be painted without taking them off of the car? Hmm...
Not worth the time saved, not even a little bit.
2nd Gear
Joined: Mar 2011
Posts: 88
Likes: 0
From: Washington
Good point - I don't want to create more work in the long run!
Thread Starter
|
2nd Gear
Joined: Mar 2011
Posts: 60
Likes: 0
Exactly =) Just get four jack stands, park the car on a flat spot and jack each side up at a time and put it on the stands.
That's what I would do if I had it to do again.
That's what I would do if I had it to do again.
2nd Gear
Joined: Apr 2011
Posts: 92
Likes: 0
From: Shelby Township, MI
toxicity, so using your diy, here is some of my work:


This one is a little dirty

The job was my first ever sand and paint job, so it took longer than the original diy. However, I'm satisfied. (Now I understand why a paint job cost so much.) The back rims are a little better than the front, but the car turns heads either way. Thanks again for the well-written diy...
PS. I don't know how it came off, but is there anybody out there with an extra MINI piece or somebody out there who works at a MINI dealer who wants to use their discount? (You will be well compensated!)

This one is a little dirty
The job was my first ever sand and paint job, so it took longer than the original diy. However, I'm satisfied. (Now I understand why a paint job cost so much.) The back rims are a little better than the front, but the car turns heads either way. Thanks again for the well-written diy...
PS. I don't know how it came off, but is there anybody out there with an extra MINI piece or somebody out there who works at a MINI dealer who wants to use their discount? (You will be well compensated!)
Thread Starter
|
2nd Gear
Joined: Mar 2011
Posts: 60
Likes: 0
That's awesome man, those wheels look great! I'm glad I could help/inspire, just made my day
Car looks a lot better with black wheels :D
Also don't be afraid to pull them off, clean em really good, scuff em with 1000 grit wet then repaint minus the primer. I had to do that on my driver side because I missed the insides of several spokes. Turned out great.
Also, if any spots flake or chip off eventually, you'll know where you didn't sand well enough Prep is 2/3rds of it!
Car looks a lot better with black wheels :D
Also don't be afraid to pull them off, clean em really good, scuff em with 1000 grit wet then repaint minus the primer. I had to do that on my driver side because I missed the insides of several spokes. Turned out great.
Also, if any spots flake or chip off eventually, you'll know where you didn't sand well enough
Prep is 2/3rds of it!