When you click on links to various merchants on this site and make a purchase, this can result in this site earning a commission. Affiliate programs and affiliations include, but are not limited to, the eBay Partner Network.
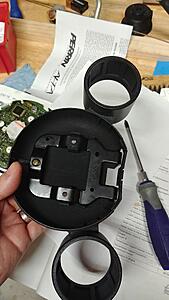
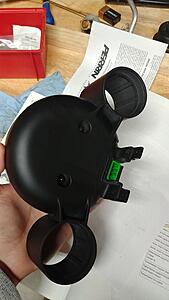
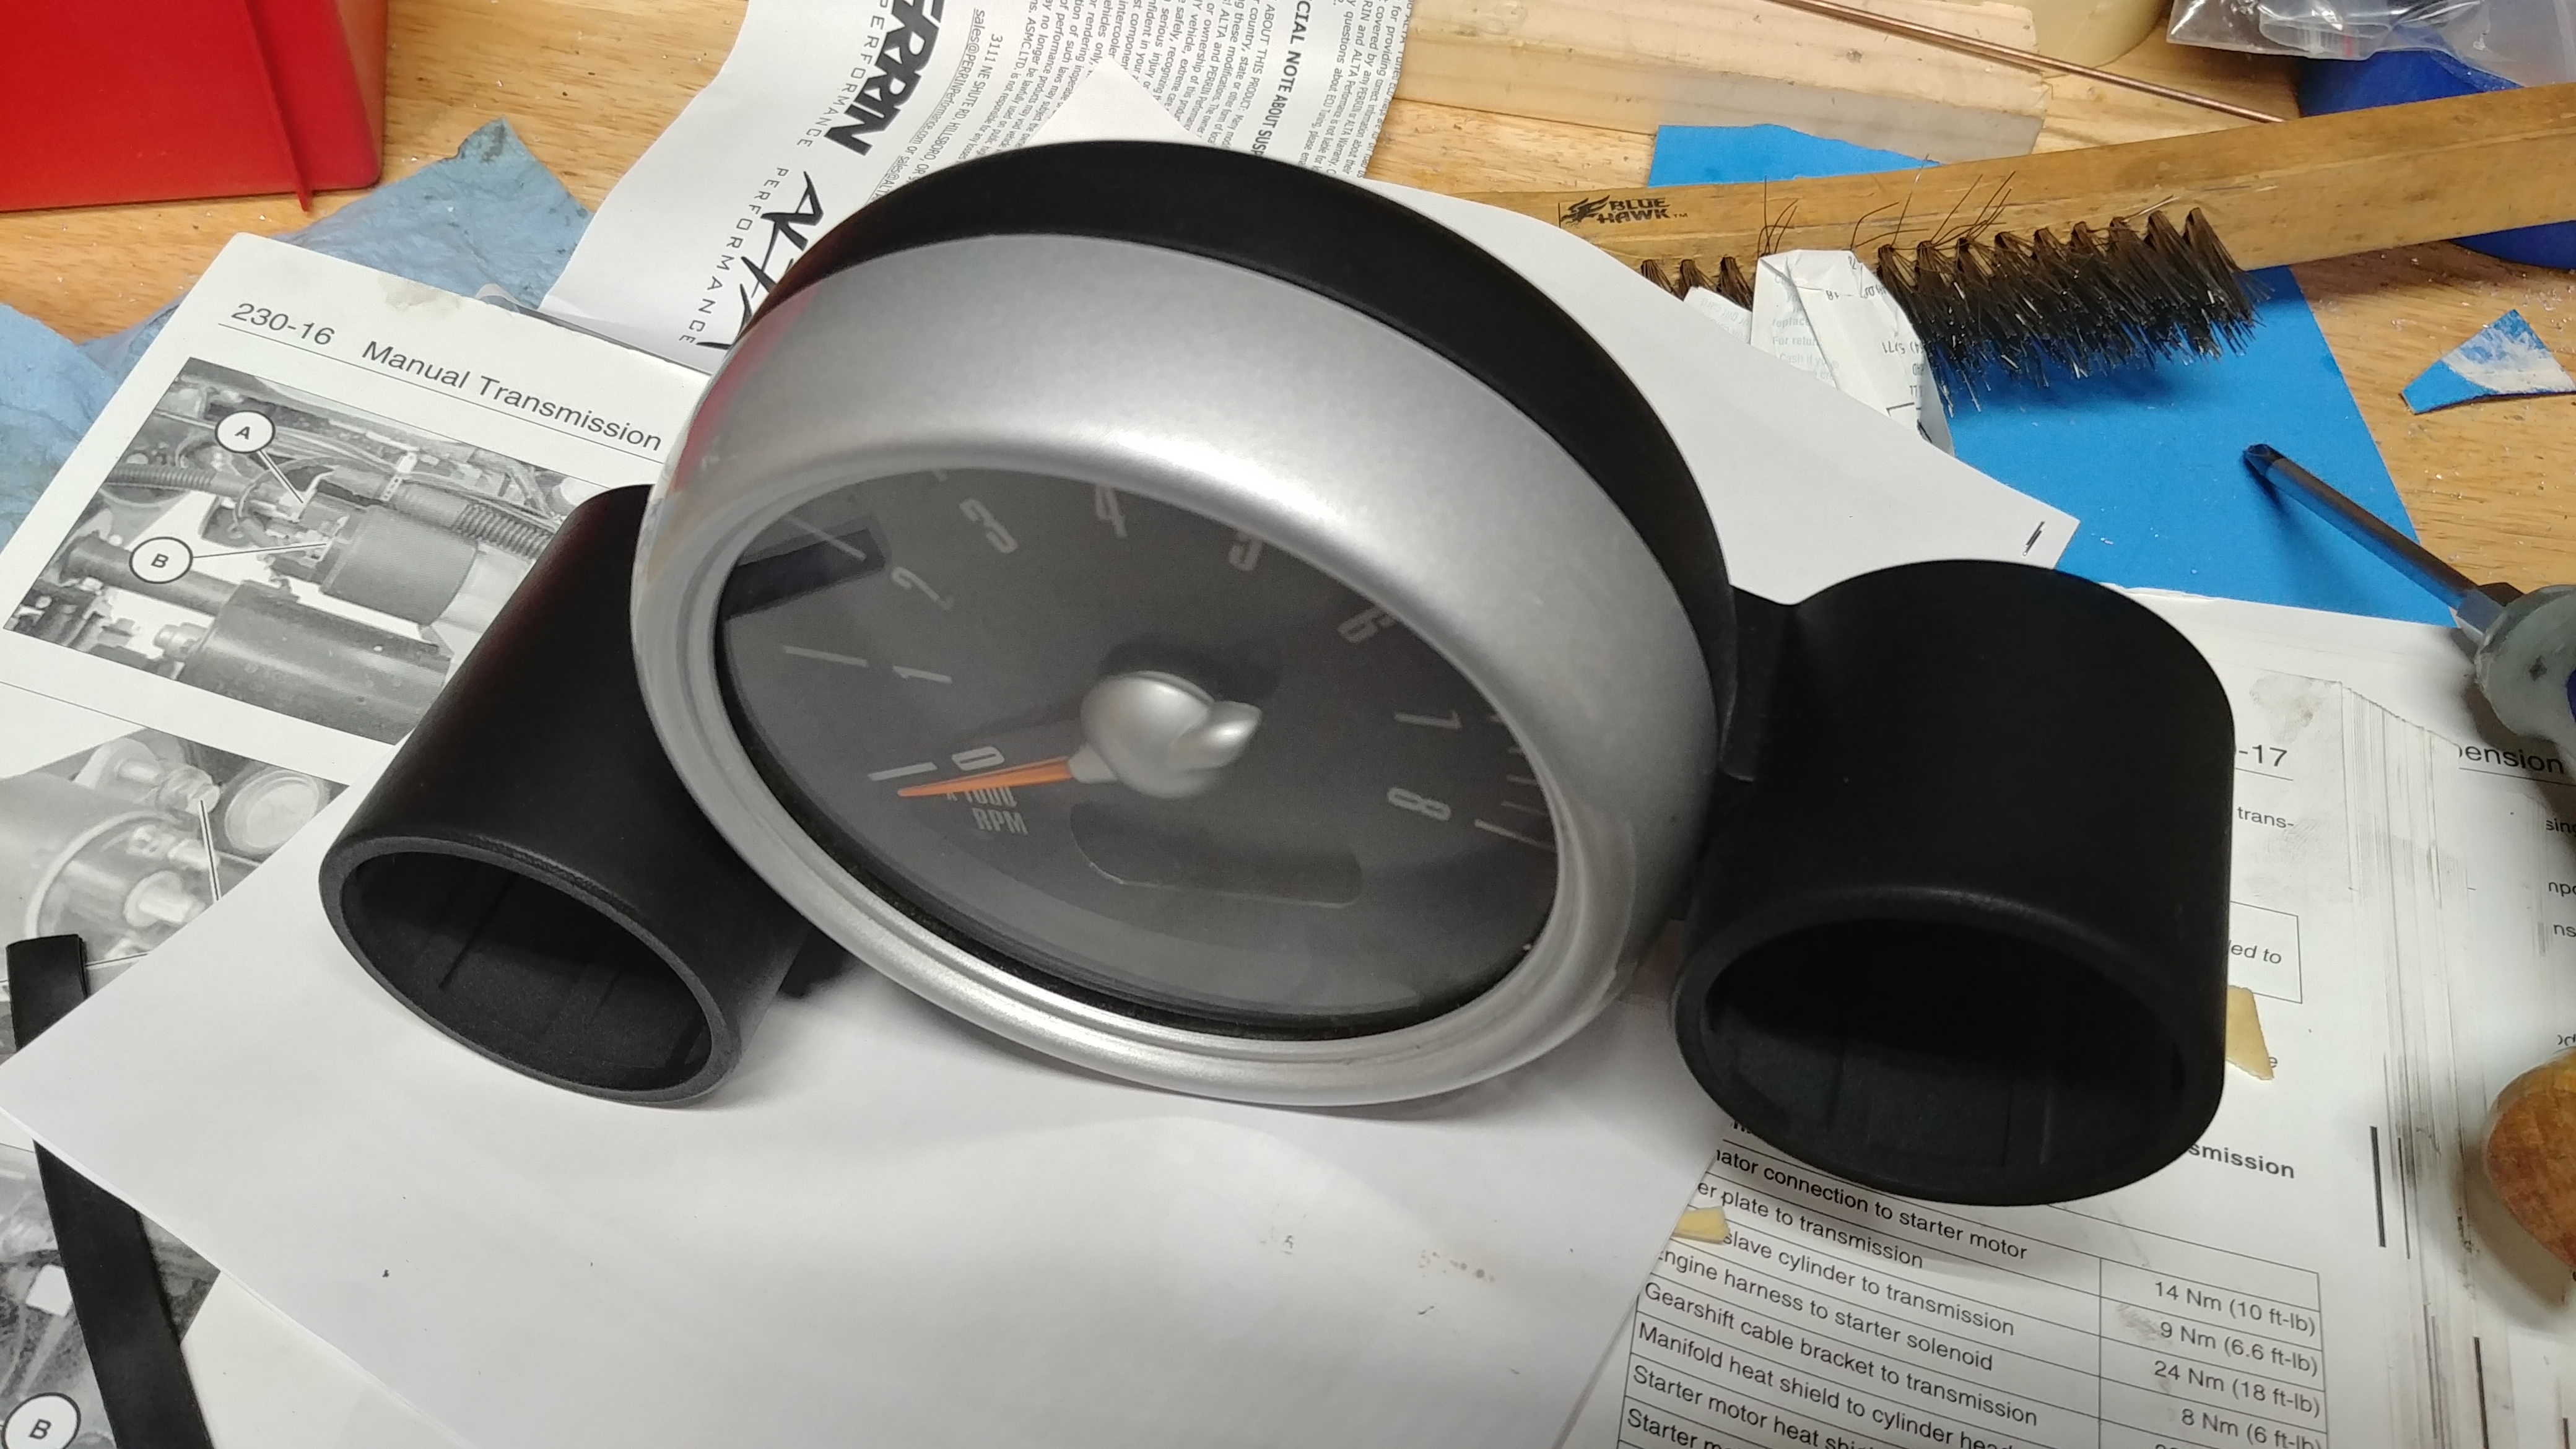
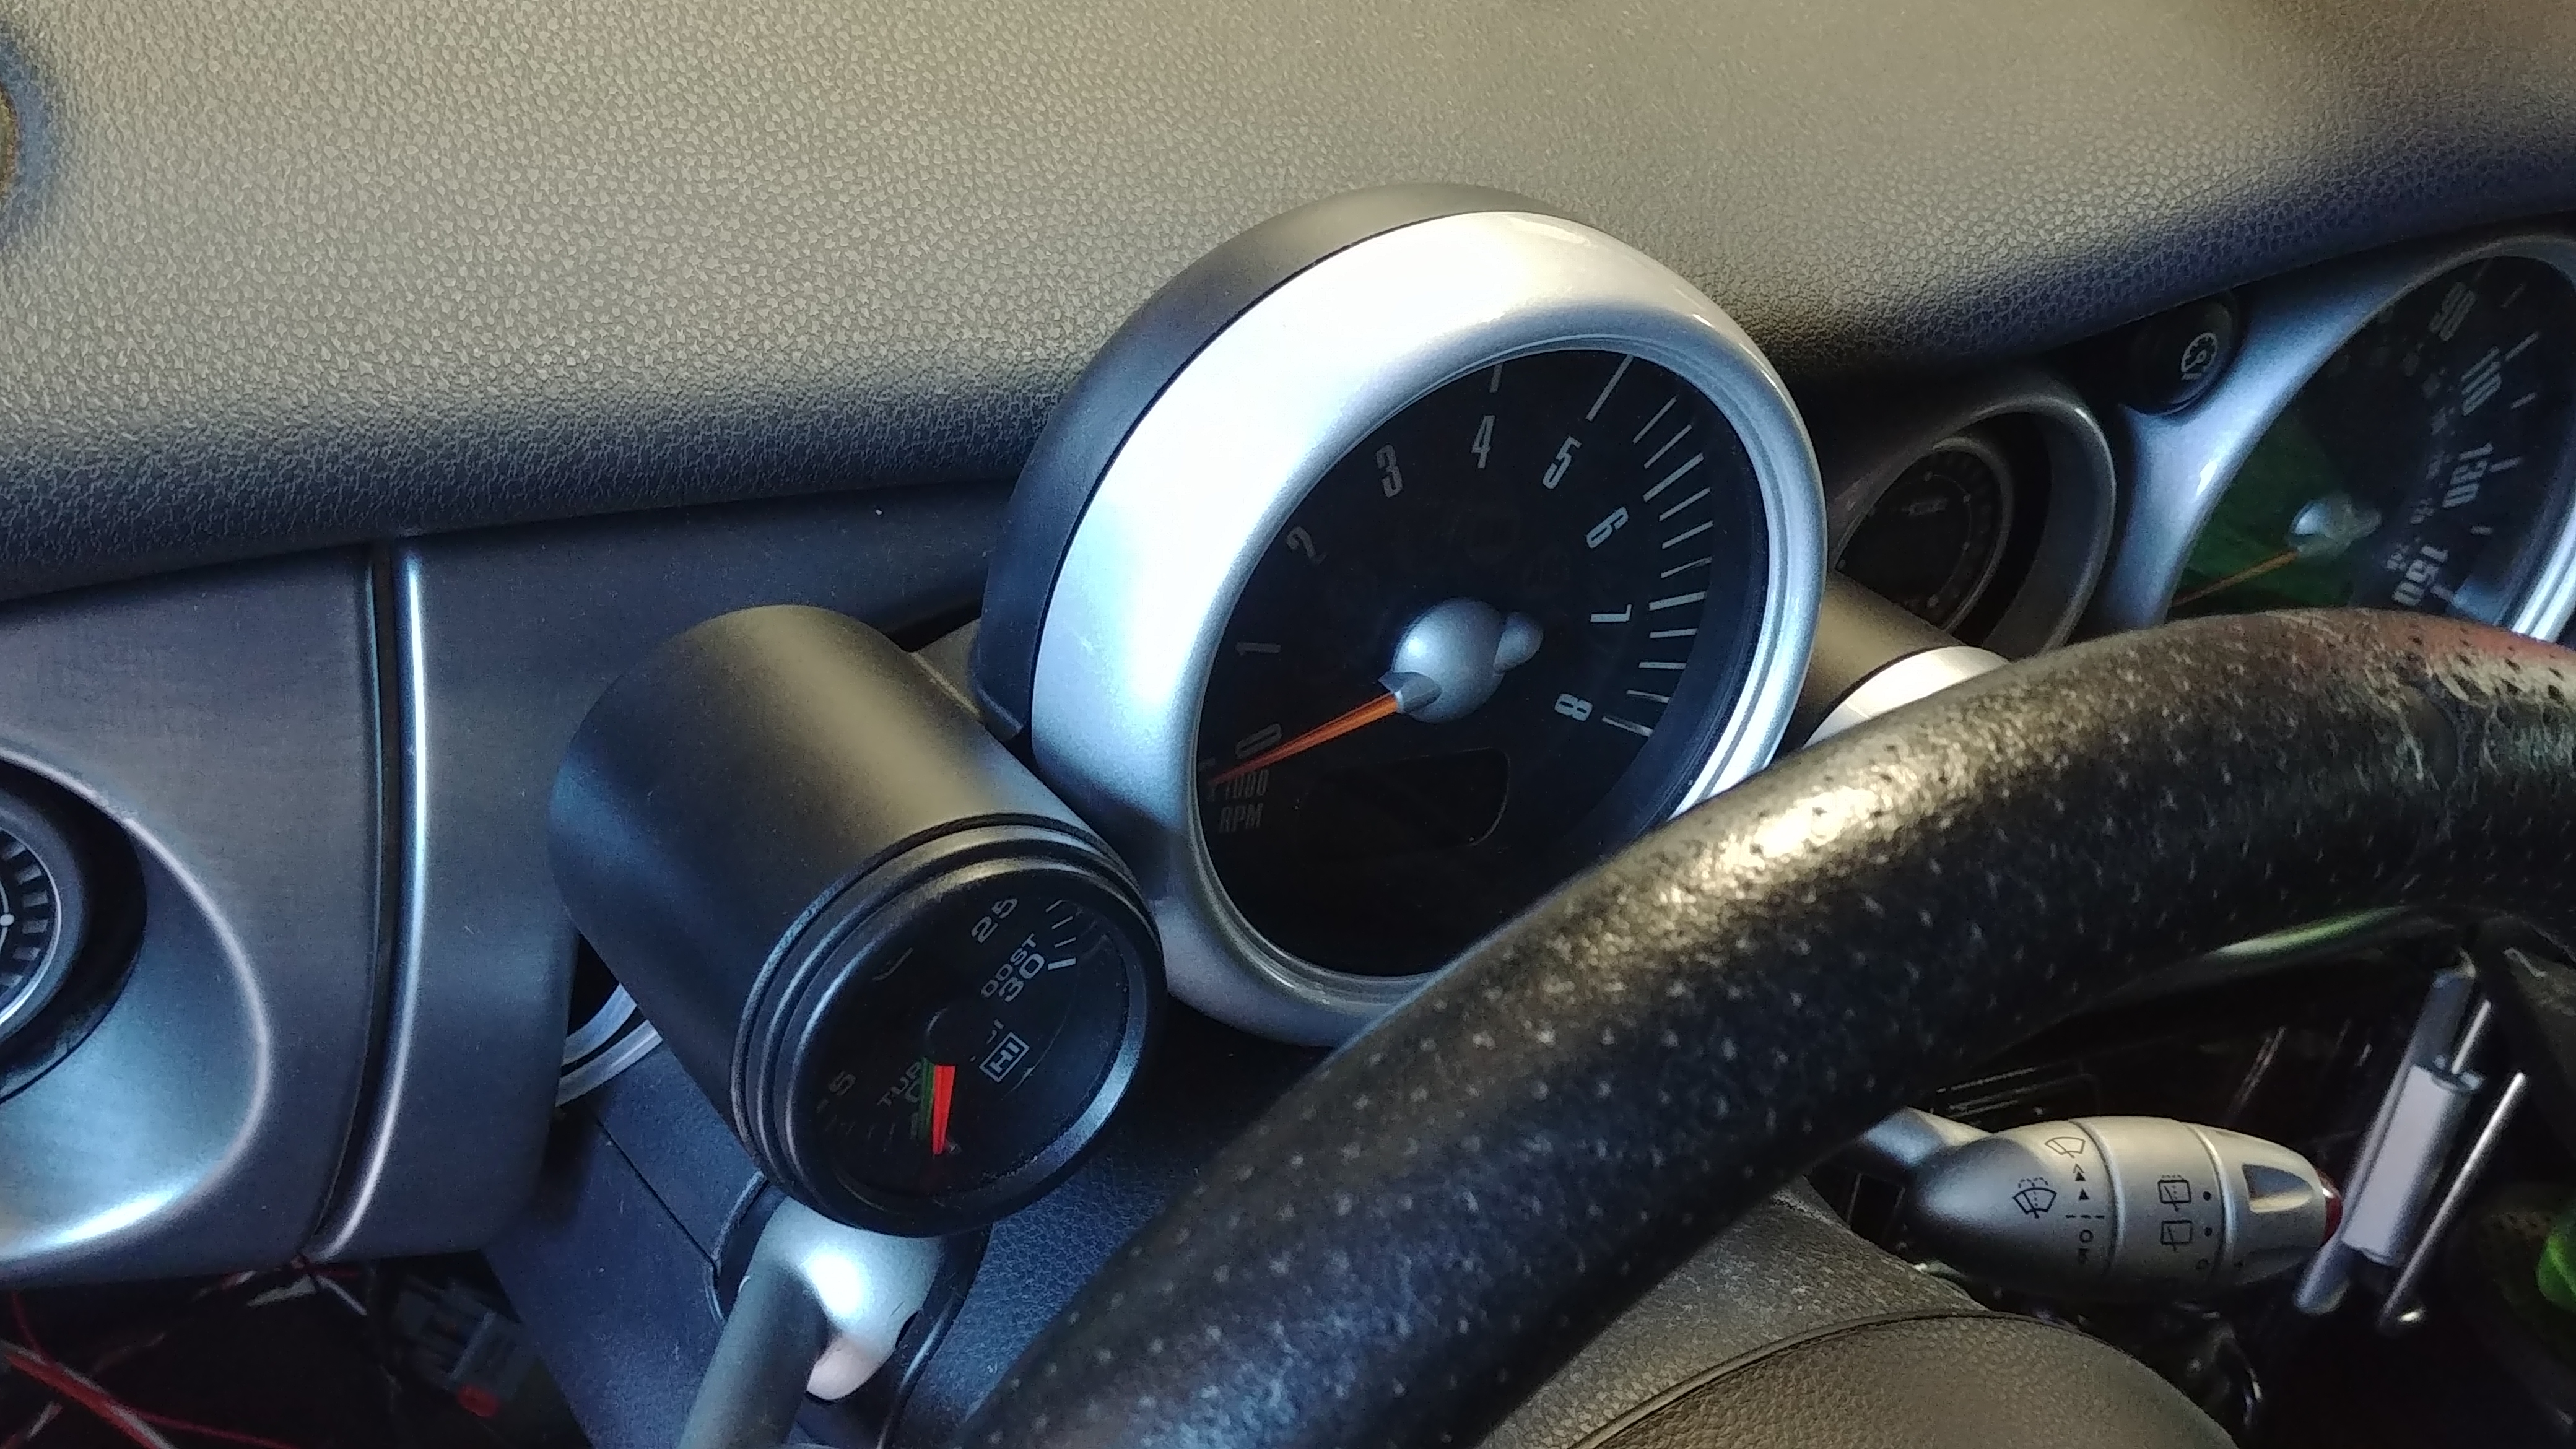
I have a funky sized gauge for my boost (really deep) and none of the aftermarket or JCW solutions work for it... so I decided to print my own tach housing! Designed in Fusion 360 with the factory housing in hand and a pair of calipers. Some liberty was taken with non critical dimensions. Printed in MJF (HP MultiJet Fusion - nylon powderbed that gives isotropic properties) Painted with 4 layers of nylon flat black automotive enamel and then 2 coats of flat clear krylon Should look quite nice (and near factory) in the car! will update once i have it in and mounted!
Last edited by soccerbummer1104; Apr 3, 2019 at 10:13 AM.
I did a test print myself out of fdm to check dimensions, but then the print I painted and am using is out of mjf that I contract printed. (mjf is much closer to injection molded strength then fdm.. and I never want to have to worry about this part)
I already have a version hosted (in my shapeways store) with just a right pod, but its for the first gen platform. (R50, 52, 53)
Mine is the 2nd Gen, the current guage cluster looks like this
I was wondering if you can fabricate the plan to have One or Two gauges added to the right... leaving the left one in place.
I can offer up my OEM back plate if needed for creating the templates.
Q - any issues with heat deforming the piece? Looks great!
**Ive had some 3D printed parts that warped very bad once temps hit 100F.. a later batch using carbon reinforced material resisted the heat deformation much better.
Fist some pictures:
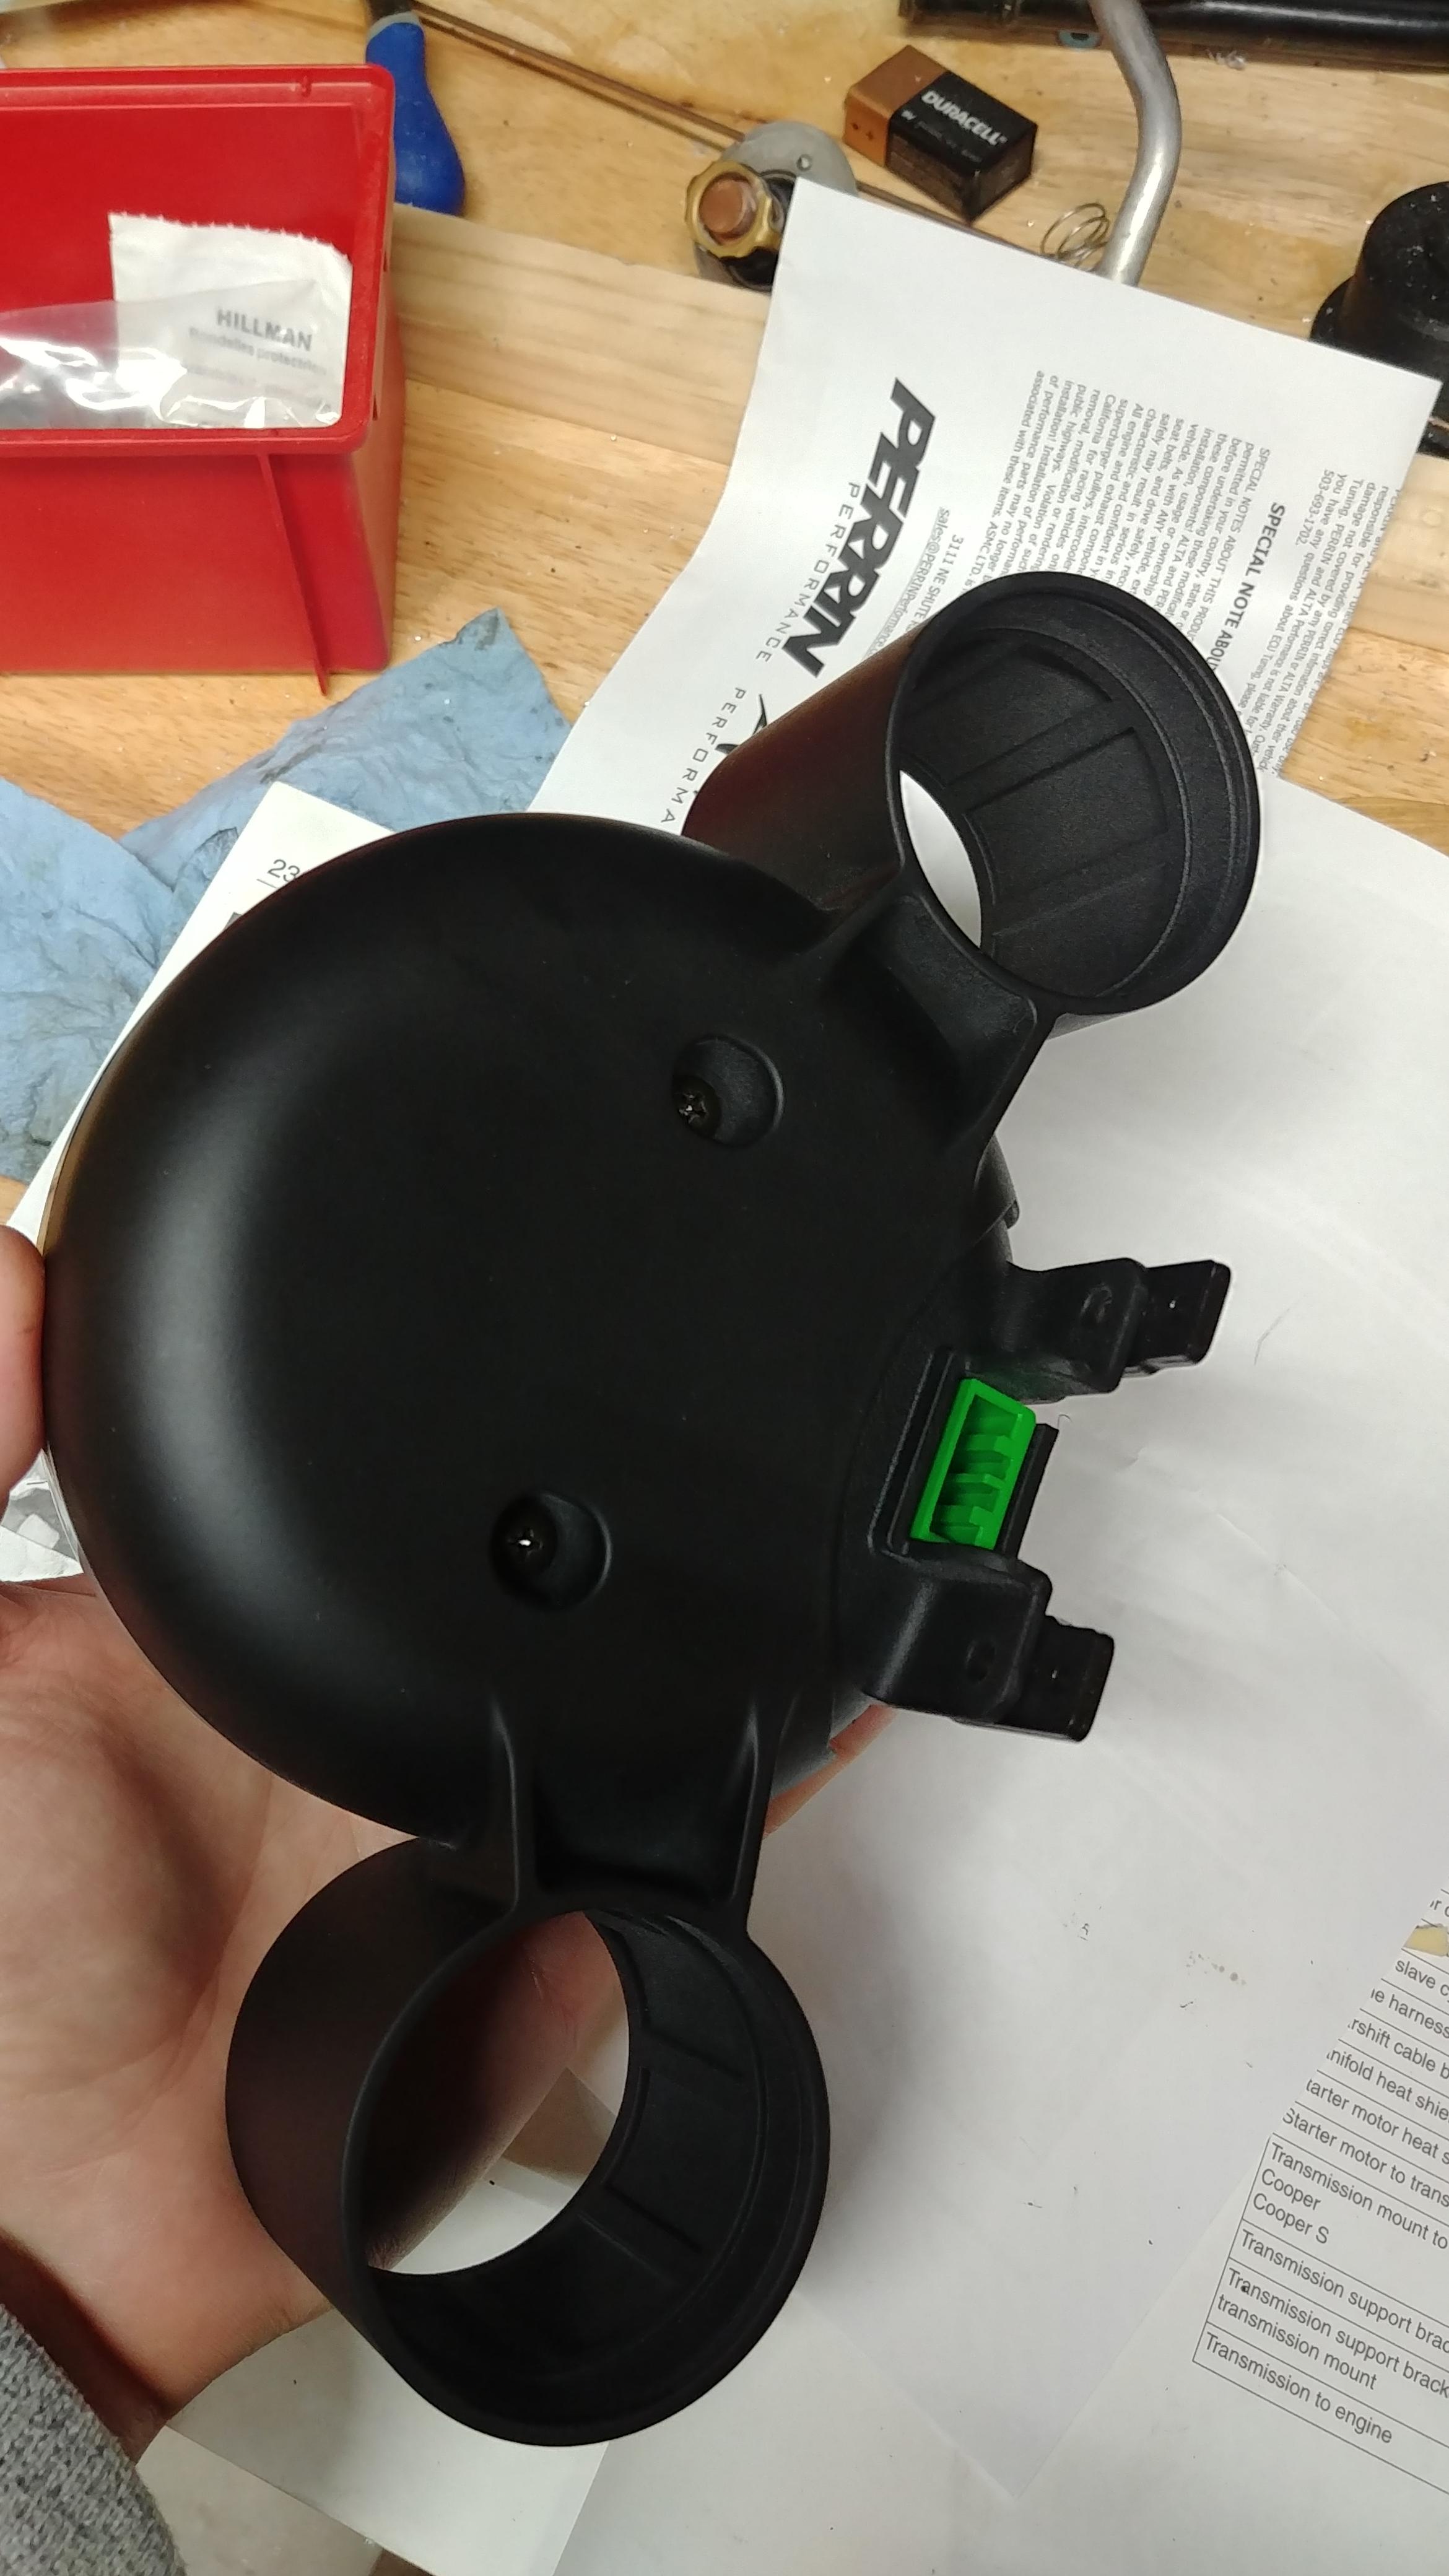
Used the factory metal bracket
Mounts the tach housing using the factory screws (and the cable connector sticks out the same)
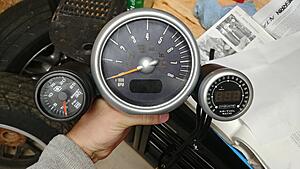
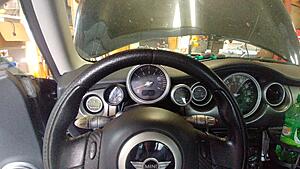
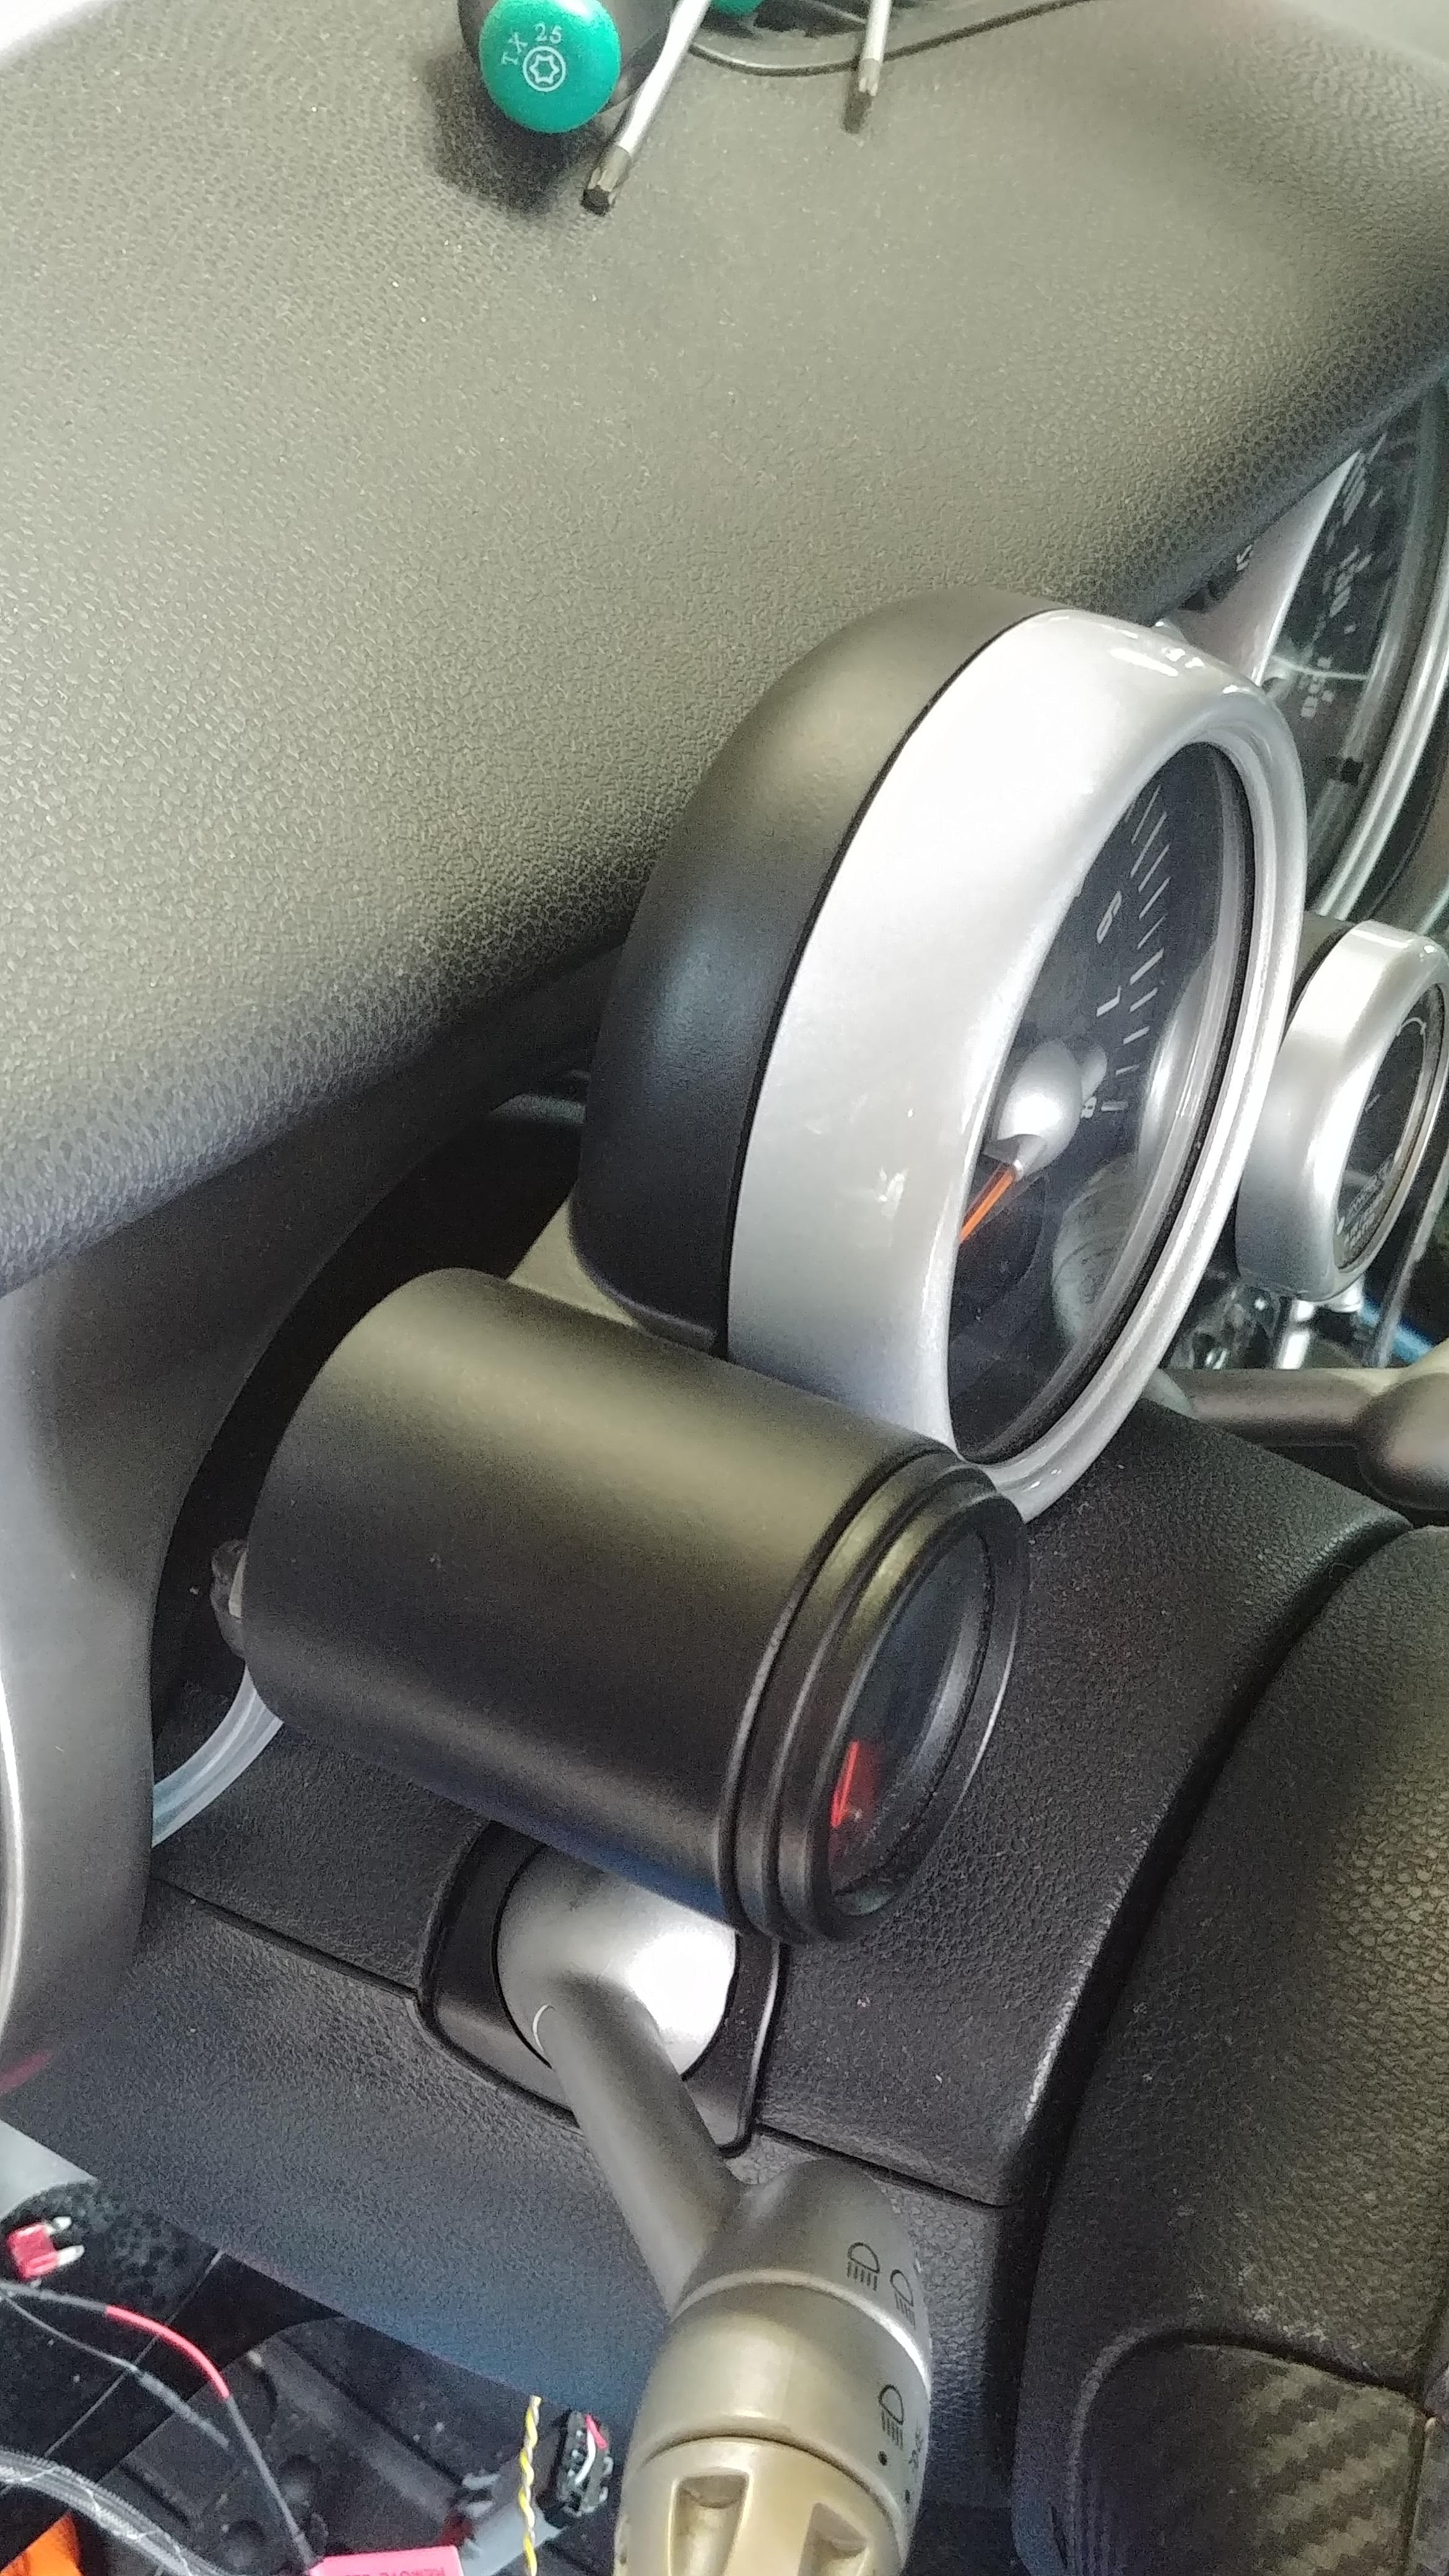
gauges mounted!
showing the factory skirt 'installed' (it has to be trimmed slightly. I did this trimming with a hand file)
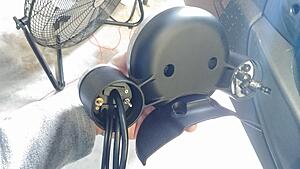
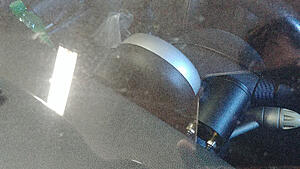
mounted on the car!
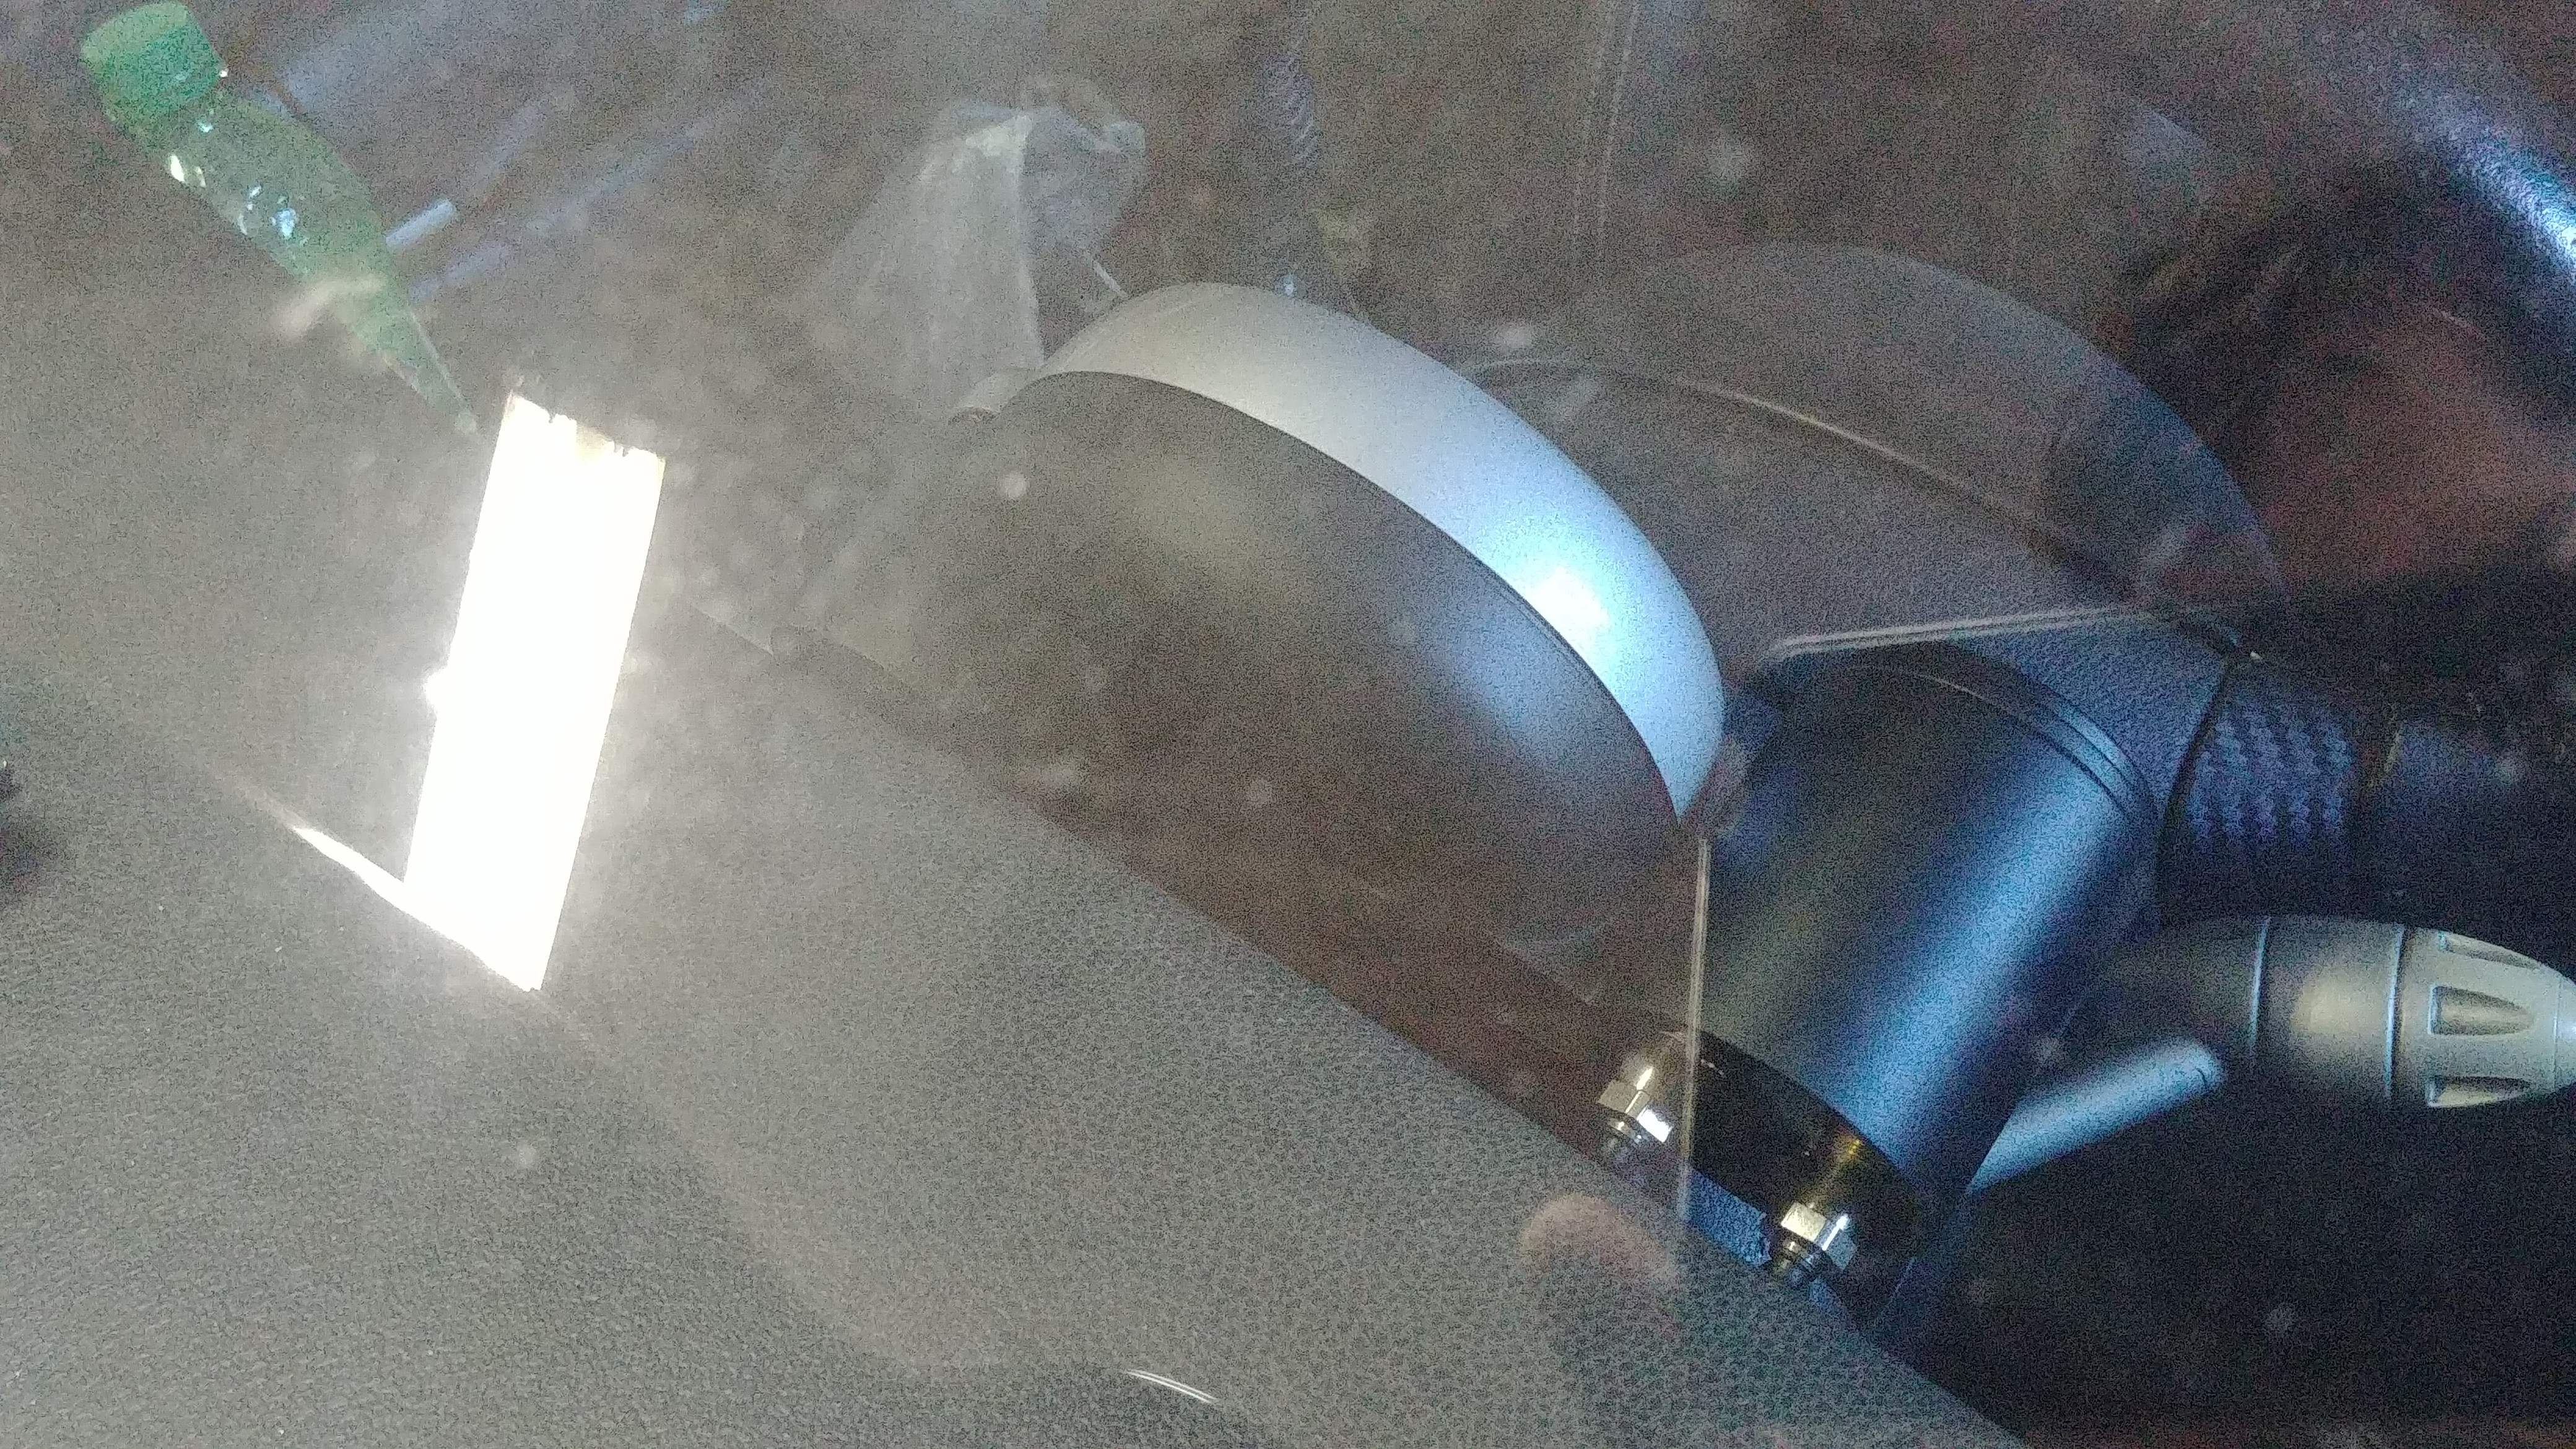
through the obscenely dirty front window
another detail shot
driver view!
No issues with warping expected. This is mjf, which is a nylon powder based printing, and its pretty even wall thickness. I fully expect it to perform as well as or better than a production injection molded part.
I would not say that about most resin prints however!
If you want me to elaborate more on printing methods and properties, please let me know and I can type up a small essay to hit the highlights. (I run the print shop for my company. Funnily enough... We do not have mjf, and this was printed outside. But I wanted end-use part for auto, with minimal layer lines for easy finishing without having to build up a ton of primer /filler. I have had amazing results with other MJF stuff I have sent out before, and decided to go that rout for this... Even though I paid a tad more for it.
I think it came out looking near-factory!)
Last edited by soccerbummer1104; Oct 28, 2018 at 06:23 PM.
Are these for sale someplace for us computer/cad/printing dummy old farts????
hahaha, check out the shapeways link in the first post.
More expensive than running the add on pods... but I think it looks better!
They don't come painted, and check dimensions, I put them in the post and in the shapeways link.
Outstanding work. I have been working on my own 3D printing + carbon fiber brake duct project, I thought that was cool but this is next level. I'm going to have to check out the MJF process, that could have saved me a lot of work! Your 3D CAD skills are obviously far beyond mine. Cant wait to see what you come up with next.
Outstanding work. I have been working on my own 3D printing + carbon fiber brake duct project, I thought that was cool but this is next level. I'm going to have to check out the MJF process, that could have saved me a lot of work! Your 3D CAD skills are obviously far beyond mine. Cant wait to see what you come up with next.
for what you want to do, if you have access to an FDM that can print a soluble support material: draw up your brake tube duct and print the fluid volume shape... But print it sparse and out of the soluble material, using a build material for the supports (but make sure the support structures are break away)
You will then be left with a soluble 'buck' to form your brake tube with. Pick up some carbon biaxial sleeves, epoxy resin, and some heat shrink. Do a few layers of carbon sleeve over your printed buck with some resin, use the heat shrink instead of a vacuum bag, and when its done curing, wash out the printed buck and voila! Custom funky shaped tube made!
Or you can carve the shape out of wax and melt it out :3.
Or you can print your shape (soluble) and wax coat it - requires a wash and then melt, but also the best inside finish with minimal user artistic skill :P
^ that's pretty much what I did, a combination of ABS prints, carbon sleeves, PVA printed forms, and carbon fabric. I have a thread going in the Builds section. I could probably do most of the ducting in MJF and skip the carbon, only the high temp part at the rotor needs to be carbon + high temp epoxy. Don't mean to hijack your thread!
sorry about that, will update as many of the links as I can.
Shapeways hit me with a takedown request over the use of "R53" "Mini" "Cooper" and a few others... even though not all of them are registered trademarks... apparently someone told bmw.. and bmw is legally obligated to do something (to protect their trademark) and so shapeways had to kill the products on the store. Been several months going back and forth.. and I guess R_53 is acceptable.. and I had to remove every thing else... even though there are no logos or trademarks on the products, and they are on a printing website so it is obvious that these are not genuine BMW parts, nor am I trying to pretend that they are.. apparently they cannot even have those WORDS in the description or product tags or it auto flags my parts and will not let them be sold.
So because of that I have removed most of the tags, and now everyone is happy and they are good to go.
The right-only pod is still pending review (as they have to have a legal team review each part and description now... frustrating and slow.. sorry)
Thanks for providing an update.... are you taking any requests for a custom design?
I have the R57 with the left-side convertible-top timer, ... would love to keep the timer and add one or two gauges to the right.
i can ship a spare back cover to you if you need something to use for RD.


 NICE!
NICE!