When you click on links to various merchants on this site and make a purchase, this can result in this site earning a commission. Affiliate programs and affiliations include, but are not limited to, the eBay Partner Network.
I should mention, Shapeways (where I decided to have the part hosted for purchase) has the part costing ~$25 out of SLS black Nylon + shipping
Still in Beta, so if you buy it now, there are no guarantees if it fits or whatever, as I will be receiving my two in mid March (away on business till late march so I saved some dough and selected the longer delivery time so the pieces were ~$17 ea. )
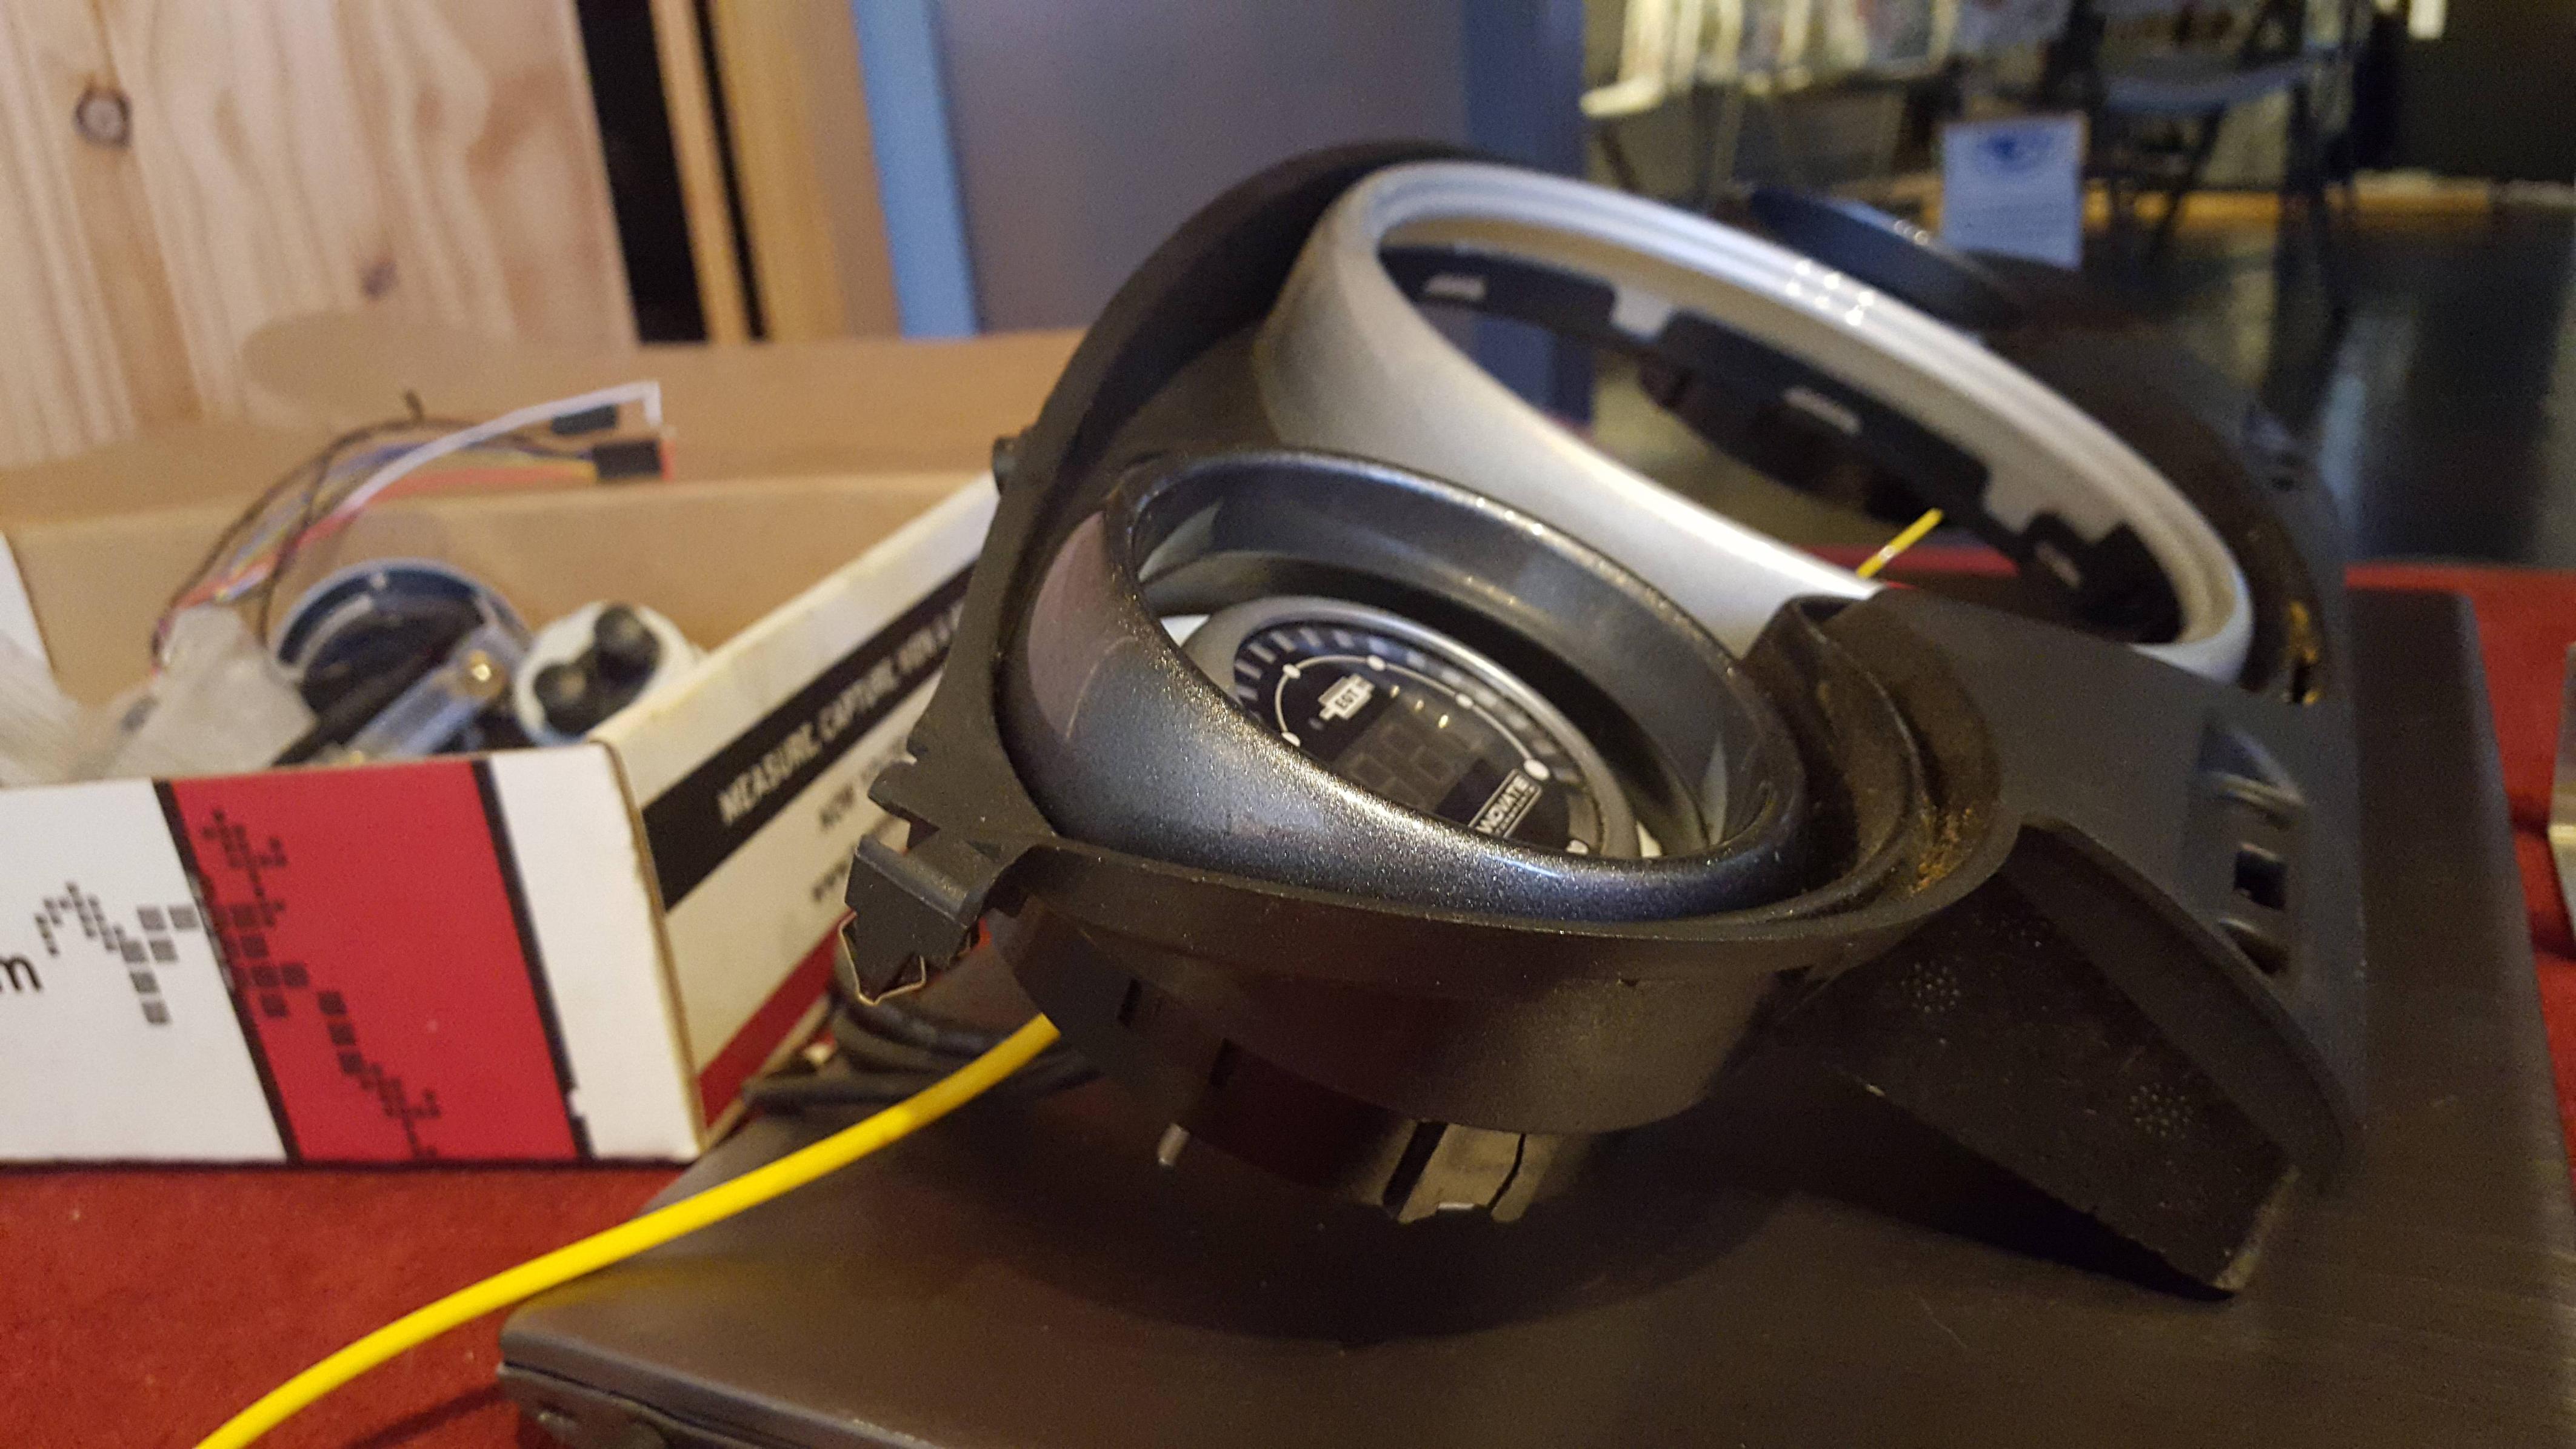
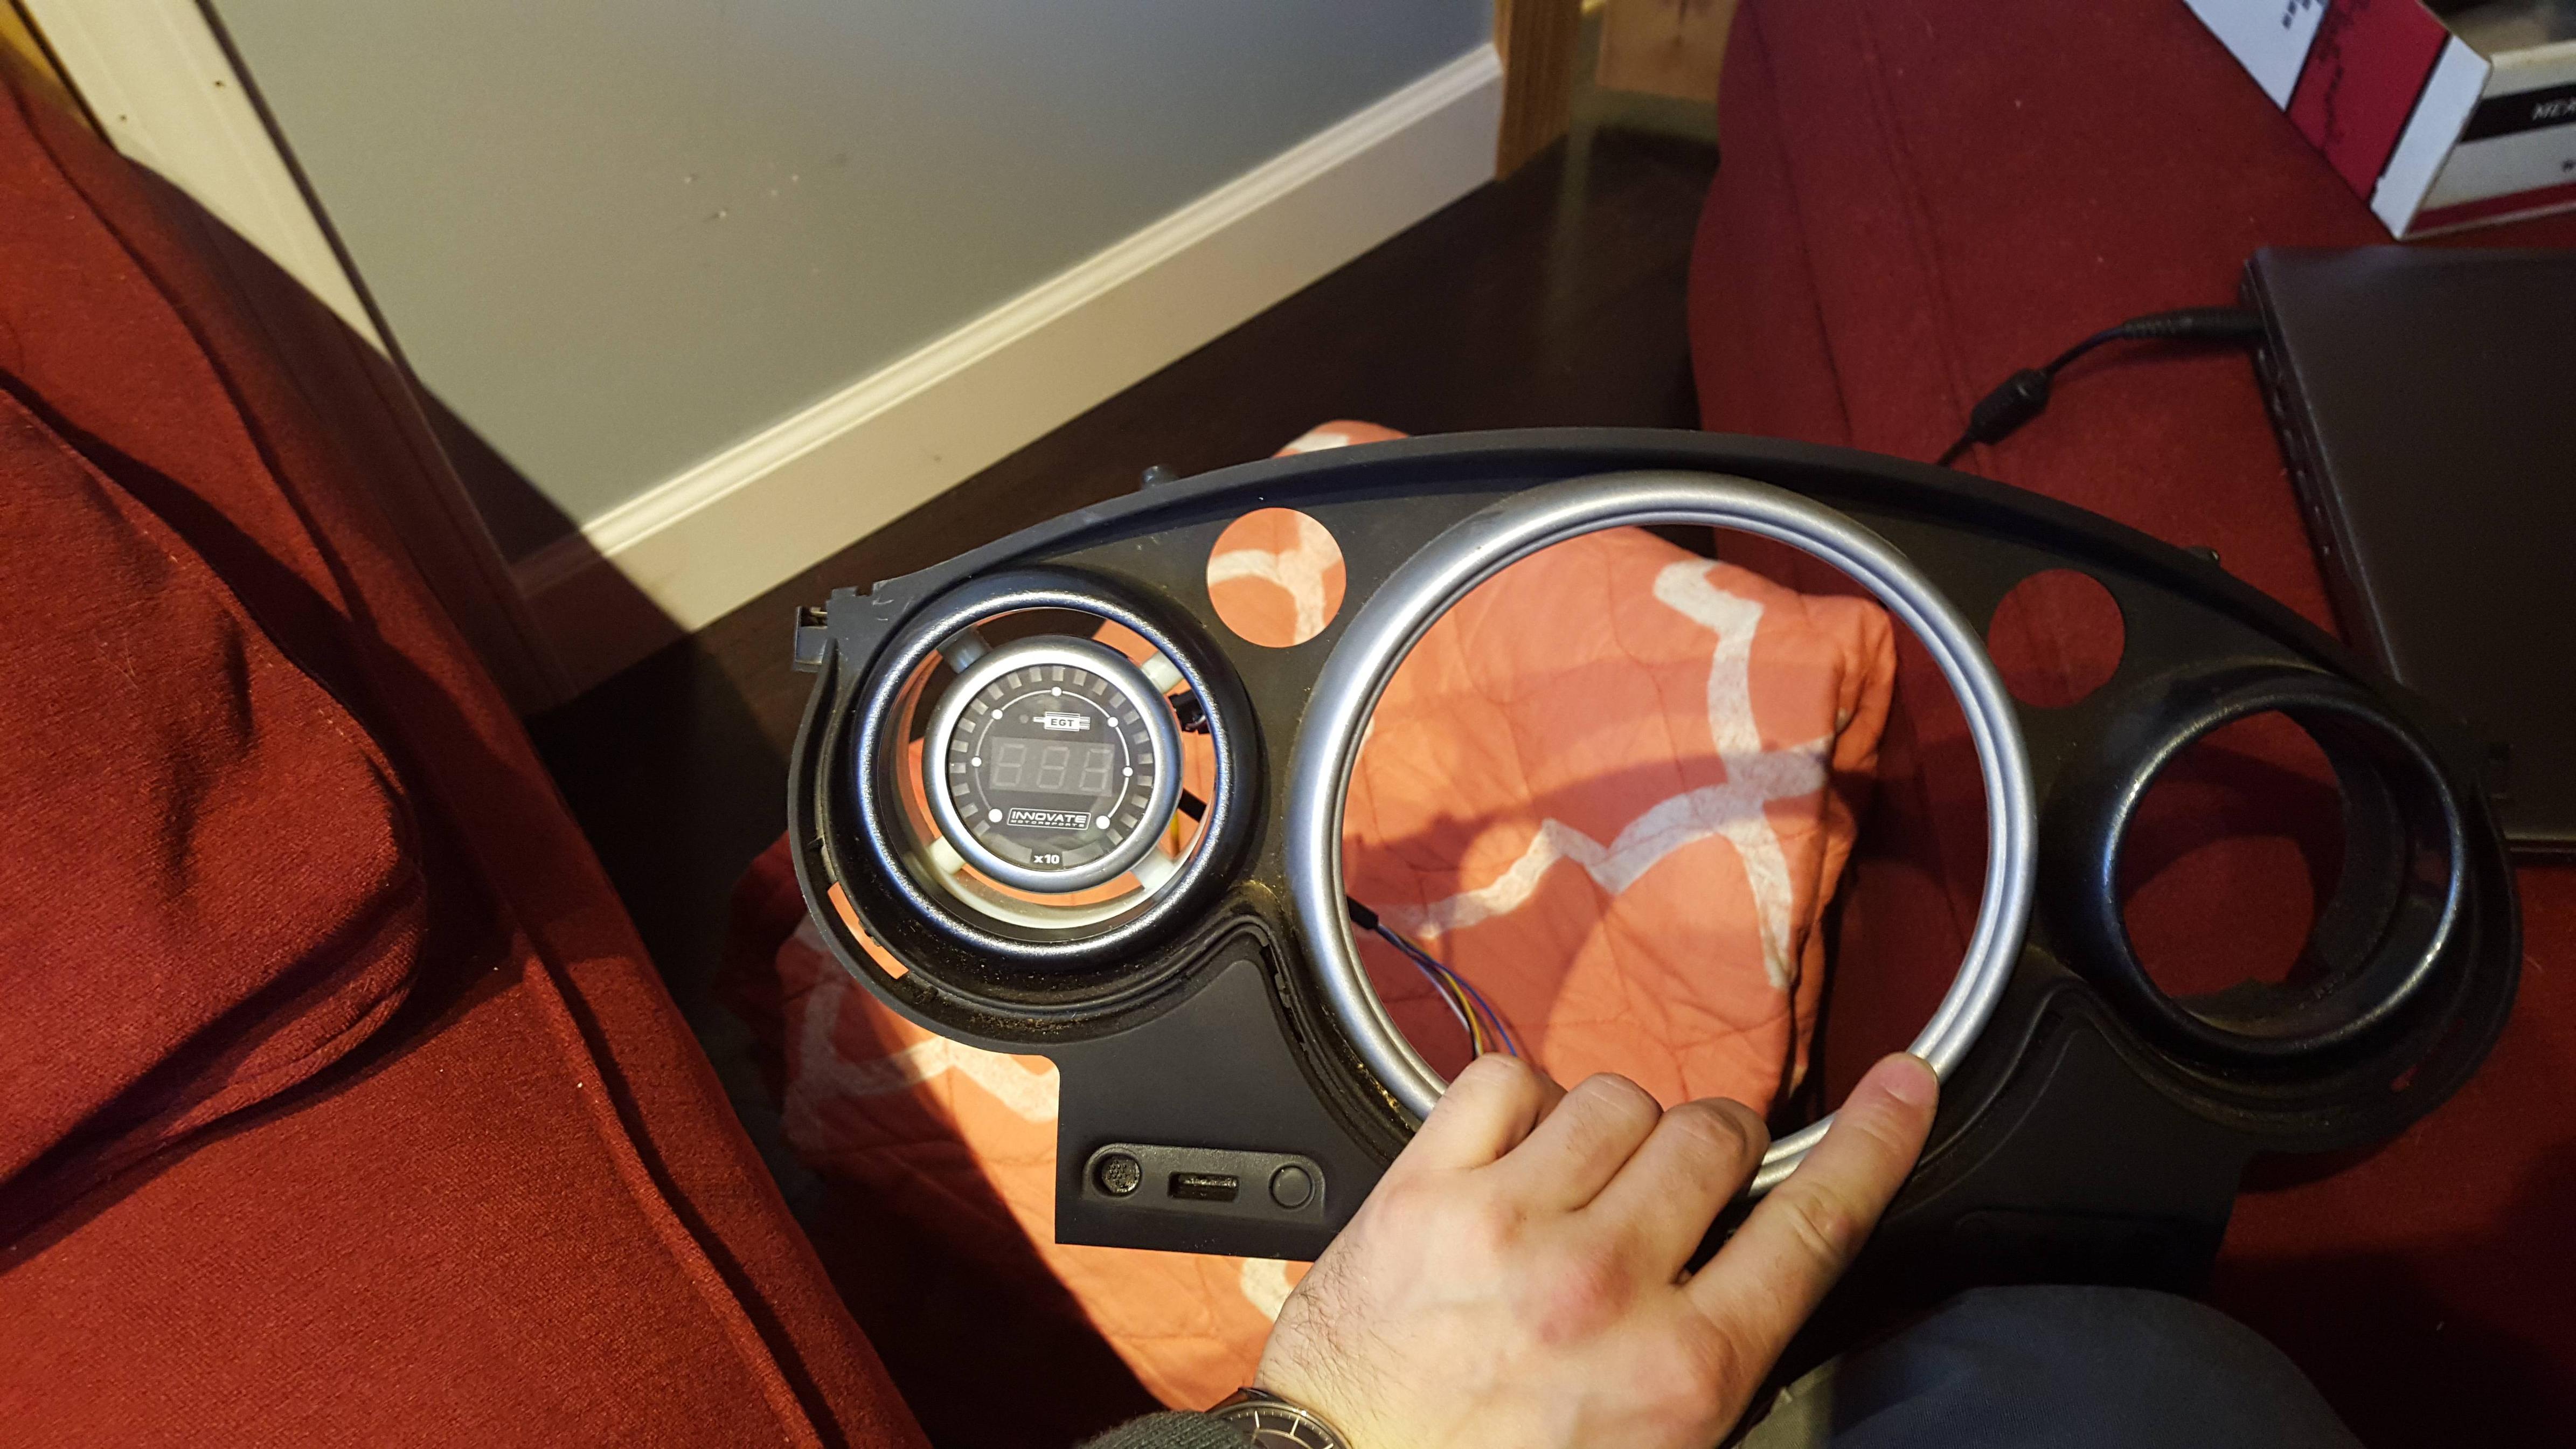
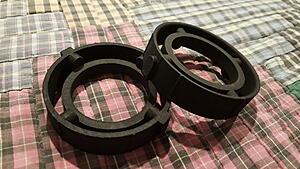
so first a few shots as they came in the mail.
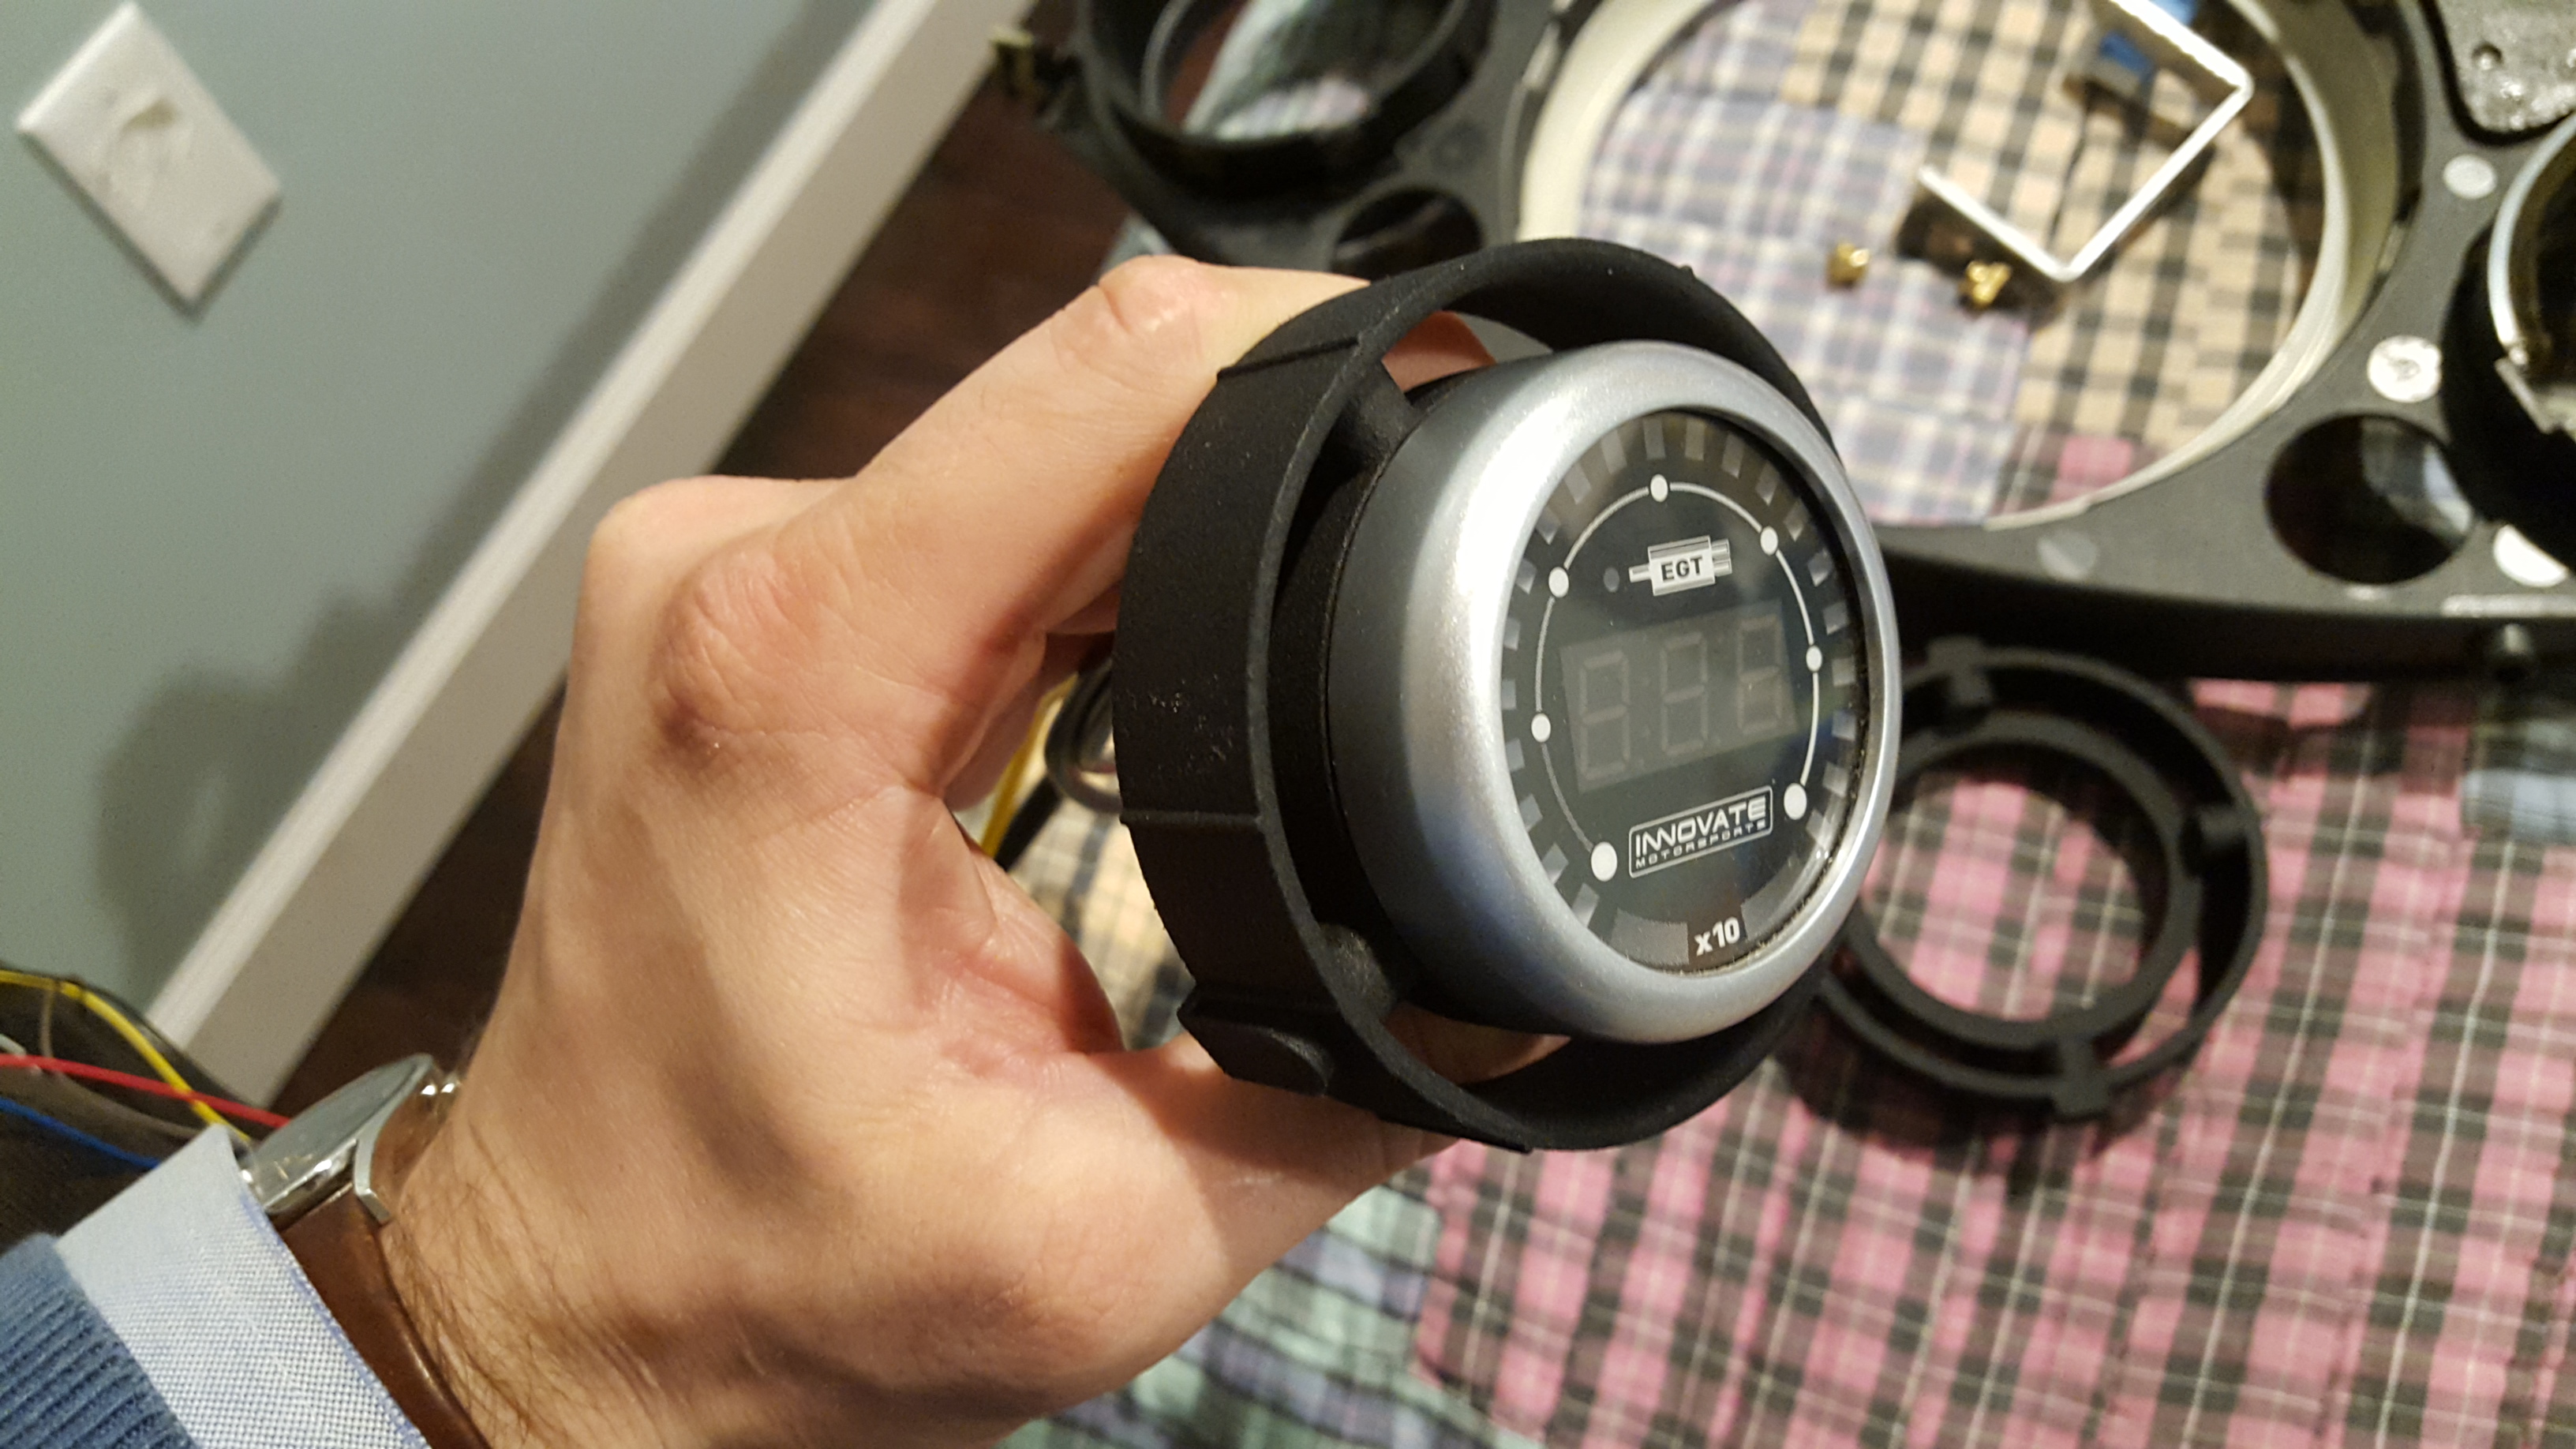
did't have to touch them up or anything, they just installed as-is. :D
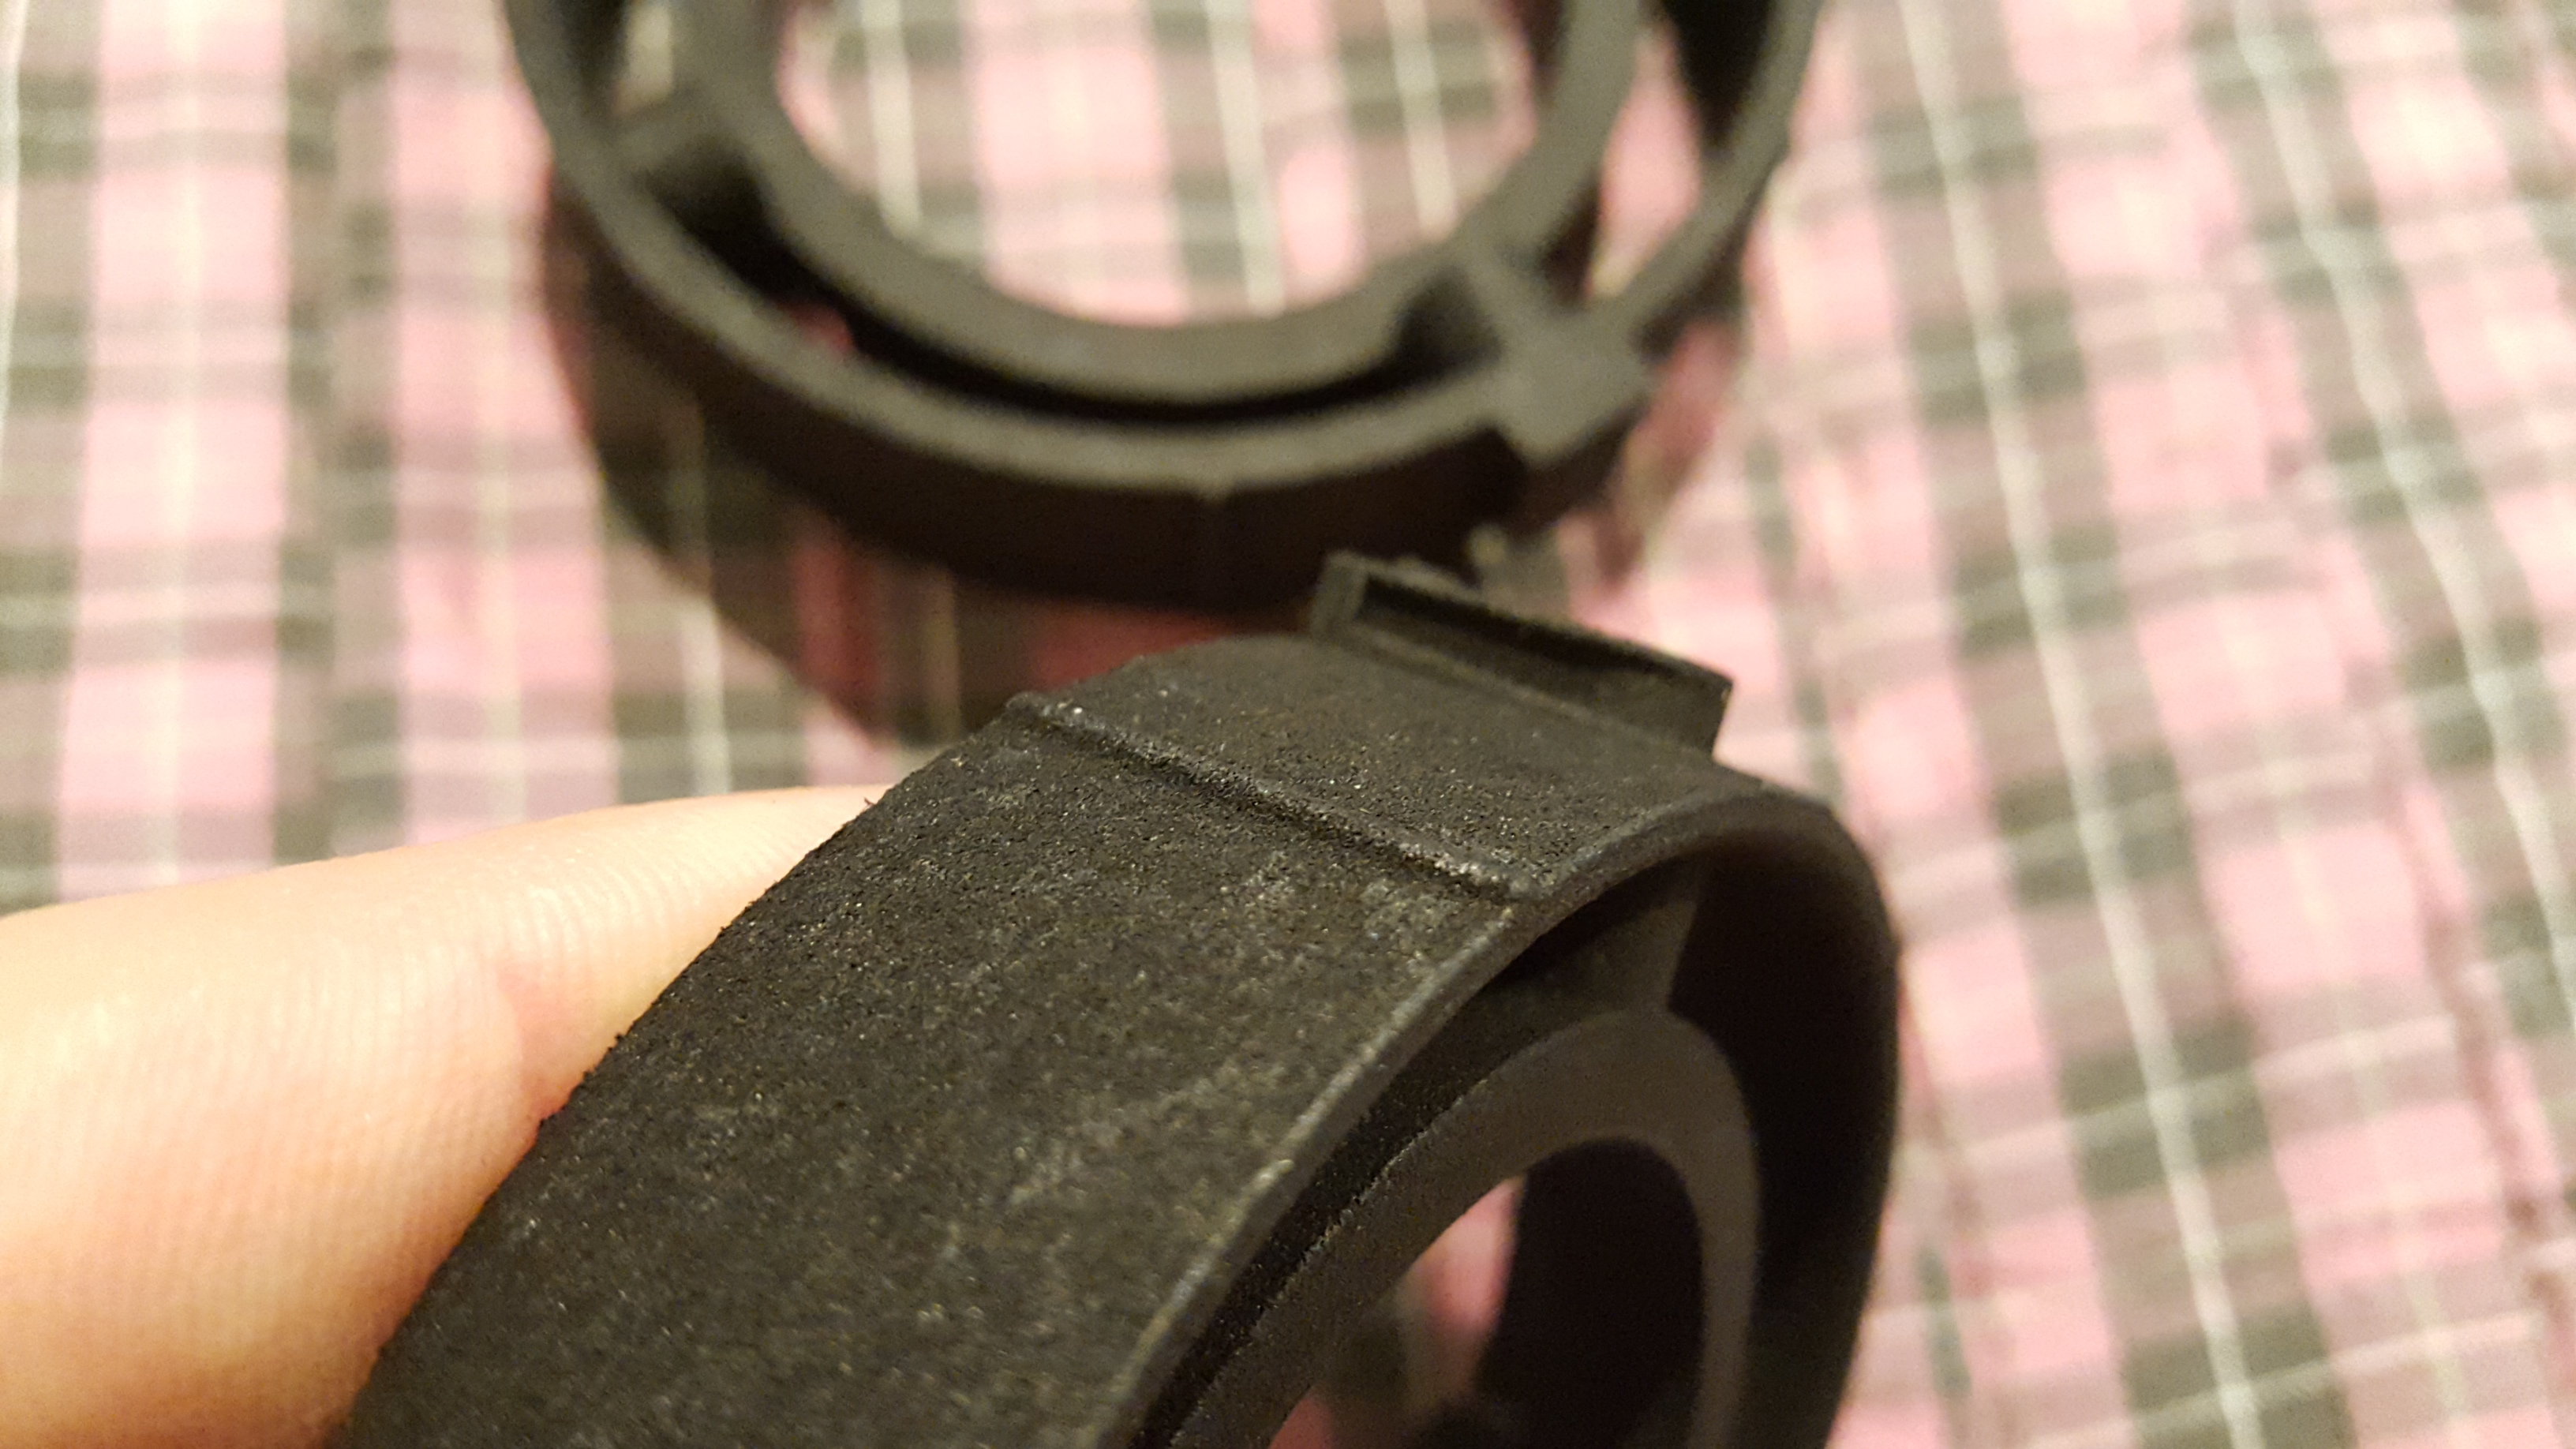
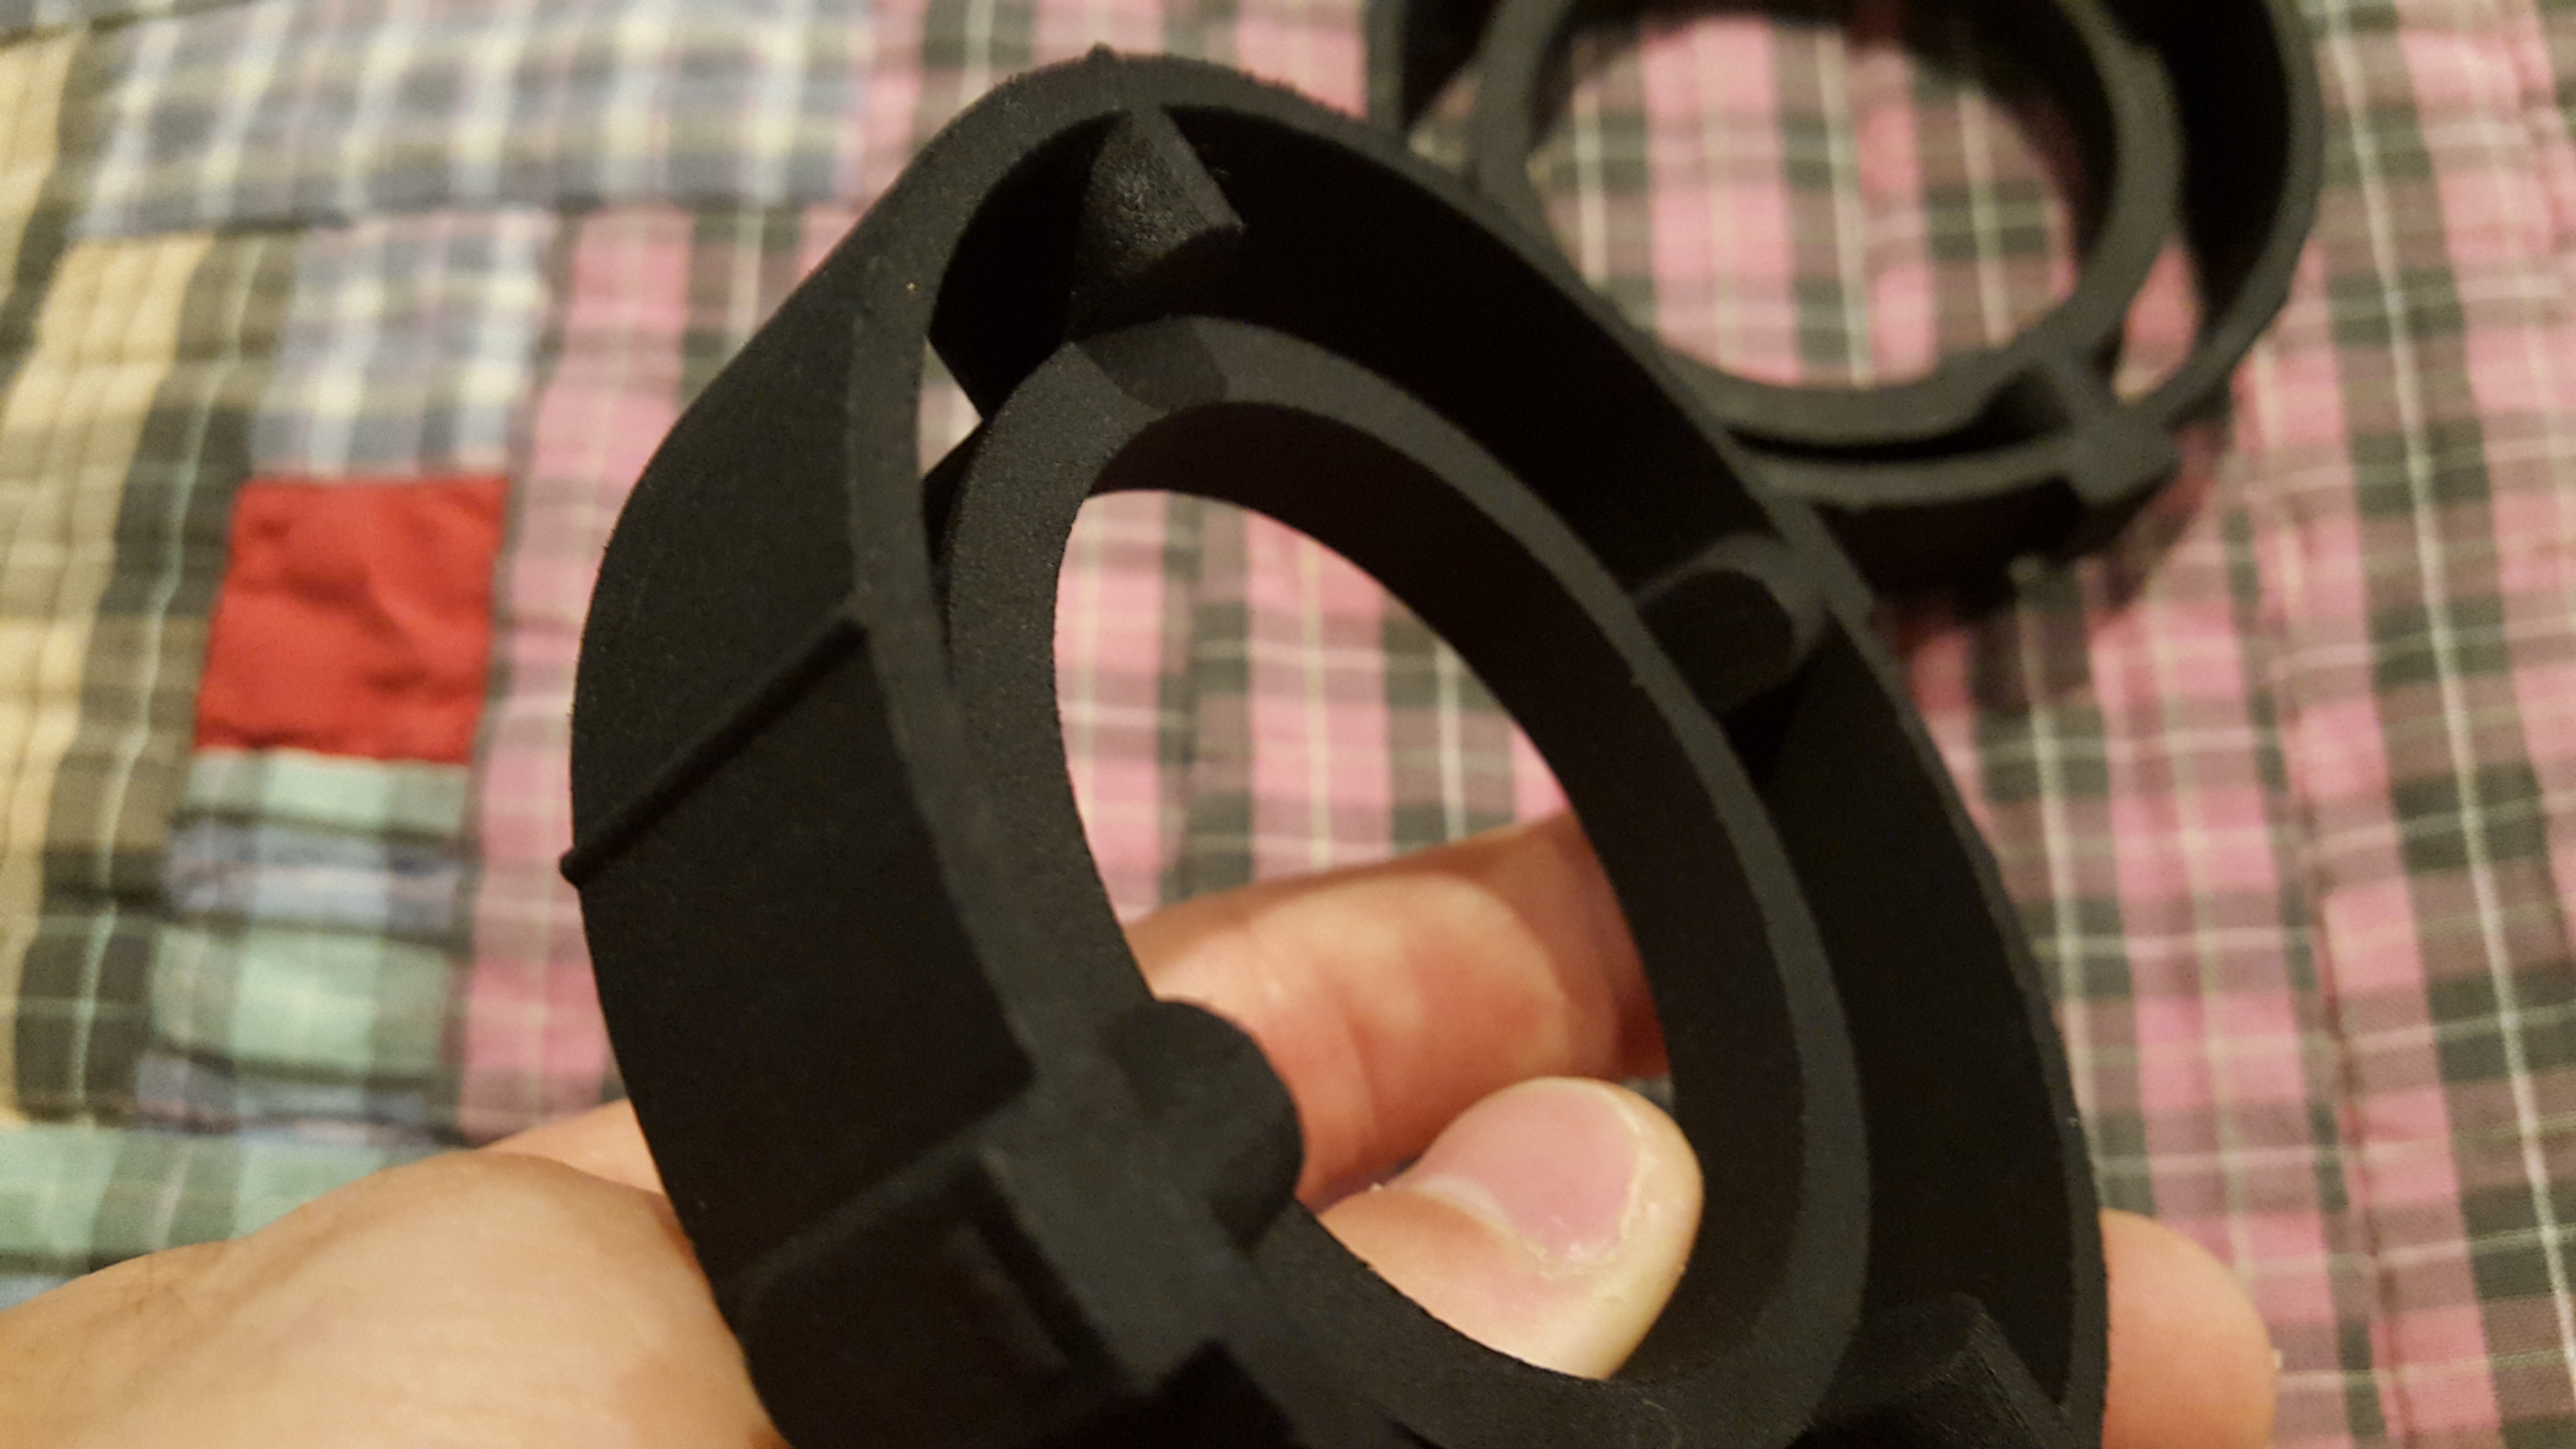
surface detail
you could always sand and finish these, but I didn't see the point.
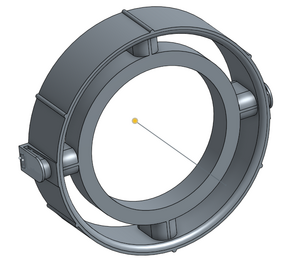
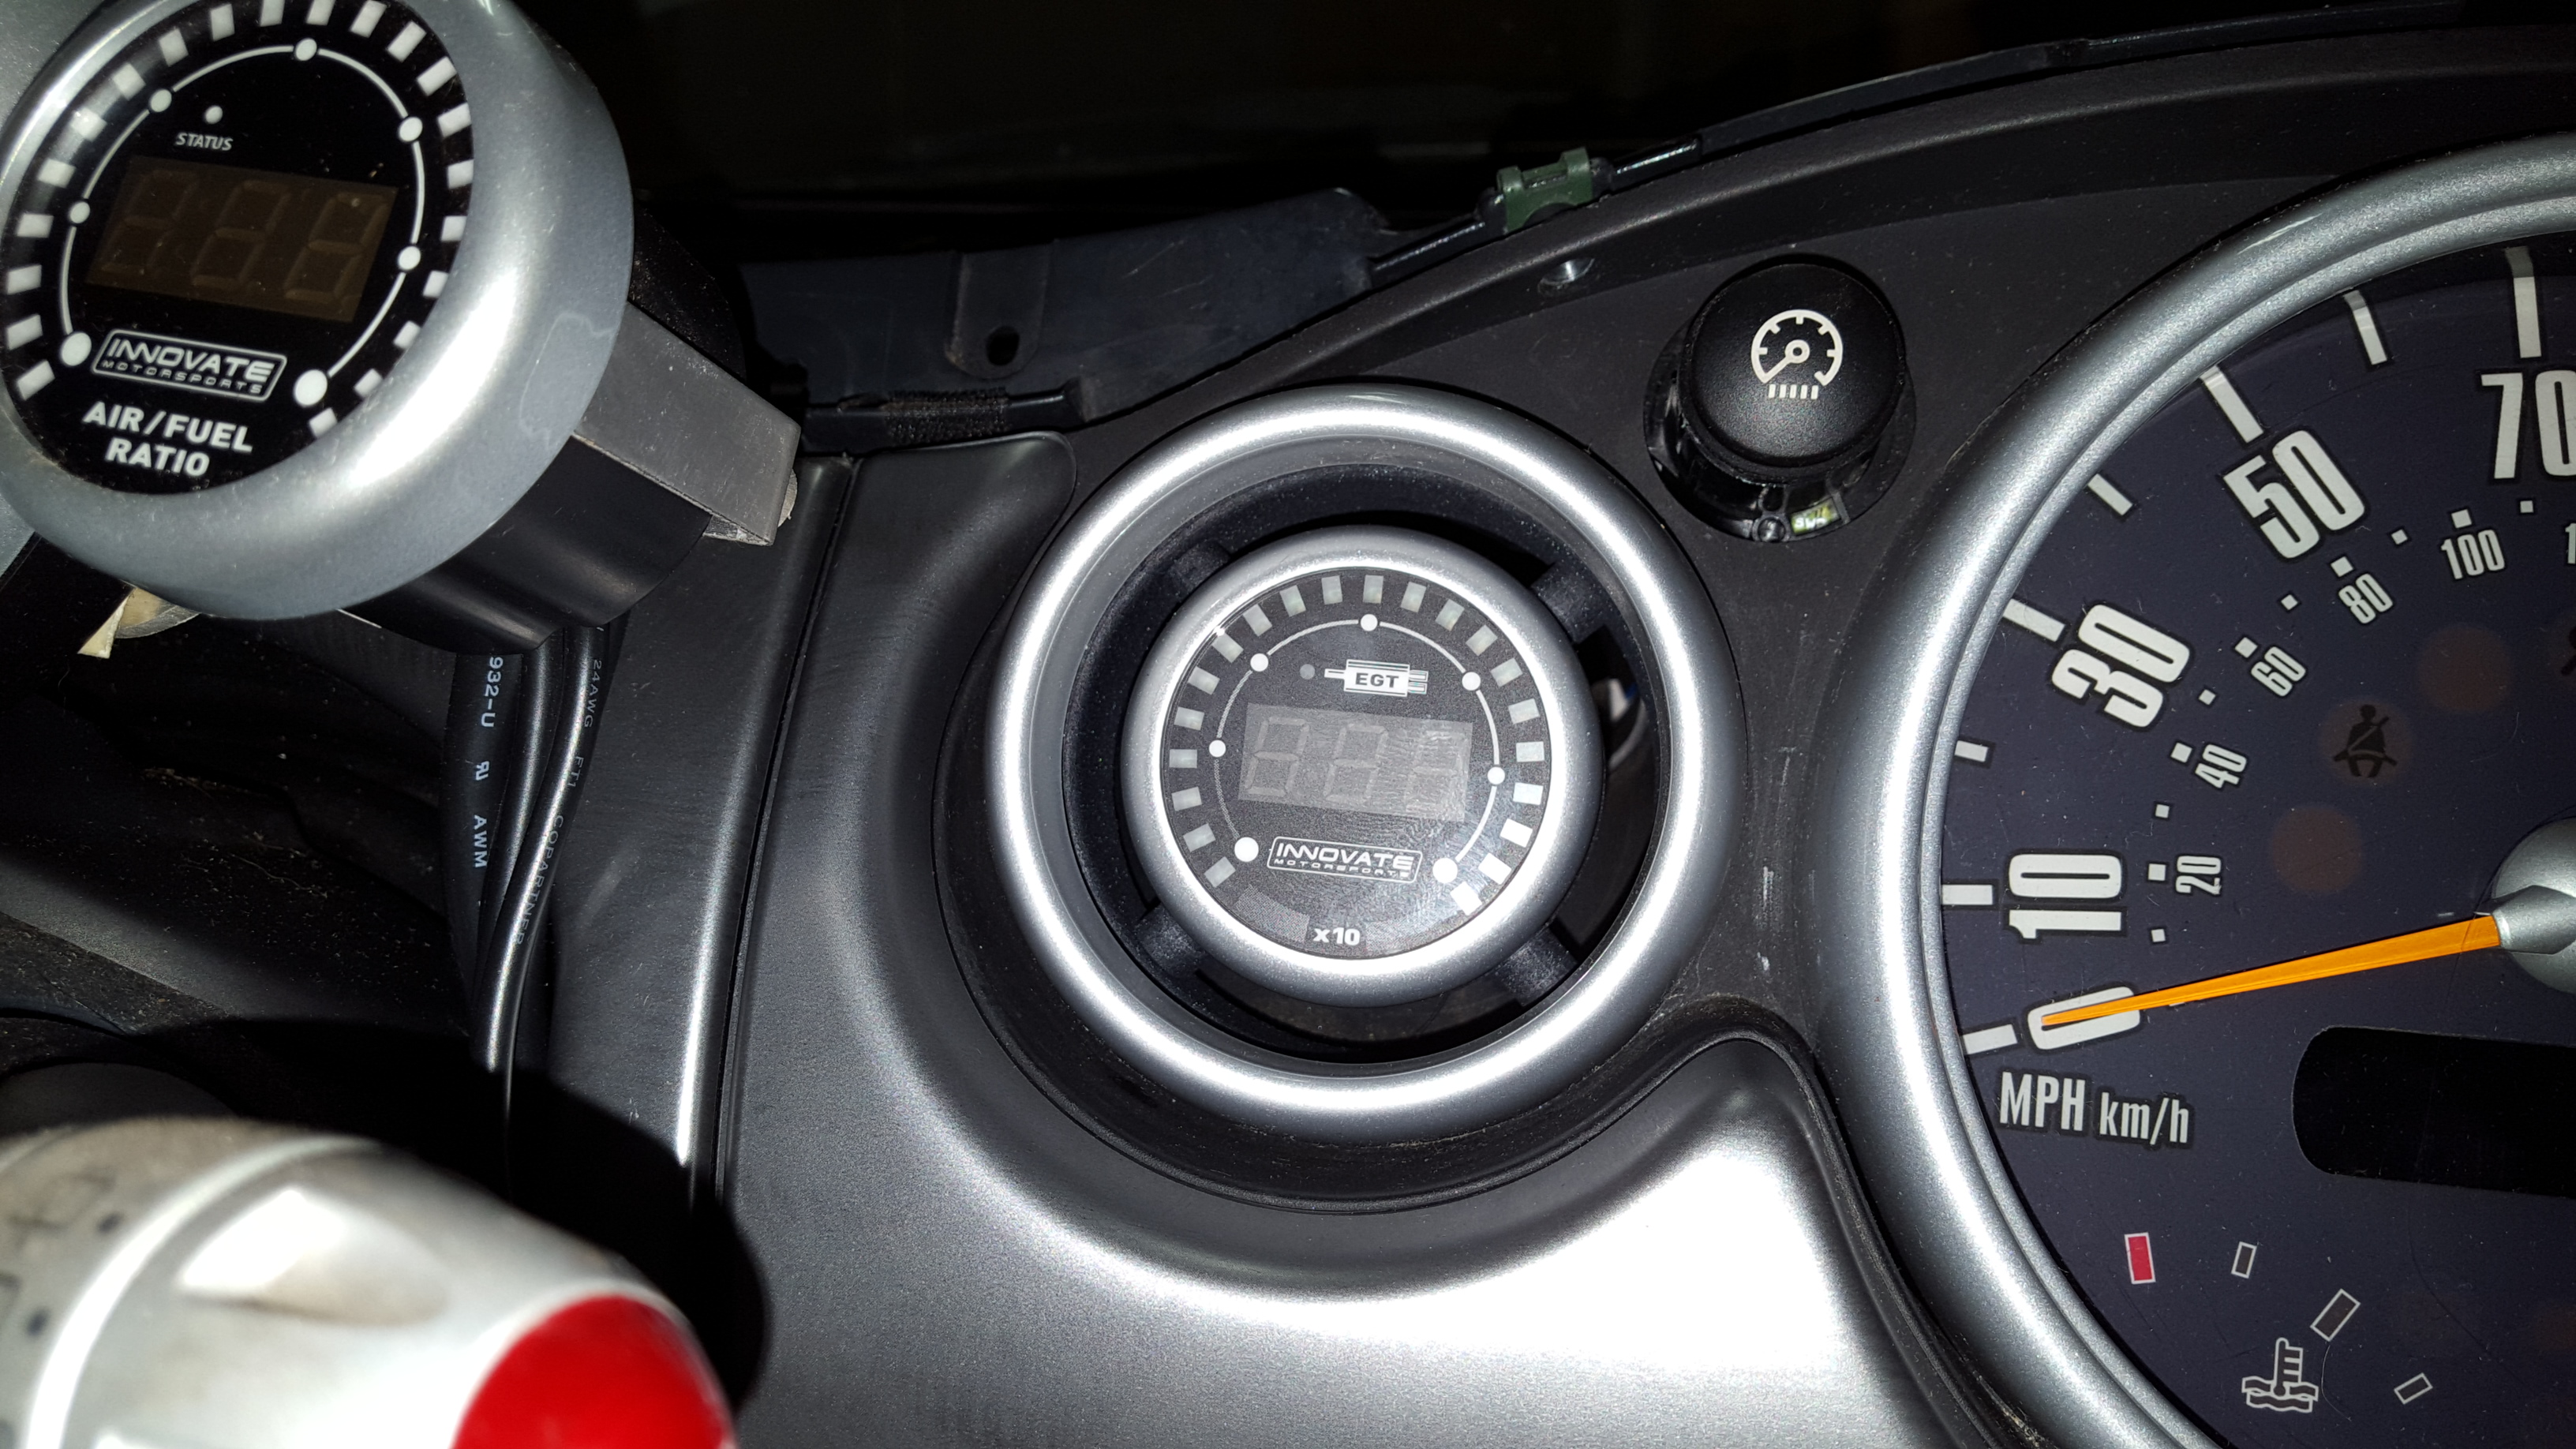
OD of gauge to OD of mounting ring
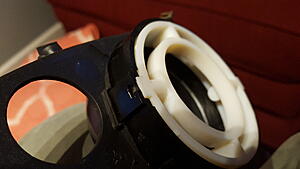
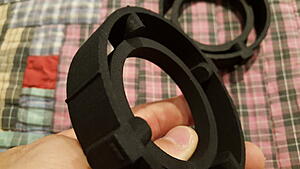
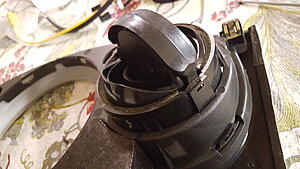
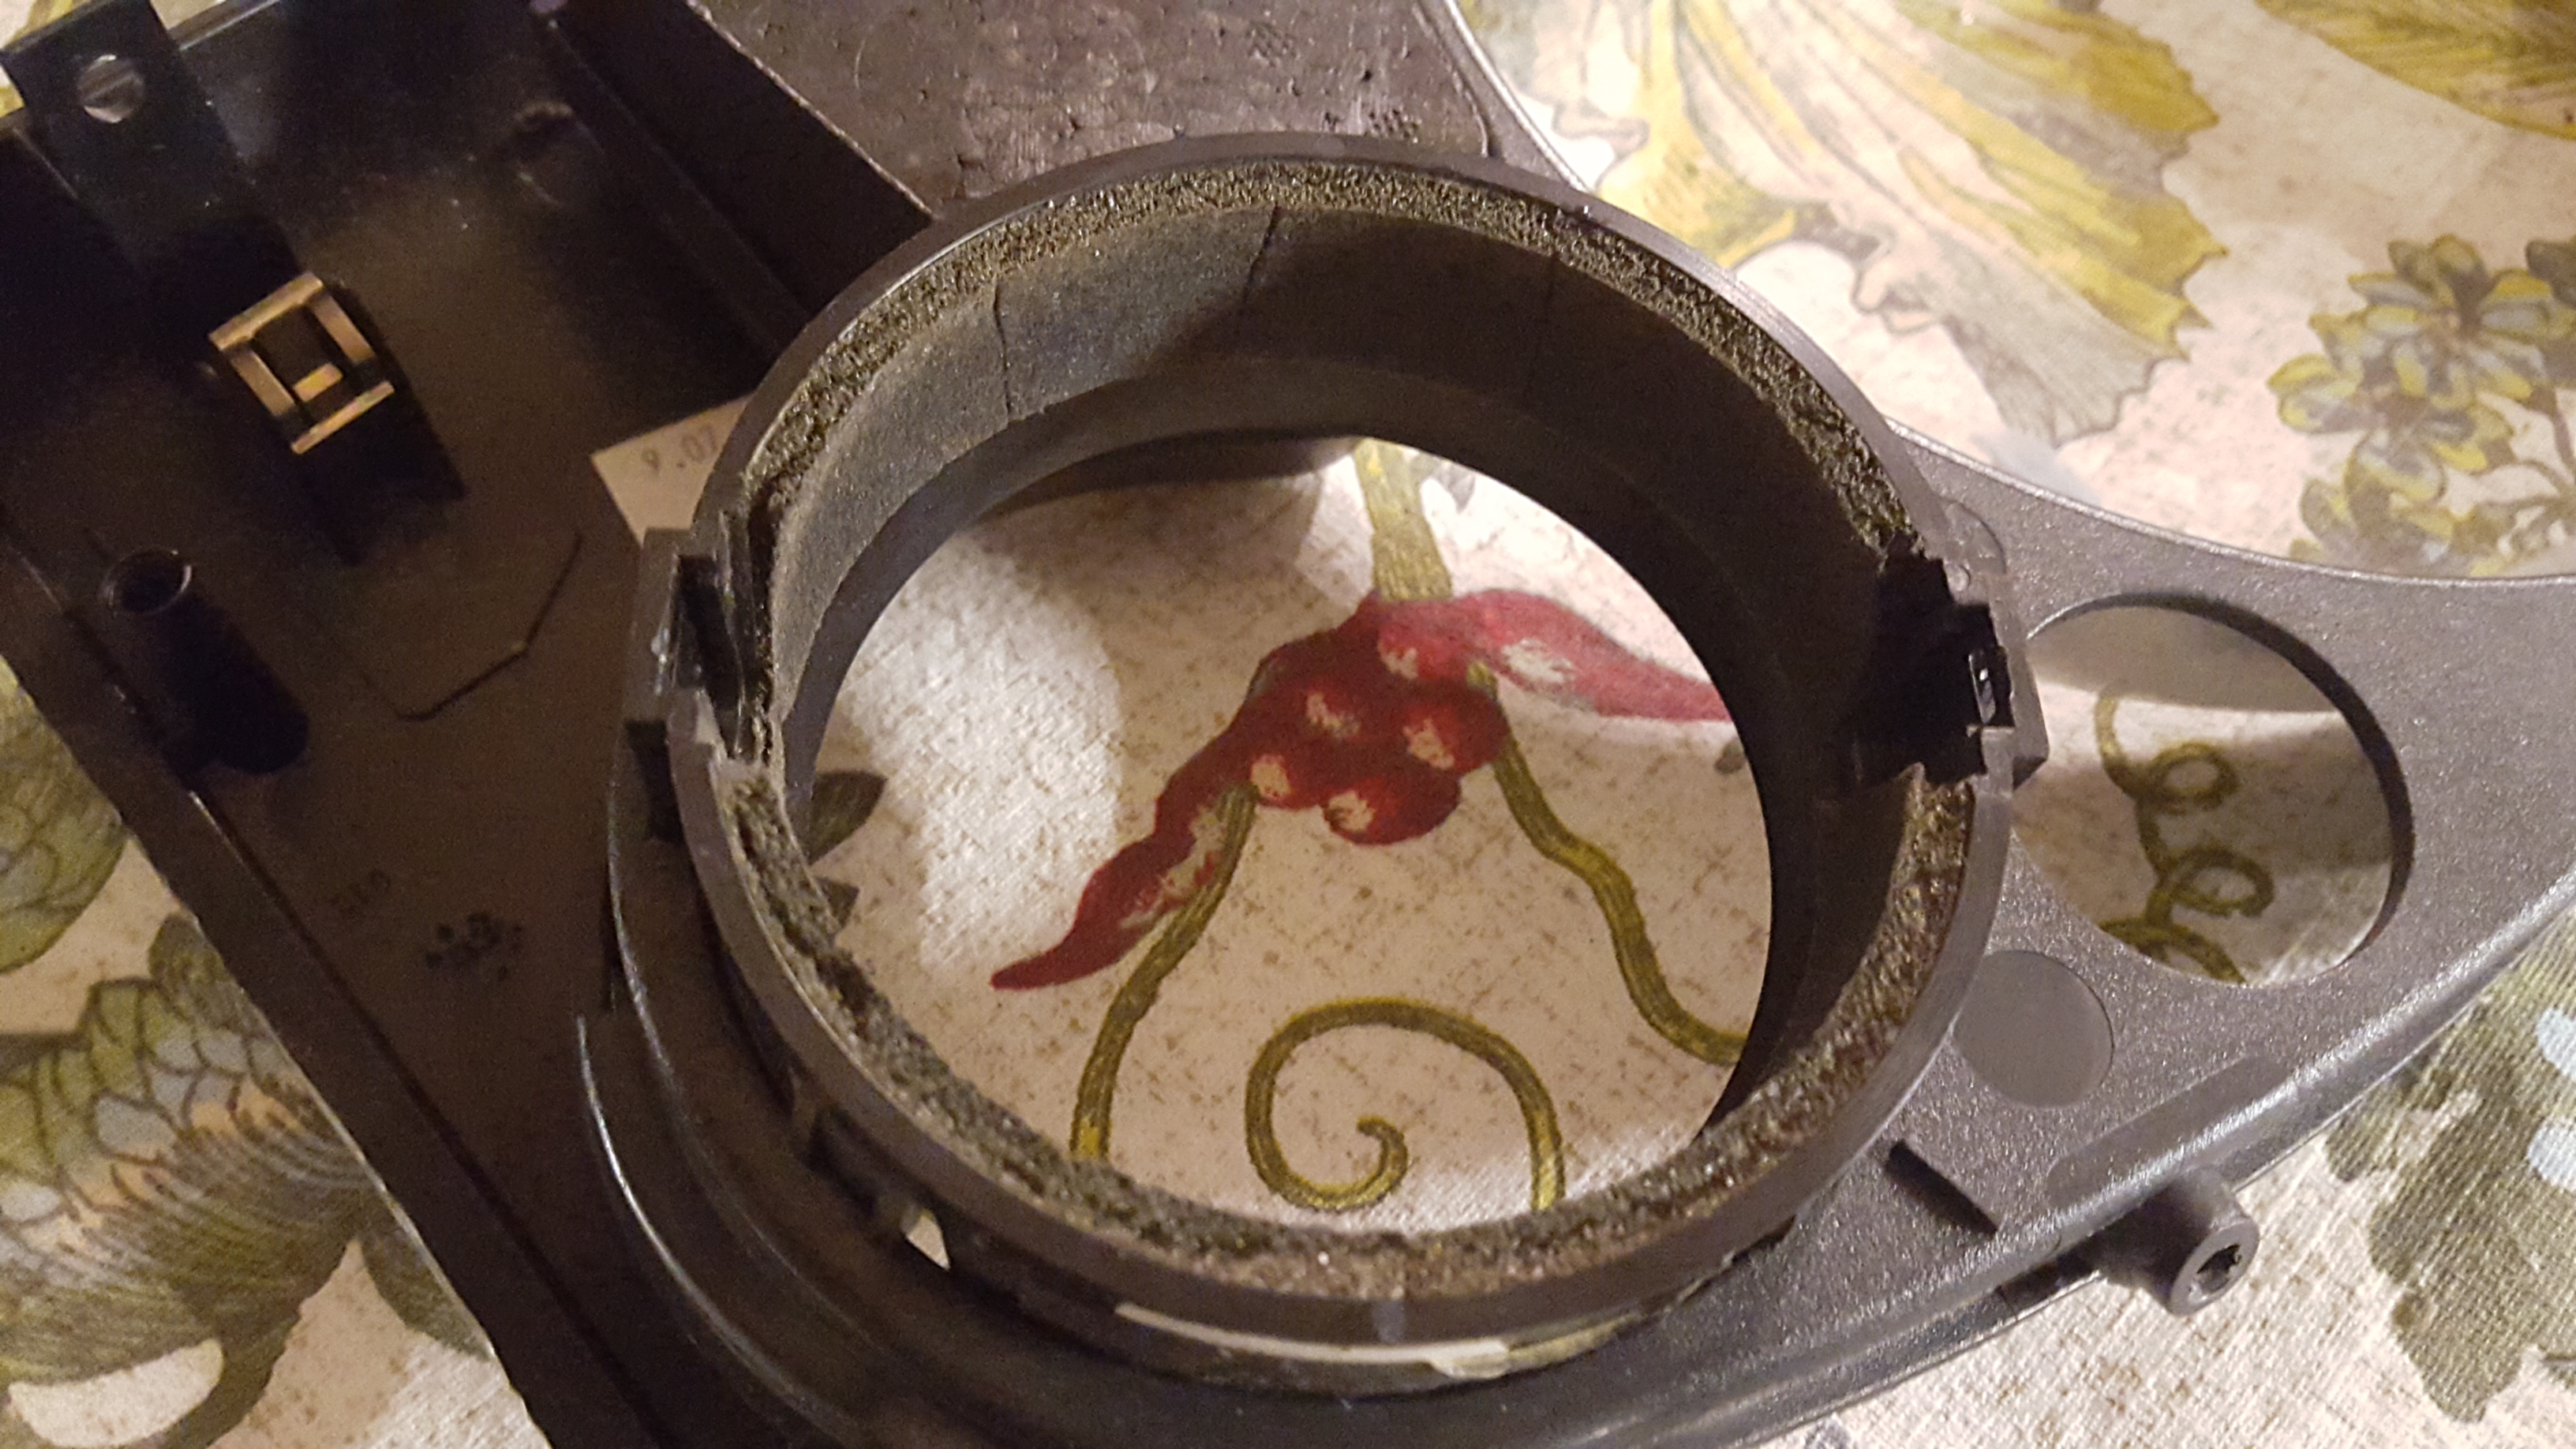
one of the two clips that needs to be un-done.
I unclipped these by wiggling in a small, sharpened (slighly) flat head screw driver until between the gimbal housing and the gimble mechanism until it was in just far enough to pry ever so slighly, and then eased the gimbal out of it's housing.
Did it one side at a time. Thankfully the gimbal is flexible enough to make this easy-ish (if you are careful.. if not you will crack the housing)
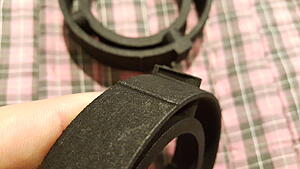
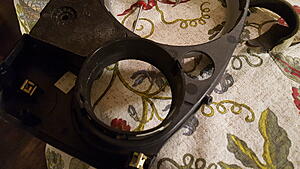
donor housing:
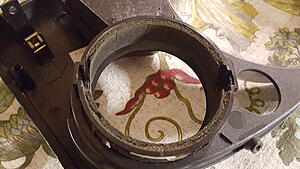
if you can get an edge of the adheesive peeled up, the foam comes off fairly mess free and pretty easily. took less than 2 minutes / gauge to clean them up.
I'm the mechanic in my circle of friends, I'll send my buddy with the printer the link, he's the tech guru, let him see what he can work out. I might order one anyhow, that's a great price.
Nice work, soccerbummer. We decided to try printing one up too. It's PLA, not SLS nylon like the shapeways one you got, but I think it came out really nice. Both of our R53's are not here today, but we'll try installing one soon.
If it is cool with you, soccerbummer, then I would be glad to print and ship them for $20. Black is an obvious choice but I have every color under the sun in PLA.
If there was a massive market for them still I would sell them, but I don't think it is large enough to worry about that. haha!
If you would like, send me the face OD of your gauges, and the gauge housing OD, and I will adjust the size of that ring so they line up nicely (if you care about such things)
If you are happy with it as-is, then no worries!
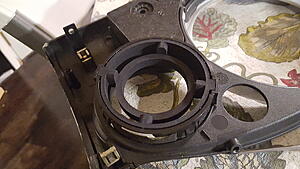
Side note: The factory housings are made from ABS plastic.
Should they crack where this new piece is supposed to go in when you remove the gimbal, you can "glue" them back together with acetone, some light pressure, and then let it sit overnight.
Just put acetone onto the joint seam (use a small syringe if you have one. The acetone will actually melt the abs!) and then push the two sides of the crack together. Make sure the acetone gets into the joint crack.
After you have it lightly held together for 24 hours you should be able to clean it up with a little piece of square metal. (some of the melted plastic may have squished out ever so slightly, but it usually scrapes off pretty easily... I used a metal spoon this time I think...)
Nice work, soccerbummer. We decided to try printing one up too. It's PLA, not SLS nylon like the shapeways one you got, but I think it came out really nice. Both of our R53's are not here today, but we'll try installing one soon.
-=Kellen
Looks pretty decent.
We have a FDM machine at work (Fortus 400 MC by Stratasys), but I didn't think some of the detail would come out as nicely as my minimum z height was .005" for that machine, and we usually have it on a .010 slice.
Let me know how the install goes! I just went with the SLS for the dimensional accuracy of the lock tab and the thin fins on the side of the housing.
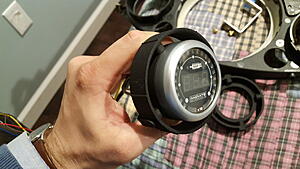
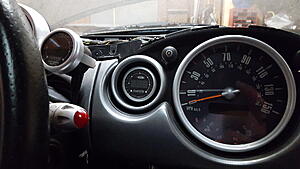
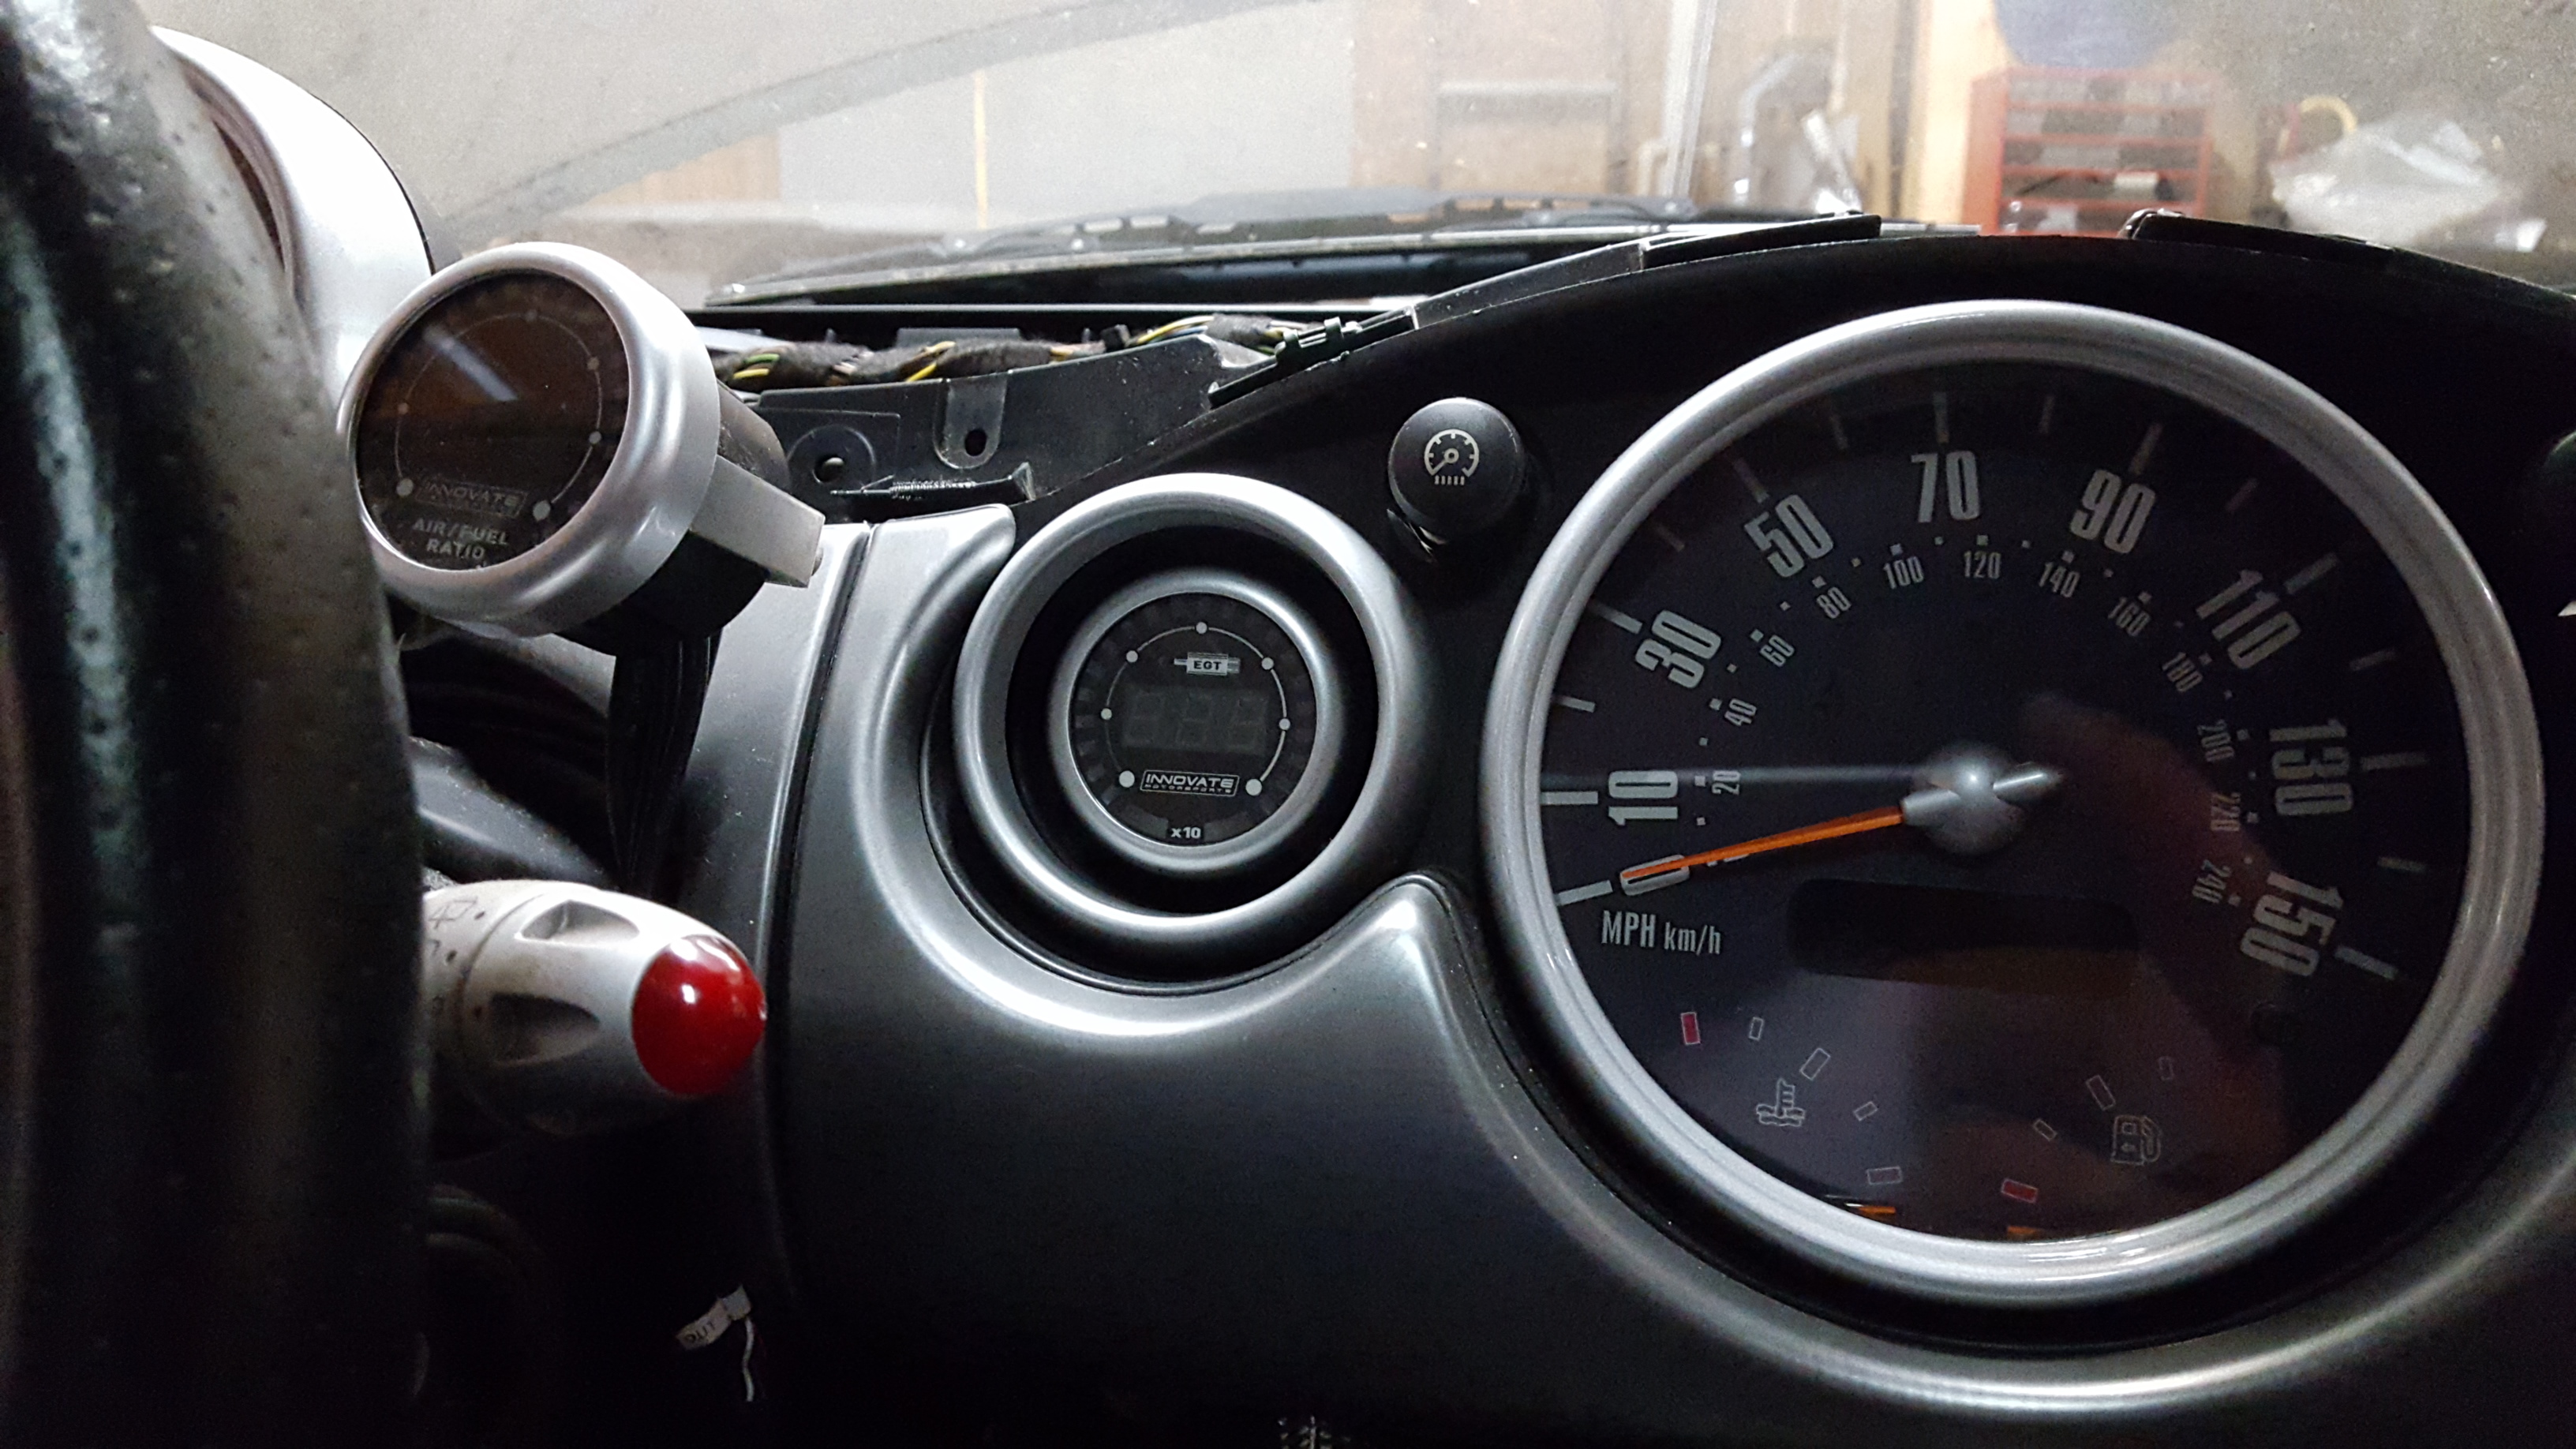
Oh, and note: the spars on the gauge will be at ~�45, so you will want to clock your gauge before you install everything behind the dash
I ordered one from Shapeways early last week and surprisingly it showed up super quick! So far the mount looks nice. I'll post some pictures of it installed once its nice enough out to work on the car.
I ordered one from Shapeways early last week and surprisingly it showed up super quick! So far the mount looks nice. I'll post some pictures of it installed once its nice enough out to work on the car.
Just to make things a little easier, the vent can be removed without removing the dash. Just follow the instructions on the first part of this link. http://www.p3cars.com/content/pdf/r53-car.pdf
After removal, the gimbal section can be removed as per the instructions in this thread.
Ok, I'm definitely interested in getting one of these puppies! Does anyone have detailed instructions on how to install a mechanical boost gauge, I may have overlooked it during my search. I especially need instruction on wire routing with this mounting location.
Ok, I'm definitely interested in getting one of these puppies! Does anyone have detailed instructions on how to install a mechanical boost gauge, I may have overlooked it during my search. I especially need instruction on wire routing with this mounting location.
you just have to drill a hole in the vent. I did it with forsner bits, and that is what i would recommend.
use judgement, needs to be far back enough that the wires wont have to kink at a funny angle getting through.
if you want seals, then you also need to plan accordingly with grommets. You can get them from mcmaster.
holes also need to be large enough to fit whatever ends need to go through them (duh) and as for wire routing... it comes out under the dash? Sorry. Dont know how to help you here. You run it like you would run any other wire. Avoid things that it would inhibit movement of, and zip tie them out of the way? I like to use adheesive backed cable tie bases to mount onto flat surfaces, and zip tie edje clips for next to thin pannels, and fir tree clips of holes are available or you feel like drilling.
sorry, but at this point, cutting into factory components that is, i think some self guidance, judgement, and hand skills are needed. It should be fairly self explanatory, and if its not, it may not be something that should be attempted.
if you have done mechanical and electrical plumbing and problemsolving before, this should be a cakewalk.
if not, its a good place to learn. Think through steps k�eping the finished product in mind the whole way. When drilling, treat it like a firearm (what is behind your target?) And plan your wiring rout.
i also suggest removing the knee tray? Whatever the thing that flips doen under the dash is called. It comes out with some fenageling and makes working under the dash easier.
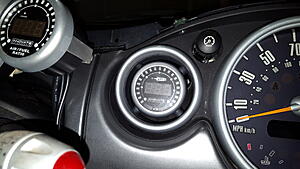
I have these exact rings installed in my vents and i'm very happy with them!
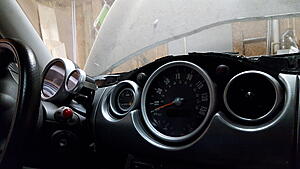
Still have the possibility to use the AC/heater and have one of the most OEM-like looks without any annoying pillar pod madness.
They're also top quality, so i can recommend them to anyone
I have these exact rings installed in my vents and i'm very happy with them!
Still have the possibility to use the AC/heater and have one of the most OEM-like looks without any annoying pillar pod madness.
They're also top quality, so i can recommend them to anyone
Yes, i really love it, at night it's really nice when the gauges have the same red/orange background light.
The only thing i'd like is the Mini OEM style trim: white background with black characters instead of the way it is now.
I could also change the existing speedometer and rev counter to GP style and leave the boost gauge as is :D it would involve quite some work...
Maybe a bit late to reply on this post, but I just saw this on instagram and started googling and it got me here.
The link to shape ways isn't working anymore... Could you maybe if you do still have it though, send me the .STL file? I have a printer of my own and would love to ad this to my R53!