
Interior/Exterior Good times with 3M carbon vinyl - PICS


1st Gear
Joined: Jul 2009
Posts: 24
Likes: 0
From: Santa Monica
I've wrap my roof rack and it's actually easier than other parts. I removed it and started on the underside, it's flat. I did have vinyl long enough so I section it off. It looks way better as on strip, still looks good with two strips but up close you can see it. I'm a novice doing it, but with a lot of practice and a heat gun, you will get better with time.
If you have someone to help, you can apply one strip all the way across without any crease, one person hold the vinyl straight the other scrap the air bubble out. If you don't have another person to help, just do half way at a time. Good luck, it does make the car look better in my opinion.
If you have someone to help, you can apply one strip all the way across without any crease, one person hold the vinyl straight the other scrap the air bubble out. If you don't have another person to help, just do half way at a time. Good luck, it does make the car look better in my opinion.
I ordered a sample from 3M and spent some time on their youtube page watching videos last night... I think I'm going to give it a shot once I practice a bit with the samples.
Hey not to side track, but does your MINI have bike attachments (or some kind of attachments) on the rack and a side mount front license plate?
I think I may have been behind you yesterday, turning left on to Michigan in Santa Monica. If it was, your MINI looks awesome and is what inspired me to start looking into how to do this stuff myself.
1st Gear
Joined: Jul 2009
Posts: 24
Likes: 0
From: Santa Monica
dez,
Thank you for the compliments. That was me. I thought that might have been you, your car is one of the best looking blacked out MINI around town. I have a surf board attachment on top of the rack. I wrap some of the chrome/silver parts on it too. Looks better with no silver showing
Thank you for the compliments. That was me. I thought that might have been you, your car is one of the best looking blacked out MINI around town. I have a surf board attachment on top of the rack. I wrap some of the chrome/silver parts on it too. Looks better with no silver showing

thx to your as well... hopefully it will look a little better with some vinyl

Thread Starter
|
3rd Gear
Joined: Mar 2011
Posts: 279
Likes: 1
From: Simi Valley, CA
wow, this thread is great... nice work Nate!
I am trying to man up and try some of this wrapping myself. I have seen another MINI with the roof rack wrapped out here on the westside and it looks sweet!!!
My rack is now is 4+ years old and faded and could use an update...
Do you have any pointers for wrapping the rack? Did you wrap it off the car or on? Was there one piece of vinyl that spans the entire cross bar or did you have to piece it together?
Thanks again for such and awesome thread
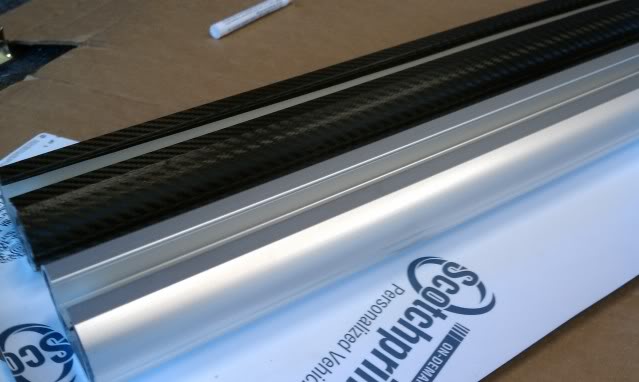
MrT offered some good suggestions. In the picture you can see that I removed the cross bars and wrapped them each in a single piece. Before I peeled the backing I folded the vinyl in half to create a center line. I also drew a pencil line down the center of the bottom of the cross bars. When I peeled the backing off I was still able to see the crease, then I carefully laid the cross bars on the vinyl, making sure that both pencil lines were lined up with the crease. From there I flipped the cross bar over and began smoothing everything toward the top channel. I had excess on the sides and in the channel that I trimmed at the end. To wrap the vinyl into the channel I used a "L" shaped feeler guage to get a tight fit.
Good luck. Vinyl is all about practice and patience.


The only trouble I had was figuring out a way to cleanly finish it off. Obviously, the vinyl wouldnt cleanly stretch over it, so I just kinda winged it and made a cut and sorta overlapped two pieces.
Its not perfect, but you will only really notice with when you have your finger back there.
I have a sheet of the Di-noc vinyl as well, wondering if I should use that on my mirror caps, or order more 1080 and keep it consistent.
Its not perfect, but you will only really notice with when you have your finger back there.
I have a sheet of the Di-noc vinyl as well, wondering if I should use that on my mirror caps, or order more 1080 and keep it consistent.
Thread Starter
|
3rd Gear
Joined: Mar 2011
Posts: 279
Likes: 1
From: Simi Valley, CA


3rd Gear
Joined: Feb 2012
Posts: 172
Likes: 0
From: Lancaster, PA
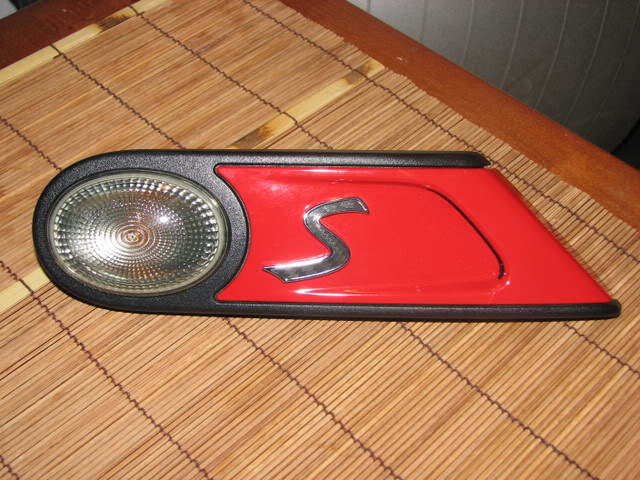
Well I ordered a sample of the carbon fiber black, light tint for my side markers and then some yellow tint to see how that looks on the fogs, but I might go the nokya route eventually. Did you prime lots of areas before applying or simply alcohol cleaned?
Thread Starter
|
3rd Gear
Joined: Mar 2011
Posts: 279
Likes: 1
From: Simi Valley, CA
IMG_2976-1.jpg?t=1325093886
I later noticed the Lyle does his scuttles in two pieces (or at least with a slit/fold near the front edge). They're hard to see but look at the top and bottom near the front vent.
Thread Starter
|
3rd Gear
Joined: Mar 2011
Posts: 279
Likes: 1
From: Simi Valley, CA
I can't seem to find the video but I'll post it if I do.
Yea, I tried laying a piece on top and just working my way down. I almost had it but then I stretched it too far and distorted the weave big time.
Gonna order some more 1080 and try again.
Gonna order some more 1080 and try again.
Thread Starter
|
3rd Gear
Joined: Mar 2011
Posts: 279
Likes: 1
From: Simi Valley, CA
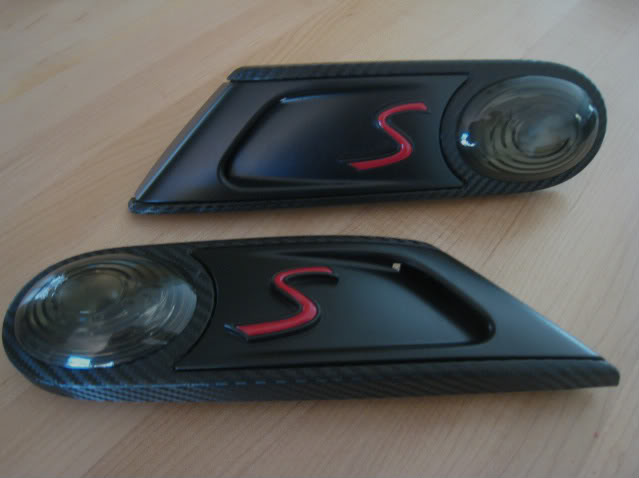
I may have used a little blow drying near the end to tuck the edges, but I did most of it at room temp. I cut a piece of tinted vinyl nearly twice the size of the marker and stretched it pretty good to begin with. I used a combination of my metal feeler gauges (pictured on page 1) and my finger nails to tuck the edges to the back side.
Speaking of technique...I stripped the plastidip off my headlight rings recently and attempted to wrap them in 3M glossy black Scotchprint. Epic fail...twice! I feel like a have a good grasp of vinyl wrapping by now but I stuffed this one. I only have enough vinyl for one ring now.
I know I can do it by leaving a small overlap seam near the bottom of the ring, but I want a single piece of perfection and I'm struggling.
One attempt was with the ring removed and placed on my workbench, the other was still mounted to the car, but with the hood propped up and away from the headlight.
If anyone has any tips for the headlight rings, please chime in!
Thread Starter
|
3rd Gear
Joined: Mar 2011
Posts: 279
Likes: 1
From: Simi Valley, CA
Latest tool added to my vinyl wrapping arsenal: standard vinyl wrapping card wrapped in "cham-wow" material.
Used 3M 90 spray adhesive to attach the fabric to the card - now I have an anti-scratch tool for those glossy vinyls.

Used 3M 90 spray adhesive to attach the fabric to the card - now I have an anti-scratch tool for those glossy vinyls.
Thread Starter
|
3rd Gear
Joined: Mar 2011
Posts: 279
Likes: 1
From: Simi Valley, CA
Thanks a lot! I'm still really happy with the CF, but I've been having a good time playing with 3M's glossy black Scotchprint lately.
Two days ago I stripped the plastidip from headlight rings and washer covers and wrapped them all in glossy black. I botched my first two attempts, but nailed it by the third. I have to say they turned out flawless and match my MB paint perfectly.
Also, I'm just about done wrapping my door sill plates in glossy black too. I recently dropped a wrench on my driver's side sill plate and it dented it pretty badly, so I puttied, sanded, and wrapped it. I would love to find a John Cooper signature decal small enough to put over the black sill plate. Thanks again for the compliments!
And the fun never ends...