
Interior/Exterior How To: Joey Mod Facelift Halogen

Thread Starter
|
5th Gear
Joined: Jan 2008
Posts: 680
Likes: 1
From: Brisbane, Australia
How To: Joey Mod Facelift Halogen
First of all thanks to those who have helped me figure out how to do this. DrPhilGandini was a great help 
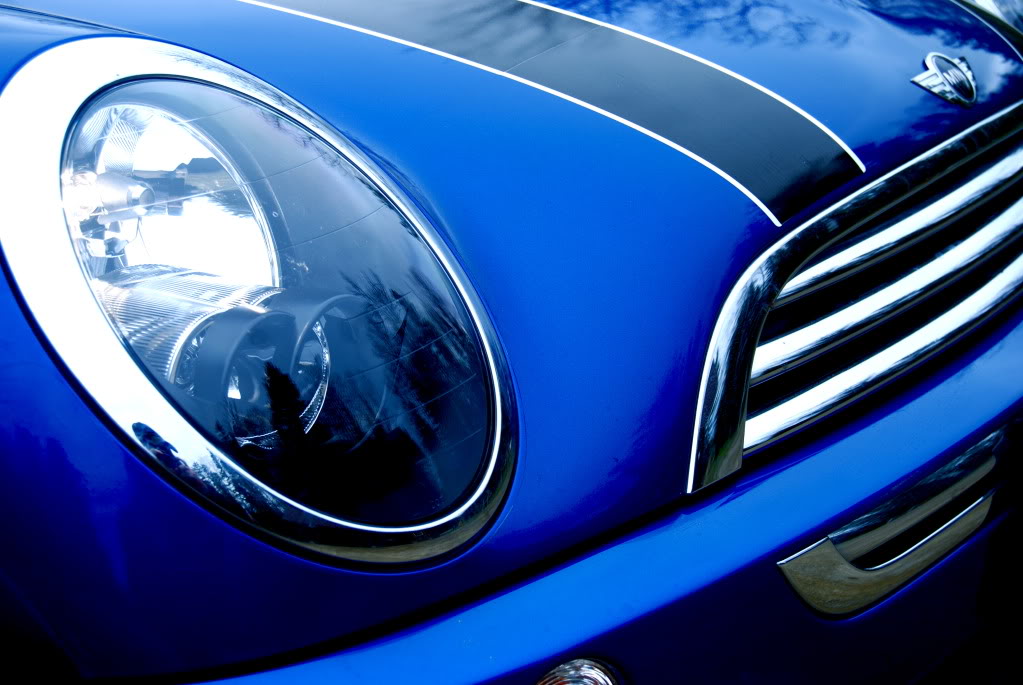
For those who are unfamiliar, a "Joey Mod" is where one paints the inside of the headlight fascia another colour, whether it be body colour or some other colour.
I have compiled together this how to for the Gen 1 facelift halogen headlights, so halogen headlights built from 2005 to the end of 2006. However this can very easily apply to other headlights. Please note that this is the "Oven-free method" and uses a heat gun instead.
WARNING: The headlights are broken open in this and have to be resealed. If you do this you do so at your own risk and I can not be held responsible; this is just to give you an idea of how to do this mod.
So what are we waiting for, lets get started.
STEP 1
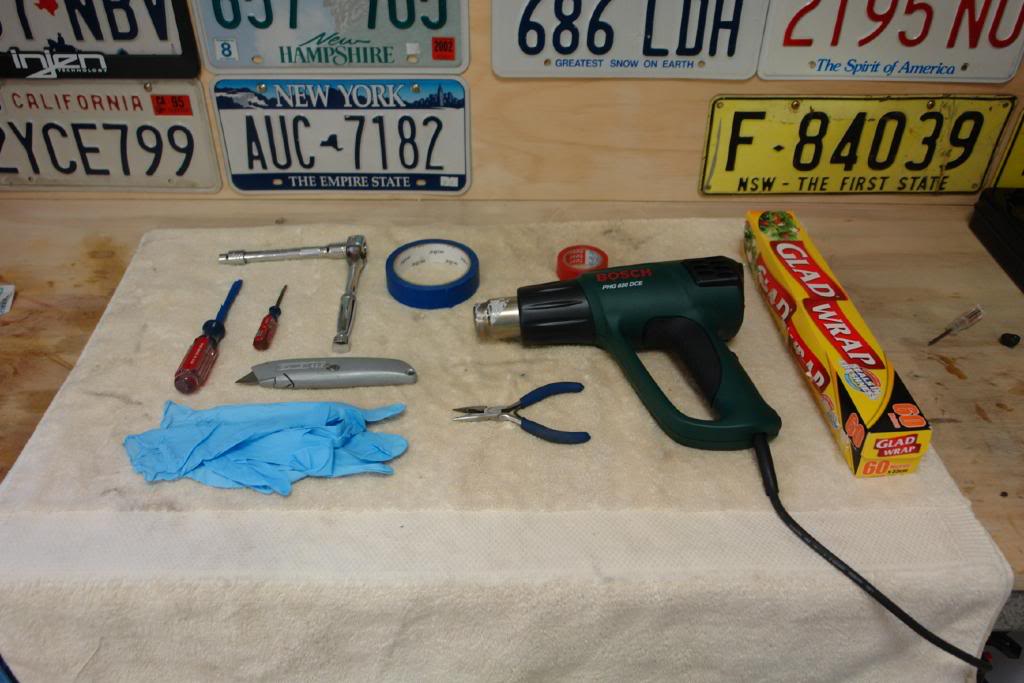
Lay out the tools you will be using now, so that when your stuck into opening up your headlight you don't have to go digging for something. I used the following:
1/8" Screwdriver
3/16" Screwdriver
8mm 12 point Hex-bit
Socket Wrench with 5" Extender
Small pliers
Stanley knife
Towel
Rubber gloves
Heat gun
Masking tape
Electrical tape
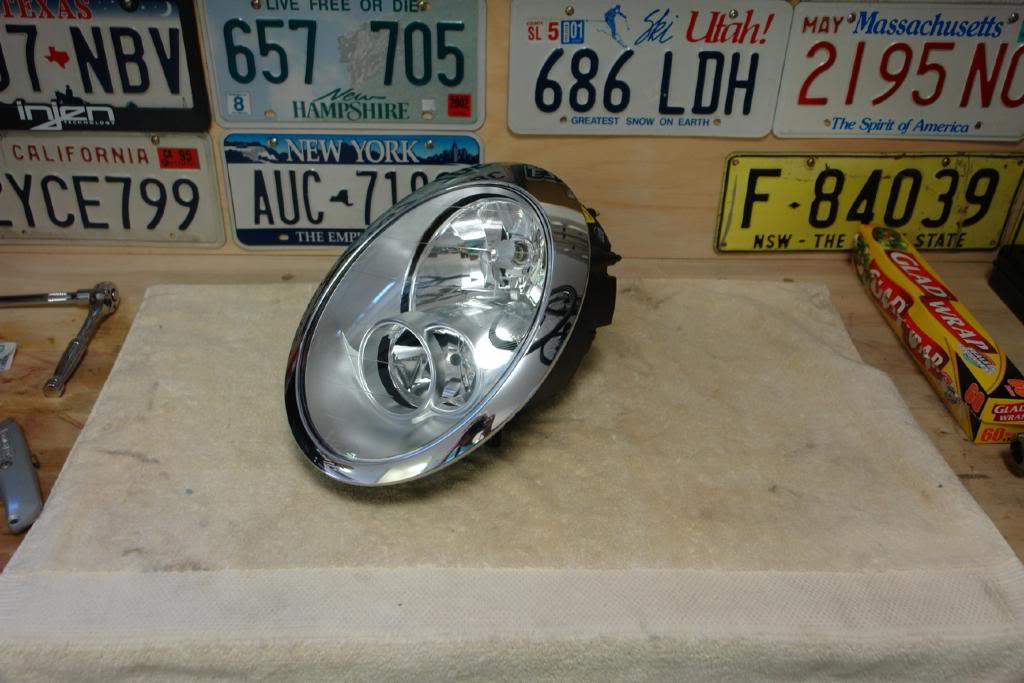
Glad wrap or non-stick paper (preferred)
STEP 2
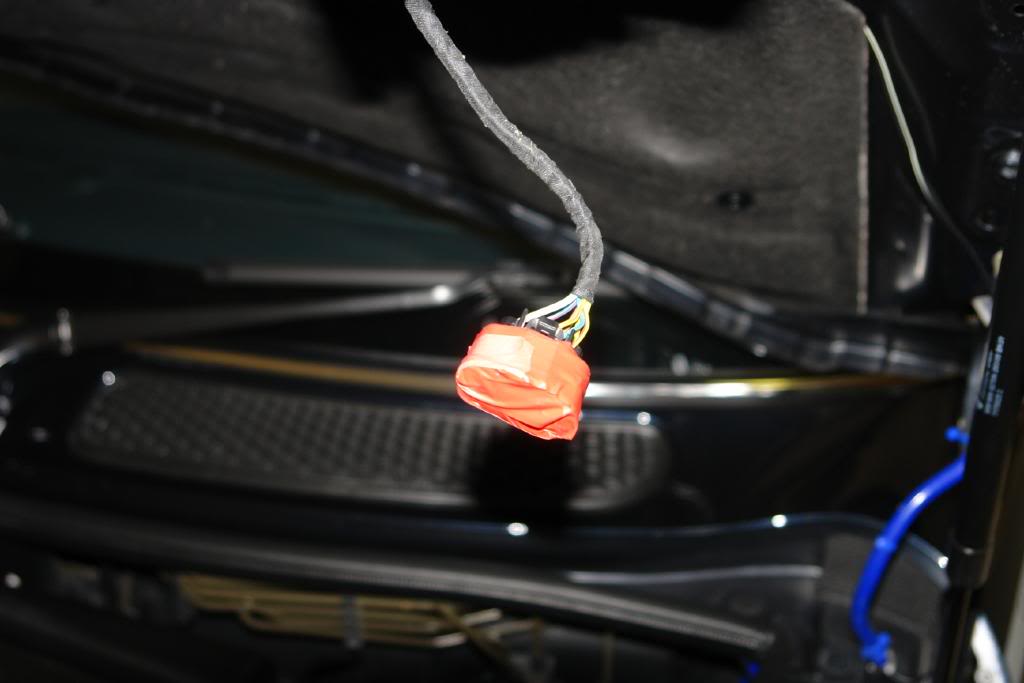
Unplug the headlight connection plug, there is a small tap that needs to be depressed on top.
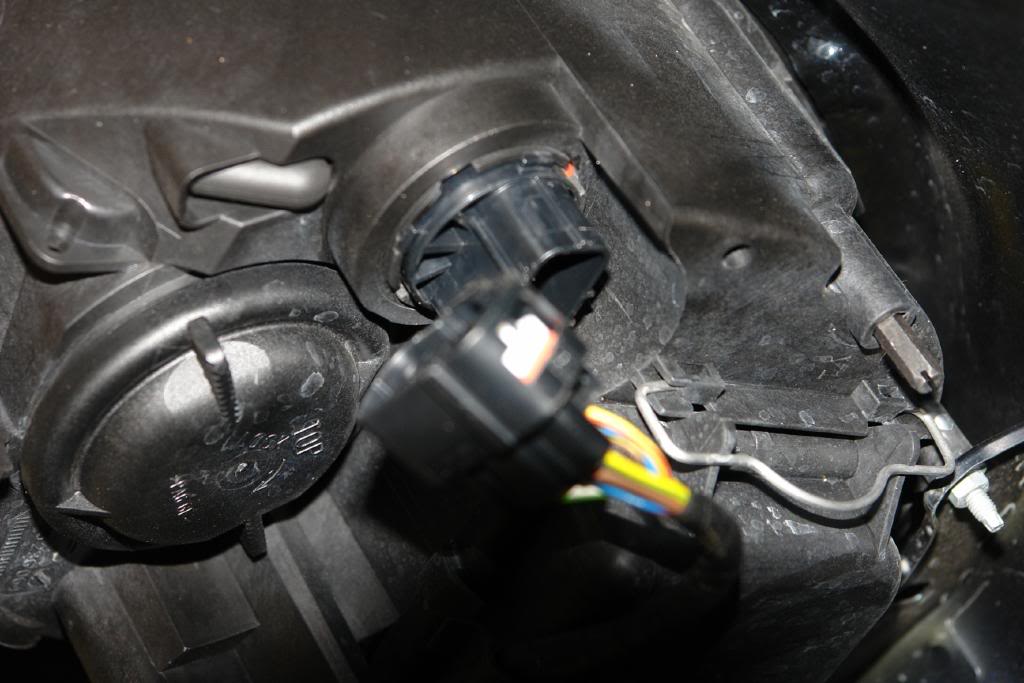
Optional:
I have taped over the connection as I will be driving to the body shop to get the headlight facia and some other parts painted.
STEP 3
Using the Socket wrench and 8mm bit remove the 3 screws holding the headlight to the bonnet.
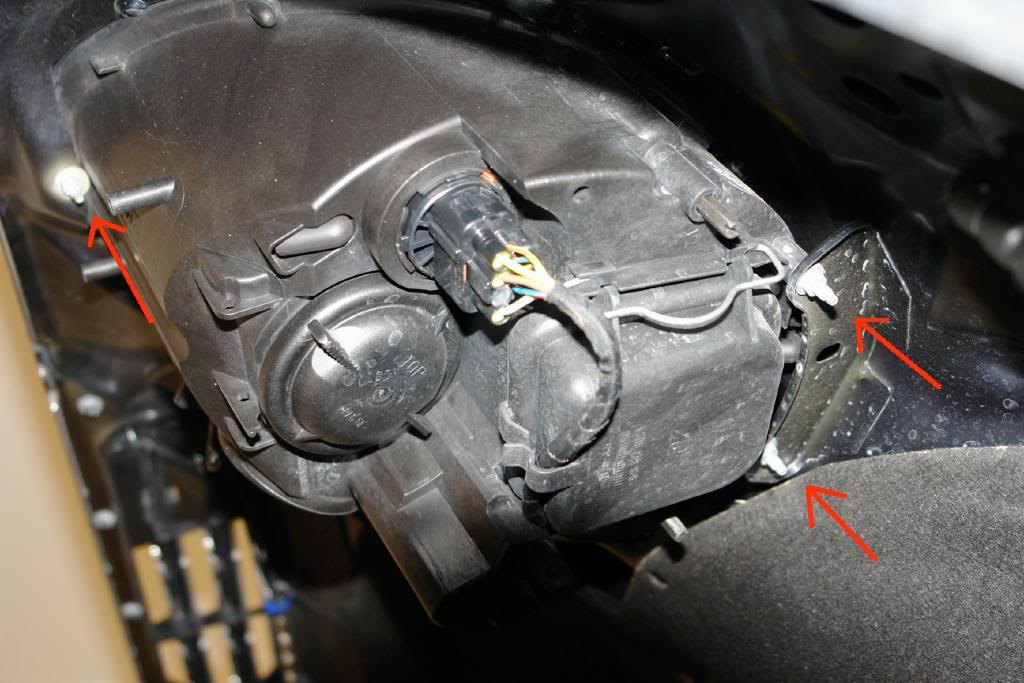

Pull the headlight straight forward gently and it will come out no problem.
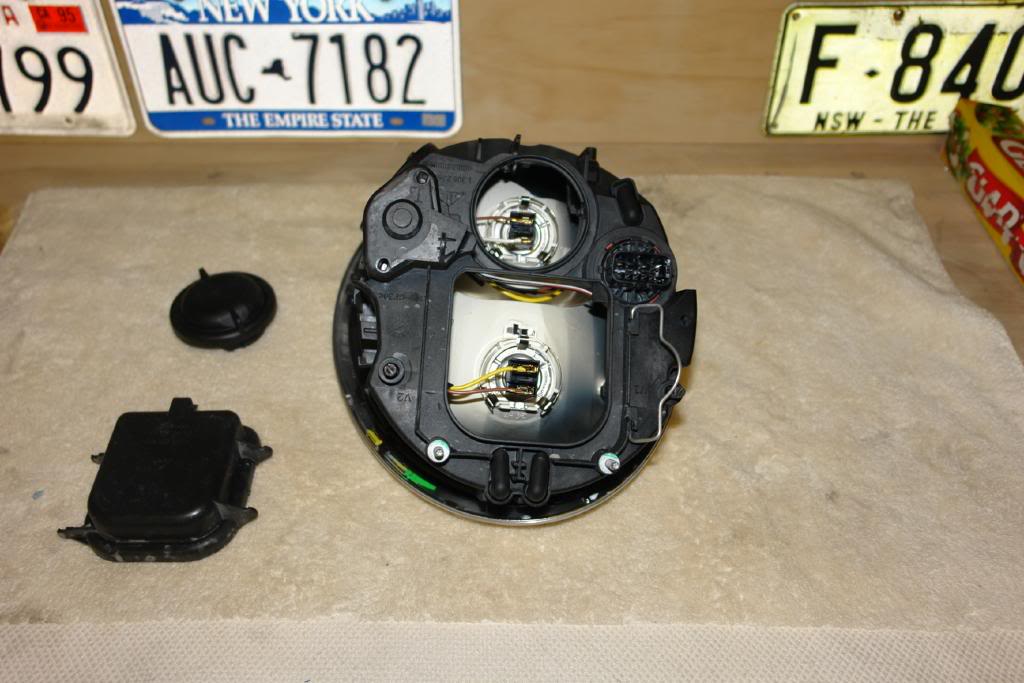
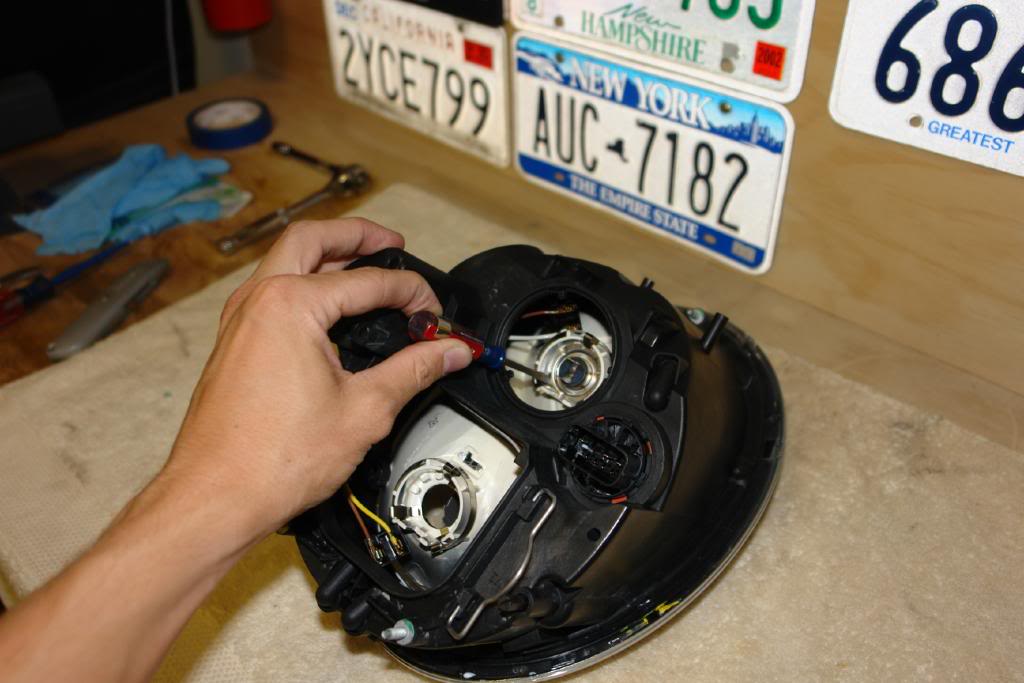
STEP 4
Remove the bulbs as a precaution so that they do not get damaged when wrangling with the headlight. This is done by removing the 2 protective covers on the back, then using the small screwdriver depress the clips holding in the bulbs.
STEP 5
Here comes the fun part.
I decided to leave on the chrome trim around the headlight as it can stay on and not affect the process.
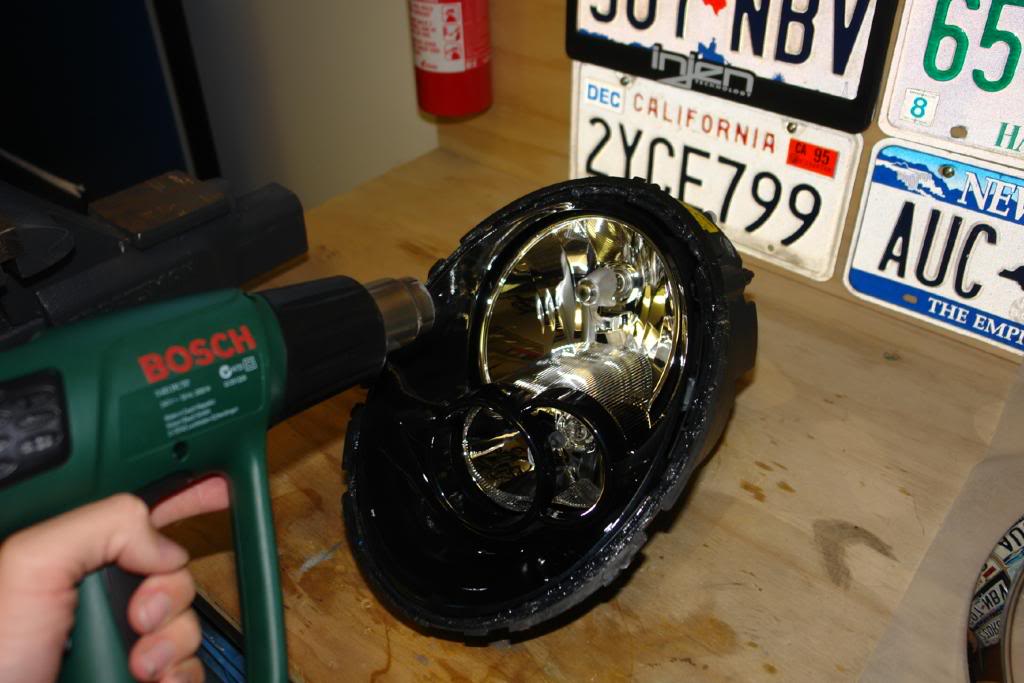
Using the heat gun heat up the area (6 inch region) you will start with. I recommend starting along the inside edge towards the bottom. (If the headlight was on the car, the part closest to the centre of the bonnet.) There will be an inch gap in the black plastic that shows this.

Heating up the area.
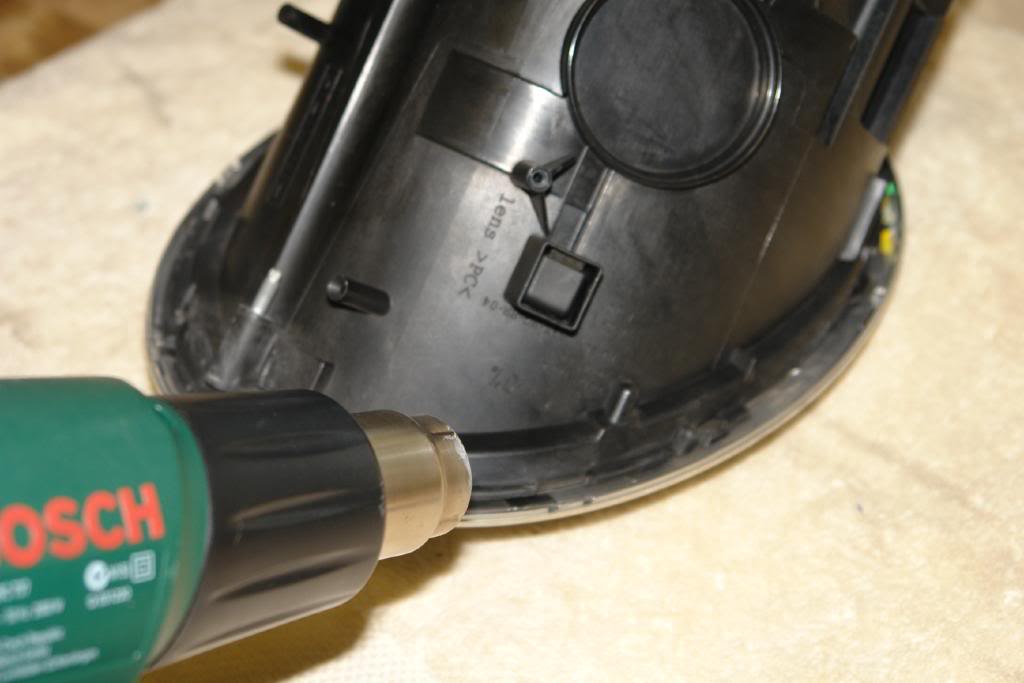
STEP 6
Prying the headlight open using a larger screwdriver which I have wrapped in tape to stop scratching. Please note that it works best if you slowly open it up with just a bit of constant pressure from the screwdriver for 30 seconds or so. This way you are less likely to break the chrome ring or anything else.

Here you can see a good portion of the headlight has been pried apart. When it does start to split you will hear a sound like bubble wrap popping, this is good. If need be use a stanley knife to cut through the black silicon which holds the headlight together.
STEP 7
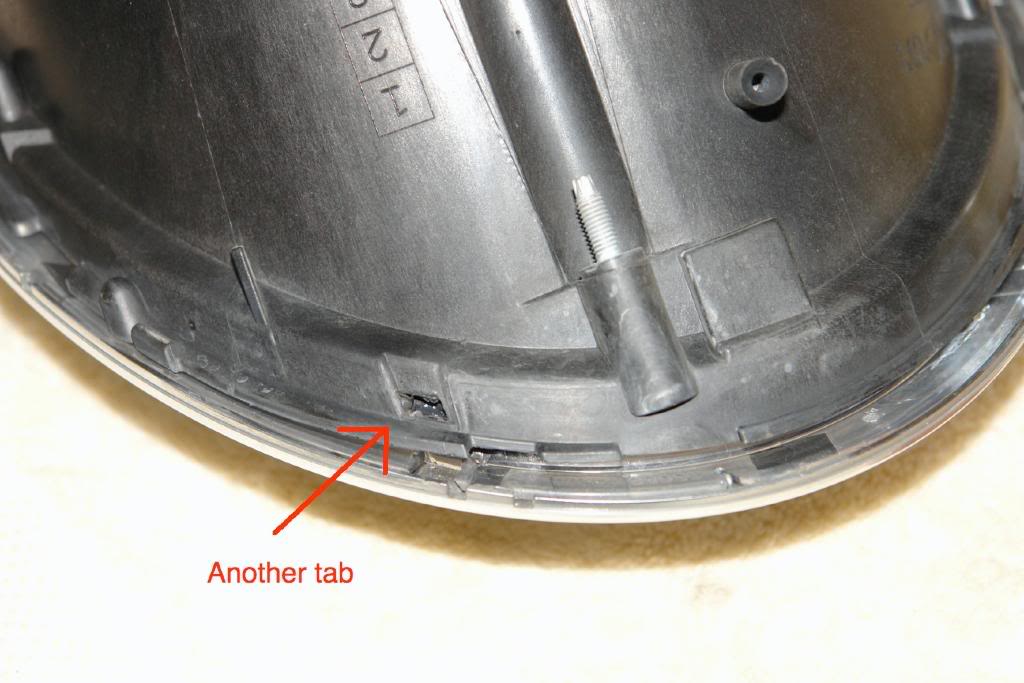
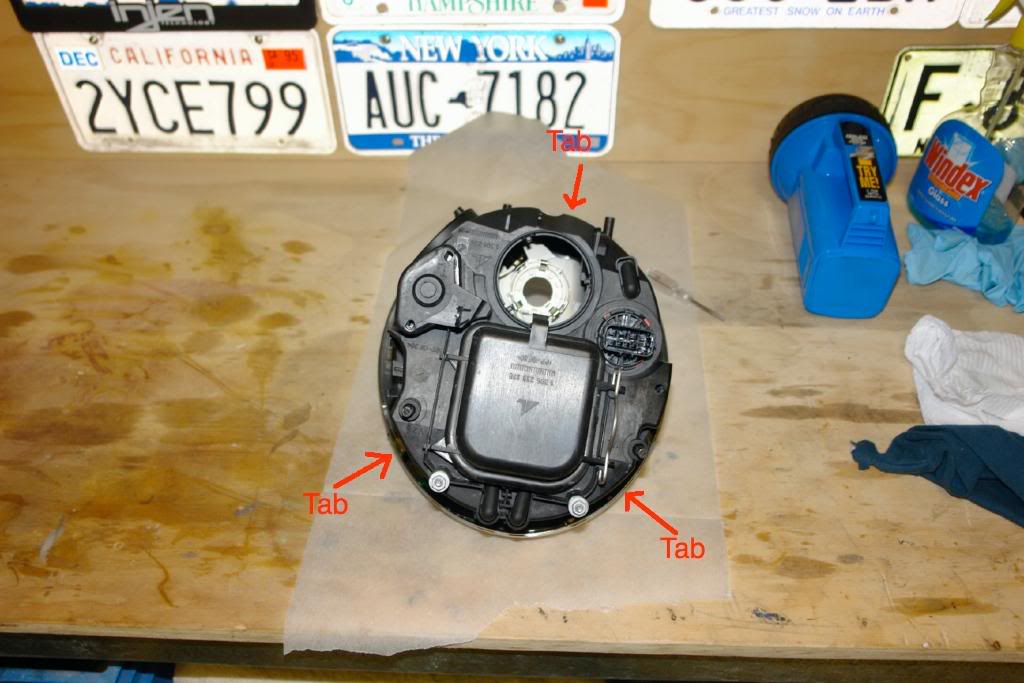
Locate the 3 tabs that hold the lens to the headlight housing. 1 is located at the bottom edge of the headlight, the other two are marked by yellow paint and are closer to the top of the headlight as seen in the photo bellow. To open these tabs, work your way to them with the heat gun. Once you have pried open the area around them use the small pliers to remove any silicon that has hardened around them. Using the small screwdriver try to push in the tab.
Note: Step 6 and 7 are done together in reality. If you try to push the tabs in before you heat the silicon they wont budge. Likewise if you try to heat the whole thing up and rip it open there is a good chance you may break the tabs. The best way to do this is to start heating the lens at one spot and work your way around the circumference. As you reach each tab push it in and move the lens away so it can not click back in. Then continue on heating and prying till you get to the next tab. (added this note on 15 Mar 2011)
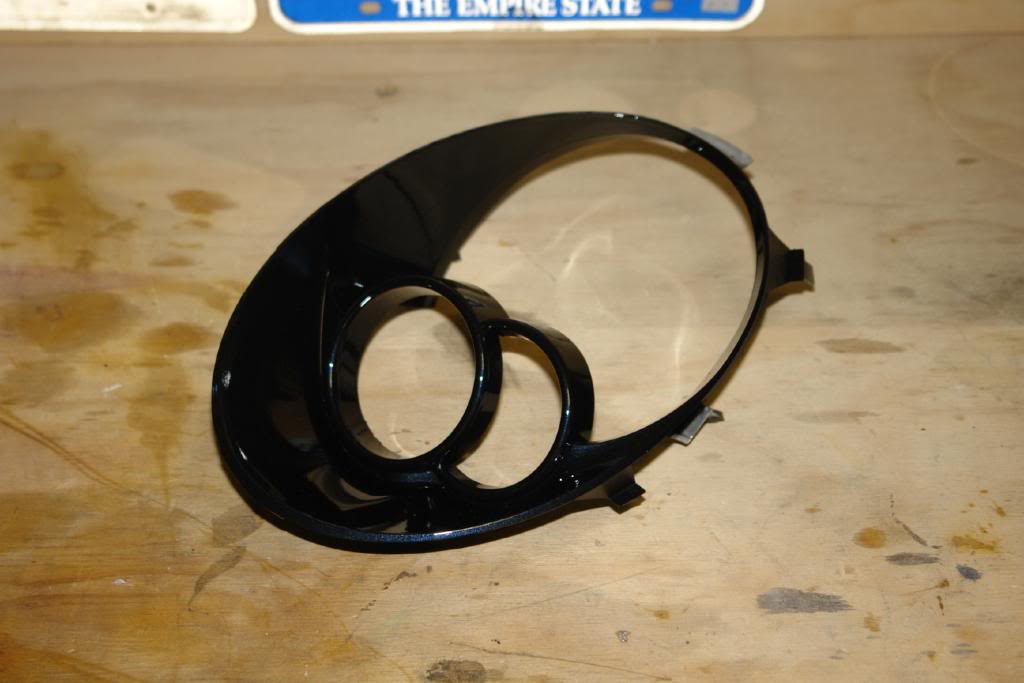
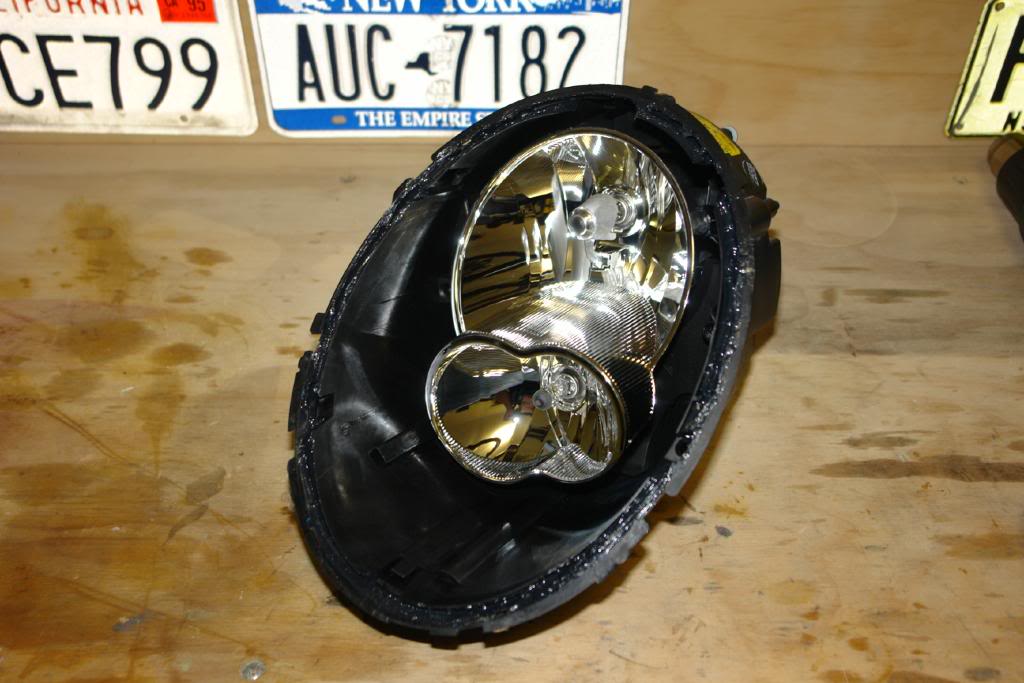
STEP 8
And there you have it, one separated headlight housing. You will find out that once you actually break the headlight open the inner fascia just falls out.
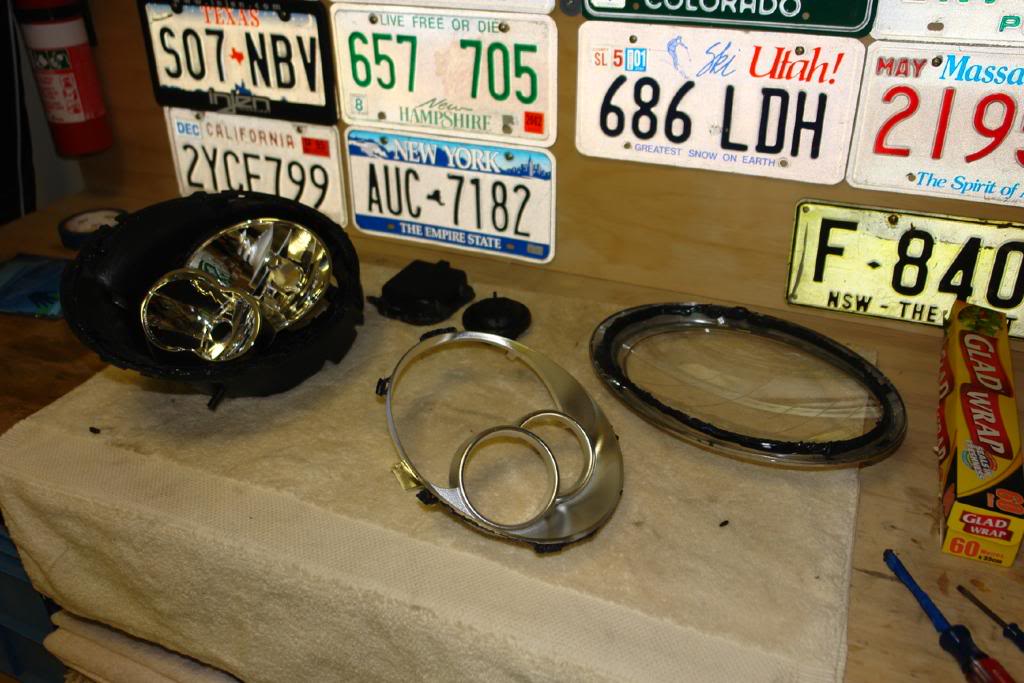
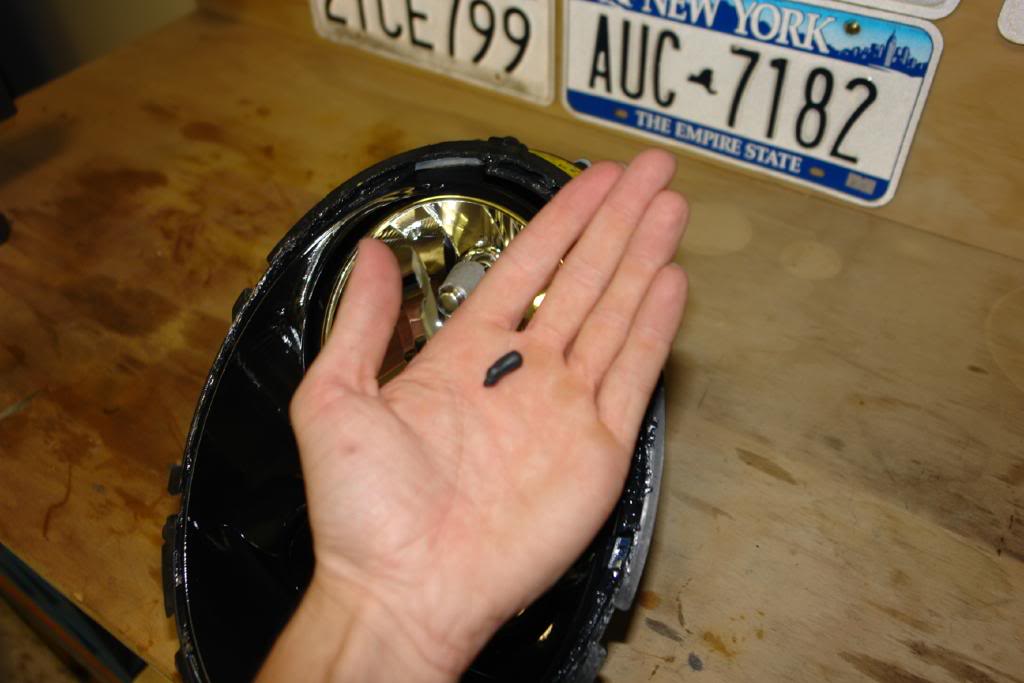
When you remove the fascia, there will be some silicon on the tabs and around the edges. Remove this by heating it up a bit and picking it off, then you can use what you have removed to "dab" the stuff still stuck on and it should pick it right off. SAVE this lil ball of silicon for later.
STEP 9
Once everything was separated I covered the inside of the lens in gladwrap so no dust or contaminants fall onto it.
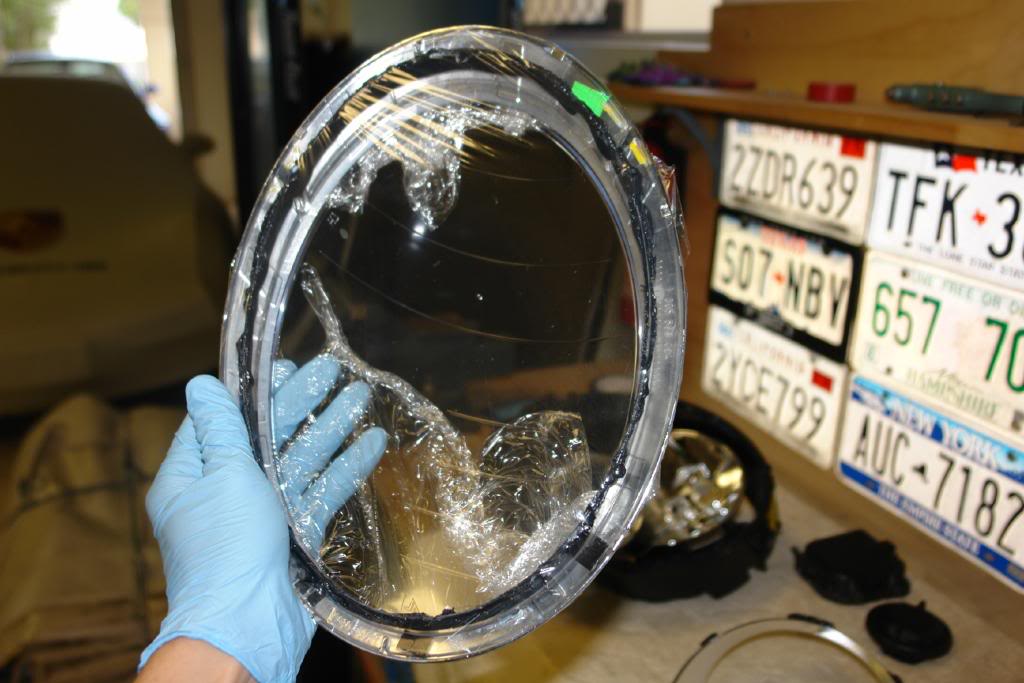
Note: The gladwrap has a tendency to stick to the silicon glue and makes it difficult to separate. To keep with the cooking concept you can use non stick cooking paper and lay the pieces on it so that the pieces all sit "silicon side down". If I were to do this again I would NOT use the gladwrap and just use the cooking paper. Takes too much effort to remove all the lil shards of gladwrap that stick to the silicon.
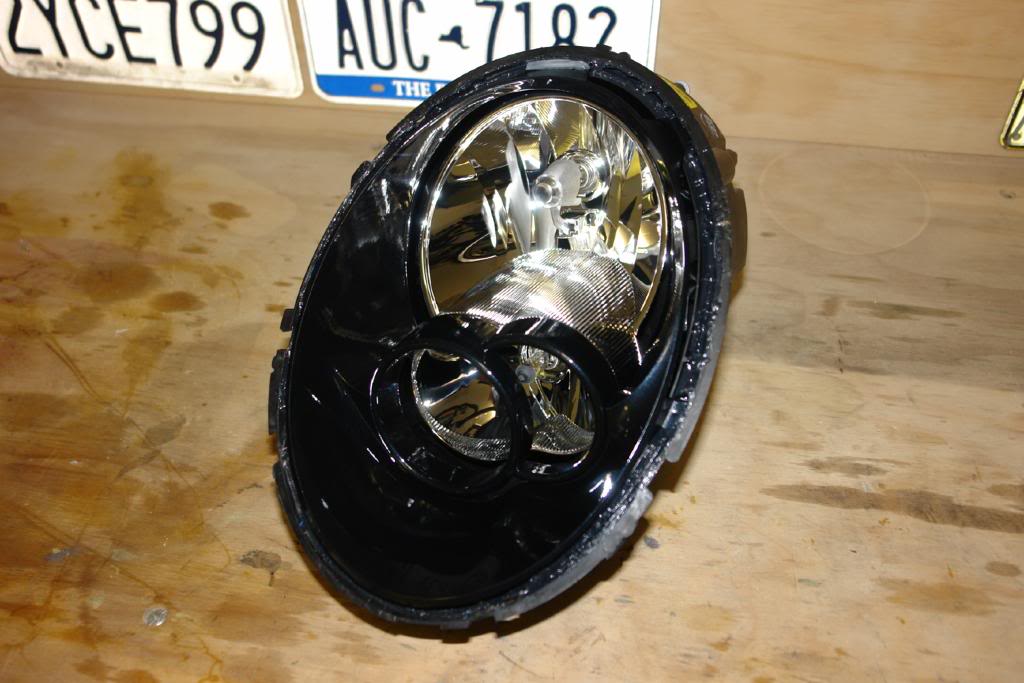
STEP 10
Now she waits to go to the body shop.
Doesn't look to happy.
At this point in time you can put your feet up, call it a day and continue when you have painted your fascia trim. I had mine professionally painted but you can just as easily do it yourself with a rattle can or plasti-dip.
STEP 10
For the assembly part you will need the following items:
1/8" Screwdriver
8mm 12 point Hex-bit
Socket Wrench with 5" Extender
Small pliers
Towel
Rubber gloves
Heat gun
Windex
Eucalyptus Oil (this is optional, I only used it in a small area to safely clean off some of the silicon which had contacted the inside of the lens.)
STEP 11
After a week of waiting in anticipation I have the parts back from the body shop.
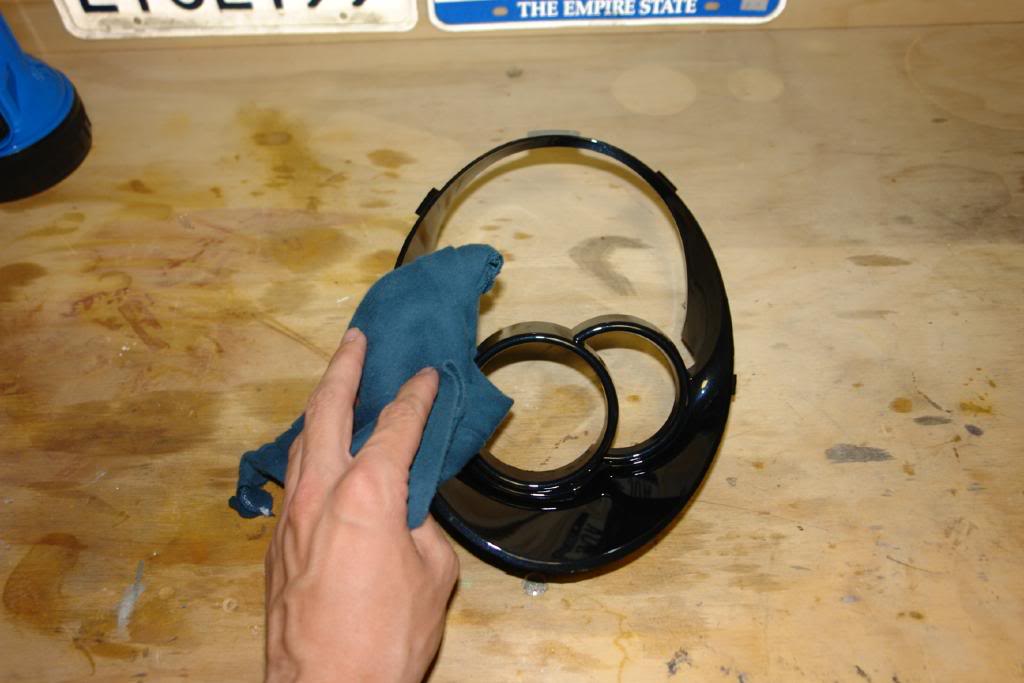
I gave the painted fascia a quick wipe down with a clean towel to remove any dust that had fallen on it.
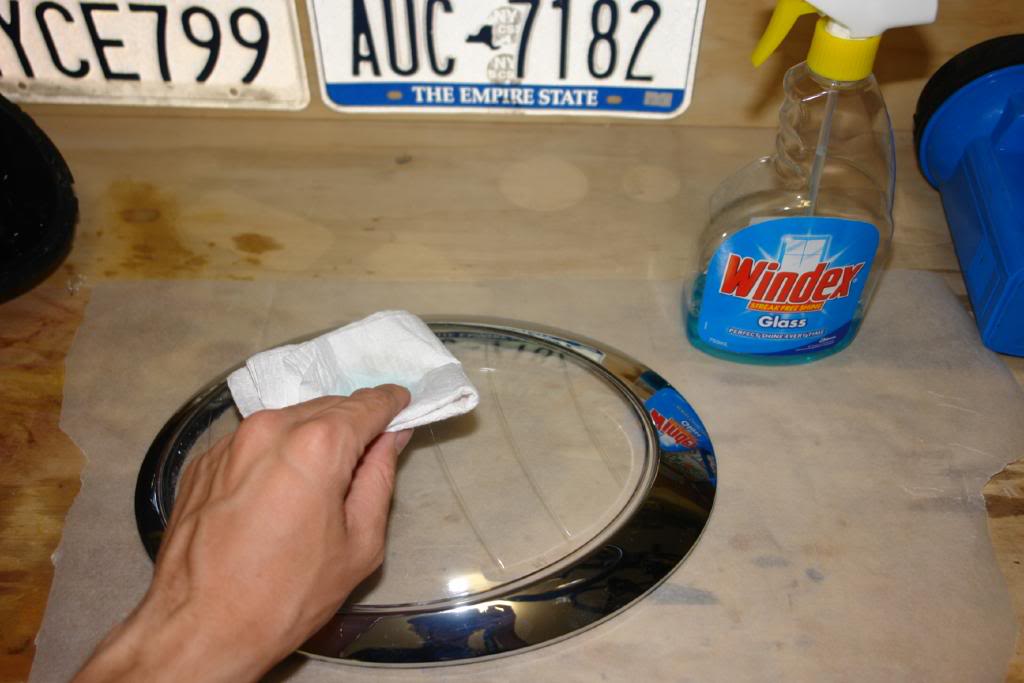
STEP 12
I peeled off the gladwrap and then cleaned the inside and outside of the lens with windex on a paper towel. Do this very gently to avoid scratching the lens. When you think you have cleaned it to perfection, hold it up against a light and look for any specks of dust you have missed. Keep doing this until your friends take you to a psychiatrist for OCD.
Note: As I said before the gladwrap tends to stick to the silicon which is good and bad. But I noticed if you heat up the left over gladwrap using the heat gun it shrivels up anyway. If I was to do it again I would opt for non stick paper.
STEP 13
Remove the gladwrap or paper from the headlight housing and make sure there is no dust on the chrome reflectors. You can brush this off using the heat gun on low heat, it worked for me. Also check that the bulbs are not in the housing just incase you put them back on there for safe keeping like I did.
STEP 14
Using the heat gun, which I had set to around 140C - 150C (about 310F), heat up the silicon on the housing just enough to allow the fascia to slide in easily.
Push the fascia into the housing, ensuring that the 3 tabs up the top and the 1 tab at the bottom lock in. There are two small locator rods directly on either side, as well as two further in. These all need to be correctly aligned to ensure the fascia does not wriggle or come loose.
STEP 15
If you saved the silicon from step 8, this is where you use it again. If you have one big ball of it use half for one headlight and half for the other. Break it off into little sausage shapes and place it over each of the tabs of the fascia. The goal here is that you apply more silicon to the areas of the fascia you had cleaned so when the headlight goes back together it won't leak.
STEP 16
Heat up the headlight housing at about 150C with the heat gun so that all the silicon is hot, but not so hot that you can not touch it. Just use some common sense here, you don't want to melt your headlight, just the silicon a bit.
Do the same to the lens briefly, trying to not let dust get on it.
STEP 17
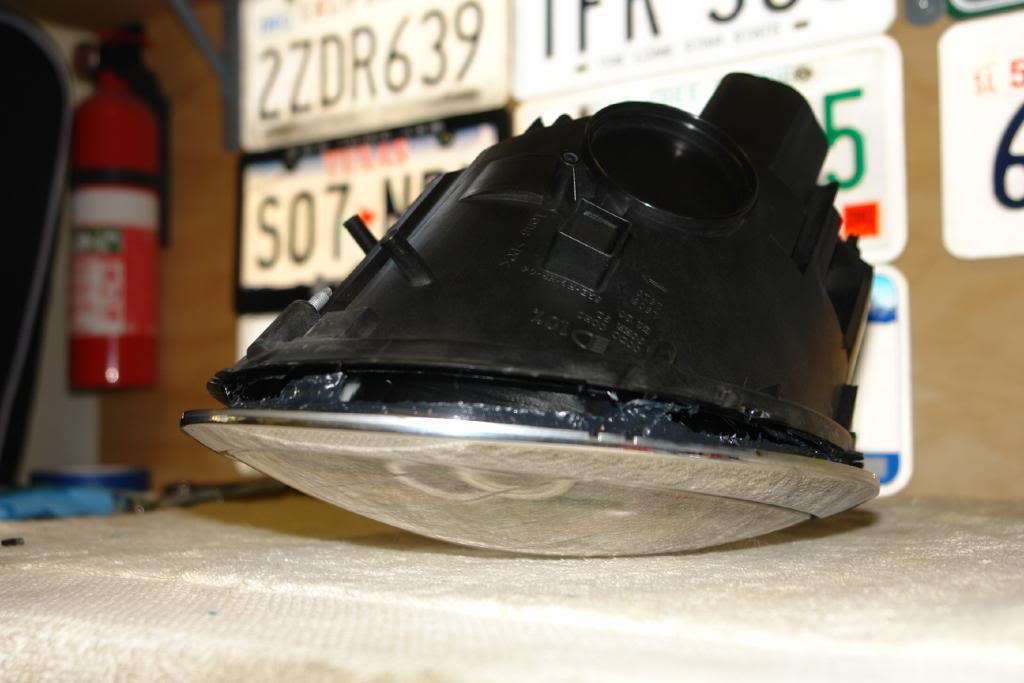
Put the heat gun down and push the lens into the headlight. Make sure that the two are aligned as close as possible, there may be little lines of yellow paint near the top for guidance, and the larger part of the chrome ring is at the top. Push the two together until they seem stuck to one another and aligned, you will notice there is a small gap along the bottom as shown bellow.

STEP 18
Lay the headlight lens down and heat up the plastic where the silicon is. Keep in the pattern of heating for a minute, then try to push it together, then repeat. Work your way around the headlight till it is firmly in one piece, with no gaps. If aligned correctly the three tabs you had to undo in step 7 should have clipped back in, if not some gentle persuasion with a heat gun, small screwdriver and your arms should do the trick. Put the screwdriver under the tab clip and pull it into position, a little patience and you will have it.
STEP 19
Let the headlight cool off and admire your work!

STEP 20
Put the bulbs back in the headlight and close it up. Using the 8mm Socket Wrench, reinstall the headlight the same way you got it out and do up the 3 bolts. Plug back in the light connection and your done. . . with one headlight.
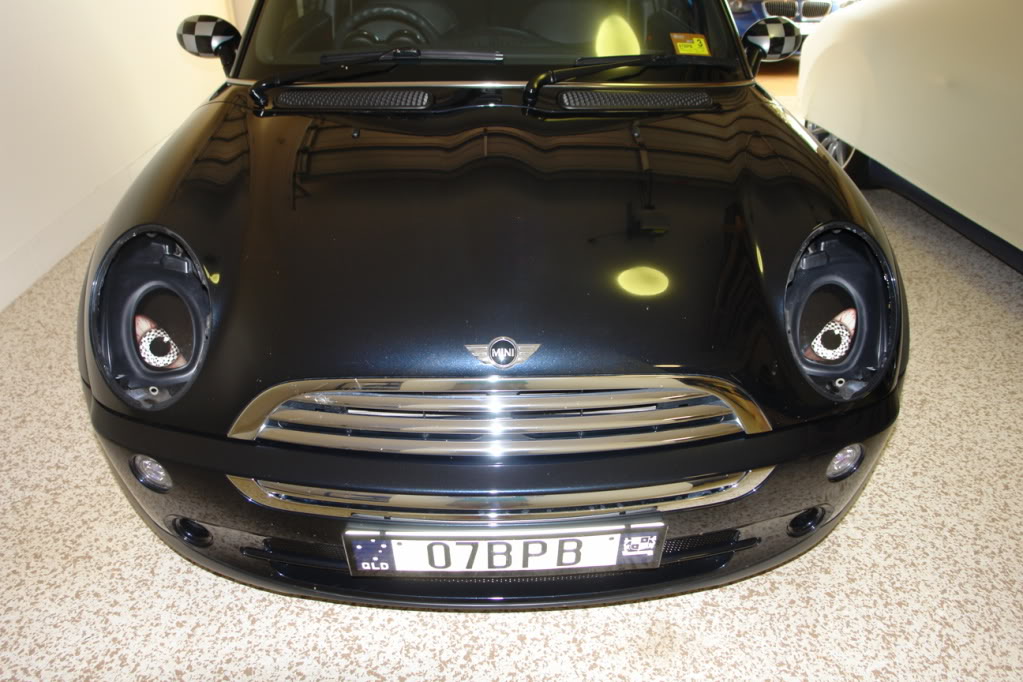
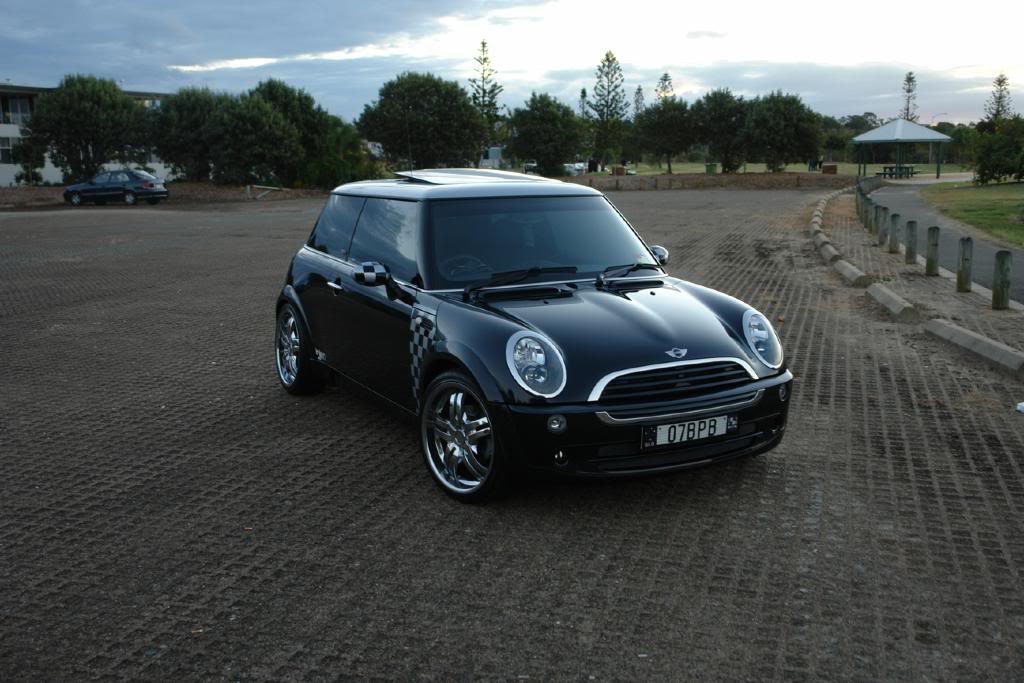
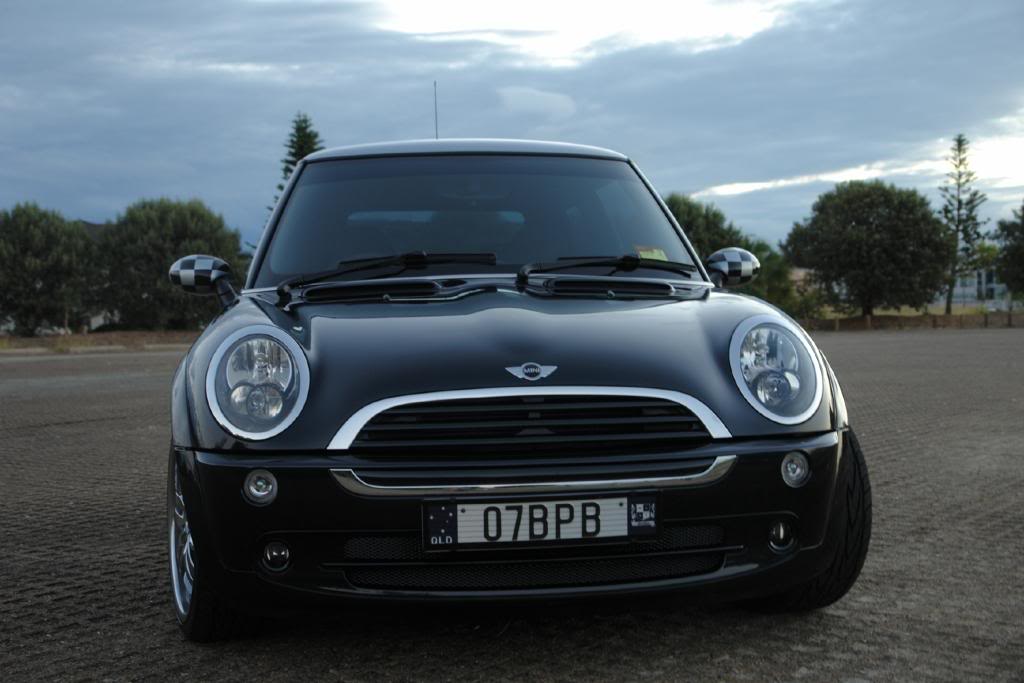
After the second one goes in this is what you should get:
Hope this helps anyone out there! Feel free to ask about any of the steps.
For those who are unfamiliar, a "Joey Mod" is where one paints the inside of the headlight fascia another colour, whether it be body colour or some other colour.
I have compiled together this how to for the Gen 1 facelift halogen headlights, so halogen headlights built from 2005 to the end of 2006. However this can very easily apply to other headlights. Please note that this is the "Oven-free method" and uses a heat gun instead.
WARNING: The headlights are broken open in this and have to be resealed. If you do this you do so at your own risk and I can not be held responsible; this is just to give you an idea of how to do this mod.
So what are we waiting for, lets get started.
STEP 1
Lay out the tools you will be using now, so that when your stuck into opening up your headlight you don't have to go digging for something. I used the following:
1/8" Screwdriver
3/16" Screwdriver
8mm 12 point Hex-bit
Socket Wrench with 5" Extender
Small pliers
Stanley knife
Towel
Rubber gloves
Heat gun
Masking tape
Electrical tape
Glad wrap or non-stick paper (preferred)
STEP 2
Unplug the headlight connection plug, there is a small tap that needs to be depressed on top.
Optional:
I have taped over the connection as I will be driving to the body shop to get the headlight facia and some other parts painted.
STEP 3
Using the Socket wrench and 8mm bit remove the 3 screws holding the headlight to the bonnet.
Pull the headlight straight forward gently and it will come out no problem.
STEP 4
Remove the bulbs as a precaution so that they do not get damaged when wrangling with the headlight. This is done by removing the 2 protective covers on the back, then using the small screwdriver depress the clips holding in the bulbs.
STEP 5
Here comes the fun part.
I decided to leave on the chrome trim around the headlight as it can stay on and not affect the process.
Using the heat gun heat up the area (6 inch region) you will start with. I recommend starting along the inside edge towards the bottom. (If the headlight was on the car, the part closest to the centre of the bonnet.) There will be an inch gap in the black plastic that shows this.
Heating up the area.
STEP 6
Prying the headlight open using a larger screwdriver which I have wrapped in tape to stop scratching. Please note that it works best if you slowly open it up with just a bit of constant pressure from the screwdriver for 30 seconds or so. This way you are less likely to break the chrome ring or anything else.
Here you can see a good portion of the headlight has been pried apart. When it does start to split you will hear a sound like bubble wrap popping, this is good.
If need be use a stanley knife to cut through the black silicon which holds the headlight together.STEP 7
Locate the 3 tabs that hold the lens to the headlight housing. 1 is located at the bottom edge of the headlight, the other two are marked by yellow paint and are closer to the top of the headlight as seen in the photo bellow. To open these tabs, work your way to them with the heat gun. Once you have pried open the area around them use the small pliers to remove any silicon that has hardened around them. Using the small screwdriver try to push in the tab.
Note: Step 6 and 7 are done together in reality. If you try to push the tabs in before you heat the silicon they wont budge. Likewise if you try to heat the whole thing up and rip it open there is a good chance you may break the tabs. The best way to do this is to start heating the lens at one spot and work your way around the circumference. As you reach each tab push it in and move the lens away so it can not click back in. Then continue on heating and prying till you get to the next tab. (added this note on 15 Mar 2011)
STEP 8
And there you have it, one separated headlight housing. You will find out that once you actually break the headlight open the inner fascia just falls out.
When you remove the fascia, there will be some silicon on the tabs and around the edges. Remove this by heating it up a bit and picking it off, then you can use what you have removed to "dab" the stuff still stuck on and it should pick it right off. SAVE this lil ball of silicon for later.
STEP 9
Once everything was separated I covered the inside of the lens in gladwrap so no dust or contaminants fall onto it.
Note: The gladwrap has a tendency to stick to the silicon glue and makes it difficult to separate. To keep with the cooking concept you can use non stick cooking paper and lay the pieces on it so that the pieces all sit "silicon side down". If I were to do this again I would NOT use the gladwrap and just use the cooking paper. Takes too much effort to remove all the lil shards of gladwrap that stick to the silicon.
STEP 10
Now she waits to go to the body shop.
Doesn't look to happy.
At this point in time you can put your feet up, call it a day and continue when you have painted your fascia trim. I had mine professionally painted but you can just as easily do it yourself with a rattle can or plasti-dip.
STEP 10
For the assembly part you will need the following items:
1/8" Screwdriver
8mm 12 point Hex-bit
Socket Wrench with 5" Extender
Small pliers
Towel
Rubber gloves
Heat gun
Windex
Eucalyptus Oil (this is optional, I only used it in a small area to safely clean off some of the silicon which had contacted the inside of the lens.)
STEP 11
After a week of waiting in anticipation I have the parts back from the body shop.
I gave the painted fascia a quick wipe down with a clean towel to remove any dust that had fallen on it.
STEP 12
I peeled off the gladwrap and then cleaned the inside and outside of the lens with windex on a paper towel. Do this very gently to avoid scratching the lens. When you think you have cleaned it to perfection, hold it up against a light and look for any specks of dust you have missed. Keep doing this until your friends take you to a psychiatrist for OCD.
Note: As I said before the gladwrap tends to stick to the silicon which is good and bad. But I noticed if you heat up the left over gladwrap using the heat gun it shrivels up anyway. If I was to do it again I would opt for non stick paper.
STEP 13
Remove the gladwrap or paper from the headlight housing and make sure there is no dust on the chrome reflectors. You can brush this off using the heat gun on low heat, it worked for me. Also check that the bulbs are not in the housing just incase you put them back on there for safe keeping like I did.
STEP 14
Using the heat gun, which I had set to around 140C - 150C (about 310F), heat up the silicon on the housing just enough to allow the fascia to slide in easily.
Push the fascia into the housing, ensuring that the 3 tabs up the top and the 1 tab at the bottom lock in. There are two small locator rods directly on either side, as well as two further in. These all need to be correctly aligned to ensure the fascia does not wriggle or come loose.
STEP 15
If you saved the silicon from step 8, this is where you use it again. If you have one big ball of it use half for one headlight and half for the other. Break it off into little sausage shapes and place it over each of the tabs of the fascia. The goal here is that you apply more silicon to the areas of the fascia you had cleaned so when the headlight goes back together it won't leak.
STEP 16
Heat up the headlight housing at about 150C with the heat gun so that all the silicon is hot, but not so hot that you can not touch it. Just use some common sense here, you don't want to melt your headlight, just the silicon a bit.
Do the same to the lens briefly, trying to not let dust get on it.
STEP 17
Put the heat gun down and push the lens into the headlight. Make sure that the two are aligned as close as possible, there may be little lines of yellow paint near the top for guidance, and the larger part of the chrome ring is at the top. Push the two together until they seem stuck to one another and aligned, you will notice there is a small gap along the bottom as shown bellow.
STEP 18
Lay the headlight lens down and heat up the plastic where the silicon is. Keep in the pattern of heating for a minute, then try to push it together, then repeat. Work your way around the headlight till it is firmly in one piece, with no gaps. If aligned correctly the three tabs you had to undo in step 7 should have clipped back in, if not some gentle persuasion with a heat gun, small screwdriver and your arms should do the trick. Put the screwdriver under the tab clip and pull it into position, a little patience and you will have it.
STEP 19
Let the headlight cool off and admire your work!
STEP 20
Put the bulbs back in the headlight and close it up. Using the 8mm Socket Wrench, reinstall the headlight the same way you got it out and do up the 3 bolts. Plug back in the light connection and your done. . . with one headlight.
After the second one goes in this is what you should get:
Hope this helps anyone out there!
Feel free to ask about any of the steps.
Last edited by 07BPB; Mar 14, 2011 at 06:21 PM.

My little dose of LITHIUM
iTrader: (1)
Joined: Jul 2005
Posts: 2,435
Likes: 2
From: Albuquerque New Mexico
Nicely done! Can't wait to see the second installment. What color scheme are you going with?
The gladwrap on the lens cover is a great idea. Mine got contaminated and aren't pristine any more.
The gladwrap on the lens cover is a great idea. Mine got contaminated and aren't pristine any more.

Thread Starter
|
5th Gear
Joined: Jan 2008
Posts: 680
Likes: 1
From: Brisbane, Australia
Cheers guys, it took a while to figure out the first light after a good 20 min attempt at trying to remove the chrome ring.
The fascia is going to be painted Astro Black to match the rest of the car. Im also doing a gas cap conversion, painting the trim around the car, orciari vents, astro black grill like the cooper s and the side grills with the indicators will be body colour as well.
The fascia is going to be painted Astro Black to match the rest of the car. Im also doing a gas cap conversion, painting the trim around the car, orciari vents, astro black grill like the cooper s and the side grills with the indicators will be body colour as well.


Thread Starter
|
5th Gear
Joined: Jan 2008
Posts: 680
Likes: 1
From: Brisbane, Australia
Dropped her off at the body shop today, will be done in 5 working days. So next thursday I get her. I got some strange looks driving there with no headlights, even though it was 1 pm.
Trending Topics

 Definitely makes me want to try this out, albeit with my pre-facelift headlights.


Thread Starter
|
5th Gear
Joined: Jan 2008
Posts: 680
Likes: 1
From: Brisbane, Australia
Lookin good there Miniman. Glad to hear that my how to actually helps!
Jonnyyellow, I have 18x7.5 et 40 (I think) Chrome Element Nitrogens.
 Glad to hear that my how to actually helps!
Jonnyyellow, I have 18x7.5 et 40 (I think) Chrome Element Nitrogens.


Well I know its on here somewhere, but I can't find it. I am looking for the write up on the xenon headlights. I just got a new mini ('06) and its got the xenons, so I get to do a joey mod again. Thanks for any help!

2nd Gear
Joined: Apr 2010
Posts: 56
Likes: 0
Hey Guys!
I'd like to use one of these guides and this one sounds very complete; however, I cant see the pictures? were they removed due to the the post been a bit old already? Does anyone have the pictures for this tutorial?
I appreciate any help anyone can provide.
Thanks,
I'd like to use one of these guides and this one sounds very complete; however, I cant see the pictures? were they removed due to the the post been a bit old already? Does anyone have the pictures for this tutorial?
I appreciate any help anyone can provide.
Thanks,

2nd Gear
Joined: Apr 2010
Posts: 56
Likes: 0
I actually got my mini last Saturda (still working on my first full gas tank LOL). Mine is Mellow yellow and I'd like to have it painted the same color. I plan to take them apart using your tutorial (hopefully isnt that different since i did noticed it is a different model. Mine is an 07, don't know if that's the different between the 2.
I was planning on having the black fenders/moldings painted yellow to match the rest of the car and possible take the headlights apart to have them painted as well.
I was planning on having the black fenders/moldings painted yellow to match the rest of the car and possible take the headlights apart to have them painted as well.