
How To Interior/Exterior :: Bonnet Scoop Install with Pics!

Thread Starter
|
2nd Gear
Joined: Jun 2009
Posts: 87
Likes: 0
From: Asheville, NC
Interior/Exterior :: Bonnet Scoop Install with Pics!
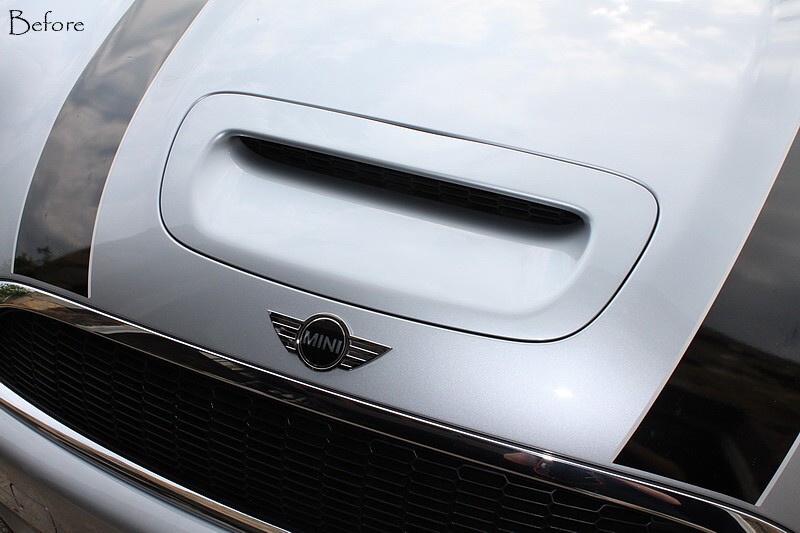
Just installed a new bonnet scoop on my 2008 Cooper S.... Thought I'd contribute my own humble How-To to the site even though a few others have covered this very subject... Mine is similar but I've added some pics that should help those like me who need to see pictures before understanding what goes where...I endured at least 2 sleepless nights worrying about the procedure while waiting for the part to arrive. If I'd had these pictures before... I would have slept better...
You'll need:
Phillips head screw driver or two
Clean rags
10 fingers
2 Beers (imported)
(Optional) a drill and 1/4 bit if you want to add some air flow to your new scoop for those who are too cheap and/or lazy to go out and buy some screen material.
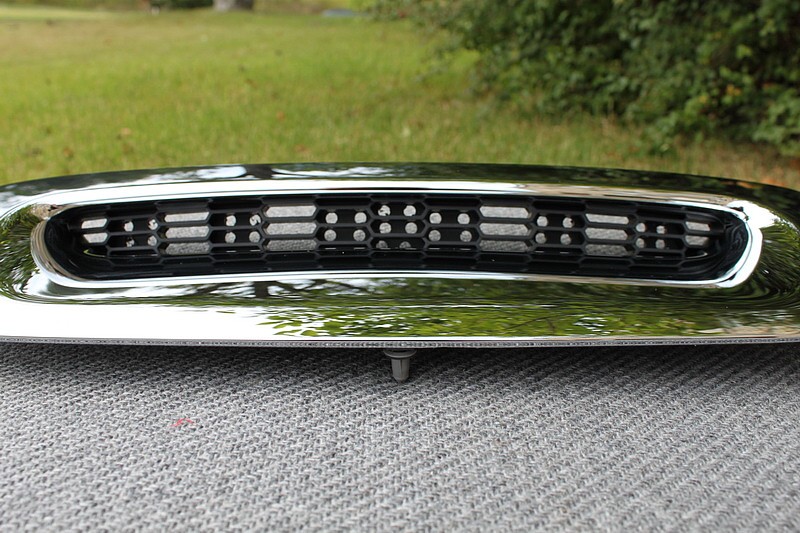
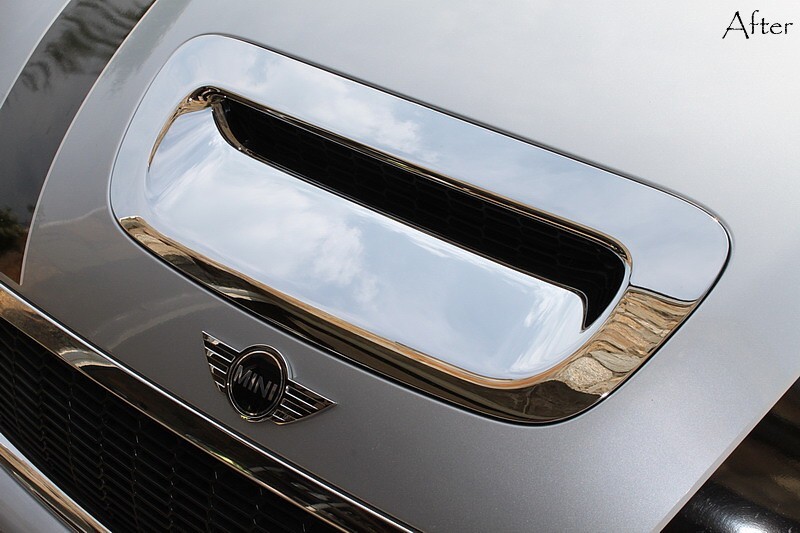
Pre-install: Had heard of others installing different screens in their scoops to allow for better airflow... Rather than go that route, I removed the plastic insert from my new scoop (4 screws) then took a drill and added (30) 1/4" holes. Took less than 5 minutes and the result should allow for quite a bit more flow.
New venting holes in new scoop pre-install.
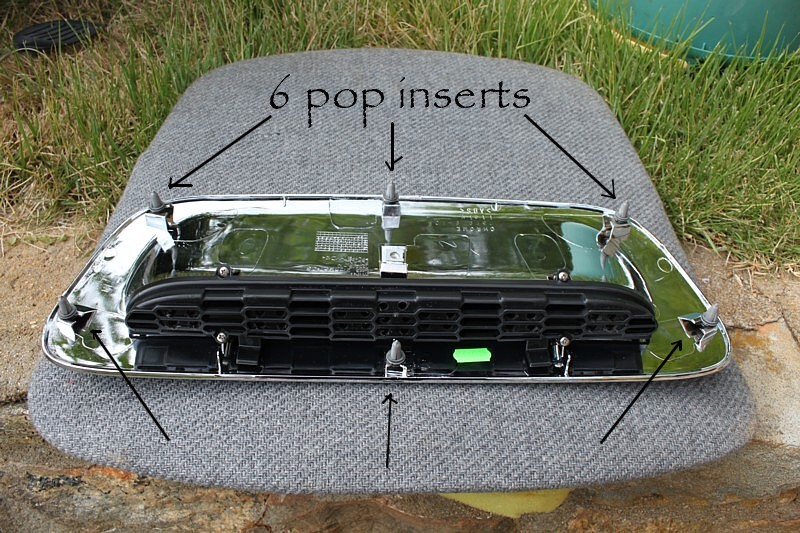
This shot shows what the pop inserts look like..
Install:
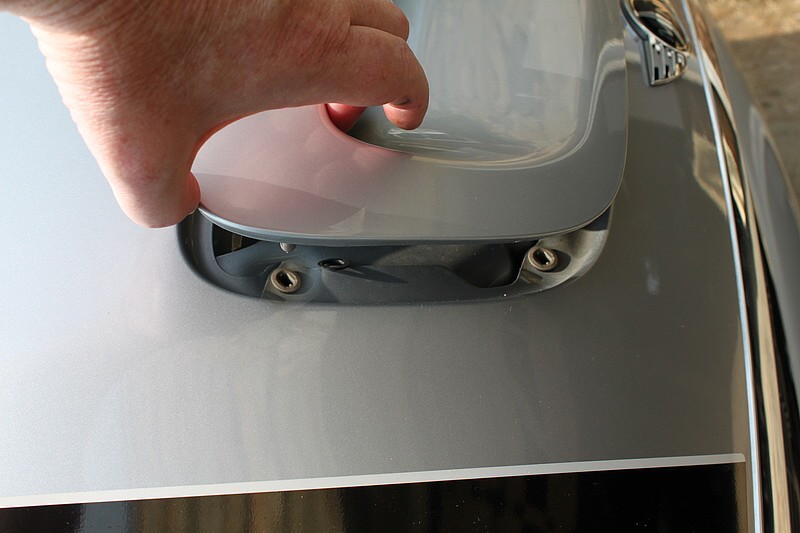
1. Raise hood and remove that single screw with a Phillips head. On my model year (no idea about the others..) that screw is plastic so try to get the correct size screwdriver or you could easily strip it out. Once it's removed there's a small black plastic plug. Remove that, too. I pried it out. I had no need for either the screw or that black plastic plug when installing the new scoop, but probably best to save them to use with the factory scoop should you decide to re-install it at some point or sell it.
2. So far so good.. You've done well up to this point... You haven't screwed up anything or scratched anything. Time for a beer....
3. A few other how-to's said you could push the factory scoop up from the bottom screw hole under the hood .. I tried and mine wouldn't budge and not knowing what exactly I would be pushing on.. I didn't want to take a hammer and screw driver to punch up through there so... I closed the hood... with clean, dry hands I put 4 fingers inside the left side scoop and yanked straight up.. I didn't pull.. I yanked. The corner popped free. I repositioned myself and on the opposite side and yanked up and the opposing side popped free... With both the left and right side open enough to get my fingers underneath, I slowly worked my way around the scoop until it popped off. I did NOT use any prying tools (unlike others) as I was scared I might dent the surrounding hood.
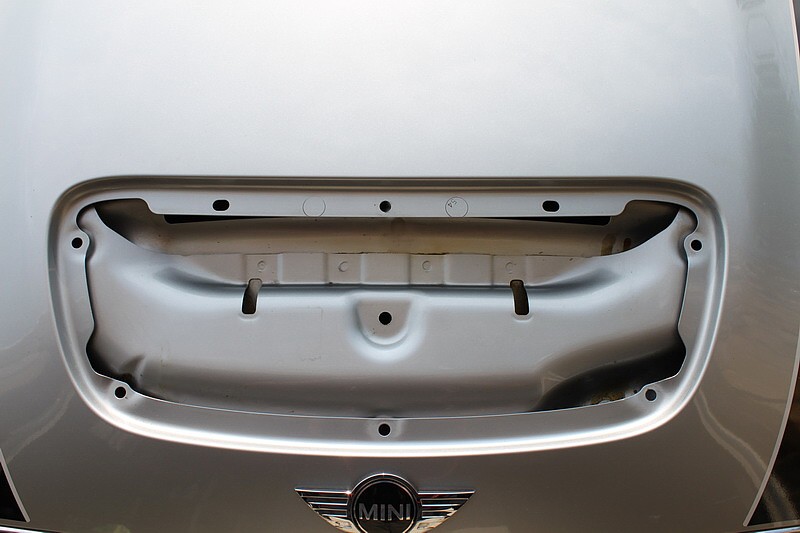
4. Once you see how the factory scoop attaches...(with (6) plastic pop inserts).. the new foofoo, bling, shiny scoop install is chimp easy. Once the new scoop is positioned over the 6 mounting holes (pic above)..just pop it down with the palm of your hand until you hear the snaps lock into place. I should mention here that my new scoop (from Prestige Motors) came with zero instructions nor a screw for the underside... and the screw needed is NOT the same size that was used with the factory scoop. DOH! Fortunately I have a shop full of hardware and located one pretty quickly. I found a wide washer then screwed it into place securing it to the hood. Done deal.
5. Time for another beer...Sit back and revel in your own magnificence...
Thx all to the other how-to posters who got me on the right track...
You'll need:
Phillips head screw driver or two
Clean rags
10 fingers
2 Beers (imported)
(Optional) a drill and 1/4 bit if you want to add some air flow to your new scoop for those who are too cheap and/or lazy to go out and buy some screen material.
Pre-install: Had heard of others installing different screens in their scoops to allow for better airflow... Rather than go that route, I removed the plastic insert from my new scoop (4 screws) then took a drill and added (30) 1/4" holes. Took less than 5 minutes and the result should allow for quite a bit more flow.
New venting holes in new scoop pre-install.
This shot shows what the pop inserts look like..
Install:
1. Raise hood and remove that single screw with a Phillips head. On my model year (no idea about the others..) that screw is plastic so try to get the correct size screwdriver or you could easily strip it out. Once it's removed there's a small black plastic plug. Remove that, too. I pried it out. I had no need for either the screw or that black plastic plug when installing the new scoop, but probably best to save them to use with the factory scoop should you decide to re-install it at some point or sell it.
2. So far so good.. You've done well up to this point... You haven't screwed up anything or scratched anything. Time for a beer....
3. A few other how-to's said you could push the factory scoop up from the bottom screw hole under the hood .. I tried and mine wouldn't budge and not knowing what exactly I would be pushing on.. I didn't want to take a hammer and screw driver to punch up through there so... I closed the hood... with clean, dry hands I put 4 fingers inside the left side scoop and yanked straight up.. I didn't pull.. I yanked. The corner popped free. I repositioned myself and on the opposite side and yanked up and the opposing side popped free... With both the left and right side open enough to get my fingers underneath, I slowly worked my way around the scoop until it popped off. I did NOT use any prying tools (unlike others) as I was scared I might dent the surrounding hood.
4. Once you see how the factory scoop attaches...(with (6) plastic pop inserts).. the new foofoo, bling, shiny scoop install is chimp easy. Once the new scoop is positioned over the 6 mounting holes (pic above)..just pop it down with the palm of your hand until you hear the snaps lock into place. I should mention here that my new scoop (from Prestige Motors) came with zero instructions nor a screw for the underside... and the screw needed is NOT the same size that was used with the factory scoop. DOH! Fortunately I have a shop full of hardware and located one pretty quickly. I found a wide washer then screwed it into place securing it to the hood. Done deal.
5. Time for another beer...Sit back and revel in your own magnificence...
Thx all to the other how-to posters who got me on the right track...


4th Gear
Joined: Feb 2003
Posts: 370
Likes: 0
From: Minneapolis
6th Gear
Joined: Nov 2010
Posts: 2,466
Likes: 2
From: Savannah Georgia
I love the install instructions, but when I decided to open my scoop I went for the MINI Fini Black Intake Scoop Grill. It comes in chrome too.
5th Gear
Joined: Jan 2013
Posts: 750
Likes: 2
From: Orange County, NY
I love the install instructions, but when I decided to open my scoop I went for the MINI Fini Black Intake Scoop Grill. It comes in chrome too.

Thread
Thread Starter
Forum
Replies
Last Post
igzekyativ
MINIs & Minis for Sale
34
Jul 16, 2020 12:54 PM
squawSkiBum
MINI Parts for Sale
15
Oct 2, 2015 09:21 AM