
How To How To: Blackout Grille Trim/JCW Grille


Thread Starter
|
Former Vendor
Joined: Feb 2007
Posts: 1,472
Likes: 2
From: Sterling, VA
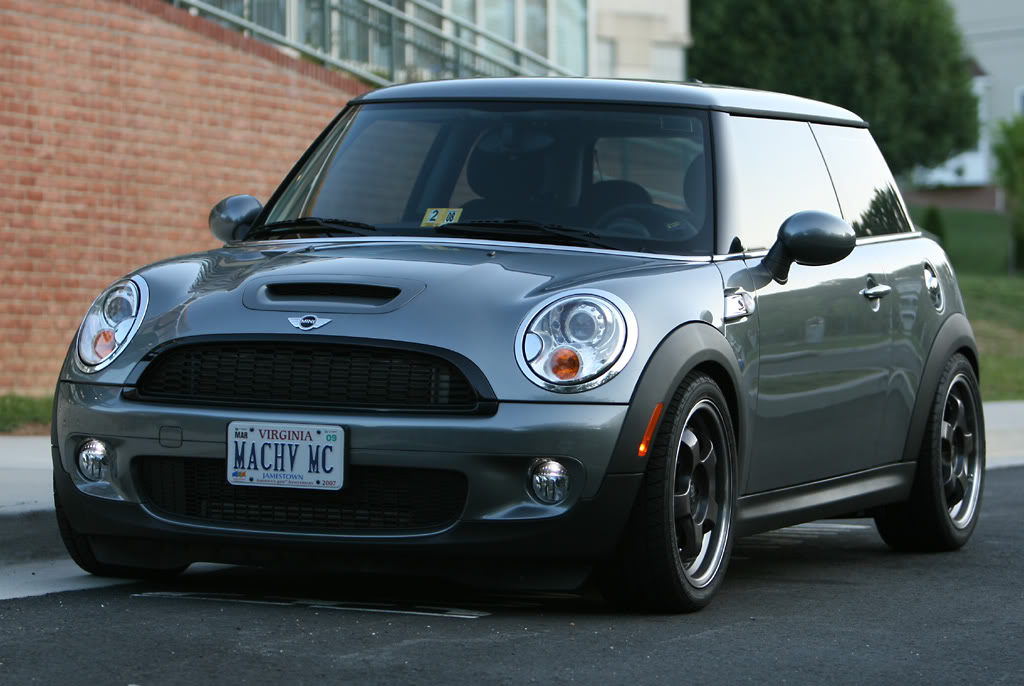
How To: Blackout Grille Trim/JCW Grille
Job: Convert the stock MCS chrome grille surround to the black version, like the JCW aero kit has. Optional: Swap the stock MCS plastic mesh grille with the almost-identical-but-sutbly-different JCW grille. (The JCW version has a coarser pitch of the grille openings. It's also made of a softer material, although that probably doesn't matter much...)
Before:
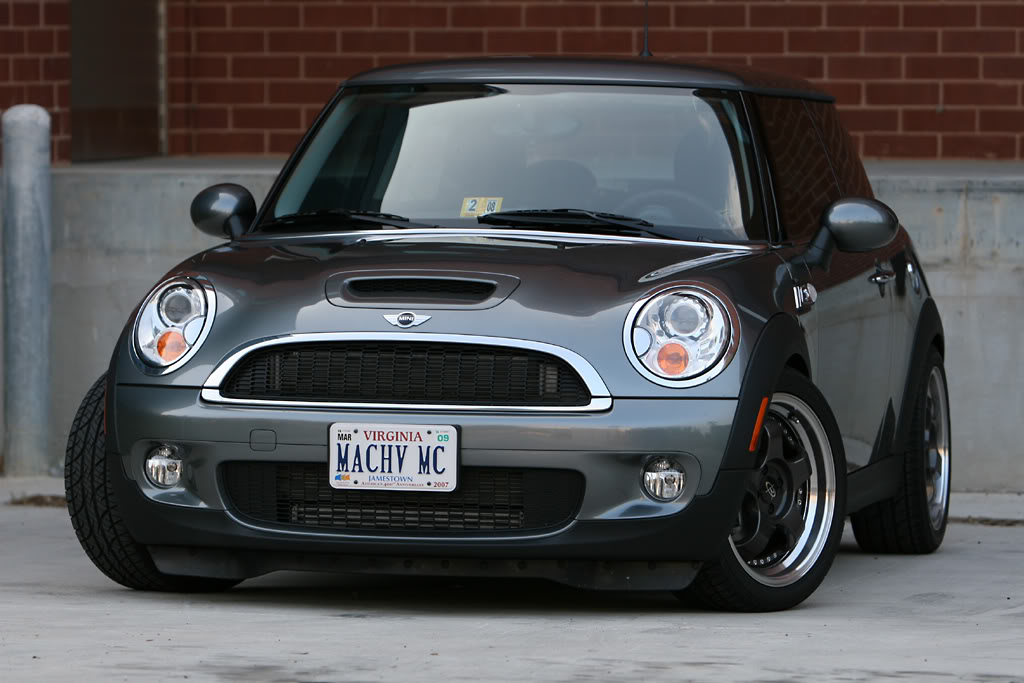
After:
This is mostly to educate those who wonder how hard this swap is. The answer is, it's almost laughably easy. You could do it in ten minutes. Sorry, I don't have pics of each step, but I don't think you'll need them.
Tools you'll need:
- Small Phillips screwdriver
- Small flat-blade screwdriver
Parts you'll need (available HERE, among other places...):
- Upper and lower JCW-style black grille surrounds
- (Option) JCW mesh grille
How To Install:
Upper Surround
- Open the bonnet (hood)
- Remove four Phillips-head screws that secure the upper grille surround to the bonnet. Wiggle the surround loose.
- Wipe the bottom edge of your bonnet clean of all the hood-goo that inevitably has dripped down from inside the bonnet.
- Press the new surround into place.
- Replace the four screws. Do NOT overtighten!
Lower Surround Removal
- With the bonnet open, reach behind each corner of the grille to find a little plastic tab that retains the corners of the grille surround. Pull on the tab while gently pulling the grille surround on that side. Repeat for other side. The just tug the surround loose.
- Wipe away hood-goo.
JCW Grille
- Use the flat-bladed screwdriver to pry up the center of the push-fasteners at the top of the grille. Once the center of the fastener is maybe 3/8" extended, you can wiggle the fastener loose.
- With the lower surround removed, you'll see four little sideways tabs poking out from the bottom of the grille. Push these sideways -- I think each one pushes towards the center of the grille, although it's not in front of me. The grille will pop loose.
- While the grille is off, wipe away still more hood goo.
- Install the new grille by carefully fitting into place and pushing to secure the four lower tabs.
- Reinstall the push fasteners. Make sure the fastener center post is still extended before you try to insert the fastener in the hole, or it'll jam without going in.
Lower grille surround re-install
- Carefully line up all the futzy little tabs, and press the surround into place.
Done!
--Dan
Mach V
FastMINI.net
Before:
After:
This is mostly to educate those who wonder how hard this swap is. The answer is, it's almost laughably easy. You could do it in ten minutes. Sorry, I don't have pics of each step, but I don't think you'll need them.
Tools you'll need:
- Small Phillips screwdriver
- Small flat-blade screwdriver
Parts you'll need (available HERE, among other places...):
- Upper and lower JCW-style black grille surrounds
- (Option) JCW mesh grille
How To Install:
Upper Surround
- Open the bonnet (hood)
- Remove four Phillips-head screws that secure the upper grille surround to the bonnet. Wiggle the surround loose.
- Wipe the bottom edge of your bonnet clean of all the hood-goo that inevitably has dripped down from inside the bonnet.
- Press the new surround into place.
- Replace the four screws. Do NOT overtighten!
Lower Surround Removal
- With the bonnet open, reach behind each corner of the grille to find a little plastic tab that retains the corners of the grille surround. Pull on the tab while gently pulling the grille surround on that side. Repeat for other side. The just tug the surround loose.
- Wipe away hood-goo.
JCW Grille
- Use the flat-bladed screwdriver to pry up the center of the push-fasteners at the top of the grille. Once the center of the fastener is maybe 3/8" extended, you can wiggle the fastener loose.
- With the lower surround removed, you'll see four little sideways tabs poking out from the bottom of the grille. Push these sideways -- I think each one pushes towards the center of the grille, although it's not in front of me. The grille will pop loose.
- While the grille is off, wipe away still more hood goo.
- Install the new grille by carefully fitting into place and pushing to secure the four lower tabs.
- Reinstall the push fasteners. Make sure the fastener center post is still extended before you try to insert the fastener in the hole, or it'll jam without going in.
Lower grille surround re-install
- Carefully line up all the futzy little tabs, and press the surround into place.
Done!
--Dan
Mach V
FastMINI.net


2nd Gear
Joined: Mar 2007
Posts: 73
Likes: 0
From: Worcester, MA
Right, I meant specifically on the fast mini website. I figured I'd ask here because I haven't had the best of luck contacting vendors around here with questions.


1st Gear
Joined: Dec 2006
Posts: 37
Likes: 0
From: Sunrise, FL
Nice looking and very easy mod
Dan, thanks for the write up .
I really like the clean look of the blackened grill.
It took me less than 10 minutes to install mine, here is a pic of the end result. (I'll take better pics this weekend).
I really like the clean look of the blackened grill.
It took me less than 10 minutes to install mine, here is a pic of the end result. (I'll take better pics this weekend).
Vendor - 15 Years

Joined: Feb 2003
Posts: 1,932
Likes: 39
From: Knoxville TN
Have had the JCW grill trim on since late April...love it:
http://www.outmotoring.com/mini-coop...rill_trim.html
http://www.outmotoring.com/mini-coop...rill_trim.html
__________________
865-223-6335

OutMotoring.com: Home of the finest MINI Parts + Accessories.
Shop online at www.OutMotoring.com
OutMotoring.com: Home of the finest MINI Parts + Accessories.
Shop online at www.OutMotoring.com
Trending Topics

3rd Gear
Joined: Jul 2007
Posts: 240
Likes: 1
From: west 'burbs of Chicago
bump
I know it's been two years since this thread was last posted-to, but: these instructions are still good!
R56 upper black grille surround: part number 51 13 0 417 135
R56 lower black grille surround: part number 51 13 0 442 011
A pair of pliers to squeeze the upper-surround center clips gently helps remove the old one
from the hood more quickly than just prying on it -- FYI.
R56 upper black grille surround: part number 51 13 0 417 135
R56 lower black grille surround: part number 51 13 0 442 011
A pair of pliers to squeeze the upper-surround center clips gently helps remove the old one
from the hood more quickly than just prying on it -- FYI.


For those of you that had an easy time with this... how hard did you have to pull the lower grill surround? I had the clips realeased on either side and i could not get it to pry away from the grill. I was pulling firmly, but it felt if i had pulled much harder something could break.
Has anything changed with this with the 2011 refresh?
Any insight would be greatly appreciated.
Has anything changed with this with the 2011 refresh?
Any insight would be greatly appreciated.

1st Gear
Joined: Oct 2011
Posts: 30
Likes: 0
From: Woodlake TX(north of houston)
Why spend 120 on the grill? I bought adhesion promoter, krylon plastics paint, clear coat, and 120 grit sand paper. About 20 bucks and a few hours later I have blacked out all but the belt line. It's held up excellent and looks much more ascetically pleasing to me.

These were excellent instructions. I just changed out my grille trim following the instructions to the tee. I could not have been any easier. Thanks for sharing.
Before:
After:
Before:
After:
Last edited by MinMin2010; Apr 7, 2012 at 01:48 PM.

Very nice.
IN CASE ANYONE IS INTERESTED IN A TRADE. I am willing to trade my OEM black JCW surround trim for your OEM chrome JCW surround trim. I am in Westchester County, NY. Only makes sense to do it local. I am trying out a different look.
IN CASE ANYONE IS INTERESTED IN A TRADE. I am willing to trade my OEM black JCW surround trim for your OEM chrome JCW surround trim. I am in Westchester County, NY. Only makes sense to do it local. I am trying out a different look.

2nd Gear
Joined: Aug 2012
Posts: 91
Likes: 0
pm'd i know its been a few months

Love the looks of your car. When you used the 120 grit; did you have to sand all of the chrome off?
I know this is a Old post but i am looking for a set of 2009 cooper s grill trim mold in matte black if anyone knows where I may be able to get one please let me know.
Thanks in advance.
Ben
Thanks in advance.
Ben


You might consider wrapping yours in flat black vinyl....I haven't done it personally, but I've heard that it's not too hard. Amazon sells 3M 1080 in matte black....

Thread
Thread Starter
Forum
Replies
Last Post
vulkandino
MINIs & Minis for Sale
8
Oct 31, 2015 08:29 PM
ECSTuning
Interior/Exterior Products
0
Sep 29, 2015 12:17 PM
ECSTuning
Vendor Classifieds
0
Sep 29, 2015 12:16 PM
ECSTuning
Vendor Announcements
0
Sep 29, 2015 12:11 PM
BendersMINI
MINI Parts for Sale
0
Sep 27, 2015 07:02 PM