When you click on links to various merchants on this site and make a purchase, this can result in this site earning a commission. Affiliate programs and affiliations include, but are not limited to, the eBay Partner Network.
General MINI TalkShared experiences, motoring minutes, and other general MINI-related discussion that applies to all MINIs, regardless of model, year or trim.
I'm in dire need for a downpipe so I can get it tuned. As far as price vs functionality, Milltek or Marios? Anyone wrap their downpipes?
I went with Milltek, because all the reviews said it fit without having to modify anything, and I know a couple guys that had already installed them on their cars.. I wrapped it with header wrap and put several coats of header paint over that. Still fit like a champ, and with a little trial and error the heat shields went back on too. I'm not saying it's better than Mario's, just relating my experience.
I had three minor MINI events today. First, I got a package of parts today including new plugs, a volume **** and the amber plastic thing that holds the lighter in the console. I installed the **** in my junkyard radio, and then I vacuumed the car. So, nothing big, but on the 4th I plan to shampoo the carpet after pulling the seats and then plan to put the console back together and install the new console with armrest I pieced together with junkyard scraps. BTW, I found you can buy a cheap center armrest pad from eBay for under $20 then disassemble it and use the base to fix an original, and that is what I did. The padding and "upholstery" are rubbish though, and best avoided.
I went with Milltek, because all the reviews said it fit without having to modify anything, and I know a couple guys that had already installed them on their cars.. I wrapped it with header wrap and put several coats of header paint over that. Still fit like a champ, and with a little trial and error the heat shields went back on too. I'm not saying it's better than Mario's, just relating my experience.
Do you have a model number or link? Is it catless
Last edited by minideucecoop; 07-03-2019 at 04:00 AM.
Reason: Question
Catless. I bought from Outmotoring, who is just one of our forum sponsors. I'm sure it's available from many of our sponsors. When I need maintenance or mod parts I do my best to support our sponsors. This is the link I used, but I would suggest you check several sources to find the deal that is best for you.
Catless. I bought from Outmotoring, who is just one of our forum sponsors. I'm sure it's available from many of our sponsors. When I need maintenance or mod parts I do my best to support our sponsors. This is the link I used, but I would suggest you check several sources to find the deal that is best for you.
Wow! That was the easiest mod I ever did. Replaced light switch and activated 2019 F55 Rear Fogs lights (bulbs and wiring already there!) Euro Rear fog switch 61 31 9 865 845 (Thank you ECS Tuning!) Panel simply pulled out and switch was held in by fasteners (no screws), clicked new switch in and replaced wires. Everything except the rear fogs worked after replacing switch. As I had to code ECU with BimmerCode iphone app ($31) and a bluetooth OBDLinkMX+ adapter.
I found coding Originally Posted by TVPostSound (thank you!)
Coded: In Expect Mode....in the "Body Control Module" [No idea what that link is?] Activate Rear Fog Lights: 3068 NSL_Verbaut = Verbaut
(Note nebelschlussleuchte = NSL= Rear Fog Lights)
Code first, the cycle ignition, then restart Bimmercode for the below options
to show up. This was scariest part as it cycles thru with alerts--but afterwards it is all OK).
Every time you recode after doing rear fogs, you WILL get a dash warning about lighting errors.
cycle the ignition, it will go away, the warning after coding is because the VO has not been coded.
It will not persist after that.
Rear fog light turn on! Back of switch Old switch, with blank button for rear fog light Rear fog on! Replaced switch
fog light switch. No screws--just pull trim fasteners and clip switch out and replace.
My son and I began detailing his new (to him) JCW Paceman. Began with a bug spray on the front end, then a thorough washing with Dawn to strip any oil or old waxes. Then Iron-X to decontaminate. After a careful rinse, we clayed the entire car and washed it again. Finally, put CarPro Reload on it. Silky smooth finish and amazing beading. We still need to do the interior and engine bay. (Sorry for the bad photo.)
Took the silly wing off the roof of my R53.
I was prepared to put round plastic plugs into the single hold down holes in the top of the deck.
But NOoo...they had to put big slots, for adjustments I guess.
I thought these cars were built to higher tolerances than to need big (about, .63") long slots in the deck. Not sure what I'm gonna do now...putting the wing back on is not one of my choices.
Mike
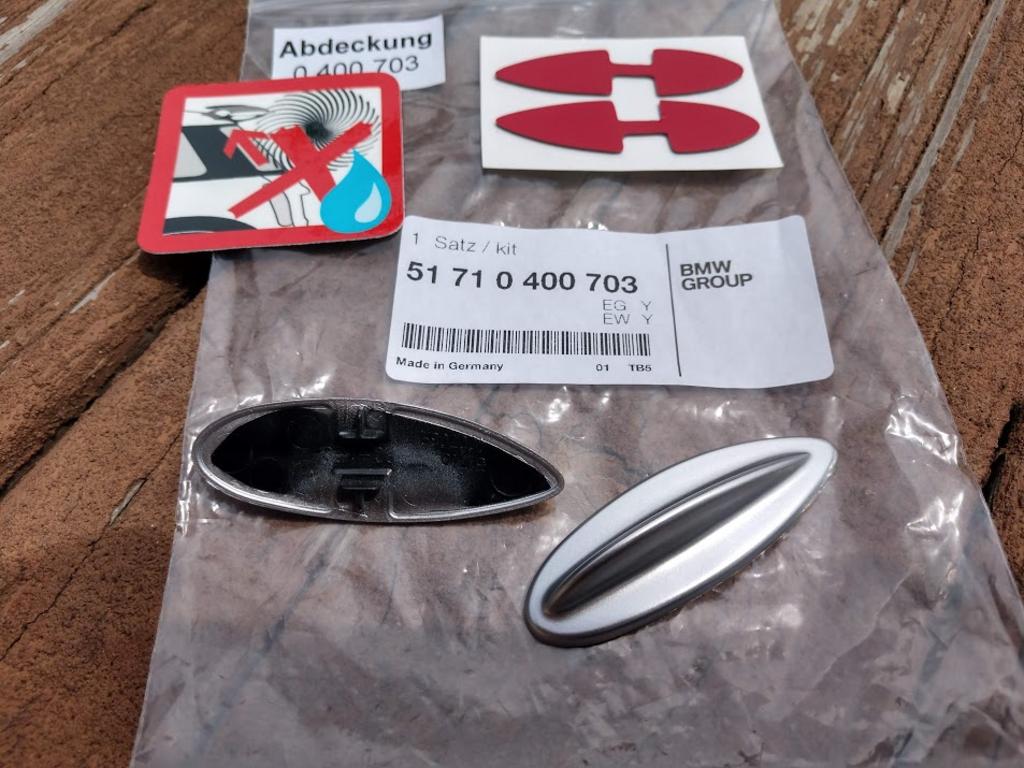
Yeah, MINI used to sell little fin thingies for when the JCW wing was installed:
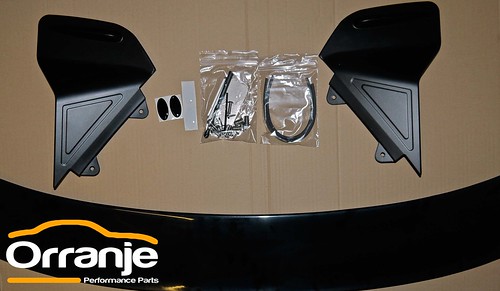
The Orranje G-Wing comes with oblong sticky thingies too:
Wow! That was the easiest mod I ever did. Replaced light switch and activated 2019 F55 Rear Fogs lights (bulbs and wiring already there!) Euro Rear fog switch 61 31 9 865 845 (Thank you ECS Tuning!) Panel simply pulled out and switch was held in by fasteners (no screws), clicked new switch in and replaced wires. Everything except the rear fogs worked after replacing switch. As I had to code ECU with BimmerCode iphone app ($31) and a bluetooth OBDLinkMX+ adapter.
I found coding Originally Posted by TVPostSound (thank you!)
Coded: In Expect Mode....in the "Body Control Module" [No idea what that link is?] Activate Rear Fog Lights: 3068 NSL_Verbaut = Verbaut
(Note nebelschlussleuchte = NSL= Rear Fog Lights)
Code first, the cycle ignition, then restart Bimmercode for the below options
to show up. This was scariest part as it cycles thru with alerts--but afterwards it is all OK).
Every time you recode after doing rear fogs, you WILL get a dash warning about lighting errors.
cycle the ignition, it will go away, the warning after coding is because the VO has not been coded.
It will not persist after that.
Rear fog light turn on! Back of switch Old switch, with blank button for rear fog light Rear fog on! Replaced switch
fog light switch. No screws--just pull trim fasteners and clip switch out and replace.
Thanks for posting...
Also, I am surprised you can do actual coding with that app. Do you know if those are the same codings use in the NCS Expert?

 07-01-2019, 08:25 PM


:format(webp)/cdn.vox-cdn.com/uploads/chorus_image/image/64693897/P90357220_highRes_the_new_mini_cooper_.0.jpg)