
What did you do to your mini today?
 05-06-2017, 08:36 PM

 I was next to a civic si and knew he was asking for it lol, so when we took off I had him by a car Lenth and suddenly poof engine light came on and started running on 2 cylenders miss firing my feelings was really hurt more than my pocket coil pack and new plugs did the job but never fixed my feelings.. I have been looking for him.
05-06-2017, 09:13 PM
I was next to a civic si and knew he was asking for it lol, so when we took off I had him by a car Lenth and suddenly poof engine light came on and started running on 2 cylenders miss firing my feelings was really hurt more than my pocket coil pack and new plugs did the job but never fixed my feelings.. I have been looking for him.
05-06-2017, 09:13 PM

3rd Gear
05-07-2017, 04:12 AM

I installed LED lighting in the footwells for only about $20 and now the interior glows a glorious deep blue around the lower cabin. The plug and off/on button is in my lighter unit, but I rarely shut it off. It shows up a bit in daylight but really glows nicely at night or when I pull into the garage.
I can pick any color, but I like the blue best. The red matches the orange dash lights which is also a nice change. I then would flick my built-in ambient lighting to match.
I vacuum my MINI out every day. It parks in my 1-car garage next to my shop vac so I make it easy to spiff it up with a quick almost daily vacuum. I use the round fabric attachment plus some tiny crevasse tools to keep her looking new inside. I run my black Clubman carpets in all but the snowiest months, so any sand or grit shows up like litter on a beach. The new interior lights make clean carpets rather essential.
The phrase 'OCD' comes to mind when I flip on that Sears shop vac every day :-)

 05-08-2017, 08:28 AM
3rd Gear
New front struts (yeah I need to do the rears too, but this was an unexpected repair at this time) and DIY strut tower reinforcement. Full write up here.


 05-09-2017, 11:17 PM

I "finally" got around to replacing the stupid door brake (check strap) on my R53's driver's side door. This thing never held the door very well and in the last couple years, it failed completely. I'm glad to see that the updated part works way better than the original one ever did.
Last edited by AKIndiMini; 05-09-2017 at 11:25 PM.
05-10-2017, 12:06 PM
I "finally" got around to replacing the stupid door brake (check strap) on my R53's driver's side door. This thing never held the door very well and in the last couple years, it failed completely. I'm glad to see that the updated part works way better than the original one ever did.

I dont know why, but that small circular reflector towards the upper rear part of the door panel makes me nervous. I've read some stories where it is understood that it will break when removing. Just glue it back together and pop it back in.
Is there an easy way to remove this piece without breaking? I have a lock actuator I need to get and install.
Your reflector appears to be nice and just popped itself out of position and on you went. haha
05-10-2017, 12:14 PM
I always pry up gently from the bottom with a plastic trim tool. Learned my lesson when I broke the passenger side reflector (prying from the sides or the top) doing a power window motor. Was actually quite surprised when the driver's side one popped off the way it did. It wasn't broken or damaged at all.
Want me to get some close up shots or footage? More than happy to do that for you.
Want me to get some close up shots or footage? More than happy to do that for you.
Well done, good job!
I dont know why, but that small circular reflector towards the upper rear part of the door panel makes me nervous. I've read some stories where it is understood that it will break when removing. Just glue it back together and pop it back in.
Is there an easy way to remove this piece without breaking? I have a lock actuator I need to get and install.
Your reflector appears to be nice and just popped itself out of position and on you went. haha
05-10-2017, 03:15 PM
I always pry up gently from the bottom with a plastic trim tool. Learned my lesson when I broke the passenger side reflector (prying from the sides or the top) doing a power window motor. Was actually quite surprised when the driver's side one popped off the way it did. It wasn't broken or damaged at all.
Want me to get some close up shots or footage? More than happy to do that for you.
Want me to get some close up shots or footage? More than happy to do that for you.
Yeah, if you do not mind! That would be great. Appears that you approach this reflector from the 6 o'clock position only. Anything you can provide would be greatly appreciated.
But no rush. I have time on the actuator as I am gearing up on some minor work on the CRX and Odyssey atm. Hunting prices on the internet, I can get it down to a reasonable price. I dont know how much cheaper I can go...
Last edited by CooperSAZ; 05-10-2017 at 03:24 PM.
05-10-2017, 03:26 PM
Yup, 6 o'clock position only. There's a notch in the reflector (around the 11 o'clock position), it appears like it's there for putting a small screwdriver in there...but that's precisely how I broke the my last reflector. I feel that this position stresses the "legs" of the reflector too much, which leads to breakage.
If you go from the bottom, you put a lot less stress on the reflector and I haven't broken one since I started approaching them this way.
I'll get a video up, maybe even tonight if the weather holds.
If you go from the bottom, you put a lot less stress on the reflector and I haven't broken one since I started approaching them this way.
I'll get a video up, maybe even tonight if the weather holds.
Yeah, if you do not mind! That would be great. Appears that you approach this reflector from the 6 o'clock position only. Anything you can provide would be greatly appreciated.
But no rush. I have time on the actuator as I am gearing up on some minor work on the CRX and Odyssey atm. Hunting prices on the internet, I can get it down to $125 shipped for the entire mechanism. I dont know how much cheaper I can go...
But no rush. I have time on the actuator as I am gearing up on some minor work on the CRX and Odyssey atm. Hunting prices on the internet, I can get it down to $125 shipped for the entire mechanism. I dont know how much cheaper I can go...
05-11-2017, 06:17 PM

1st Gear
05-12-2017, 09:05 AM
Yeah, if you do not mind! That would be great. Appears that you approach this reflector from the 6 o'clock position only. Anything you can provide would be greatly appreciated.
But no rush. I have time on the actuator as I am gearing up on some minor work on the CRX and Odyssey atm. Hunting prices on the internet, I can get it down to a reasonable price. I dont know how much cheaper I can go...
But no rush. I have time on the actuator as I am gearing up on some minor work on the CRX and Odyssey atm. Hunting prices on the internet, I can get it down to a reasonable price. I dont know how much cheaper I can go...
05-12-2017, 10:00 AM
Awesome! Thank you sir!
That helps a lot. I knew there had to be a method to the madness on those little pieces. Thank you.
05-12-2017, 10:47 AM
I don't know why those little screwdriver slots are on these reflectors. Maybe it's so the dealers can sell DIY folks these rather expensive (for their size) parts.
https://www.ecstuning.com/b-genuine-...e/51417067171/
https://www.ecstuning.com/b-genuine-...d/51417046394/
Last edited by AKIndiMini; 05-12-2017 at 11:03 AM.
05-12-2017, 12:21 PM
You're very welcome. Funny enough, a couple of people sent me messages through Google/YouTube asking about the reflector just after I posted the door brake video. I shot the reflector info video from my passenger door because this one has a brand new reflector in it and it is snapped on there very tight.
I don't know why those little screwdriver slots are on these reflectors. Maybe it's so the dealers can sell DIY folks these rather expensive (for their size) parts.
https://www.ecstuning.com/b-genuine-...e/51417067171/
https://www.ecstuning.com/b-genuine-...d/51417046394/
I don't know why those little screwdriver slots are on these reflectors. Maybe it's so the dealers can sell DIY folks these rather expensive (for their size) parts.
https://www.ecstuning.com/b-genuine-...e/51417067171/
https://www.ecstuning.com/b-genuine-...d/51417046394/
 05-13-2017, 05:07 AM
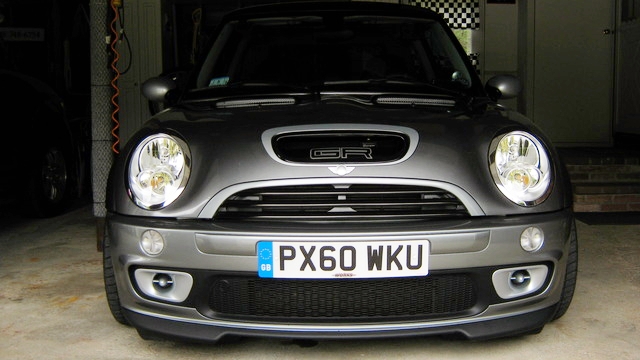
You're very lucky, your car is the only one that takes facelift headlights without needing to be programmed. Halogen cars need a trip to the dealership, and flicker without the programming.
05-13-2017, 03:25 PM
I "finally" got around to replacing the stupid door brake (check strap) on my R53's driver's side door. This thing never held the door very well and in the last couple years, it failed completely. I'm glad to see that the updated part works way better than the original one ever did.
https://youtu.be/oxOmAAaovKU
https://youtu.be/oxOmAAaovKU
Excellent...Reminds me, I still need to remove door card and replace dr side door latch...only opens manually with key...pita.
 05-13-2017, 03:45 PM
Cabin fever from fighting pneumonia last 3 wks....
Today was nice but forecasting 3 days of rain , so decided to clean up engine bay.


Removed cowl scoops and painted scoop mesh silver to match mirror caps, bumper ducts and scoop surround....hard to see though.


Today was nice but forecasting 3 days of rain
, so decided to clean up engine bay.Removed cowl scoops and painted scoop mesh silver to match mirror caps, bumper ducts and scoop surround....hard to see though.
Last edited by -=gRaY rAvEn=-; 05-13-2017 at 04:10 PM.
05-13-2017, 05:21 PM


Looks sharp!
Pneumonia = No fun!Topped off the oil, check fluids, check tire pressure and got him ready to go for driving to work next week.
05-13-2017, 07:30 PM
3rd Gear