
Electrical Rear Fog Light Switch Plate and Toggle Switch Install


2nd Gear
Joined: May 2008
Posts: 68
Likes: 0
From: Central New Jersey
Thanks for the info. Let me know how it goes with yours.

1st Gear
Joined: Jul 2003
Posts: 42
Likes: 1
From: Kentucky
I just used Automan21's hook technique to remove the switch plate. I could not believe how easily it came out. It took longer to remove the blank in the switch plate!
Now I'm off to my independent MINI shop to have the lights programmed.
Interestingly, when we bought the car, a 2010 R56S, I inquired about rear fogs the local dealer informed me that, based on the VIN number, the wiring harness did not include rear fog wiring/connectors. I looked under the car and could not find the wiring and accepted the dealer explanation. But, I installed the lamps anyway as they look better than the blanks. Recently I did some more looking around on NAM and learned that the black foam above the bumper must be pulled down to expose the rear fog connections. Sure enough, there they were.


2nd Gear

Joined: May 2010
Posts: 93
Likes: 2
All who want to turn on their retro fitted rear fog lights should read this thread by GTECKO . Can be done yourself with NcsExpert . You need to add the code $5AA to the VO by adding code in the CAS and FRM module .
https://www.northamericanmotoring.co...beginners.html
https://www.northamericanmotoring.co...beginners.html


1st Gear
Joined: Jan 2011
Posts: 38
Likes: 0
I don't think that would change for other years or models, but you should obviously double check.

Neutral
Joined: Sep 2013
Posts: 10
Likes: 0
I have just recieved my rear fog light set and new panel and toggle. The only thing I had to do to install it on my 2010 Mayfair was to pry the panel off the dash with a screwdriver at three points indicated by looking at the new panel's back and putting the toggle in then replacing the new panel into the dash. Total time; 5 minutes. Thank goodness I didn't look at the install directions here first! The longest part of the install was the rear wire harness location. Total time spent was 1/2 hour. Next is a trip to the dealer for programming and new Borla exhaust , Alta turbo inlet and hot side hoses and K&M cold air filter assembly.

4th Gear
Joined: May 2013
Posts: 314
Likes: 0
It seems like the best way to remove the toggle cover is to use panel removal tools instead of pulling the whole dash apart.
I have a 2013 R56 JCW and have not seen any info on the module mods required for a 2013. Recommendations welcome.
I have a 2013 R56 JCW and have not seen any info on the module mods required for a 2013. Recommendations welcome.
For 2013
Add toggle switch.
Add new toggle bank cover with rear fog icon.
We were unsuccessful using a Blue Box coming back with a Part Error, so PUMA explained how to program with BMW terminal to activate rear fog.
Was wired up for about an hr but I don't think it was actually programming the entire time.
Add toggle switch.
Add new toggle bank cover with rear fog icon.
We were unsuccessful using a Blue Box coming back with a Part Error, so PUMA explained how to program with BMW terminal to activate rear fog.
Was wired up for about an hr but I don't think it was actually programming the entire time.

4th Gear
Joined: May 2013
Posts: 314
Likes: 0
Assume no new light needed on drivers side?
Still need guidance on programming.
Still need guidance on programming.
For 2013
Add toggle switch.
Add new toggle bank cover with rear fog icon.
We were unsuccessful using a Blue Box coming back with a Part Error, so PUMA explained how to program with BMW terminal to activate rear fog.
Was wired up for about an hr but I don't think it was actually programming the entire time.
Add toggle switch.
Add new toggle bank cover with rear fog icon.
We were unsuccessful using a Blue Box coming back with a Part Error, so PUMA explained how to program with BMW terminal to activate rear fog.
Was wired up for about an hr but I don't think it was actually programming the entire time.
4th Gear
Joined: May 2013
Posts: 314
Likes: 0
Has anyone confirmed this code works on 2013 R56s?
All who want to turn on their retro fitted rear fog lights should read this thread by GTECKO . Can be done yourself with NcsExpert . You need to add the code $5AA to the VO by adding code in the CAS and FRM module .
https://www.northamericanmotoring.co...beginners.html
https://www.northamericanmotoring.co...beginners.html
4th Gear
Joined: May 2013
Posts: 314
Likes: 0
I am not sure how just pulling will unseat the upper clips with notches. Seems like you you have to somehow depress those. Also, there are clips on each outer side?
Thanks to this tread, I was able to retrofit rear fog light to my Canadian 2011 Mini Cooper Classic.
I didn't use the pick method, but it is a good reference point of where to pull. I just soft nylon strings and just wrap around the rings, and use the gear shifter to give it a constant pull, and it came out. Total time for installation is about 10 minutes as the above members said.
For programming, I just use NCS Expert to add the rear fog VO to the vehicle string. and rewrite FRM and CAS module.
4th Gear
Joined: May 2013
Posts: 314
Likes: 0
Has anyone done this cover swap out recently? Looking for advice.
4th Gear
Joined: May 2013
Posts: 314
Likes: 0
Does anyone have a picture of a cover for no seat heaters? Specifically I want to see the side tabs.
4th Gear
Joined: May 2013
Posts: 314
Likes: 0
I ended up using this method but modified it by taping the Captain Hook and using it to pull on the outermost rings. It worked perfectly! I just could not figure out how forcibly pulling would "cleanly" remove the cover with absolutely no damage.
Ok as promised, feel free to bash my picture taking ability lol.
First get a set of these and just use the Captain Hook one(3rd from left)

Then just slide it under the left or right side till it catches and gets behind the plastic cover.
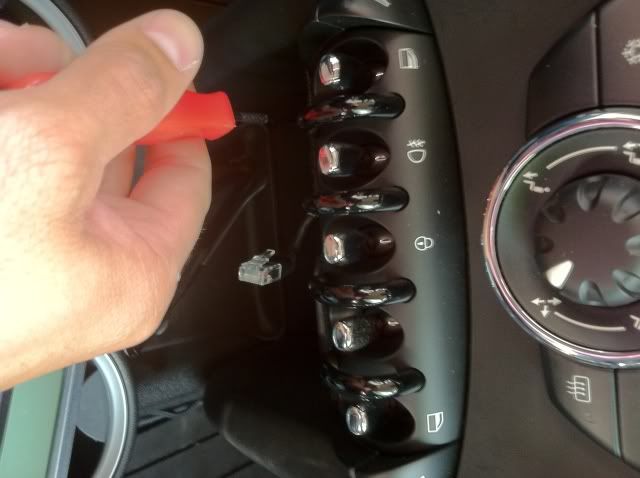

Try to put equal pressure on both sides when pulling. Just pull enough to pop that side out a bit.
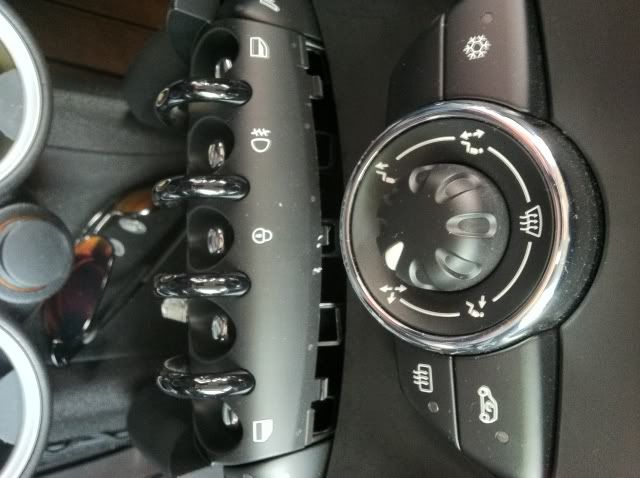
This is what you will have when both sides are popped out evenly.
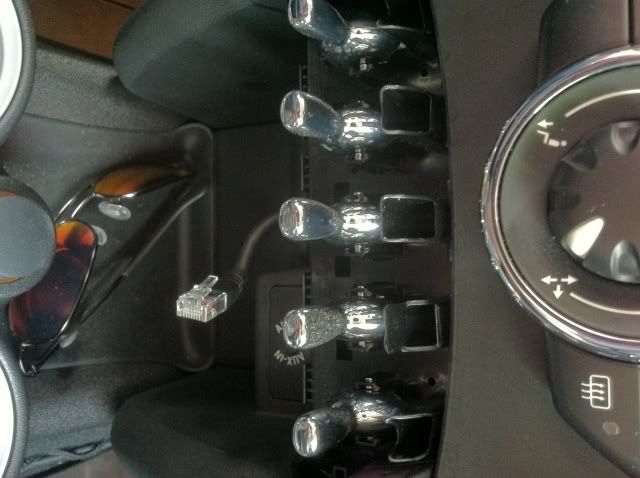
this is how it looks after the cover is out.
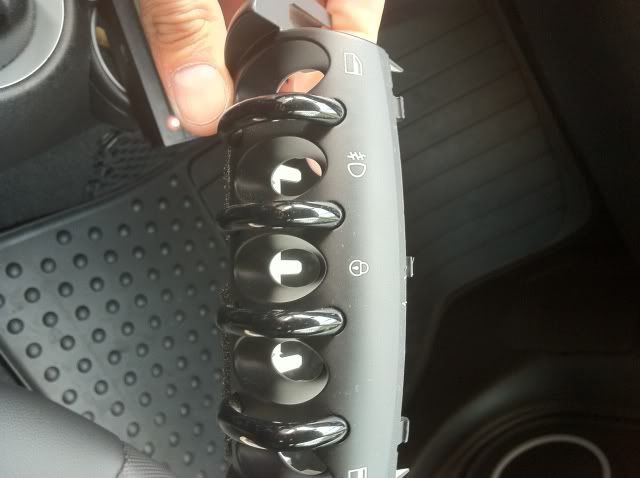
heres the cover
I have the toggle in there and just trying to get it programmed by anyone.
Then putting it back on just evenly line up and push back till it snaps.
sorry again for the sideways pics.
It took me like 2mins to pop off the cover, snap the toggle in and pop cover back on.
First get a set of these and just use the Captain Hook one(3rd from left)
Then just slide it under the left or right side till it catches and gets behind the plastic cover.
Try to put equal pressure on both sides when pulling. Just pull enough to pop that side out a bit.
This is what you will have when both sides are popped out evenly.
this is how it looks after the cover is out.
heres the cover
I have the toggle in there and just trying to get it programmed by anyone.
Then putting it back on just evenly line up and push back till it snaps.
sorry again for the sideways pics.
It took me like 2mins to pop off the cover, snap the toggle in and pop cover back on.

2nd Gear
Joined: Jul 2013
Posts: 76
Likes: 0
From: San Diego
Why are you giving up? You can do so much more when you have a working NCS Expert system! Too bad..I was just up there last week. If you can't find anyone. I will be up there again in December.

5th Gear
Joined: Oct 2010
Posts: 1,053
Likes: 5
From: Bx, NY
I never damaged my cover when removing it. Im glad people are using this method instead of removing the whole dash. Thats a big mess and always extra clips and screws left over. Good luck to those who are trying to code the newer R56s.