
Electrical Interior :: Reversing Tilt Switch mirror KPTech MT-20 installation


Thread Starter
|
Neutral
Joined: Feb 2011
Posts: 1
Likes: 0
Interior :: Reversing Tilt Switch mirror KPTech MT-20 installation
Reversing Tilt Switch Mirror KPTech MT-20 (Standard) installation
(this is my first how-to so bear with me)
Searched and searched and did not find a how to install so here you go.
Reversing Tilt switch purchased from http://www.outmotoring.com/mini-coop...lt-module.html
Link to the instructions
http://www.kptechnologies.com/docs/M...stallation.pdf
Installation is for a 2004 MCS
Tools needed:
T-20 torx bits
10mm socket
Cross-tip bit
Wire cutters
Wire Taps/connections/etc needed to splice into vehicle wiring
One Fuse tap
20ga wire (connections WILL be too short)
Electrical tape
Multimeter
At least one zip tie
My last vehicle had auto-tilting mirrors when you put the vehicle in reverse which made parking much easier.
<KPTech MT-20 (Standard)>

I decided to put the adjusting switch under the steering wheel on my parcel shelf.
Start by removing the center console, drivers side under dash panel and glove box.
Console removal instructions
http://documents.victorytechnologies...roduct/950.pdf
When disconnecting the mirror switch, note that the heated seat connectors are somewhat color coded with the white connector going in the lighter (right side of the assembly)
Take the Console base off and the cover panel as well to allow wires to go under the carpeting
Glove box is pretty straight forward, remove light, remove 5 Torx screws then pull out
I draped the Tilt switch over the bar to the right of the steering wheel then started running all but the RED and PURPLE wires ones down through a gap in the air handling cover that is on the left side of the console (sorry, forgot to take a pic but is pretty obvious).
On the pic below you can see a little cut in the upper left carpet above the yellow wire. There is just enough wire from the tilt switch to run all the wires through that hole and out near the lighter wiring
<Yellow and Black to Lighter Red and Brown>

I spliced the YELLOW (Switched Power) and BLACK (Ground) to the lighter wiring. Might want to extend both wires though they will reach barely. Splice as far down on the wiring as possible away from the connectors.
You will have to extend the remaining four wires to reach the mirror switch
<Passenger Mirror Control Connector>

The black tipped Mirror connector is for the Passenger Mirror and control switch
We will cut the Blue/Black and Blue/Green wires but here is where the installation got interesting.
The instructions state
5 - BLUE � MIRROR �UP� OUTPUT
a. Find and cut the �mirror up� wire. This wire will read 12vdc when the
power mirror is being motored up. Once cut, connect the mirror side of
the cut wire to this Blue �Mirror Up Output� wire.
6. GREEN � MIRROR �UP� INPUT
a. Connect this wire to the switch side of the �mirror up� wire found and cut in step 5.
7. BROWN � MIRROR �DOWN� OUTPUT
a. Find and cut the �mirror down� wire. This wire will read 12vdc when the
power mirror is being motored down. Once cut, connect the mirror side of
the cut wire to this Brown �Mirror Down Output� wire.
8. ORANGE � MIRROR �DOWN� INPUT
a. Connect this wire to the switch side of the �mirror down� wire found and cut in step 7.
This is exactly OPPOSITE what works on the mini.
Blue/Green (outside wire on the connector) will measure 12vDC when you press UP on the controller. Once cut, attach the ORANGE wire to the switch side and BROWN to the mirror side
Blue/Black (Position 4 on connector) will measure 12vDC when you press the DOWN controller. Once cut, attach GREEN to the switch side and BLUE to the mirror side.
I extended and ran the RED constant power wire to the left fuze panel and tapped into a Fuze that read 12vDC with no key in the ignition
Route the PURPLE (Reverse switch) wire over the radio behind where the glove box would be.
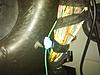
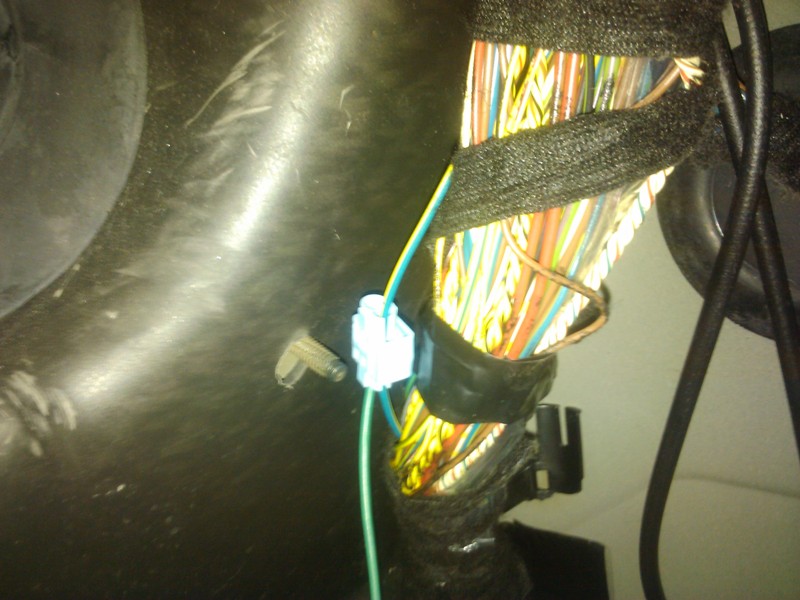
The reverse lights are powered by a Light Blue/Yellow stripe wire in the bundle of wires in the upper left of the passenger footwell. When I was installing I took off the left trim panel as well but think you can actually get to it without removing.
Note that there are at least three Blue with Yellow stripe wires in the bundle but the reverse one is thicker gauge than the other two and a little lighter blue.
<Reverse Wire Tapped in Footwell>
Now would be a good time to check to make sure everything is working!!
Center console base and little cover plate in the back go on first hiding wires
Then the actual center console and down tubes (cigarette lighter was a pain)
When connecting the seat warmers, Black is left and White right. Mirror has White in the middle and Black on the back
Need a zip tie for the shifter cover
Glove box goes back on ensuring you pull the light wires back through and reconnect the A?C hose to the back side. Side screws probably would be easier with a magnetized driver!!
Adjustments and Tuning as per the instructions!
(this is my first how-to so bear with me)
Searched and searched and did not find a how to install so here you go.
Reversing Tilt switch purchased from http://www.outmotoring.com/mini-coop...lt-module.html
Link to the instructions
http://www.kptechnologies.com/docs/M...stallation.pdf
Installation is for a 2004 MCS
Tools needed:
T-20 torx bits
10mm socket
Cross-tip bit
Wire cutters
Wire Taps/connections/etc needed to splice into vehicle wiring
One Fuse tap
20ga wire (connections WILL be too short)
Electrical tape
Multimeter
At least one zip tie
My last vehicle had auto-tilting mirrors when you put the vehicle in reverse which made parking much easier.
<KPTech MT-20 (Standard)>
I decided to put the adjusting switch under the steering wheel on my parcel shelf.
Start by removing the center console, drivers side under dash panel and glove box.
Console removal instructions
http://documents.victorytechnologies...roduct/950.pdf
When disconnecting the mirror switch, note that the heated seat connectors are somewhat color coded with the white connector going in the lighter (right side of the assembly)
Take the Console base off and the cover panel as well to allow wires to go under the carpeting
Glove box is pretty straight forward, remove light, remove 5 Torx screws then pull out
I draped the Tilt switch over the bar to the right of the steering wheel then started running all but the RED and PURPLE wires ones down through a gap in the air handling cover that is on the left side of the console (sorry, forgot to take a pic but is pretty obvious).
On the pic below you can see a little cut in the upper left carpet above the yellow wire. There is just enough wire from the tilt switch to run all the wires through that hole and out near the lighter wiring
<Yellow and Black to Lighter Red and Brown>

I spliced the YELLOW (Switched Power) and BLACK (Ground) to the lighter wiring. Might want to extend both wires though they will reach barely. Splice as far down on the wiring as possible away from the connectors.
You will have to extend the remaining four wires to reach the mirror switch
<Passenger Mirror Control Connector>

The black tipped Mirror connector is for the Passenger Mirror and control switch
We will cut the Blue/Black and Blue/Green wires but here is where the installation got interesting.
The instructions state
5 - BLUE � MIRROR �UP� OUTPUT
a. Find and cut the �mirror up� wire. This wire will read 12vdc when the
power mirror is being motored up. Once cut, connect the mirror side of
the cut wire to this Blue �Mirror Up Output� wire.
6. GREEN � MIRROR �UP� INPUT
a. Connect this wire to the switch side of the �mirror up� wire found and cut in step 5.
7. BROWN � MIRROR �DOWN� OUTPUT
a. Find and cut the �mirror down� wire. This wire will read 12vdc when the
power mirror is being motored down. Once cut, connect the mirror side of
the cut wire to this Brown �Mirror Down Output� wire.
8. ORANGE � MIRROR �DOWN� INPUT
a. Connect this wire to the switch side of the �mirror down� wire found and cut in step 7.
This is exactly OPPOSITE what works on the mini.
Blue/Green (outside wire on the connector) will measure 12vDC when you press UP on the controller. Once cut, attach the ORANGE wire to the switch side and BROWN to the mirror side
Blue/Black (Position 4 on connector) will measure 12vDC when you press the DOWN controller. Once cut, attach GREEN to the switch side and BLUE to the mirror side.
I extended and ran the RED constant power wire to the left fuze panel and tapped into a Fuze that read 12vDC with no key in the ignition
Route the PURPLE (Reverse switch) wire over the radio behind where the glove box would be.
The reverse lights are powered by a Light Blue/Yellow stripe wire in the bundle of wires in the upper left of the passenger footwell. When I was installing I took off the left trim panel as well but think you can actually get to it without removing.
Note that there are at least three Blue with Yellow stripe wires in the bundle but the reverse one is thicker gauge than the other two and a little lighter blue.
<Reverse Wire Tapped in Footwell>
Now would be a good time to check to make sure everything is working!!
Center console base and little cover plate in the back go on first hiding wires
Then the actual center console and down tubes (cigarette lighter was a pain)
When connecting the seat warmers, Black is left and White right. Mirror has White in the middle and Black on the back
Need a zip tie for the shifter cover
Glove box goes back on ensuring you pull the light wires back through and reconnect the A?C hose to the back side. Side screws probably would be easier with a magnetized driver!!
Adjustments and Tuning as per the instructions!


4th Gear


Joined: Jan 2007
Posts: 395
Likes: 6


Thread
Thread Starter
Forum
Replies
Last Post
igzekyativ
MINIs & Minis for Sale
34
Jul 16, 2020 12:54 PM
squawSkiBum
MINI Parts for Sale
15
Oct 2, 2015 09:21 AM
BoCRon
F55/F56 :: Hatch Talk (2014+)
4
Aug 17, 2015 01:21 PM