
First time paint correction + ceramic coating


Thread Starter
|
1st Gear
Joined: Apr 2018
Posts: 36
Likes: 27
First time paint correction + ceramic coating
Hey Guys,
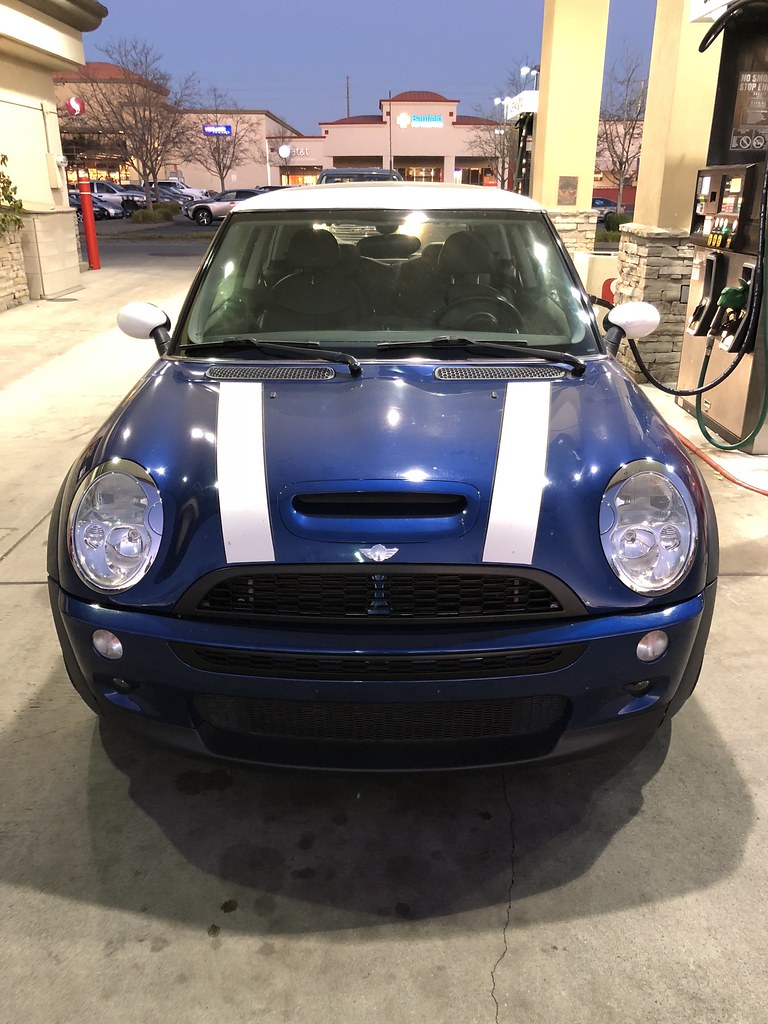
I recently picked up a 2004 R53 Mini Cooper S with 84k miles back in February. The paint was decent, but had tons of swirls and scratches. Since then I really wanted to take a stab at doing a paint correction myself and start getting more into the actual detailing of a car. I decided to do just that. I started at 7am, and finished with everything around 7:30pm. A lot more work than I anticipated, but the results are well worth it
Polisher: PORTER-CABLE 7424XP
Pads: Chemical Guys Hex Logic Orange and White Pads
Results (Not bad for a 14 year old car):

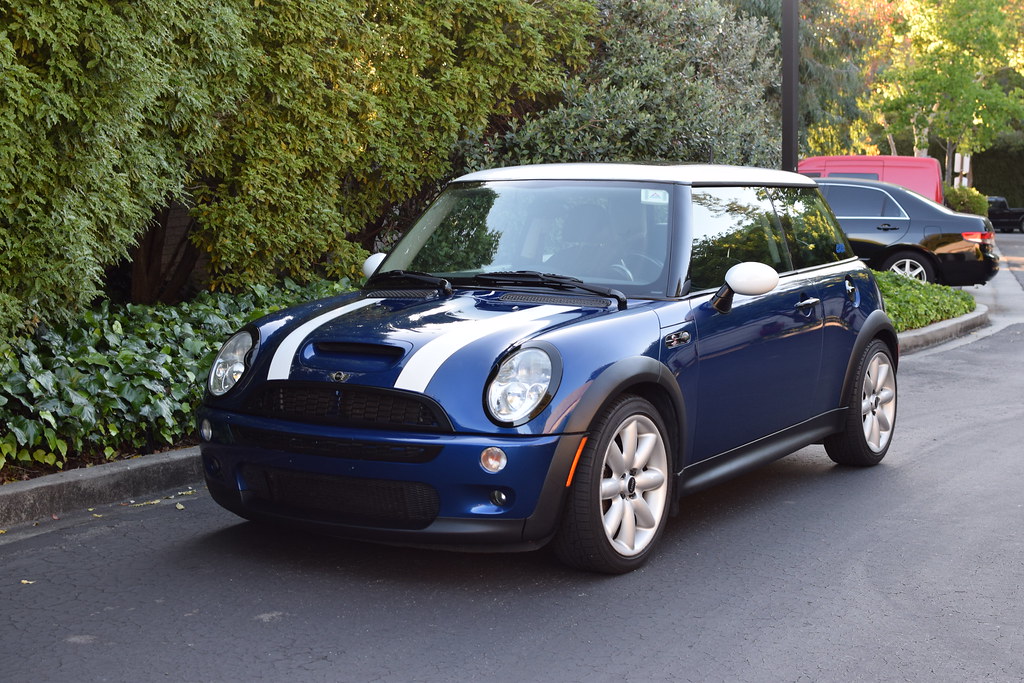
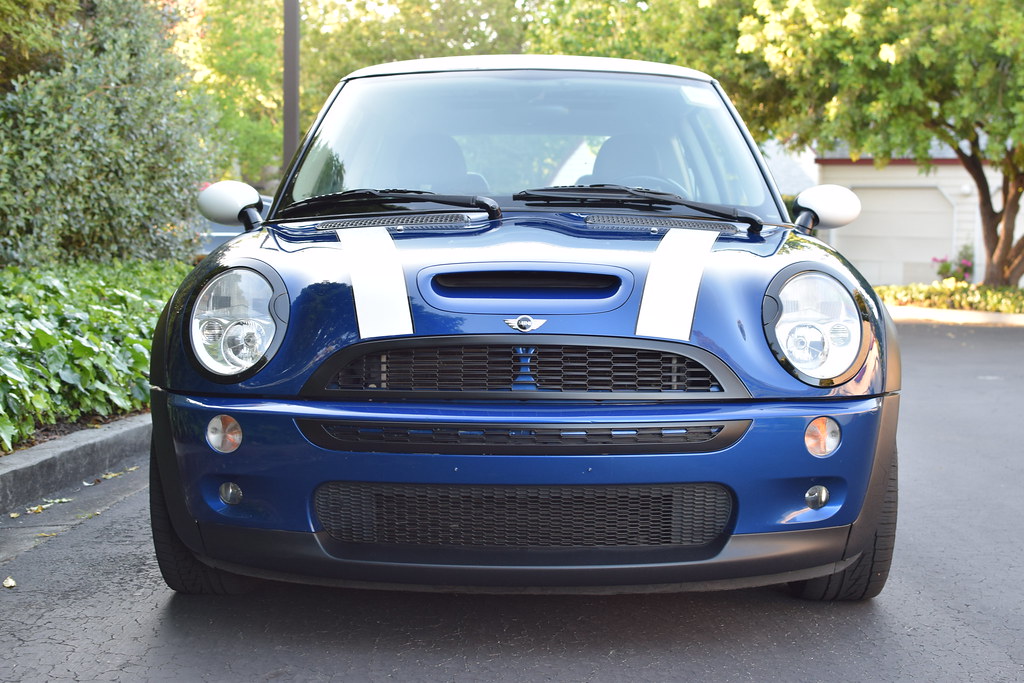
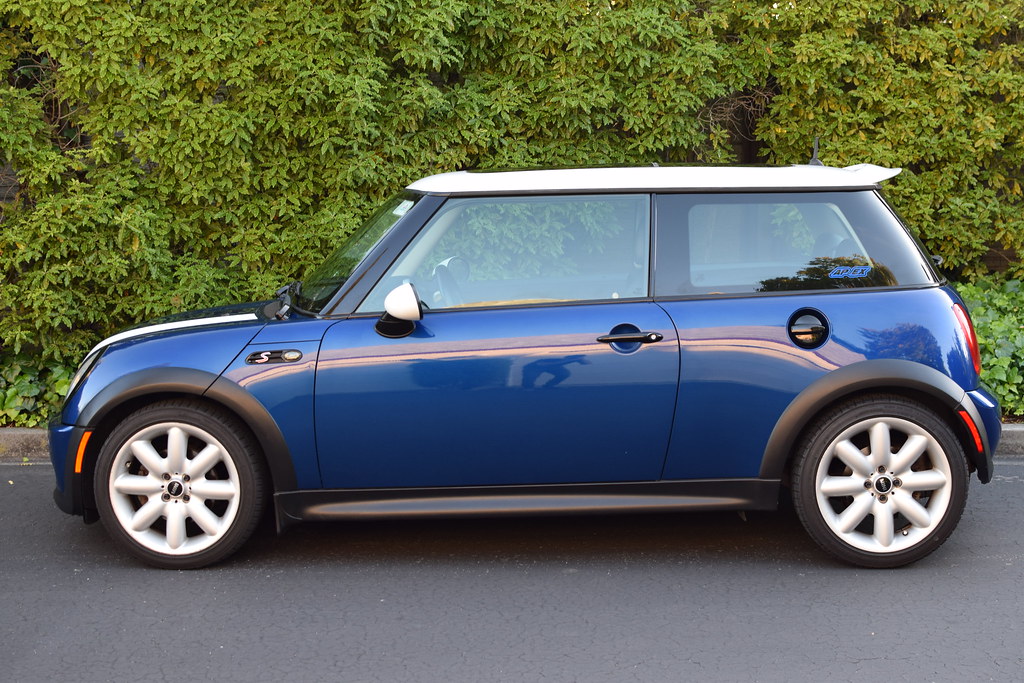
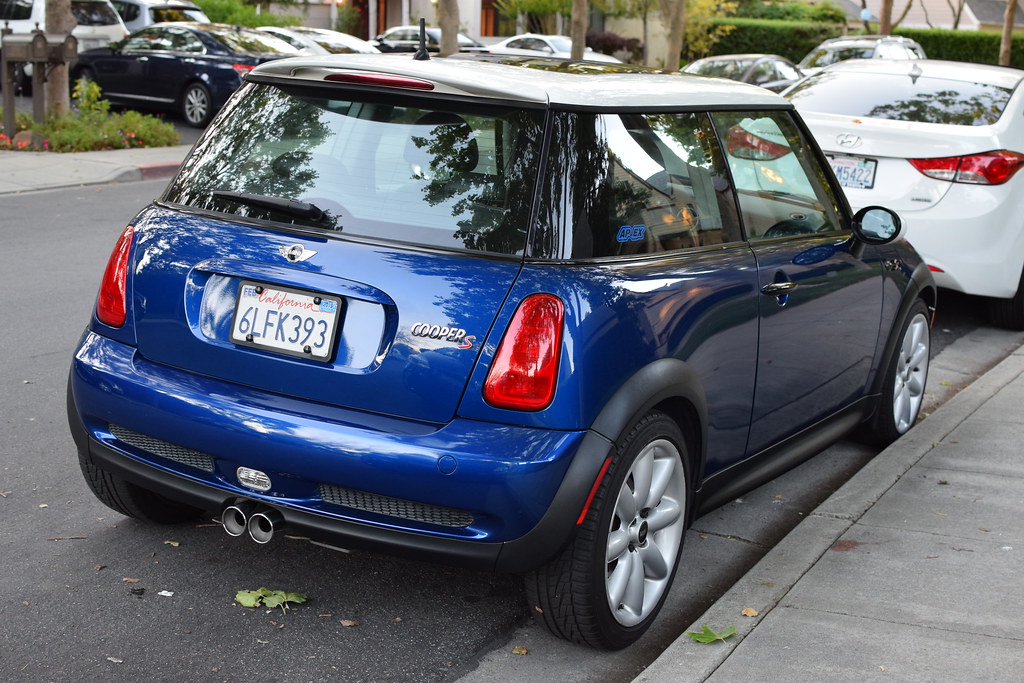
I recently picked up a 2004 R53 Mini Cooper S with 84k miles back in February. The paint was decent, but had tons of swirls and scratches. Since then I really wanted to take a stab at doing a paint correction myself and start getting more into the actual detailing of a car. I decided to do just that. I started at 7am, and finished with everything around 7:30pm. A lot more work than I anticipated, but the results are well worth it
Polisher: PORTER-CABLE 7424XP
Pads: Chemical Guys Hex Logic Orange and White Pads
- Step 1: Wash
- Step 2: Carpro Iron-X
- Step 3: Chemical Guys Clay Bar
- Step 4: Carpro Eraser
- Step 5: Cut (Meguiars Ultimate Compound)
- Step 6: Polish (Meguiars 205)
- Step 7: Meguiars Ultimate Black (Plastics)
- Step 8: Carpro Eraser
- Step 9: Cquartz Ceramic Coating
- Step 10: Carpro Reload
Results (Not bad for a 14 year old car):


4th Gear
Joined: Oct 2007
Posts: 512
Likes: 53
From: West Chester PA
Great job! I know it’s hard the first time you prep, Polish and ceramic coat a car but in the end it looks excellent.
The best part is it will look that way for well over a year , which most people that use sealant and wax don’t get.
The best part is it will look that way for well over a year , which most people that use sealant and wax don’t get.
Thread Starter
|
1st Gear
Joined: Apr 2018
Posts: 36
Likes: 27
 Definitely requires a lot of patience, but I'm happy with the result.
 Appreciate it! I have my weekend car ceramic coated as well, and it makes life so much easier. I'm curious to see how long the CQuartz will last. I have Gtechniq on my other car.
Thread Starter
|
1st Gear
Joined: Apr 2018
Posts: 36
Likes: 27
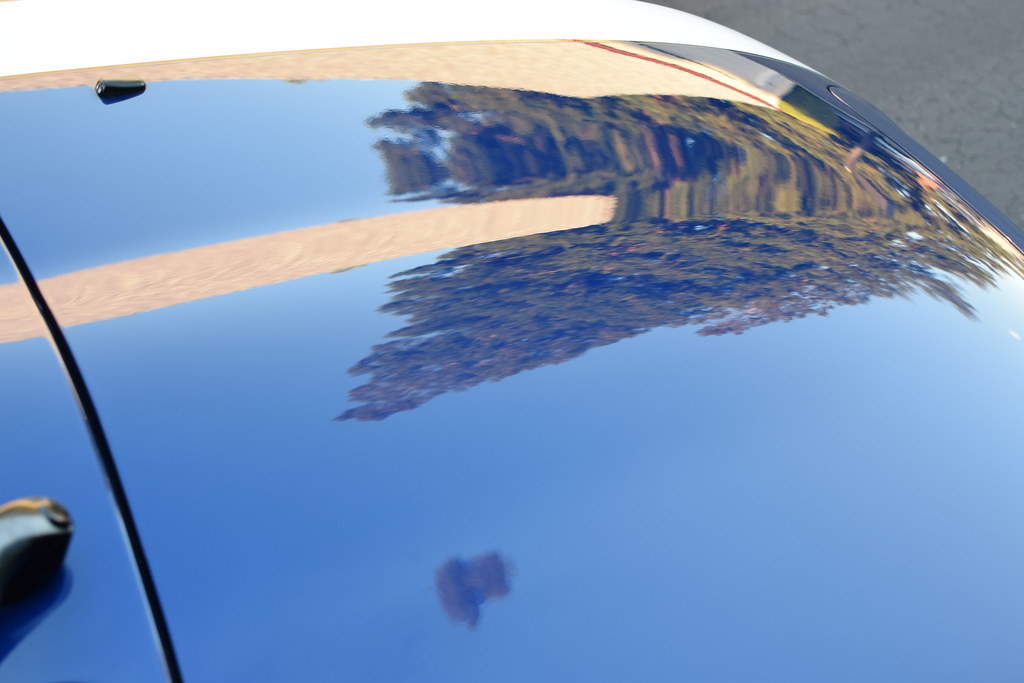
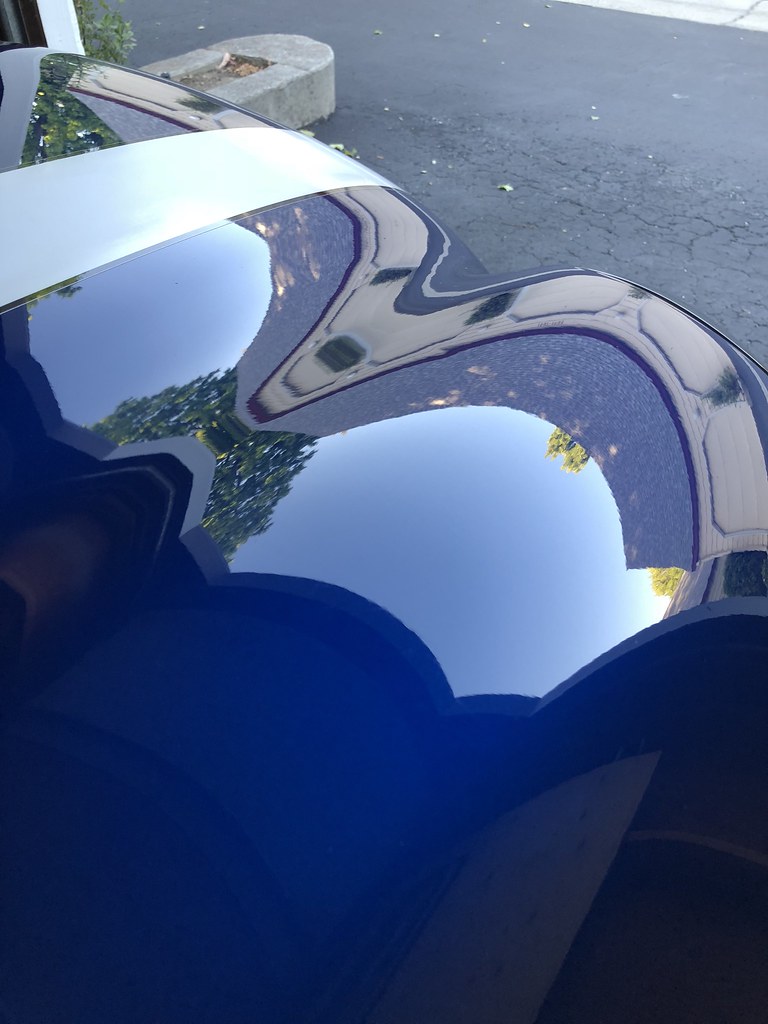
Here is one picture that best shows the condition of the hood before. As you can see, it wasn't in the best shape.
Also here is a short video I took of the paint after just one pass of the compound! In total I did two passes of the compound, and one pass of the polish so the finished product looks even better than on the video.
Also here is a short video I took of the paint after just one pass of the compound! In total I did two passes of the compound, and one pass of the polish so the finished product looks even better than on the video.
Trending Topics
4th Gear
Joined: Oct 2007
Posts: 512
Likes: 53
From: West Chester PA
CQuarts should last at least a year or longer with proper washing and maintenance like CarPro Reload.
Thread Starter
|
1st Gear
Joined: Apr 2018
Posts: 36
Likes: 27
Great info! I'll definitely check out Gyeon Syncro. A year is not bad for the CQuartz. Doing a polish and reapplying CQuartz once I year won't be too difficult.
Last edited by tallskinnymatt; May 31, 2018 at 10:17 PM.

Thread Starter
|
1st Gear
Joined: Apr 2018
Posts: 36
Likes: 27
Thanks! This was my first time, and it wasn't as hard as it looks. I'm sure you would do fine
Thanks! Been one of my favorite cars so far.
Thanks! Been one of my favorite cars so far.
Thread Starter
|
1st Gear
Joined: Apr 2018
Posts: 36
Likes: 27
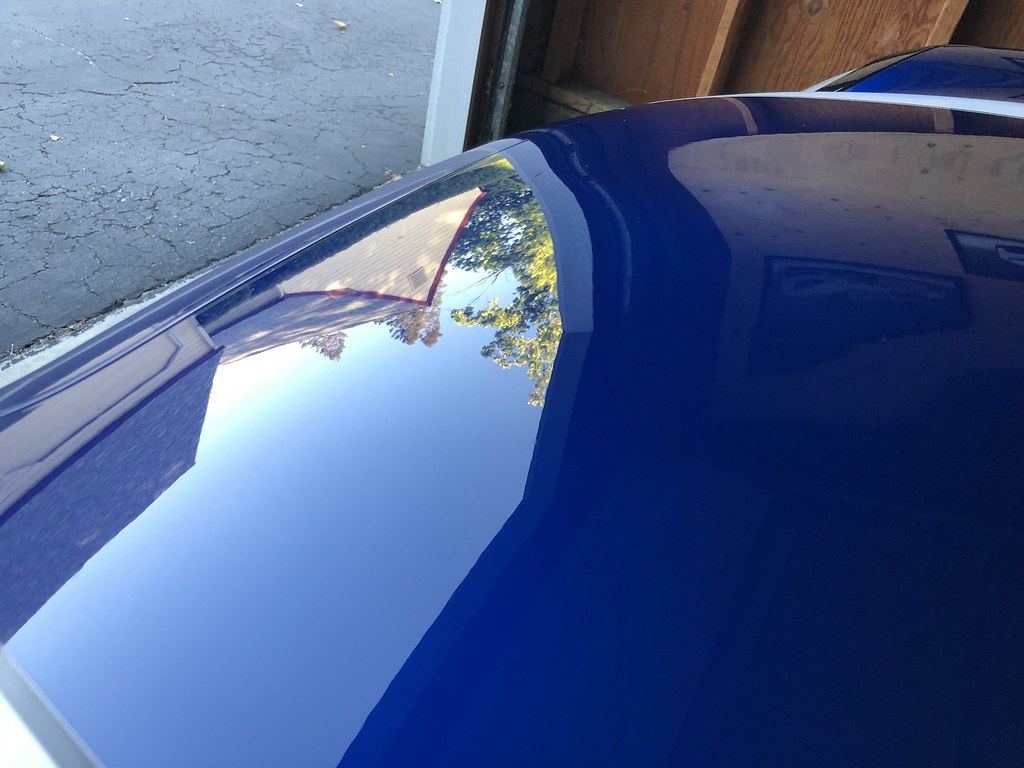
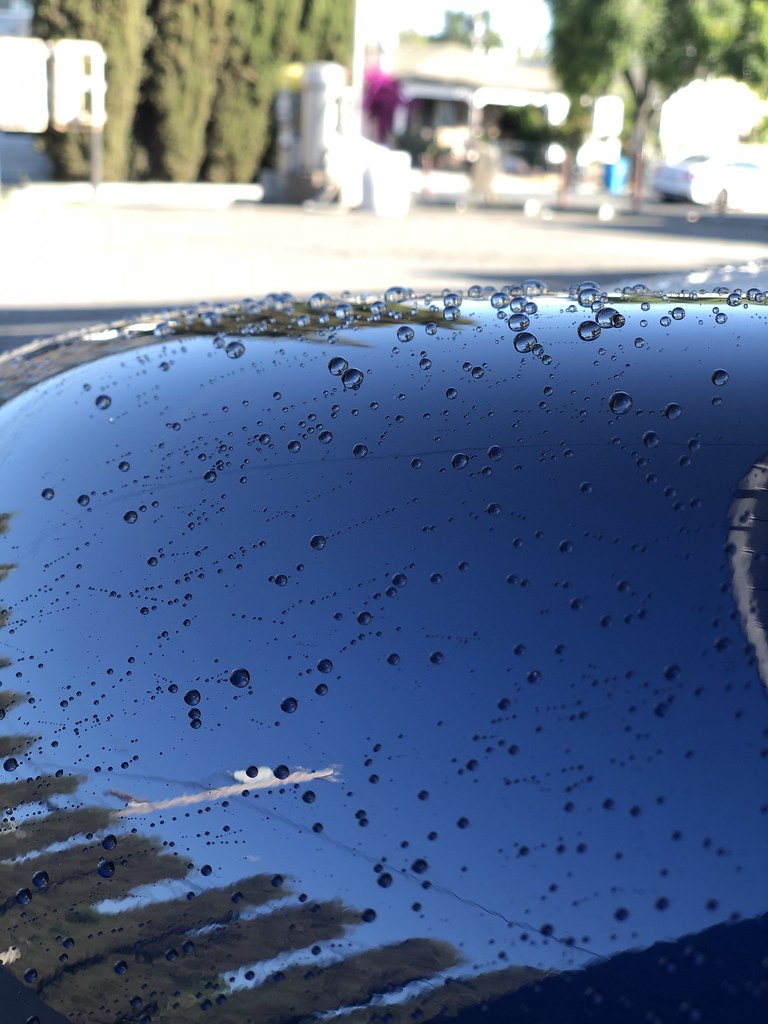
Decided to re-do my hood, as there were some deep water spots that were not quite gone the first time. Results turned out great. Did 1 pass of Meguiars 205 to remove the coating, 2 passes of Ultimate Compound to cut, and topped it off with another pass of 205. Re-coated it with CQuartz and applied Reload. Turned out really nice and not more water spots. I ordered new white racing stripes as well, so the front will look brand new.

OVERDRIVE
Joined: Mar 2013
Posts: 5,489
Likes: 629
From: Fuquay Varina, NC
This reminds me of an another post that I made recently on HP mods, something like just as men will never figure out women and shopping, they will never figure us out with our cars.
Last edited by Whine not Walnuts; Jun 2, 2018 at 12:29 PM.
OVERDRIVE
Joined: Mar 2013
Posts: 5,489
Likes: 629
From: Fuquay Varina, NC
Did you have any issues with Carpro Reload streaking? I have read posts about people having issues with it. From similar discussions it appears that HydroSilex Recharge does not have as many issues.
4th Gear
Joined: Oct 2007
Posts: 512
Likes: 53
From: West Chester PA
CarPro Reload works great. The key is remember to shake it between sprays.
I also see people get streaks all the time because they use way too much.
It�s the same with glass cleaner. I have seen people pump 5-6 squirts on one side window. It just one window, you only need one squirt and move it around with your towel.
Most times I only spray the towel and not the glass or the paint.
Thread Starter
|
1st Gear
Joined: Apr 2018
Posts: 36
Likes: 27
CarPro Reload works great. The key is remember to shake it between sprays.
I also see people get streaks all the time because they use way too much.
It�s the same with glass cleaner. I have seen people pump 5-6 squirts on one side window. It just one window, you only need one squirt and move it around with your towel.
Most times I only spray the towel and not the glass or the paint.

But don't polish every year if you can avoid it. Polishing removes clear coat (and eventually base coat paint).
Modern (post-1980s) car paint is around 6 thousandths of an inch thick (~150 microns); about 1/3 of that is clearcoat. That's half the thickness of a sheet of paper.
A light polishing is good for 0.5�1 microns; a heavy correction runs around 4. Sounds like you should have plenty, with 50 microns of clearcoat to work with. But, it seems the ultraviolet light protectants reside in the top 25% of the clearcoat. Based on this, you've got about 12 microns before you seriously expose the base coat to UV and fading.
Aggressive polishing can eat up that 12 microns fast. Take care of your paint and do the minimum possible polishing. It's definitely a case where prevention is better than cure. Try to stay ahead of the swirls so you don't need to do a heavy correction again.
Anyway, I'm really posting to praise your car and the work you've done. Indeed it looks better than new, and you've done a better job than I usually do

Thread Starter
|
1st Gear
Joined: Apr 2018
Posts: 36
Likes: 27
Your mini looks amazing. So good!
But don't polish every year if you can avoid it. Polishing removes clear coat (and eventually base coat paint).
Modern (post-1980s) car paint is around 6 thousandths of an inch thick (~150 microns); about 1/3 of that is clearcoat. That's half the thickness of a sheet of paper.
A light polishing is good for 0.5�1 microns; a heavy correction runs around 4. Sounds like you should have plenty, with 50 microns of clearcoat to work with. But, it seems the ultraviolet light protectants reside in the top 25% of the clearcoat. Based on this, you've got about 12 microns before you seriously expose the base coat to UV and fading.
Aggressive polishing can eat up that 12 microns fast. Take care of your paint and do the minimum possible polishing. It's definitely a case where prevention is better than cure. Try to stay ahead of the swirls so you don't need to do a heavy correction again.
Anyway, I'm really posting to praise your car and the work you've done. Indeed it looks better than new, and you've done a better job than I usually do
Definitely appreciate the kind words, and I'm thrilled the way it turned out!
Thread Starter
|
1st Gear
Joined: Apr 2018
Posts: 36
Likes: 27
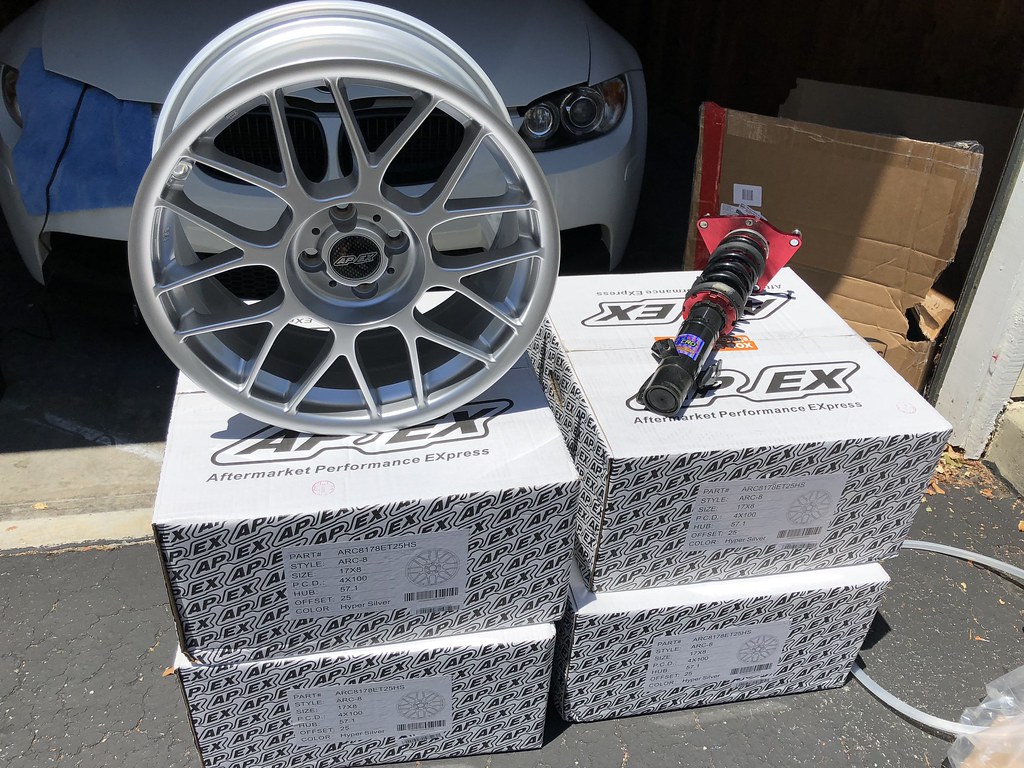
I know this is not necessarily detailing, but my new parts just arrived as well! Did a ceramic coating on my new wheels, so they will keep them protected and aid with washing. This will be an aggressive fitment, but should be able to dial in enough camber to make it work.

6th Gear
Joined: Jun 2004
Posts: 1,522
Likes: 7
From: San Diego, CA
Just want to say 12 hours to do all that work seems really fast to me - nice job!
I had CQuartz Classic put on my 04 R53 three years ago and have just been adding Reload ~3 times a year since then. No idea if the coating is still under there, but the surface is amazingly smooth after periodic lightly claying and Reload-ing.
For Reload, my detailer had the same advice as people above - just spray a tiny amount on a fluffy microfiber towel and rub & wipe. I have white MF towels reserved just for Reload.
Thread Starter
|
1st Gear
Joined: Apr 2018
Posts: 36
Likes: 27
Just want to say 12 hours to do all that work seems really fast to me - nice job!
I had CQuartz Classic put on my 04 R53 three years ago and have just been adding Reload ~3 times a year since then. No idea if the coating is still under there, but the surface is amazingly smooth after periodic lightly claying and Reload-ing.
For Reload, my detailer had the same advice as people above - just spray a tiny amount on a fluffy microfiber towel and rub & wipe. I have white MF towels reserved just for Reload.
I had CQuartz Classic put on my 04 R53 three years ago and have just been adding Reload ~3 times a year since then. No idea if the coating is still under there, but the surface is amazingly smooth after periodic lightly claying and Reload-ing.
For Reload, my detailer had the same advice as people above - just spray a tiny amount on a fluffy microfiber towel and rub & wipe. I have white MF towels reserved just for Reload.

Thread
Thread Starter
Forum
Replies
Last Post
Interior/Exterior Powder Coating (NY Area) Wheels or Using Dupli-Color High Performance Wheel Coating
toolazyforalogin
Interior/Exterior
95
Oct 13, 2012 11:17 AM
Drivetrain How to prep header for ceramic coating?
TonyB
Drivetrain (Cooper S)
31
May 29, 2006 05:52 PM
Drivetrain How beneficial is ceramic coating...
The MINITOR
Drivetrain (Cooper S)
12
Jan 13, 2006 04:18 PM