
suspension


Thread Starter
|
1st Gear
Joined: Apr 2011
Posts: 29
Likes: 0
suspension
Hi everyone,I am putting in brand new rubber cones and adjust a ride suspension in the front & back of my mini. The back seems easy enough I hope, but I do not know about the front. Does anyone have any easy ideas how to approach this job. Any help would be appreciated. Thanks.

4th Gear
Joined: Sep 2007
Posts: 542
Likes: 0
From: Chandler, AZ
Hi everyone,I am putting in brand new rubber cones and adjust a ride suspension in the front & back of my mini. The back seems easy enough I hope, but I do not know about the front. Does anyone have any easy ideas how to approach this job. Any help would be appreciated. Thanks.
I bought a tool from an online vendor that makes removing the knuckles a breeze. Well worth the money but in a pinch you can use a pickle fork to get the ball joints to separate from the knuckle. Pulling off the knuckle will provide enough sag in the front upper suspension arms to pull the knuckle joint out. From there it's just fussy work trying to get the old cones out of the subframe.
Good luck,
Jeff
Thread Starter
|
1st Gear
Joined: Apr 2011
Posts: 29
Likes: 0
suspension
Thanks for the help, but I have not removed the front suspension yet. The original rubber cones & trumpets are still in there due to me owning the mini for just 2 years now. The front & back have sagged big time so it is due to be changed. So I have to figuer out an easy way two get the fronts out. With my luck there will not be an easy way. Thanks.

5th Gear
Joined: Sep 2008
Posts: 623
Likes: 8
From: Jersey C.I. UK
You need a cone compressor , this pulls the rubber cone away from the trumpet and then you need to remove the top arm so you can get the trumpet and cone out..................
http://minispares.com/Product.aspx?ty=pb&pid=36986
http://minispares.com/Product.aspx?ty=pb&pid=36986

Thread Starter
|
1st Gear
Joined: Apr 2011
Posts: 29
Likes: 0
Hi there, thanks for the tip. I just bought the April 2011 edition of MINI magazine, and there is a 2 page article in it. By the way do you know if all the rubber cones can be used for the hi-lo's or the adjustaride's. Cheers.
Trending Topics

2nd Gear
Joined: Jun 2004
Posts: 140
Likes: 1
From: Escondido, CA
You do not need the cone compressor if you're replacing the trumpets with hi-los. You can just remove the rebound buffer, jack the car up (remove the wheel) and use a sawzall and cut out the old aluminum trumpet (cut it in half) and then wind in the hi-low.
If you are replacing the rubber cones, you will 99.9% likely need to remove the top arm. In addition to removing the rebound buffer and jacking up the car and removing the wheel, you will need to pop the top ball joint off of the swivel hub.
then loosen the nut (11/16 or 3/4", can't remember wrench size for sure) on the back side of the subframe that hold the top arm pivot shaft. (No need to undo the front nut of the same size.) You won't be able to remove it entirely just yet because it's too close to the firewall. Just unthread a few turns for now.
Then take a 7/16 wrench or socket and undo the bolt that is just inside the engine bay that holds the upper arm pivot shaft plate. There's two of them. The one that's inboard threads into the subframe, the one that's toward the outside of the car has a nut and washer. You need to hold the nut. It's a pig of a job on the radiator side, but can be done without removing the radiator with persistance using a bunch of socket extensions through the gril.
Once those two 1/4" bolts are out (with the 7/16" heads) you can push on the big nut you undid earlier to slide the shaft forward (use a big screwdriver to give leverage). when it pushes in some you can pull that nut off the rest of the way.
It is a bit tricky to get the pivot shaft out with all the brake lines and such in the way, but it will come out. You may have to pull the top arm off of the shaft and out the subframe before you can get the whle shaft out.
Be prepared to need/want to replace the bearings and shaft. This is an oft-neglected part that doesn't get the grease it should.
Reassembly is the reverse order and can also be a PITA. But the hi-los make is a bunch easier because you have have them cranked in while you are refitting the top arm.
Remember to put the lock washer and nut on the rear part of the pivot shaft BEFORE you put in and tighten up the 7/16" headed bolts! Nto fully tight, just get it started and in the position it was in like the first step of the removal described above.
Have fun and post pictures of the bloodied knuckles when your'e done.
Thread Starter
|
1st Gear
Joined: Apr 2011
Posts: 29
Likes: 0
Hi spank,thanks for the info.I was following the steps with pictures in my mini magazine. I got the drivers side,left hand steering side done, and it was a tight fit to get your hands into the small areas,but we got her done.Now it is on to the other side hopefully it will be a little easier without the rad in the way. I am a little confused though,I purchased a set of rubber cones from mini sport thinking of putting my old trumpets back in,but then I was talked into putting in adjustaride suspension instead. Now I see at mini sport they offer a different cone to use with adjustaride. I thought with a genuine moulton cone you can use it with any application so I went ahead and used it. Holds the mini up fine. Do you know if this is just a gimmick or what. Thanks.
Thread Starter
|
1st Gear
Joined: Apr 2011
Posts: 29
Likes: 0
Hi everyone, just completed one side of the front suspension. Just a little hint for anyone, you do not have to remove the ball joint. When you put your rubber cone in place wind your compression tool into the cone this will draw your cone upwards nice and tight. Then you can put in your hi-lo's.I thought that I would try this and it worked perfectly. Then you can put all the other parts back in place. Then you unwind your compression tool take it out and put your tower bolt back in. Then put your tire back on and that is it.

Thread Starter
|
1st Gear
Joined: Apr 2011
Posts: 29
Likes: 0
Hello everyone, just to let you know that I just completed the passenger side with the hi-lo's. The same thing as the other side I did not have to split the ball joints, but it is a bugger of a job. It might be easier to remove the ball joints, but I will never know. Oh-yah spank there were a few bloodied knuckles, but I am sure it will be worth it in the end I hope.
Thread Starter
|
1st Gear
Joined: Apr 2011
Posts: 29
Likes: 0
Adjusta ride
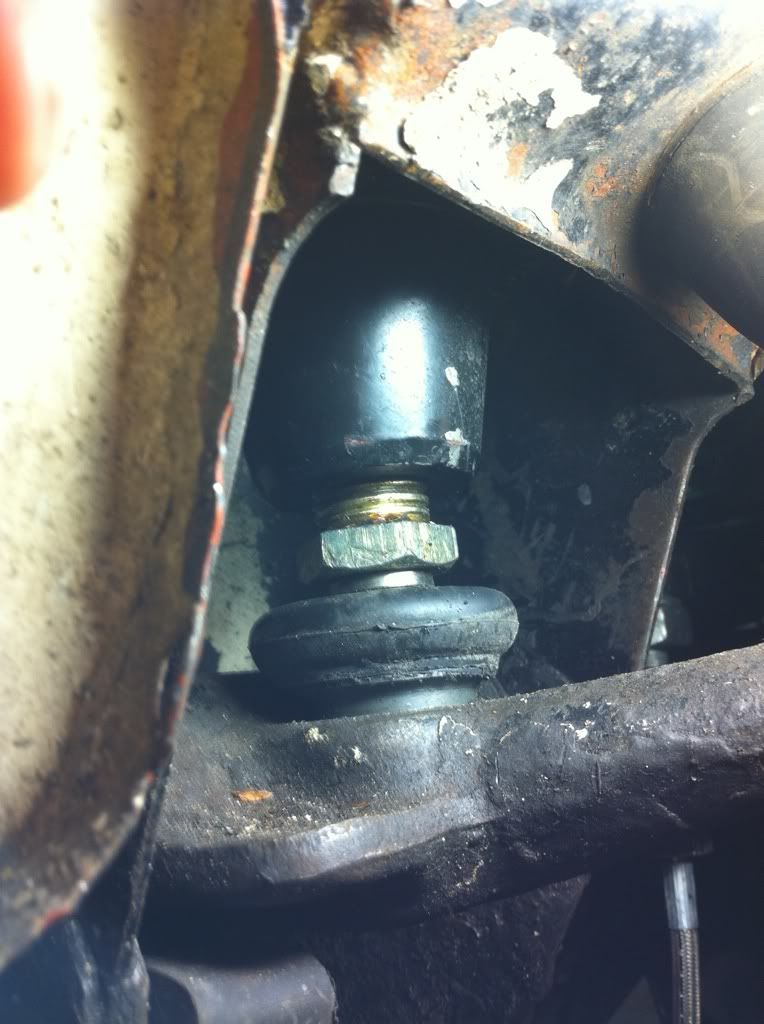
Hi there, you say that you just purchased a mini with the kit installed into the mini. All you have to do in the front is loosen the top nut,and with a 1 inch wrench you turn the bottom nut one way to lower the mini or turn it the other way to raise the mini. As for the back it is the same as the front loosen the top nut which is closest to the rubber cone, and turn it one way to lower the ride or the other way to raise the ride height. Turning to raise the mini you will see more threads. When you turn it the other way to lower the mini you will see less threads. Also when you are finished you should put some copper grease on the threads so the next time that you want to adjust the ride it will be easier to adjust. It sounds like a lot of work, but it is very easy. If I can do it any one can.

Neutral
Joined: May 2011
Posts: 7
Likes: 0
From: Scotch Plains, NJ
Thanks, I tried this with the front tonight. I jacked it up and then the nut could be turned by hand so I just turned it, not allowing the cone to move with it, and then let the car down. I didn't see where you tighten the top nut. Did I do something wrong? The car looks better now.
I have about 11 inches both front and rear from wheel center to fender lip. Is that too low? My sump clearance to the ground is about 4.5"
I have about 11 inches both front and rear from wheel center to fender lip. Is that too low? My sump clearance to the ground is about 4.5"
Thread Starter
|
1st Gear
Joined: Apr 2011
Posts: 29
Likes: 0
Hi, you need to tighten that top nut so the mini can stay at the height that you want it to, otherwise the suspension will start to lower itself,and you do not want that. What I have done with my mini for ride height is at the front end. I can put 3 fingers in between the tire & fender, and for the back end I have it set up that I can put 4 fingers in between the tire & the fender. That is the height that I have for now, but I might change it later I do not know yet. You can set it up for however it suits you.

Thread
Thread Starter
Forum
Replies
Last Post
vulkandino
MINIs & Minis for Sale
8
Oct 31, 2015 08:29 PM
GAT
R56 :: Hatch Talk (2007+)
6
Oct 4, 2015 07:27 PM
Mini Mania
Tires, Wheels & Brakes
0
Oct 1, 2015 10:38 AM
Mini Mania
Tires, Wheels & Brakes
0
Oct 1, 2015 10:17 AM
Emnotek
Vendor Announcements
0
Sep 29, 2015 07:37 AM