

so I'm thinking about plastidipping all my chrome parts, but I've read that its a pain to remove the rear headlight trim and was considering dipping the front trim and buying the blackline rears.
Has any compared plastidip to the blackline? Do they look similar enough to match if I were to get this hybrid set up? Wouldn't want it to look mismatched!
Has any compared plastidip to the blackline? Do they look similar enough to match if I were to get this hybrid set up? Wouldn't want it to look mismatched!
ECSTuning
Platinum Sponsor
close


Today
- Join DateJan 2013
- LocationWadsworth, Ohio
- Posts:36,704
-
iTrader Positive Feedback0
-
iTrader Feedback Score(0)
-
Likes:6,608
-
Liked:2,534 Times in 2,243 Posts
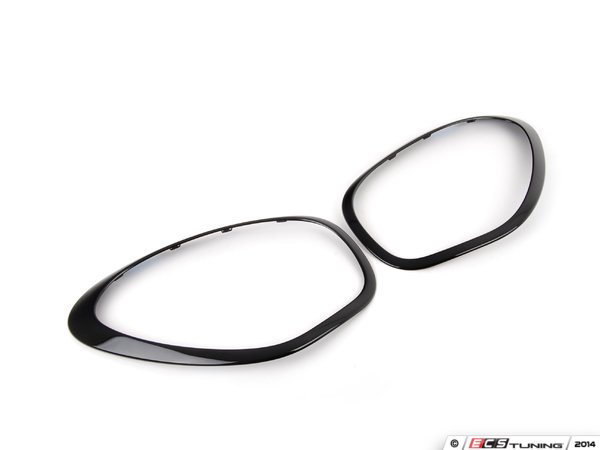
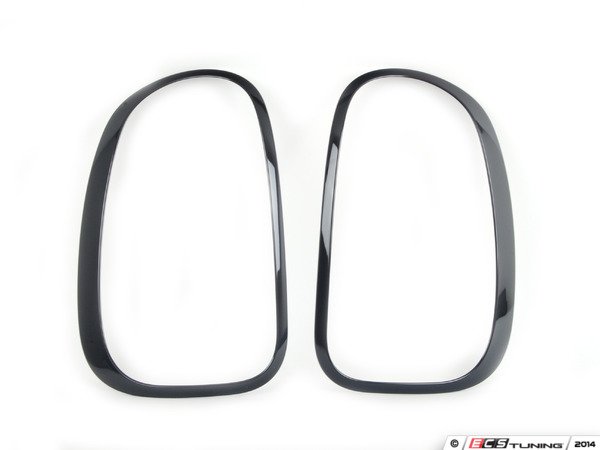
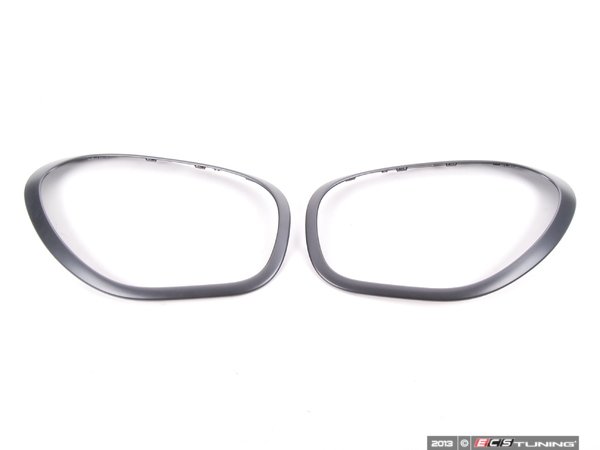
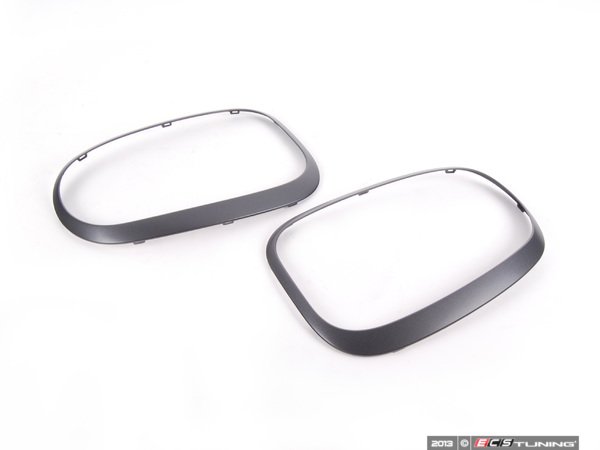
Blackline is simple in and out. Some people complain the plasti dip on the front will chip through. Also you have to be good at it or it will look a little bad. The Blacklines comes in gray matte version and a shinny black version.
Blackline - shiny black
http://www.ecstuning.com/News/MINI_R60_Countryman_Base_S_SX_JCW_Black_Line_Genui ne_Headlight_Tail_Light_Trim_2011_2012_2013_2014/
OR
Headlight Trim Ring Gray - Set 51132254023 KT
http://www.ecstuning.com/Search/SiteSearch/51132254023/ES2635829/
And
51132296300 KT Taillight Trim Ring Gray - Set
http://www.ecstuning.com/Search/SiteSearch/51132296300/ES2635841/
Thanks and gives you some options.
On the trims you have to pop the headlight trims out from the back. Easier to do with the hood up and press around the clips and it will pop out.
Thanks
does anyone have a side by side comparison? I want to make sure the black matches up.
ECSTuning
Platinum Sponsor
close
Today
- Join DateJan 2013
- LocationWadsworth, Ohio
- Posts:36,704
-
iTrader Positive Feedback0
-
iTrader Feedback Score(0)
-
Likes:6,608
-
Liked:2,534 Times in 2,243 Posts
https://www.northamericanmotoring.co...w-pick-up.html
Blackline on the Paceman

Black Line " Gray version "
https://www.northamericanmotoring.co...t-parts-2.html

Thanks
Blackline on the Paceman
Black Line " Gray version "
https://www.northamericanmotoring.co...t-parts-2.html
Thanks
sorry, I meant side by side comparison of a plastidipped part vs either the black or gray kits out there.
I want to dip the fronts, and buy the rears, but I'm worried if they will match since they are different items.
I want to dip the fronts, and buy the rears, but I'm worried if they will match since they are different items.
ECSTuning
Platinum Sponsor
close
Today
- Join DateJan 2013
- LocationWadsworth, Ohio
- Posts:36,704
-
iTrader Positive Feedback0
-
iTrader Feedback Score(0)
-
Likes:6,608
-
Liked:2,534 Times in 2,243 Posts
No I don't have that. also there are different color plasti dip. All I can reference is the genuine.
4th Gear
i dipped mine because the blackline kit wasn't available 2-1/2 years ago when i did mine and yes the rear tail lights are a pita to remove. that being said... my dipped ones still look good for being over 2 years old, if i was to redo it today i'd use the blackline kit. i may switch mine out this summer.

3rd Gear
If you are firm and hv time do the dip then do it. The trim kit is good too since is a quick swap and if somehow you dont like the look or got bored you can swap back.
What color is yr R60
What color is yr R60
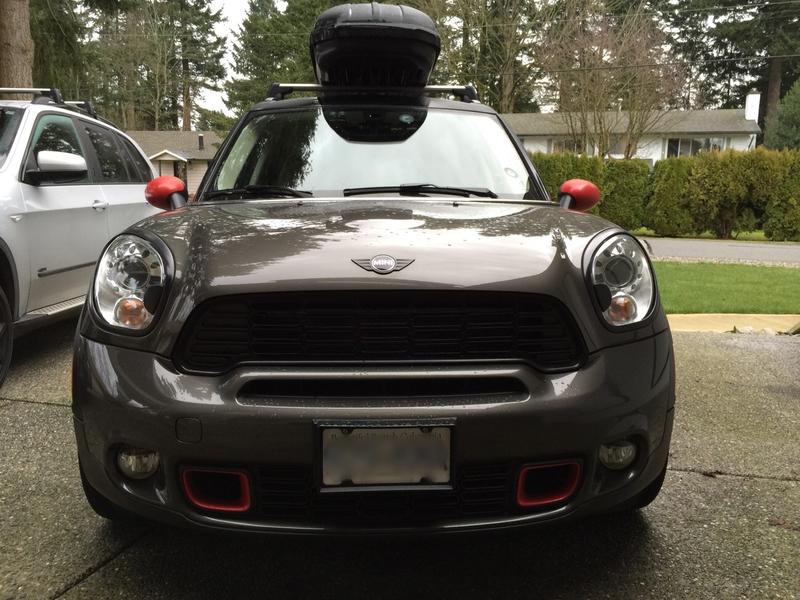
I have the Absolute Black R60 and I was considering either Black dip or the Dark Gray. Ideally, I'd like it match the plastic panels above the wheel wells.
I've read its pain to remove the rear trims, but I haven't found exact instructions on how to remove them. Do you know where I can find instructions?
I've read its pain to remove the rear trims, but I haven't found exact instructions on how to remove them. Do you know where I can find instructions?
3rd Gear
I did all the trims in black. Had to redo film on tails yesterday and yes is a pain the remove it. Best to remove rear tail lights then when it is out pop those taps to remove the chrome trims.
Dark grey be gd match to the panels
Dark grey be gd match to the panels

3rd Gear
I plastidip mine and glossifier on top of it, it last much longer...plus I smoked my tailights too with smoke dip

4th Gear
Quote:
I've read its pain to remove the rear trims, but I haven't found exact instructions on how to remove them. Do you know where I can find instructions?
The instructions are on here somewhere...that's where I found them when I did mine last year. Honestly, it wasn't as much as a PIA as I thought it would be to get the rears off. There are definitely some tricks, one of which is to get a flexible extension for a wrench (don't remember which size since I didn't buy it). Originally Posted by osinkboy
I have the Absolute Black R60 and I was considering either Black dip or the Dark Gray. Ideally, I'd like it match the plastic panels above the wheel wells.I've read its pain to remove the rear trims, but I haven't found exact instructions on how to remove them. Do you know where I can find instructions?
If you do try to dip them yourself, I'd recommend tying a string around the wrench and your wrist so if (when) you drop the wrench trying to maneuver in the tight spaces, it'll be easy to retrieve.
I debated about getting the "Grey Line" versions, but found it much easier to justify the $8 for a can of Plastidip.
Good luck.
3rd Gear
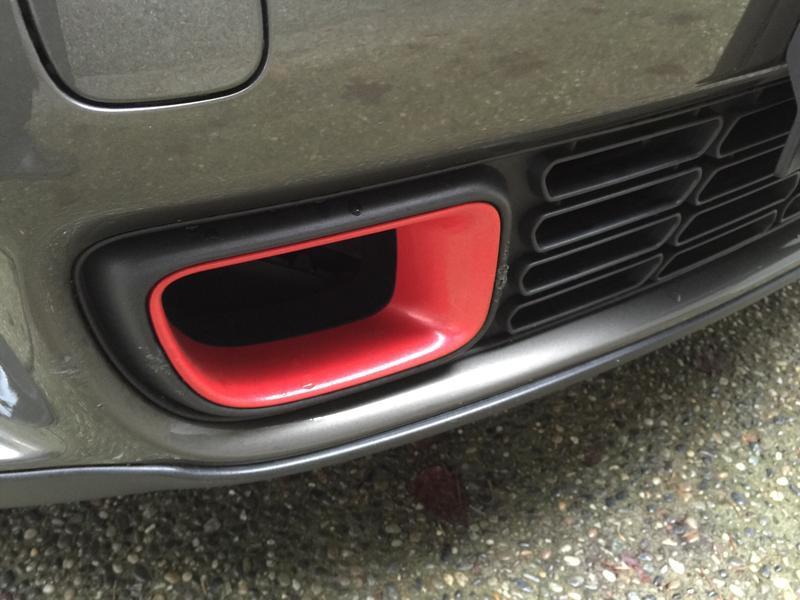
Dipped the trims, emblems and mirrors plus air duct red, plus glossified too. Oh yes almost forgot, smoked the tailights with smoke plastidip


3rd Gear
Minicountry: Can you give me a basic rundown of how you did the plastidip on the big MINI wings? Did you bother taping off anything or did you just spray and peel/scrub off the leftovers?
3rd Gear
Quote:
Just leave about half an inch all around and make sure you do at least 4 coats and up so make it easier to remove the over sprayed. For the emblem try to cover it with masking tape and leave 1/4 from the edge. Make sure use glossifier for few more coats after the black dried. I always like glossified all my black because it will last longer because I tried without before and doesn't look good after few months.Originally Posted by Jason Garrett
Minicountry: Can you give me a basic rundown of how you did the plastidip on the big MINI wings? Did you bother taping off anything or did you just spray and peel/scrub off the leftovers?

1st Gear
Quote:
looks great! If you don't mind me asking, how did you do the hood badge? Did you plasti dip the whole emblem and use the toothpick method to remove the center? The front is the last thing I have to do so I want it to come out nice. Your looks awesome. Thanks.Originally Posted by minicountry
Dipped the trims, emblems and mirrors plus air duct red, plus glossified too. Oh yes almost forgot, smoked the tailights with smoke plastidip
Do you glossify it before you remove the overspray or after? I guess I'm wondering it the glossify makes it hard to peel off the regular plastidip
Quote:
Originally Posted by minicountry
Just leave about half an inch all around and make sure you do at least 4 coats and up so make it easier to remove the over sprayed. For the emblem try to cover it with masking tape and leave 1/4 from the edge. Make sure use glossifier for few more coats after the black dried. I always like glossified all my black because it will last longer because I tried without before and doesn't look good after few months.

6th Gear
Glossifier is used before removing any overspray. It won't peel off very well otherwise
3rd Gear
 Put some masking tape on the middle of the emblem to make peeling easier. Yes toothpick works great, I glossify it before removing the overspray. I did few coats to make it more glossy.
2nd Gear
If you have extra money laying around then get the blackline. If you want to save the money for other upgrades than Plastidip works just as well.
ECSTuning
Platinum Sponsor
close
Today
- Join DateJan 2013
- LocationWadsworth, Ohio
- Posts:36,704
-
iTrader Positive Feedback0
-
iTrader Feedback Score(0)
-
Likes:6,608
-
Liked:2,534 Times in 2,243 Posts
The blackline black gloss looks great and fish matches well with the factory black or the black headlight buckets if you have them. The Black Line Gray matches perfect with the gray on the side scuttles . That what I have noticed.