

Lancs clubbie me and my clubman


Thread Starter
|
2nd Gear
Joined: Dec 2008
Posts: 87
Likes: 0
Lancs clubbie me and my clubman
Picture heavy.
Seeing as i can't find my thread i will start afresh
Hi my name is Iain,i was born in 1968 in Beverley East Yorkshire,from there i travelled to Germany as my dad was serving in the RAF,then it was back to blighty and to the place where i grew up and would spend my best days Driffield.After i left school i went to collage to study engineering and Technical drawing i only studied for 1 year as i found myself my first job as a sewing machine mechanic,but unfortunately i got made redundant and the same with my next job which was also a sewing machine mechanic :( from there i worked in a record studio as helping hand money was pants nothing new there a few little job here and there.Then my last job before i joined up was working in a poultry factory money was great but not the best job in the world.In 1989 at the age of 21 i joined the Army as a tank crewman i served with the 13/18th royal hussars for 3 years were i travelled to Germany and to cyprus with the United Nations,after the cutbacks and amalgamations i then joined the 9/12th Royal Lancers where i spent just over 6 years with tours to Northern Ireland and 2 tours of bosnia i eventually left the army in 1998 the year i got married.I'm married to Lynn a Lancashire lass whom is really my best mate if you know what i mean,she works in a small factory which make's soft furnishings she has been there since leaving school.
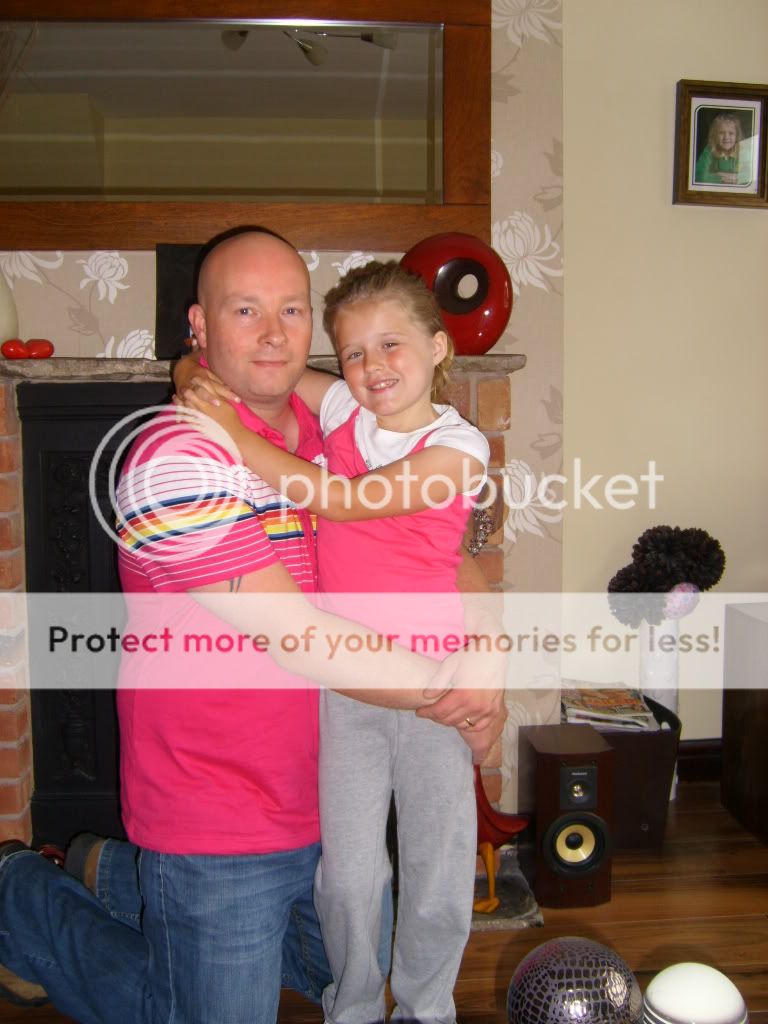
We also have a daughter Jane,as many of you know she was diagnosed with Leukaemia back in March 2007 and is now looking great and the treatment finished in 2009 :D This is our first MINI and i'm sure it won't be our last :D
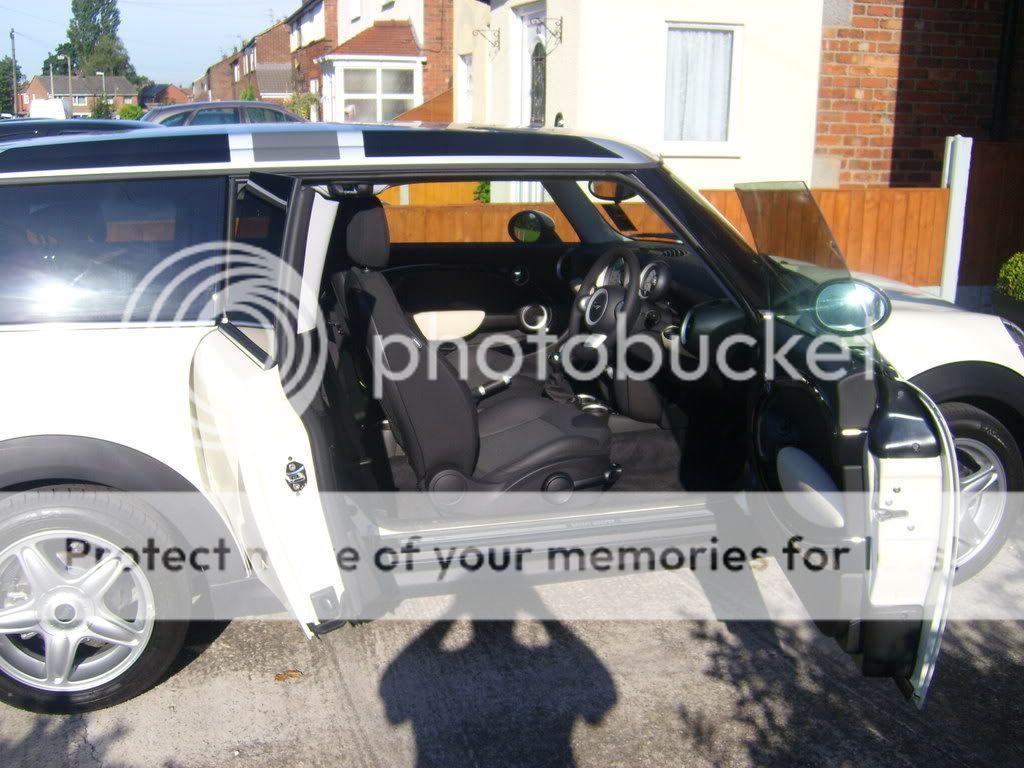
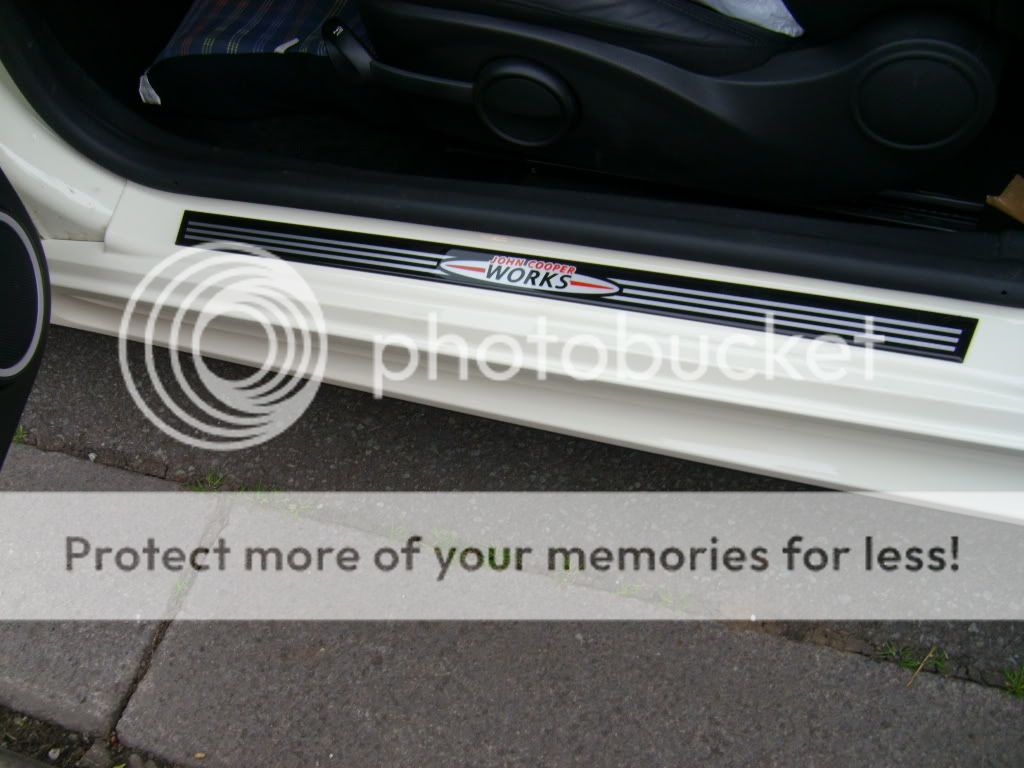
2008 cooper clubman with the Black jack theme.
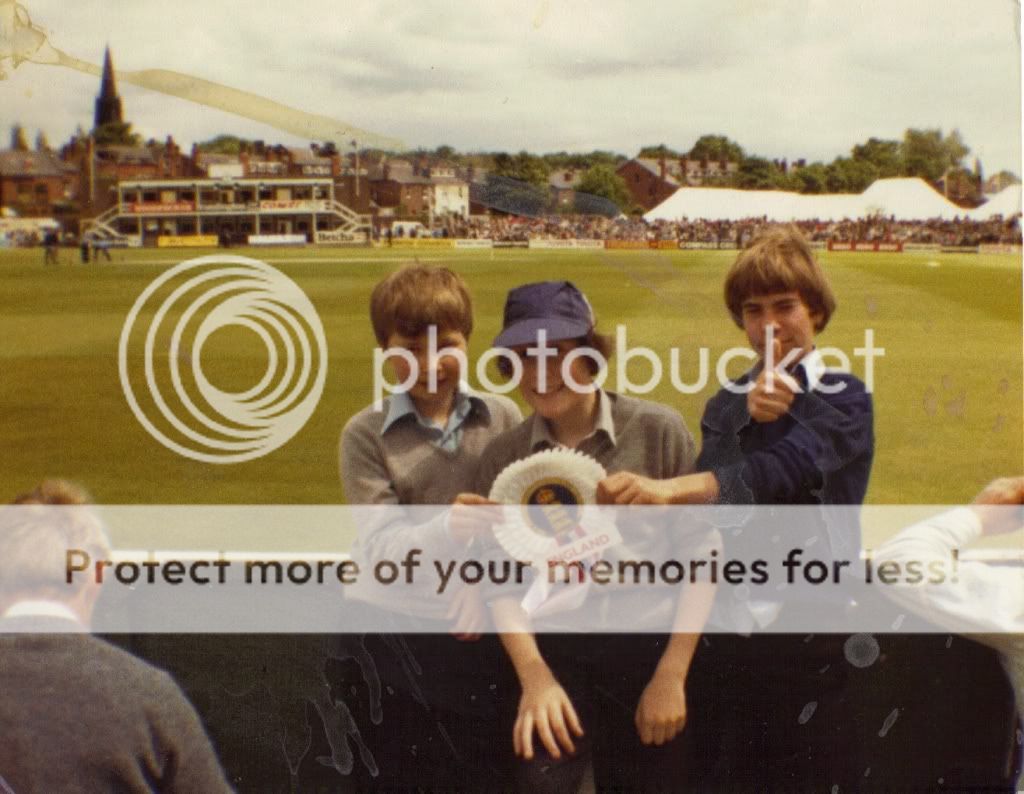
School days trip to headingley
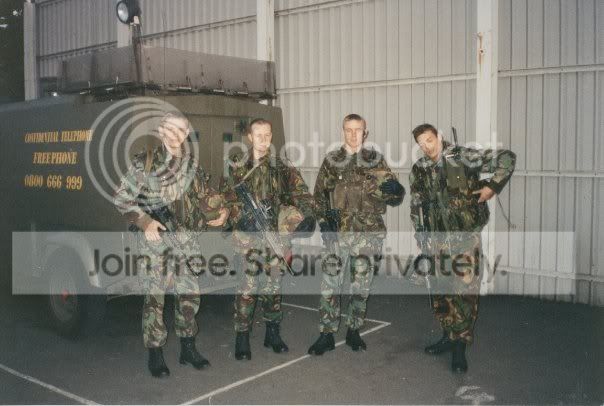
Nothern Ireland
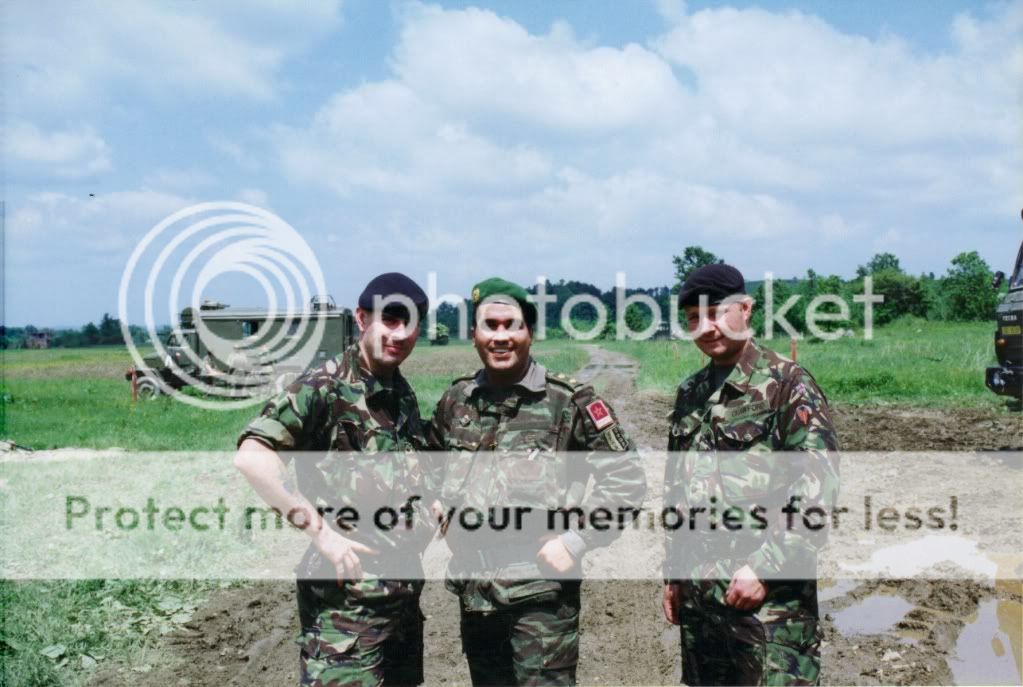
Bonia
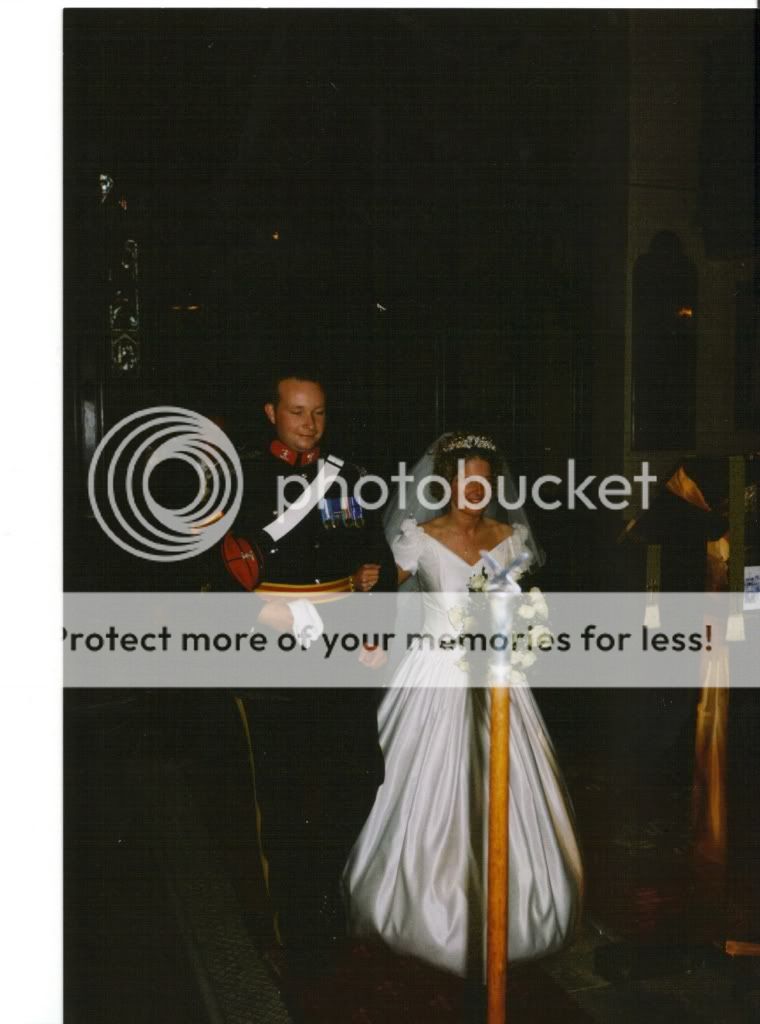
Our wedding day
Jane
Then
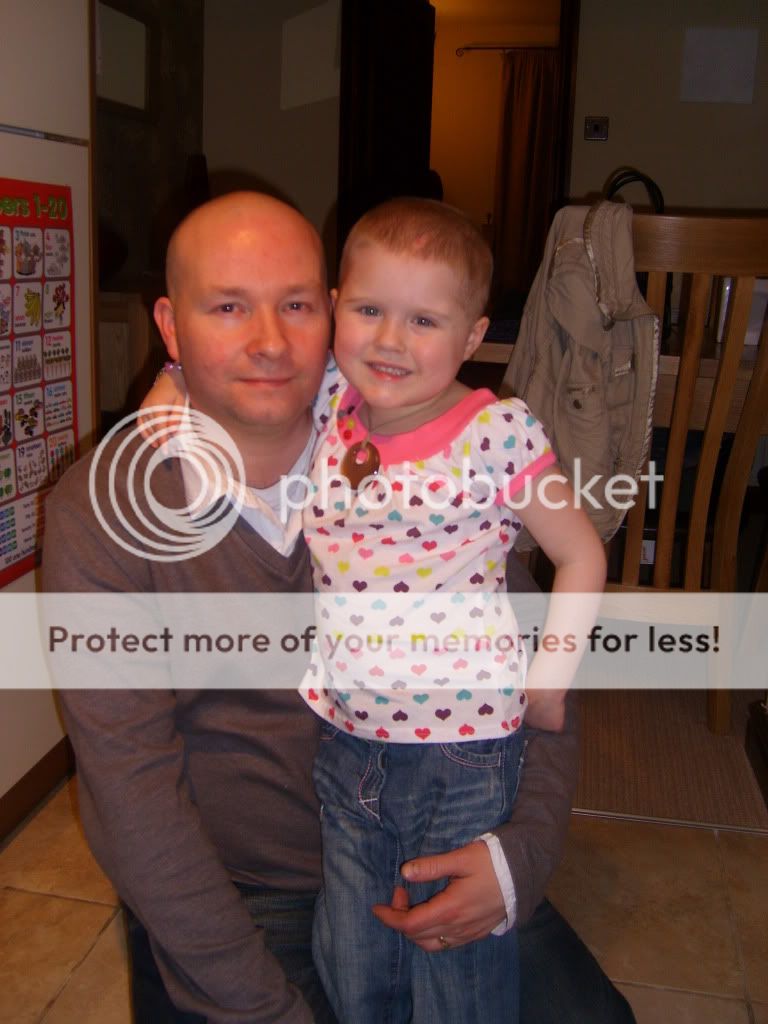
And now
The day we brought it home


Seeing as i can't find my thread i will start afresh
Hi my name is Iain,i was born in 1968 in Beverley East Yorkshire,from there i travelled to Germany as my dad was serving in the RAF,then it was back to blighty and to the place where i grew up and would spend my best days Driffield.After i left school i went to collage to study engineering and Technical drawing i only studied for 1 year as i found myself my first job as a sewing machine mechanic,but unfortunately i got made redundant and the same with my next job which was also a sewing machine mechanic :( from there i worked in a record studio as helping hand money was pants nothing new there
a few little job here and there.Then my last job before i joined up was working in a poultry factory money was great but not the best job in the world.In 1989 at the age of 21 i joined the Army as a tank crewman i served with the 13/18th royal hussars for 3 years were i travelled to Germany and to cyprus with the United Nations,after the cutbacks and amalgamations i then joined the 9/12th Royal Lancers where i spent just over 6 years with tours to Northern Ireland and 2 tours of bosnia i eventually left the army in 1998 the year i got married.I'm married to Lynn a Lancashire lass whom is really my best mate if you know what i mean,she works in a small factory which make's soft furnishings she has been there since leaving school.We also have a daughter Jane,as many of you know she was diagnosed with Leukaemia back in March 2007 and is now looking great and the treatment finished in 2009 :D This is our first MINI and i'm sure it won't be our last :D
2008 cooper clubman with the Black jack theme.
School days trip to headingley
Nothern Ireland
Bonia
Our wedding day
Jane
Then
And now
The day we brought it home


Neutral
Joined: Aug 2011
Posts: 8
Likes: 0
From: Luxembourg
Hi,
I like the styling changes you did to your car.
Looks new and fresh after each step.
I'm not sure I like the PW Headlight rings and the roof though. To me it looked better with the roof in grey and the graphics, now it's a bit too sleek, but that may just be my opinion.
I also feel there's some stripes missing.
Regards
David
Thread Starter
|
2nd Gear
Joined: Dec 2008
Posts: 87
Likes: 0
Hi,
I like the styling changes you did to your car.
Looks new and fresh after each step.
I'm not sure I like the PW Headlight rings and the roof though. To me it looked better with the roof in grey and the graphics, now it's a bit too sleek, but that may just be my opinion.
I also feel there's some stripes missing.
Regards
David
I like the styling changes you did to your car.
Looks new and fresh after each step.
I'm not sure I like the PW Headlight rings and the roof though. To me it looked better with the roof in grey and the graphics, now it's a bit too sleek, but that may just be my opinion.
I also feel there's some stripes missing.
Regards
David


5th Gear
Joined: Sep 2009
Posts: 719
Likes: 0
From: Tallahassee, FL
Wow Iain!
Dave has been through some changes and is looking gorgeous.
Little Wing was in an accident about a year and a half ago too!
Ouch! All better now, but feeling the need for some changes.
I had the C pillars and back bumper painted black when LW was in the body shop.
It's much more visible from behind now.
Now I realize that if I take the UJ roof graphic off, it's silver underneath.
Too be honest, I'm kind of missing the silver though.
Anymore black and LW will start to look like a Storm Trooper.
I still like my UJ roof, but the FL sun is taking a toll and the bonnet stripes are looking a little ratty too.
Not sure what I'll do, but you always have such good ideas!
I am keeping on eye on my used-to-be twin.
I'm really happy that Jane is doing well and growing up so beautifully.
Thread Starter
|
2nd Gear
Joined: Dec 2008
Posts: 87
Likes: 0
Well storm trooper it is as a few more changes have been added with the black a panel ans black scuttles followed by the removal of the silver from the the rear to be replaced by new black pillars and painted light surrounds and upper rear bumper.


as a few more changes have been added with the black a panel ans black scuttles followed by the removal of the silver from the the rear to be replaced by new black pillars and painted light surrounds and upper rear bumper.
Trending Topics
5th Gear
Joined: Sep 2009
Posts: 719
Likes: 0
From: Tallahassee, FL
The Storm Trooper look is very good on Dave.Really, your car looks amazing. Well done!
Little Wing has some issues that I want to change, but can't make a decision.
Then there's always the $$$ too.
What you have done is very impressive.

5th Gear
Joined: Sep 2009
Posts: 719
Likes: 0
From: Tallahassee, FL
Okey dokey...
Little Wing is at the dealer today for scheduled maintenance and the water pump recall.
While there, she is getting a change...
The silver bonnet stripes are going and...
she's getting new black bonnet stripes!
Little Wing is at the dealer today for scheduled maintenance and the water pump recall.
While there, she is getting a change...
The silver bonnet stripes are going and...
she's getting new black bonnet stripes!
Thread Starter
|
2nd Gear
Joined: Dec 2008
Posts: 87
Likes: 0
Thread Starter
|
2nd Gear
Joined: Dec 2008
Posts: 87
Likes: 0
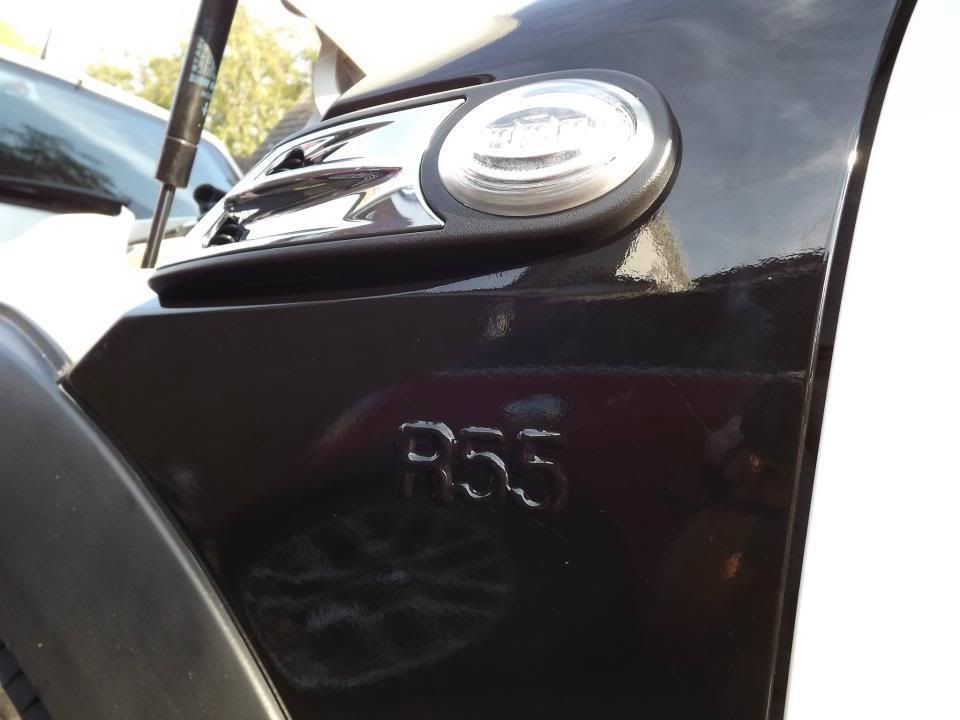
Removed the black A panel vinyls back to the naked look,bought new colour coded grille and added some new LED puddle lights


267276_4680324169895_155240657_n by Lancs clubbie, on Flickr
206288_4680310209546_1185035353_n by Lancs clubbie, on Flickr
483122_4680319729784_267184995_n by Lancs clubbie, on Flickr
267276_4680324169895_155240657_n by Lancs clubbie, on Flickr
206288_4680310209546_1185035353_n by Lancs clubbie, on Flickr
483122_4680319729784_267184995_n by Lancs clubbie, on Flickr

3rd Gear

Joined: Aug 2012
Posts: 294
Likes: 0
From: Denver, CO
Diggin the puddle lights. Where'd you find them?
Thread Starter
|
2nd Gear
Joined: Dec 2008
Posts: 87
Likes: 0

3rd Gear
Joined: Jul 2012
Posts: 228
Likes: 1
From: San Diego
Those puddle lights are slick! I wonder if their available in the US? Any pictures on how they are installed?
Great first post and great pics LC.
I worked with 4/5 Commando in the first gulf war, and really enjoyed the times subsequently when I worked with UK military forces. Spent some time (about four months) working out in RAF Marham, just before OIF (in fact, ended up back in the same area 3 months after leaving, over at Mildenhall).
Still miss the friends I made (and still keep in touch with) over in the UK. Fond memories of competing at Bisley, at the local range, as well as the daily 3 mile walks in the local wood (RAF mate had a chocolate Lab that needed walking everyday at lunch)...
3rd Gear
Joined: Aug 2012
Posts: 294
Likes: 0
From: Denver, CO
Thread Starter
|
2nd Gear
Joined: Dec 2008
Posts: 87
Likes: 0
Well this is the way i did it.
[size=150]Tools req'd[/size]
Pliers
T25 BIT
T30 BIT
Small flat headed screw driver
Drill
Spanner to undo nut on neg terminal
Dark piece of paper
LED lights
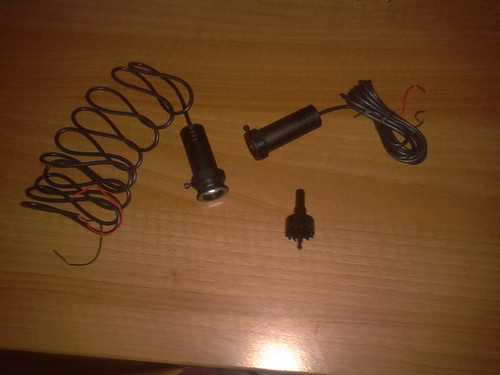
LED PUDDLES LIGHTS by Lancs clubbie, on Flickr
Step 1
Remove armrest,simply grab at the top of the rest and pull towards yourself.
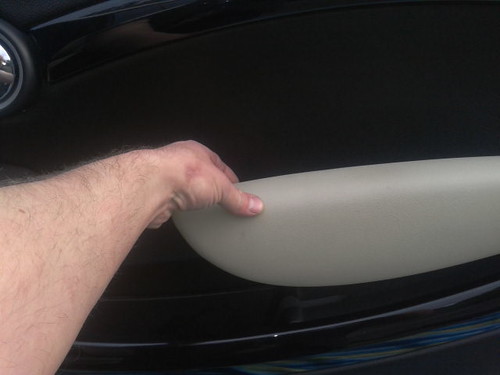
2012-09-15 08.45.08 by Lancs clubbie, on Flickr
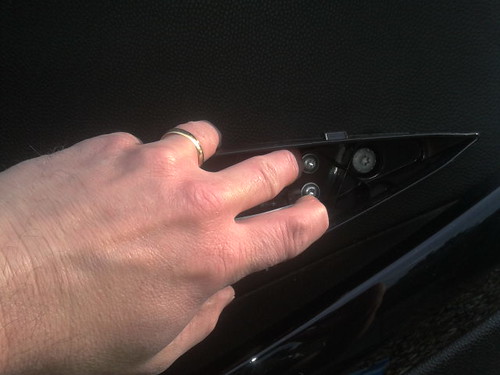
Step 2
Remove 3x torques screws using the T25 BIT,and then the larger using the T30 BIT as shown in the photos.
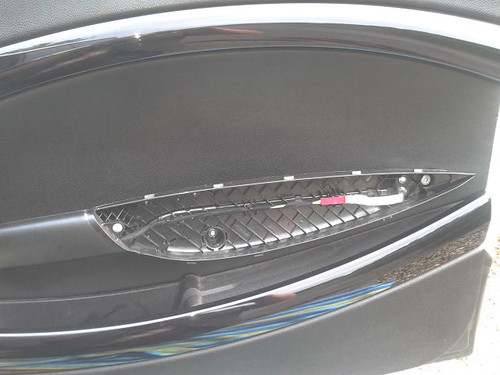
2012-09-15 08.45.32 by Lancs clubbie, on Flickr
2012-09-15 08.45.48 by Lancs clubbie, on Flickr
2012-09-15 08.45.59 by Lancs clubbie, on Flickr
2012-09-15 08.46.46 by Lancs clubbie, on Flickr
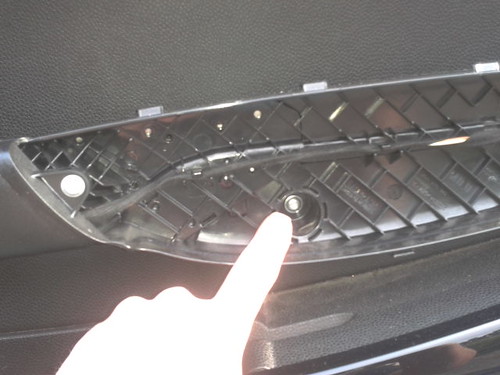
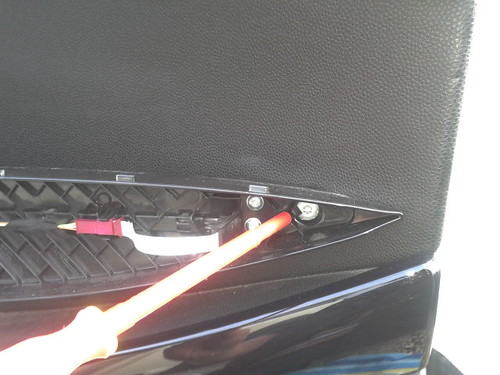
Step 3
Remove the plastic pin securing the door pull surround using the small flat screwdriver and pliers.
2012-09-15 08.54.05 by Lancs clubbie, on Flickr
2012-09-15 08.55.17 by Lancs clubbie, on Flickr
2012-09-15 08.55.35 by Lancs clubbie, on Flickr
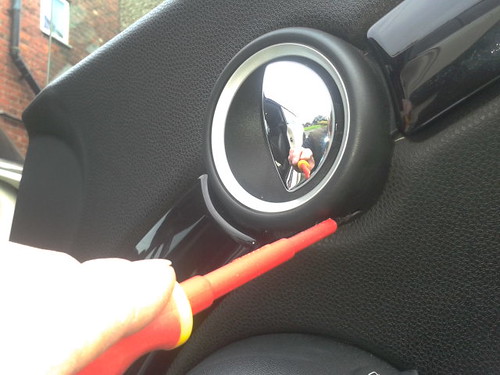
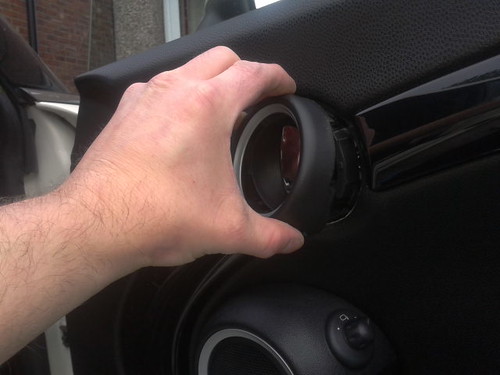
Step 4
Now remove the door card,start from the bottom right corner and pull away from right to left and up over the locking button,then disconnect the puddle light and remove.
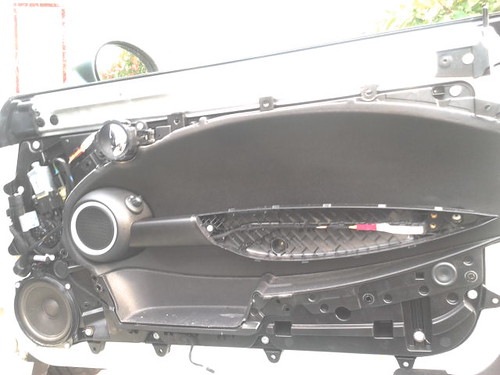
2012-09-15 09.08.33 by Lancs clubbie, on Flickr
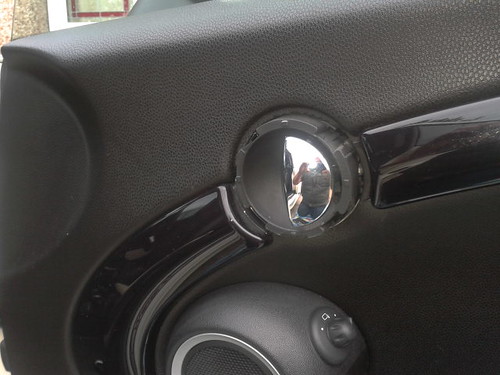
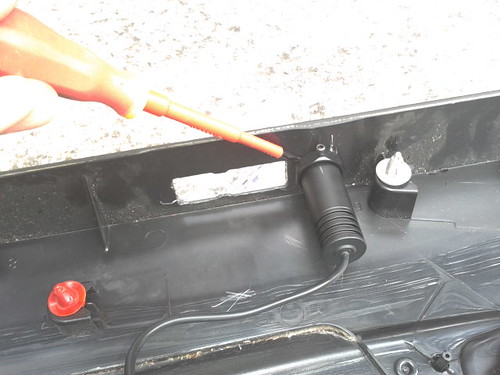
[size=150]Fitting of new lights[/size]
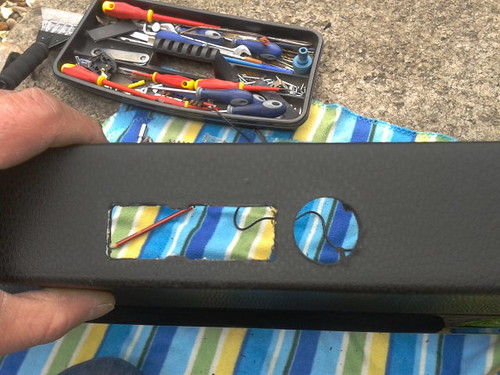
Step 5
I found that this is the best place to put it which is about 10mm from the edge of the old light hole edge to edge,drill hole,you will need to remove some plastic braces this will give you a flush fit for the nut that comes with the light.
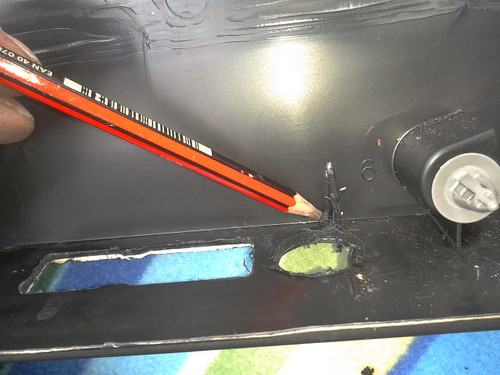
2012-09-15 11.28.19 by Lancs clubbie, on Flickr
2012-09-15 11.27.32 by Lancs clubbie, on Flickr
It's upto you but i disconnected the negative terminal from the bty just in case.
Now fit the light into the hole,i cut the wire as i didn't need all that excess floating about,i used the existing wires from the old light and connected them to the Led light .
[size=150]YELLOW-BLACK
YELLOW/BROWN-RED[/size]
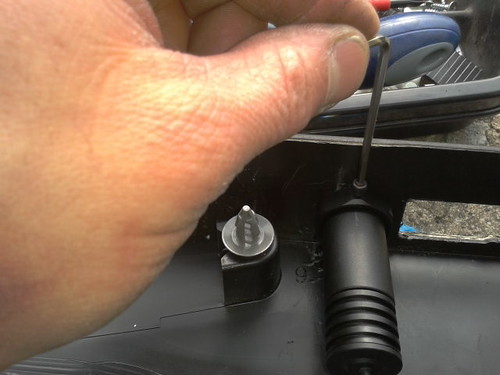
STEP 6
Line up and adjust light,the best way to do this is to lie the door card down on some type of blanket with bottom of the door card facing away from you.
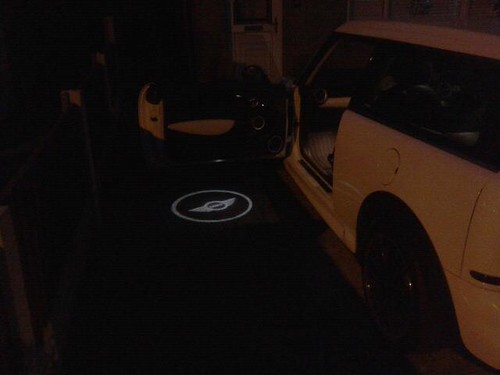
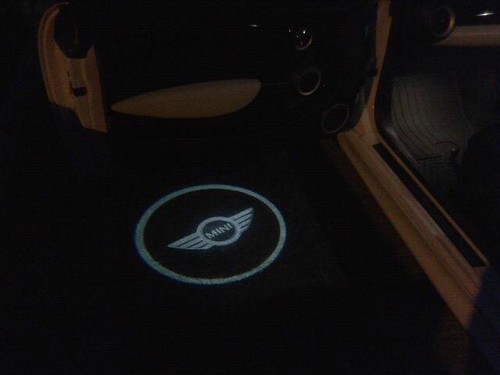
Reconnect the bty terminal,place the piece of paper in front on the light and adjust the logo to your desired position,then tighten the nut and the grub screw.
2012-09-15 10.39.21 by Lancs clubbie, on Flickr
2012-09-15 11.41.14 by Lancs clubbie, on Flickr
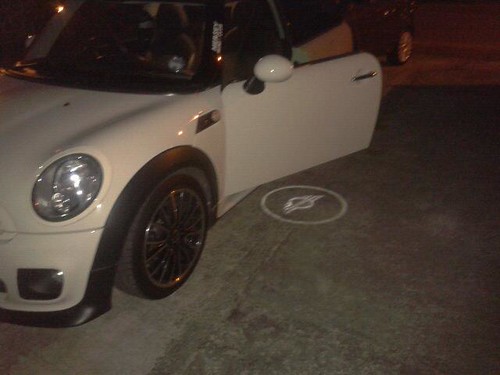
Just waiting for it to go dark for the finished look
[size=150]Tools req'd[/size]
Pliers
T25 BIT
T30 BIT
Small flat headed screw driver
Drill
Spanner to undo nut on neg terminal
Dark piece of paper
LED lights
LED PUDDLES LIGHTS by Lancs clubbie, on Flickr
Step 1
Remove armrest,simply grab at the top of the rest and pull towards yourself.
2012-09-15 08.45.08 by Lancs clubbie, on Flickr
Step 2
Remove 3x torques screws using the T25 BIT,and then the larger using the T30 BIT as shown in the photos.
2012-09-15 08.45.32 by Lancs clubbie, on Flickr
2012-09-15 08.45.48 by Lancs clubbie, on Flickr
2012-09-15 08.45.59 by Lancs clubbie, on Flickr
2012-09-15 08.46.46 by Lancs clubbie, on Flickr
Step 3
Remove the plastic pin securing the door pull surround using the small flat screwdriver and pliers.
2012-09-15 08.54.05 by Lancs clubbie, on Flickr
2012-09-15 08.55.17 by Lancs clubbie, on Flickr
2012-09-15 08.55.35 by Lancs clubbie, on Flickr
Step 4
Now remove the door card,start from the bottom right corner and pull away from right to left and up over the locking button,then disconnect the puddle light and remove.
2012-09-15 09.08.33 by Lancs clubbie, on Flickr
[size=150]Fitting of new lights[/size]
Step 5
I found that this is the best place to put it which is about 10mm from the edge of the old light hole edge to edge,drill hole,you will need to remove some plastic braces this will give you a flush fit for the nut that comes with the light.
2012-09-15 11.28.19 by Lancs clubbie, on Flickr
2012-09-15 11.27.32 by Lancs clubbie, on Flickr
It's upto you but i disconnected the negative terminal from the bty just in case.
Now fit the light into the hole,i cut the wire as i didn't need all that excess floating about,i used the existing wires from the old light and connected them to the Led light .
[size=150]YELLOW-BLACK
YELLOW/BROWN-RED[/size]
STEP 6
Line up and adjust light,the best way to do this is to lie the door card down on some type of blanket with bottom of the door card facing away from you.
Reconnect the bty terminal,place the piece of paper in front on the light and adjust the logo to your desired position,then tighten the nut and the grub screw.
2012-09-15 10.39.21 by Lancs clubbie, on Flickr
2012-09-15 11.41.14 by Lancs clubbie, on Flickr
Just waiting for it to go dark for the finished look

Thread
Thread Starter
Forum
Replies
Last Post
LCranston
R55 :: Clubman Talk (2008+)
42
Jun 27, 2016 11:35 AM
TrueEddie
MINI Parts for Sale
2
Sep 2, 2015 11:43 AM