When you click on links to various merchants on this site and make a purchase, this can result in this site earning a commission. Affiliate programs and affiliations include, but are not limited to, the eBay Partner Network.
I own a 2009 R56 - Base Model. The passenger side rubber engine mount is cracked at one of the bolt points. I have a replacement mount ready to install, but need some practical DIY advice on how to install the part. It seems simple enough in removing the bolts, but let me not assume anything when removing a mount. There is a discussion on this topic in another post on this site, but it's for an earlier version mini. https://www.northamericanmotoring.co...placement.html
Trying to find a step-by-step replace/install procedure for newer Minis.
(I wish it were Septmber already so I could buy the new Bentely manual)
Replacing R56 Cooper S passenger side engine mount
Hey,
I realize your question was posted years ago, but since I was looking for the same info and couldn't find it, and did this job today I figured Id piggyback on your post.
I actually changed all 3 mounts today on a 2008 Cooper S automatic. Not sure how the mount would differ if at all for the non-S car.
Anyway the bottom mount or TORQUE LINK, as Mini calls it, is the most likely to fail and easiest to change. Two 18 mm bolts...you don't even need to support the engine.
Driver's side (actually called the automatic transmission mount) is easy too. The only hassle is that you have to decouple the engine computer electrical connectors and remove the ECU and shift the fuse box out of the way. Five 10 mm bolts and a 10 mm screw (pain in the *** to get back in place because 2 bolts are recessed between the ECU and the fuse box) and the ECU and fuse box are out of the way and the rest is pretty obvious. It also has a bracket which needs to be removed which sits on top of the engine mount. But access is easy once the ECU is outta the way.
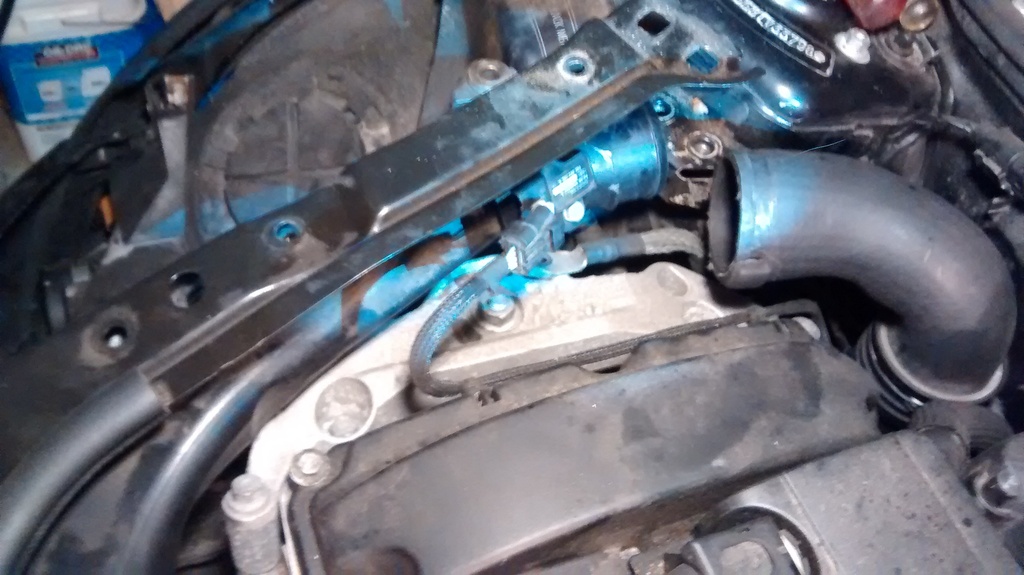
The passenger side is the most annoying because you have to remove the headlight (Four 10mm bolts, a connector and a tube which I assume is for the headlight washers), and then you have to remove or at least decouple one end of the intercooler piping and a metal bracket. Pics below. Youll need a torque wrench and some sockets and wrenches and wobble extensions etc.
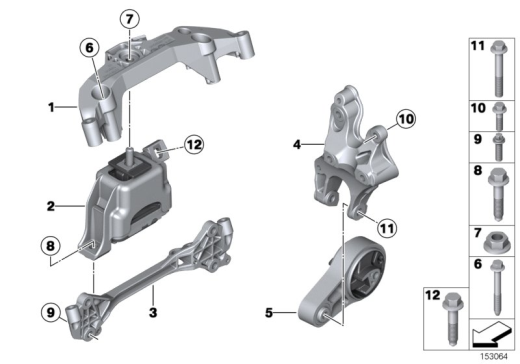
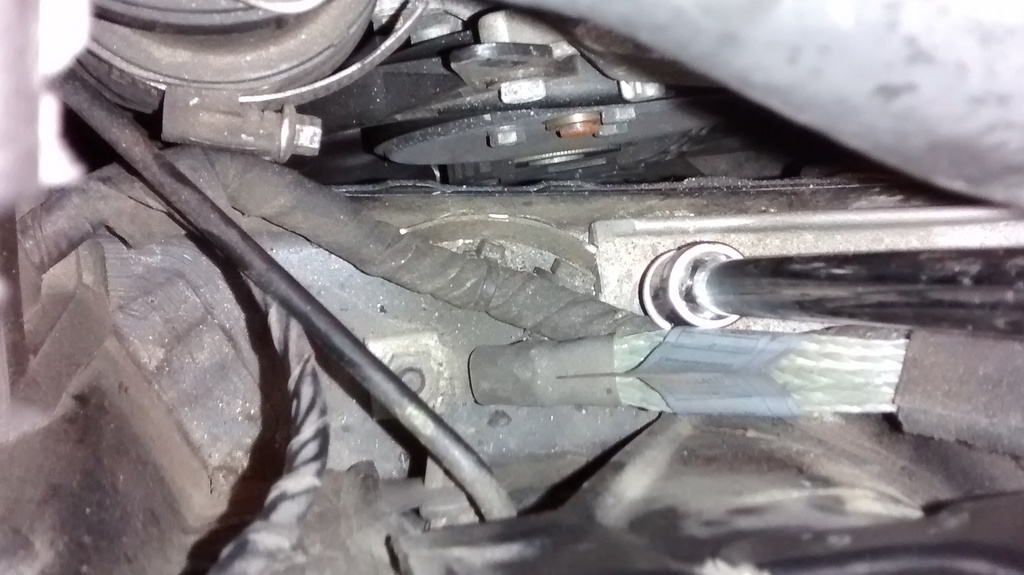
Here is the schematic of bottom and passenger side mounts:
You separate the top half of the engine bracket which ties the engine mount to the engine. The engine mount itself only connects to the bracket via a 18 mm nut. The engine mount itself connects to the body via 3 bolts (two 13 mm and one 16 mm).
Start by removing the headlight assembly. (4 x 10mm bolts, one electrical connector and the washer fluid connector if you have headlight washers)
I supported the engine where the engine meets the automatic transmission so the engine wouldn't want to tilt as I removed the engine mount.
Then disconnect the 2 (14 mm?) bolts holding this bracket to the body. You just need to be able to shift it towards the strut tower a few inches. so you can reach in with a socket.
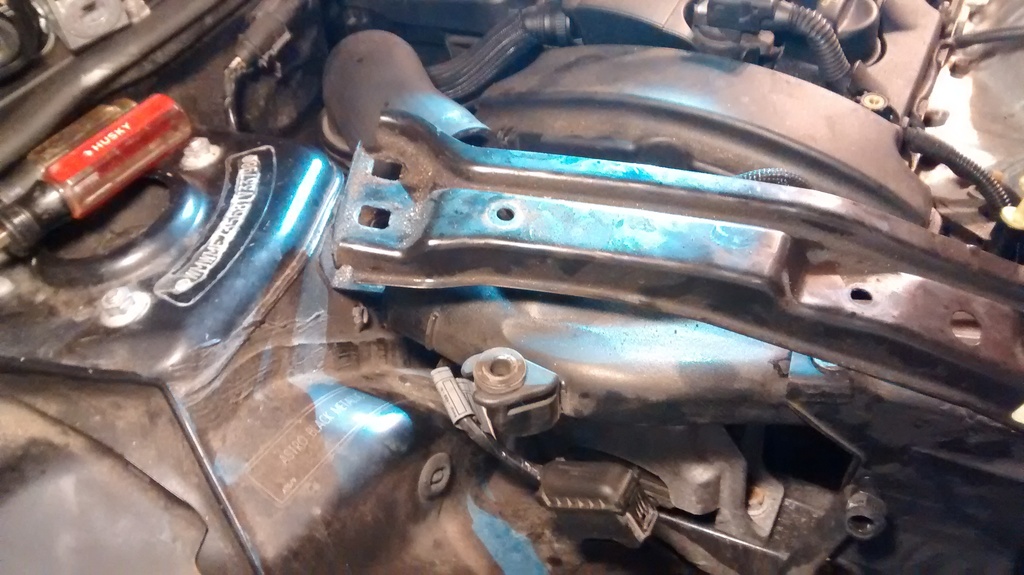
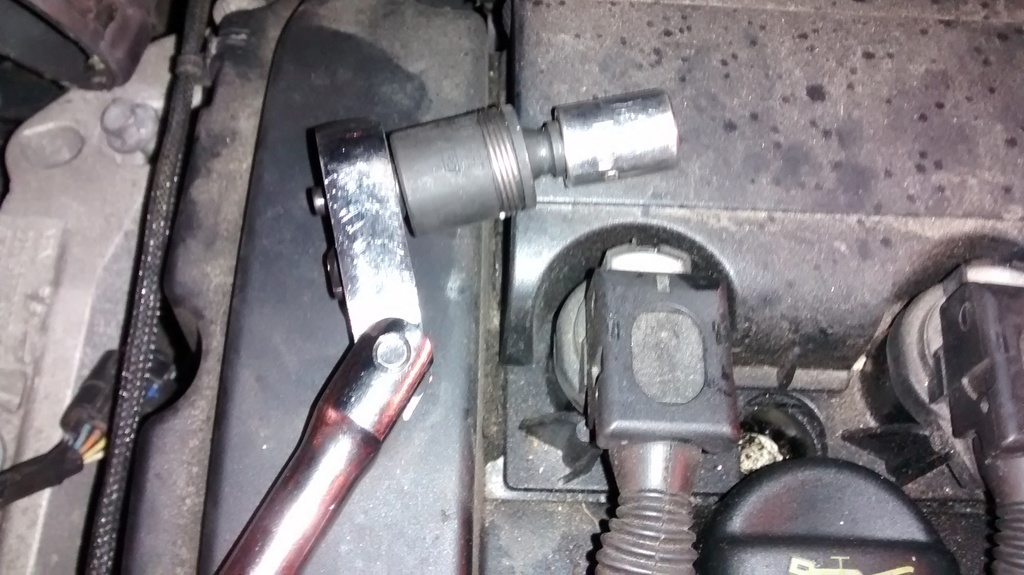
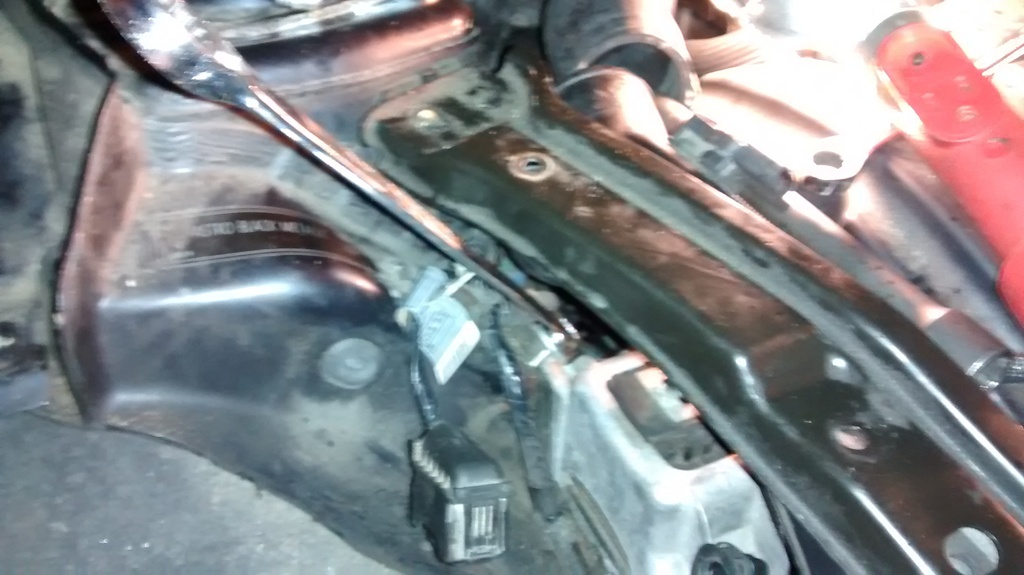
Then loosen the intercooler pipe band clamp that connects the hard plastic pipe section to the flexible rubber section nearer to the firewall. Then disconnect the electrical connector from the sensor integrated into the plastic pipe section.
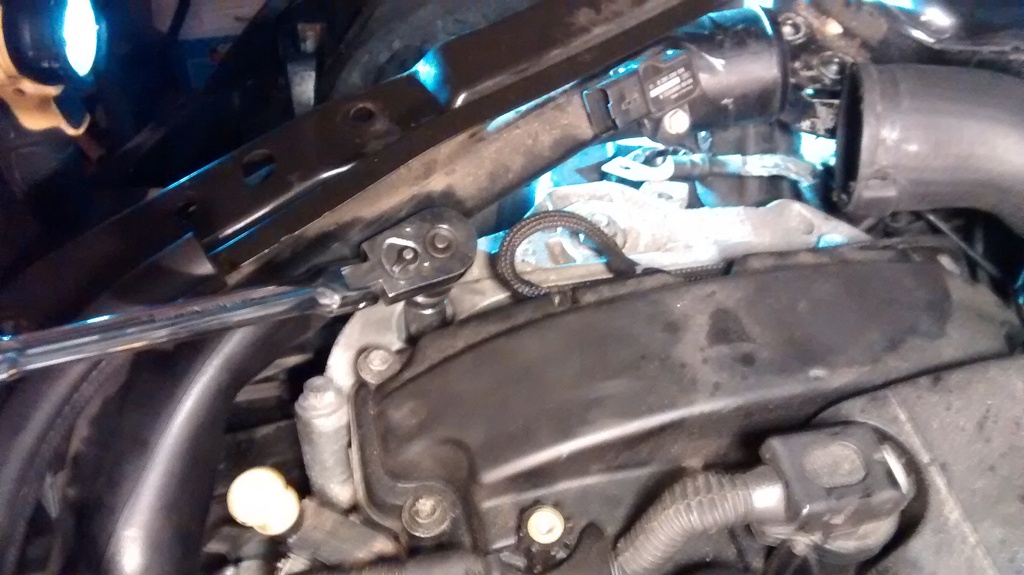
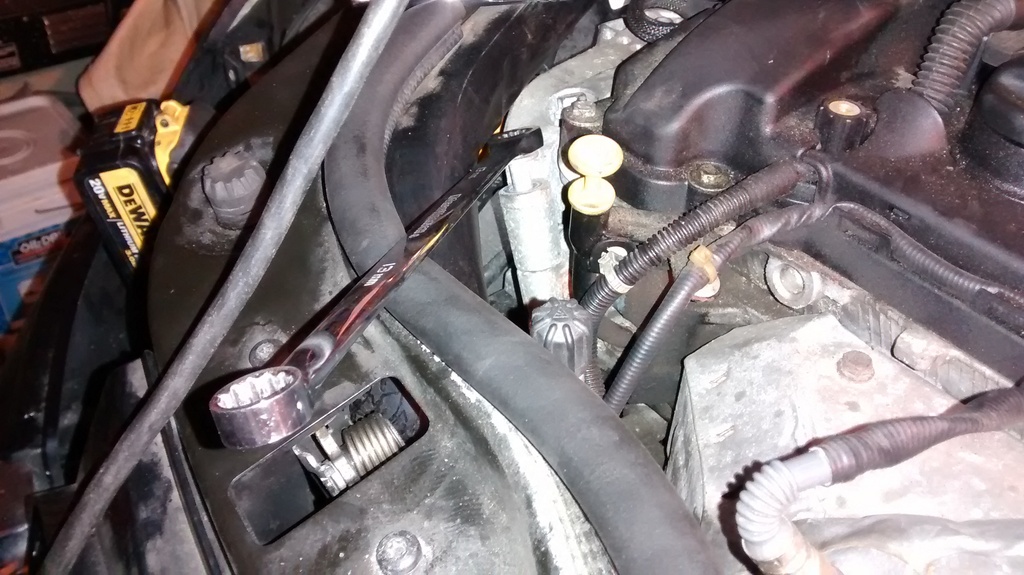
Then remove the 10mm bolt on the bracket next to the 2 bolts holding the bracket to the strut tower. This bolt passes through an ear in the plastic intercooler pipe section to hold it tight. Make sure and put your hand underneath to catch the bottom sections of the fastener or you will lose the sections when you loosen the bolt. See it here: (Sorry for the blurry pic.)
If you can remove the hard plastic section all together then do so. You'll have more room. I had a hell of a time getting the pipe disconnected where it meets the next section right behind the radiator. So I just shifted the hard section of plastic pipe back and forth as needed to access the bolts underneath it.
Here is where I separated the sections:
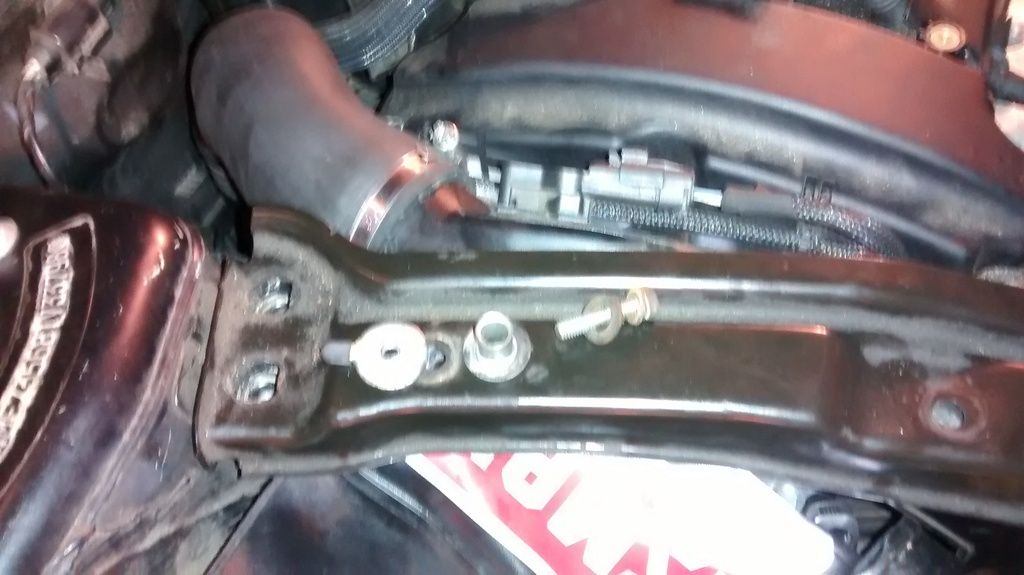
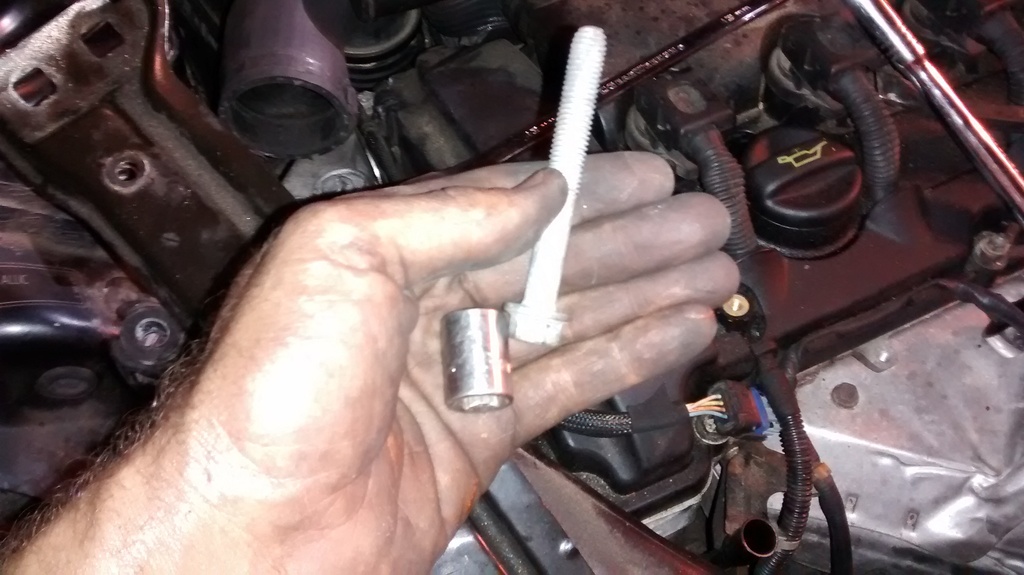
Here is the passenger side engine mount as seen from the side when you remove the headlight assembly. You can see the 18 mm NUT holding the mount to the engine bracket and the engine grounding strap which you also need to remove (be careful because the grounding strap connection is a bolt and nut, Be prepared to catch the bolt as you loosen the nut).
The top of the bracket has 4 13mm bolts. Take all of them out. This is the annoying part because the bolts are hard to access and 2 of them are recessed into the bracket. This is why the plastic intercooler section and bracket need to be pushed to the side...to gain access to these 4 bolts.
I used a variety of different joints to gain access to these.
They are long bolts so you will need a wrench to finish backing them out. Like so:
The 4 bolts look like this:
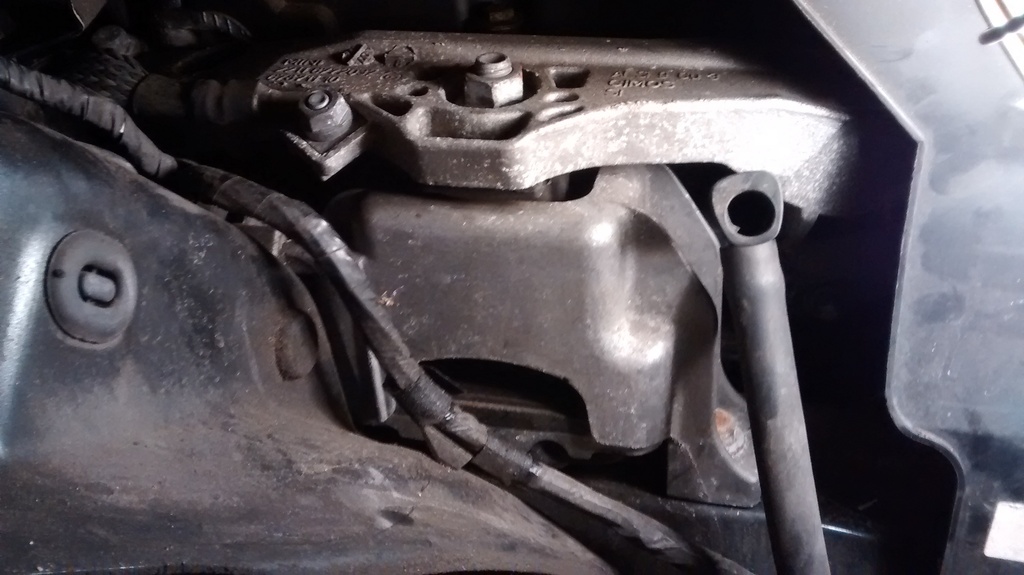
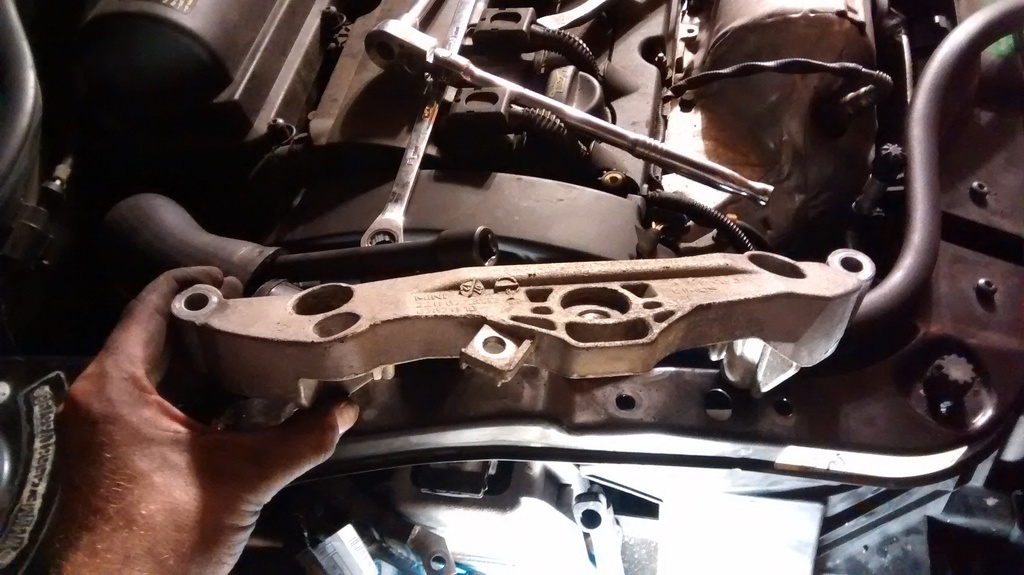
This is the top half of the engine to engine-mount mounting bracket which you need to remove. The bottom half of the engine mounting bracket stays in place.
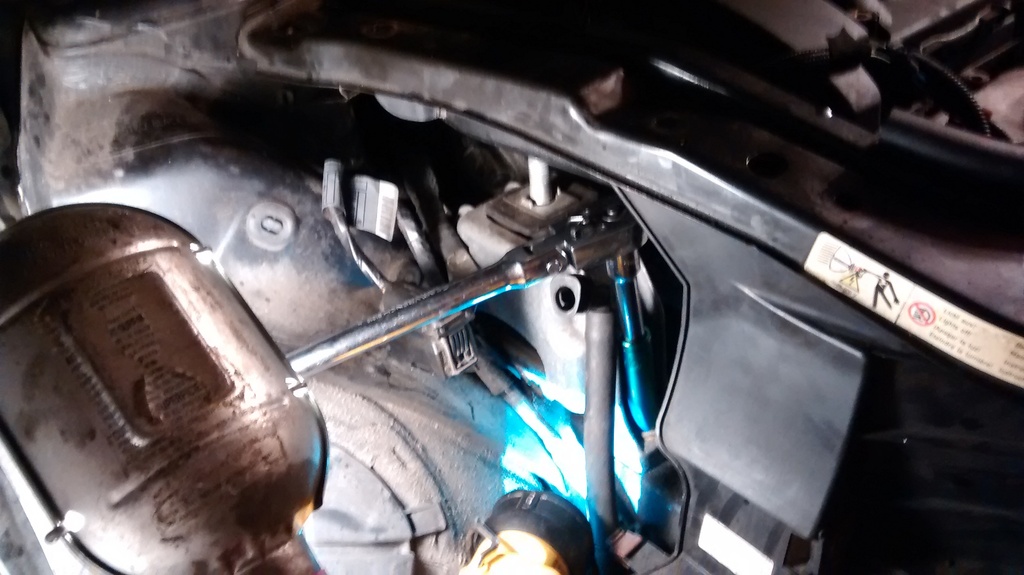
Only now can you remove the engine mount. It is held in place with two 13mm bolts and a 16 mm bolt. The bolts are easy to access. This is the easy part.
Here I remove one of the 13mm bolts...
Now I remove the second 13 mm bolt closest to the firewall:
and now the 3rd bolt, a 16mm:
Anyway, I changed all 3 mounts on my car with 145k milles. None of them looked bad. No obvious tears in the rubber. Bottom mount had some minor cracks in it but nothing major.
I got all 3 delivered from AMAZON for $210. Lemforder (passenger side) and Febi Bilstein brand (bottom and drivers side). The rubber in the brand new Febi bottom mount was actually easier to flex than the OEM mount with 145k miles! Go figure. If you want a stiffer mount, FEBI aint the one for you.
The OEM passenger mount's (with 145k miles on it) top rubber section was shifting around inside the mount. The new Lemforder replacement didn't shift at all.
Ill keep you posted on any other worthwhile observations after I drive a few hundred miles.
How different will it be to replace all three mounts on turbo engine 2011 N18?
I see there is an extra bolt to extract on the passenger side with the S model mount? Anything else?
Also, how did you know the mounts need to be replaced?
much thanks
How different will it be to replace all three mounts on turbo engine 2011 N18?
I see there is an extra bolt to extract on the passenger side with the S model mount? Anything else?
Also, how did you know the mounts need to be replaced?
much thanks
N18...no idea my man. I've only ever worked on this Mini Cooper S.
I changed the mounts for a few reasons. The car has 145k miles so the torque link (bottom mount) was most likely in need of changing as its the one that fails most often. Even though it wasn't actually torn (that's when you know you must change it) after so many miles I assumed it would be in sub-optimal condition.
Second reason, the engine would jerk when shifting back into 1st at a stop, so I assumed the tranny mount was bad, and I was right, changing the mounts helped. The jerking is lesser but I don't know for sure which mount was the culprit, although my guess is the automatic transmission mount. It could be the torque link mount. Not sure.
Lastly, the car has horrifying, horrendous, petrifying, frightening, unreasonable bump steer. Way worse than any other FWD car I've ever owned, so I thought this might help. It didn't. I bought this car from a friend with all these miles on it and changed all bushings, joints, struts etc etc.
Lastly, they weren't very expensive.
If you do change your mounts don't use the Febi for the bottom mount/torque link. Its too soft/pliable. Use an insert or another brand.
Really great write up, Lex! We are adding content to our R56 section right now. I think this is on the list. Do you have any other DIY stuff on NAM? We are looking to add content to our articles that other individuals have done.
Ya I have a write up on the clock-spring swap...and perhaps a few others.
It's not mine personally, but it is owned by Pelican. Been trying to convince them to let me take it out to one of my track days! It's a great little MINI.
Lex2008 - Nice Write up , very technical. Congrats.
Owned many MINIs since the early year when they were marked over MSRP , drive two of them daily and work on them every weekend, mods, upgrades. One has over 245K+ for a 05'
If ECS were to fight vs Pelican Parts, hypothetically and metaphorically speaking...who would win? P.S. Its just motor mounts. Nothing tech about it. Just R&R.
This. Very funny. Hana has. Batman vs Spider-Man. Superman vs Godzilla.
ya exactly...ECS vs Pelican Parts with trusty sidekick, Luccia.
I mean a PELICAN?....not particularly fearsome. Then again ECS has no mascot, however their prices are markedly better than Pelican's. And Pelican is on left coast which means you aren't getting anything in less than 5 days if you're on the east coast, even if you pat $3 for 3-day shipping.
On the other hand, Luccia is lookin kinda good, and her name is Italian or Brazilian, which is why they have her on the forums anyway,which is likely 99.8% male (heavily skewed towards metros, non of whom are reading this post on how to change motor mounts cause they're too busy deciding what color shift *** matches their smart phone cover).
My vote is for ECS...mascot be damned! Frugality is a weapon.
...
I got all 3 delivered from AMAZON for $210. Lemforder (passenger side) and Febi Bilstein brand (bottom and drivers side). The rubber in the brand new Febi bottom mount was actually easier to flex than the OEM mount with 145k miles! Go figure. If you want a stiffer mount, FEBI aint the one for you.
The OEM passenger mount's (with 145k miles on it) top rubber section was shifting around inside the mount. The new Lemforder replacement didn't shift at all.
Ill keep you posted on any other worthwhile observations after I drive a few hundred miles.
I think I saw your Amazon review on the Febi lower engine mount saying it is softer than your old mount. That had me worried, but keep reading...
So I have a 2009 Clubman S automatic with 66,000 miles and I've been noticing how clunky the transition is between accelerating and decelerating, and between shifting gears even when in D automatic. It's not terrible but it's really been bothering me because it makes my car feel old.
I took a 'gamble' and bought the $40 Febi-Bilstein lower engine mount and installed it. When I removed and compared the old mount to the new mount and flexed the inner metal part by hand, you're right, the new mount does flex slightly easier and feels slightly softer. I went ahead and installed it anyway. WOW, it totally resolved the problem and my car once again feels like new. Totally worth it!
It's curious because even while I was under the car and rocking the bottom of the engine with the old mount installed, it's difficult to produce much movement. I guess the old rubber gets brittle even though it didn't appear to have any cracks. The new more pliable rubber just works noticeably better.
I changed the mount at 145k miles and honestly it had a minor effect. Then again the car was driven very gently those 145k miles. Maybe I didnt need to change it...
I wonder how flexible the other brands of bottom mounts would feel in our hands compared to the new FEBI.
When they are new they feel softer then the old one due to age of the rubber. The rubber on older ones tend to get a but harder. I know what you mean , as I felt it a little softer on the R52 MCC lower mount, but I believe that again was because it was new. I had a lemfoder one new also beside it and it felt about the same.

 08-15-2011, 03:25 PM


 , drive two of them daily and work on them every weekend, mods, upgrades. One has over 245K+ for a 05'