How To How to fit LED logo puddle lights.
#1
 09-17-2012, 04:44 AM


Join Date: Dec 2008
Posts: 87
Likes: 0
Received 0 Likes
on
0 Posts
How to fit LED logo puddle lights.
Well this is the way i did it.
[size=150]Tools req'd[/size]
Pliers
T25 BIT
T30 BIT
Small flat headed screw driver
Drill
Spanner to undo nut on neg terminal
Dark piece of paper
LED lights
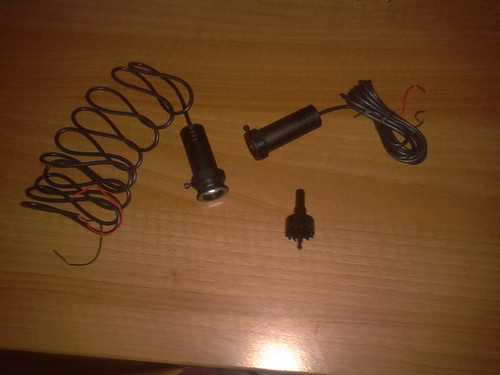
LED PUDDLES LIGHTS by Lancs clubbie, on Flickr
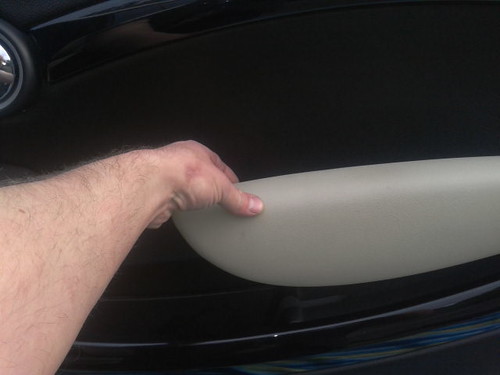
Step 1
Remove armrest,simply grab at the top of the rest and pull towards yourself.
2012-09-15 08.45.08 by Lancs clubbie, on Flickr
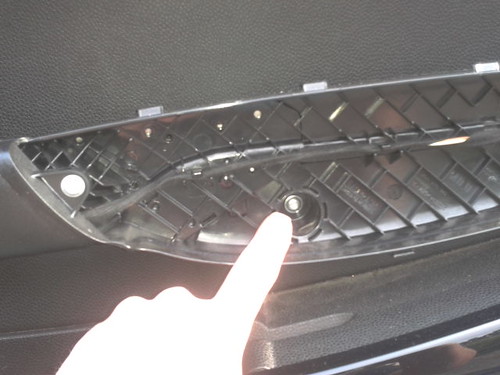
Step 2
Remove 3x torques screws using the T25 BIT,and then the larger using the T30 BIT as shown in the photos.
2012-09-15 08.45.32 by Lancs clubbie, on Flickr
2012-09-15 08.45.48 by Lancs clubbie, on Flickr
2012-09-15 08.45.59 by Lancs clubbie, on Flickr
2012-09-15 08.46.46 by Lancs clubbie, on Flickr
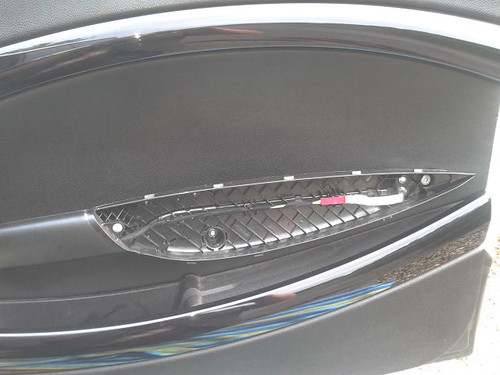
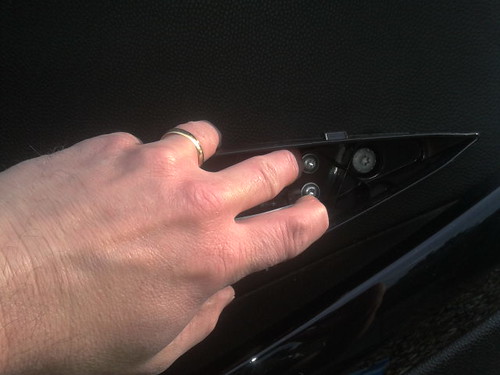
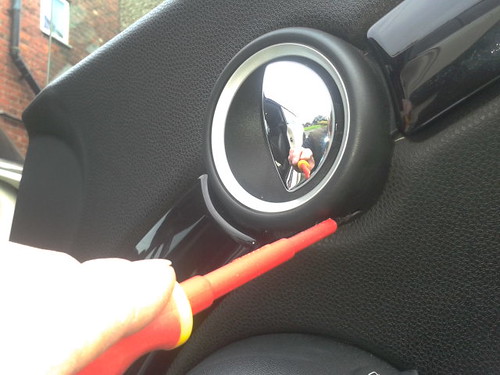
Step 3
Remove the plastic pin securing the door pull surround using the small flat screwdriver and pliers.
2012-09-15 08.54.05 by Lancs clubbie, on Flickr
2012-09-15 08.55.17 by Lancs clubbie, on Flickr
2012-09-15 08.55.35 by Lancs clubbie, on Flickr
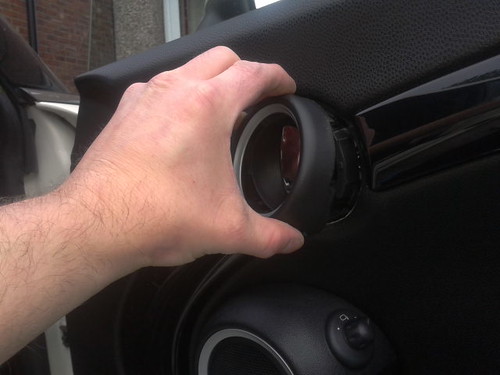
Step 4
Now remove the door card,start from the bottom right corner and pull away from right to left and up over the locking button,then disconnect the puddle light and remove.
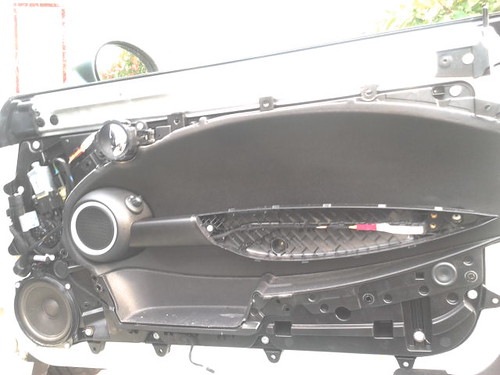
2012-09-15 09.08.33 by Lancs clubbie, on Flickr
[size=150]Fitting of new lights[/size]
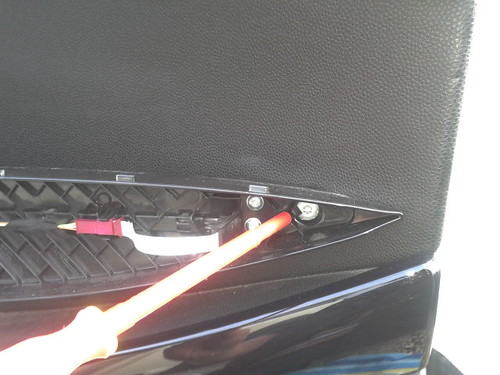
Step 5
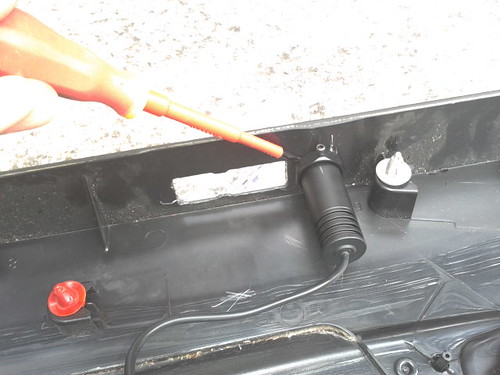
I found that this is the best place to put it which is about 10mm from the edge of the old light hole edge to edge,drill hole,you will need to remove some plastic braces this will give you a flush fit for the nut that comes with the light.
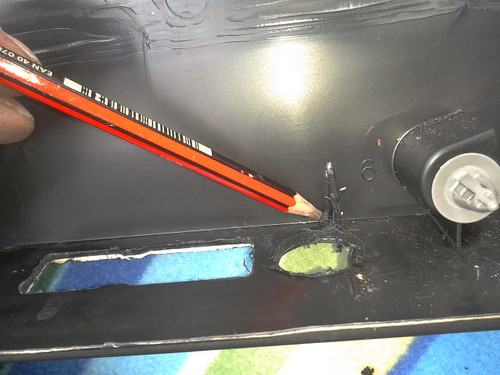
2012-09-15 11.28.19 by Lancs clubbie, on Flickr
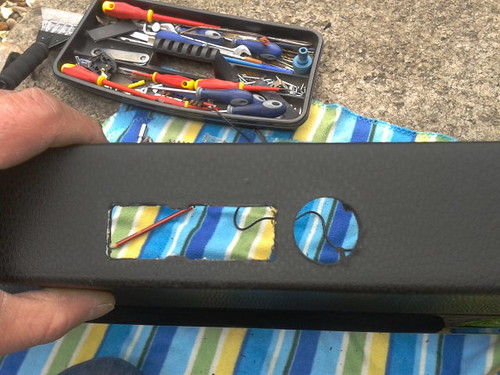
2012-09-15 11.27.32 by Lancs clubbie, on Flickr
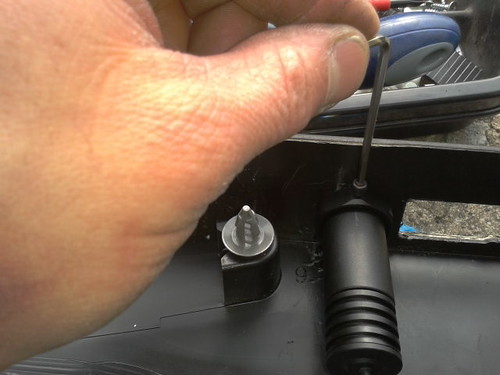
It's upto you but i disconnected the negative terminal from the bty just in case.
Now fit the light into the hole,i cut the wire as i didn't need all that excess floating about,i used the existing wires from the old light and connected them to the Led light .
[size=150]YELLOW-BLACK
YELLOW/BROWN-RED[/size]
STEP 6
Line up and adjust light,the best way to do this is to lie the door card down on some type of blanket with bottom of the door card facing away from you.
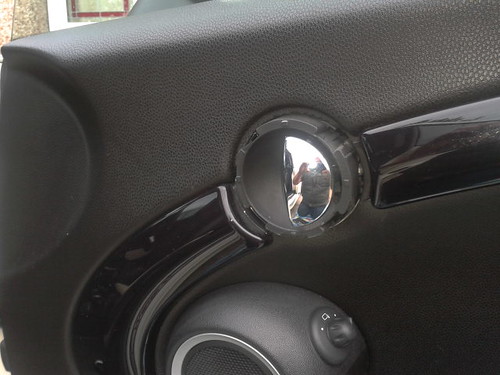
Reconnect the bty terminal,place the piece of paper in front on the light and adjust the logo to your desired position,then tighten the nut and the grub screw.
2012-09-15 10.39.21 by Lancs clubbie, on Flickr
2012-09-15 11.41.14 by Lancs clubbie, on Flickr
Finished look
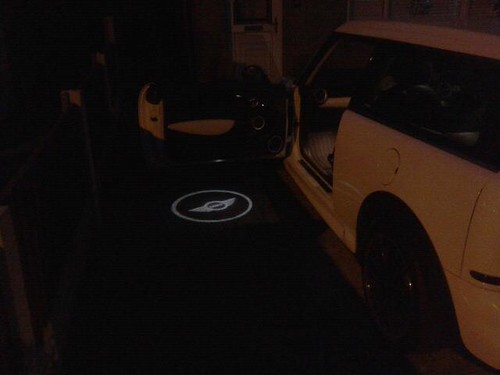
267276_4680324169895_155240657_n by Lancs clubbie, on Flickr
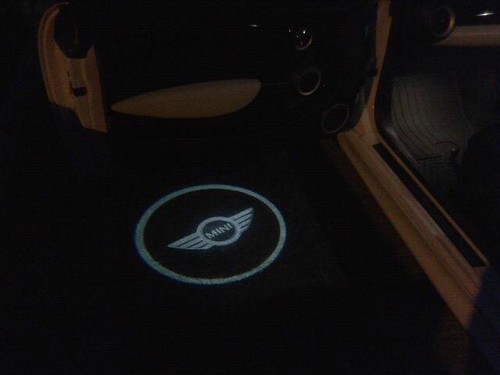
206288_4680310209546_1185035353_n by Lancs clubbie, on Flickr
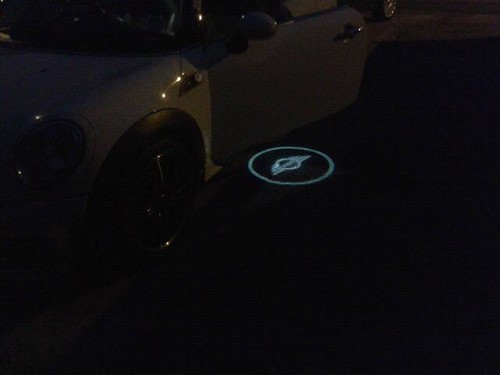
156587_4680321569830_1353353281_n by Lancs clubbie, on Flickr
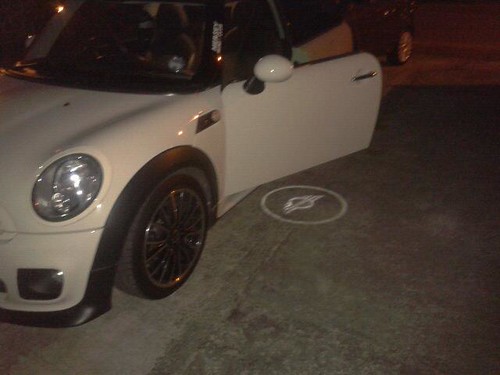
483122_4680319729784_267184995_n by Lancs clubbie, on Flickr
[size=150]Tools req'd[/size]
Pliers
T25 BIT
T30 BIT
Small flat headed screw driver
Drill
Spanner to undo nut on neg terminal
Dark piece of paper
LED lights
LED PUDDLES LIGHTS by Lancs clubbie, on Flickr
Step 1
Remove armrest,simply grab at the top of the rest and pull towards yourself.
2012-09-15 08.45.08 by Lancs clubbie, on Flickr
Step 2
Remove 3x torques screws using the T25 BIT,and then the larger using the T30 BIT as shown in the photos.
2012-09-15 08.45.32 by Lancs clubbie, on Flickr
2012-09-15 08.45.48 by Lancs clubbie, on Flickr
2012-09-15 08.45.59 by Lancs clubbie, on Flickr
2012-09-15 08.46.46 by Lancs clubbie, on Flickr
Step 3
Remove the plastic pin securing the door pull surround using the small flat screwdriver and pliers.
2012-09-15 08.54.05 by Lancs clubbie, on Flickr
2012-09-15 08.55.17 by Lancs clubbie, on Flickr
2012-09-15 08.55.35 by Lancs clubbie, on Flickr
Step 4
Now remove the door card,start from the bottom right corner and pull away from right to left and up over the locking button,then disconnect the puddle light and remove.
2012-09-15 09.08.33 by Lancs clubbie, on Flickr
[size=150]Fitting of new lights[/size]
Step 5
I found that this is the best place to put it which is about 10mm from the edge of the old light hole edge to edge,drill hole,you will need to remove some plastic braces this will give you a flush fit for the nut that comes with the light.
2012-09-15 11.28.19 by Lancs clubbie, on Flickr
2012-09-15 11.27.32 by Lancs clubbie, on Flickr
It's upto you but i disconnected the negative terminal from the bty just in case.
Now fit the light into the hole,i cut the wire as i didn't need all that excess floating about,i used the existing wires from the old light and connected them to the Led light .
[size=150]YELLOW-BLACK
YELLOW/BROWN-RED[/size]
STEP 6
Line up and adjust light,the best way to do this is to lie the door card down on some type of blanket with bottom of the door card facing away from you.
Reconnect the bty terminal,place the piece of paper in front on the light and adjust the logo to your desired position,then tighten the nut and the grub screw.
2012-09-15 10.39.21 by Lancs clubbie, on Flickr
2012-09-15 11.41.14 by Lancs clubbie, on Flickr
Finished look
267276_4680324169895_155240657_n by Lancs clubbie, on Flickr
206288_4680310209546_1185035353_n by Lancs clubbie, on Flickr
156587_4680321569830_1353353281_n by Lancs clubbie, on Flickr
483122_4680319729784_267184995_n by Lancs clubbie, on Flickr

#3
12-15-2012, 12:18 AM
1st Gear
Join Date: Nov 2012
Location: Singapore
Posts: 12
Likes: 0
Received 0 Likes
on
0 Posts
#4
05-06-2013, 08:58 AM

Thanks for the write-up. I was going to be purchasing a pair of these, but was hunting for a tutorial. This does nicely. I may have some questions later on for you.
I do wonder why they don't make a bracket to fit the existing light frame and make it plug and play with the port on the existing light. Seems like a few easy to do changes to the sale item, charge just a little more, but would make the install easier and not require any drilling/cutting.
I do wonder why they don't make a bracket to fit the existing light frame and make it plug and play with the port on the existing light. Seems like a few easy to do changes to the sale item, charge just a little more, but would make the install easier and not require any drilling/cutting.
#5
05-12-2013, 04:52 PM
I was working on installing these today, and I have a brown and yellow/brown wire (someone mentioned this in another NAM thread...anyway, so I connect the brown to the black (ground) and the yellow/brown to the red, essentially matching red to yellow as done above. However, the light does not come on and the wire hardness running to the puddle light gets very warm. Any thoughts?
#6
05-12-2013, 06:25 PM
Hey guys, need some help. I am trying to wire up the puddle light projectors I purchased. I had no problem removing the door panel and I removed the wire hardness from the existing puddle light. I trimmed the plug off to expose the two wires (a yellow/brown) and a brown. I tested the wires with my multimeter and the yellow/brown is power and the brown is ground. So I wired the red from the puddle light to the yellow/brown and the black to the brown, as I have seen on a number of sites. When I connnected the wires the puddle light wire sleeve became extremely hot and the light does not come on. I immediately disconnected them, but do fear I burnt this light. Anyone have experience or thoughts to what my issues my be? The install instructions are pretty straight forward: Connect red to 12v and black to ground. Here is a image of the wiring (simple). Help!

#7
05-15-2013, 06:48 PM
Trending Topics
#8
05-16-2013, 04:36 AM

#9
05-16-2013, 07:29 AM
Pretty much the wire housing for the light was getting hot, disconnected immediately and I got that lovely burnt electronic smell. Well after some back and forth with an electrician friend found that the unit must have been defective, the auto-off circuit board had burnt and one of the leads was not connected well. So I finally wired up the other switch with some success, but measuring it it just seemed too tall to fit in the gap between the door panel and frame. After reviewing existing posts, however, i gave it a go and it fit. Now to just get the other unit replaced.

Thread
Thread Starter
Forum
Replies
Last Post
igzekyativ
MINIs & Minis for Sale
34
07-16-2020 12:54 PM
blackie
MINI Parts for Sale
31
01-18-2017 09:56 PM
trw92a
R50/R53 :: Hatch Talk (2002-2006)
8
08-26-2015 01:47 PM
ECSTuning
Vendor Announcements
0
08-19-2015 12:51 PM