Mini Cooper 2007-2013: How to Replace Valve Cover Gasket
If you have a bad valve cover gasket, you don't necessarily have to consider selling your house to get it fixed.
This article applies to the Mini Cooper (2007-2013).
For small issues, such as changing fluids, belts, filters or even spark plugs and coils, many folks have no problems doing this on their own. When you start discussing tearing apart the engine to change fuel injectors or valve cover gaskets, the stress factor usually starts climbing. If you know you have an issue with your valve cover gasket, take heart because you can do this fix on your own. This job will take you about an hour to complete and it really is not too difficult for a novice to finish.
There are a couple of important facts to consider when you are dealing with a leaking valve cover. The first is to check into a recall for the fan motor fuse. Many owners have reported that the fan motor fuse, as installed, was an underrated 30 amp and the engine would overheat as the fan wouldn't run. This overheating situation would bake the valve cover gasket and cause it to start leaking. Another common issue was that the entire plastic valve cover would warp, causing the oil leaks. You do have the option of just replacing the gaskets, or, if you choose to purchase an entire valve cover replacement, it will come with all the gaskets and a new oil cap. You should also check into the fan fuse to make sure it is a 40 amp fuse or you may see this situation come up again in about 30,000 more miles.

Materials Needed
- Ratchet and socket set with extension
- Pick tool with curved neck
- Needle nose pliers
- Replacement valve cover or gasket set
- Replacement 40 amp fan motor fuse
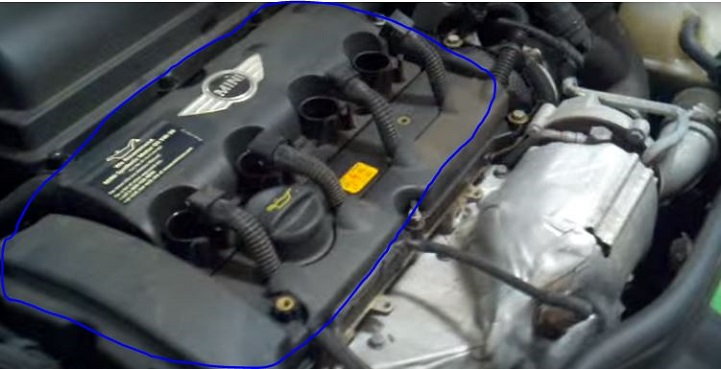
Step 1 – Pop the hood and locate the valve cover
The valve cover is the plastic cover on the top of your engine. The ignition coils and spark plugs go through the cover, so it is right underneath them. You will have to remove the coils and a couple of hoses that connect to the sides of the cover.
Step 2 – Remove ignition coils
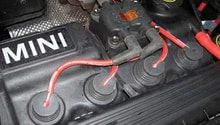
You will see the four ignition coils on top of the valve cover. These are secure by a plastic cap over each rubber boot.
- Pop the plastic cap from the front and lift if all the way up.
- Grab the small rubber tab with one hand and grab the top of the boot with the other, then pull up.
- It may take quite a bit of effort, but the long ignition coils will pull straight up and out.
- The coils can easily be replaced if you choose to do so. All four can be purchased for around $200.
- If you also wish to replace the spark plugs, you should wait until after you replace the valve cover to avoid getting any debris into the holes. The spark plugs are located below the coils and you will need a 14mm deep well socket and a six inch extension with your ratchet to remove them.
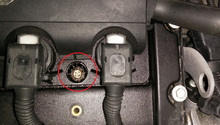
- There is a small cover strip over the base of the ignition wires that needs to be pulled up. You can use a flat head screwdriver to pry up this plastic strip and bend it back so you can move the ignition wires out of the way.
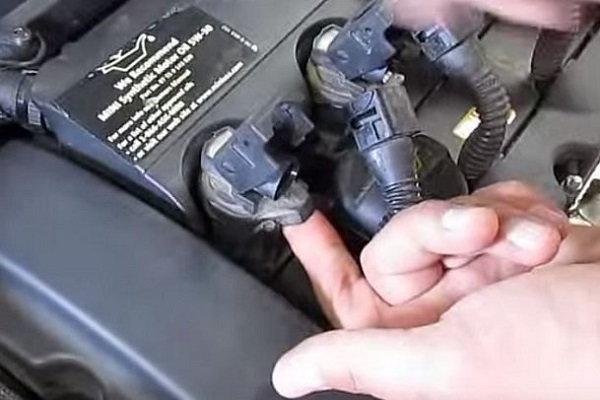
Figure 2. After popping the cap, grab the rubber tab as well as the top of the boot, then pull straight up and out. 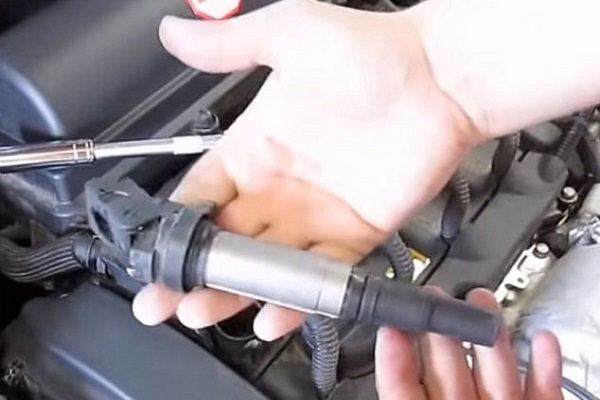
Figure 3. Set the coil aside. 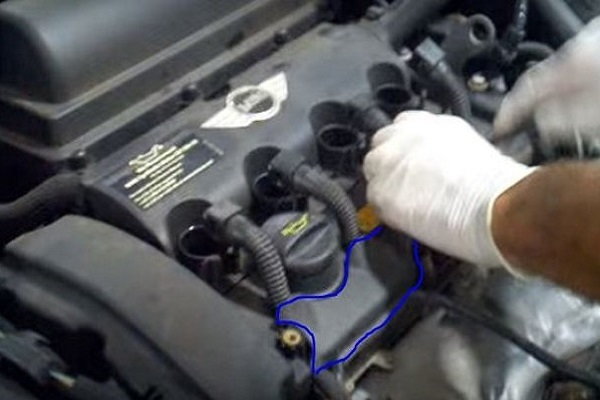
Figure 4. Pop open this plastic cover strip that covers the base of the ignition wires.
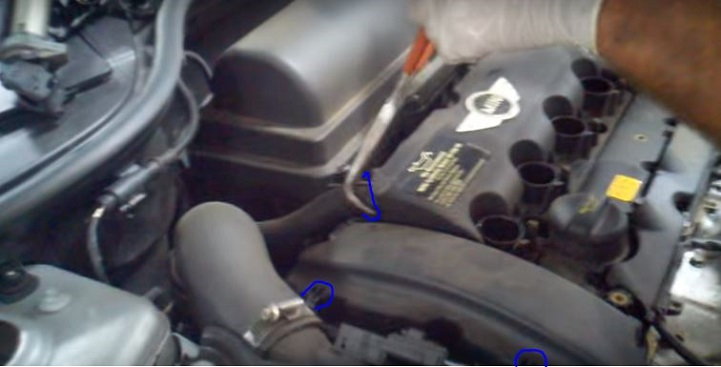
Step 3 – Disconnect hoses and tabs
Use a pick tool with a curved neck to release the valve cover plastic tabs on each end of the valve cover. Take care that you do not break these tabs if you are not replacing your valve cover. Insert the tip of the pick tool and pry the tabs away from the valve cover. There are also two hoses on either side at the rear of the valve cover. They are secured with a simple clamp that can be disengaged with the pick tool or needle nose pliers. Pop the hoses off the the ports on both sides of the cover. The hose on the right side has a protective plastic cover that will come completely off; remove and set it aside.
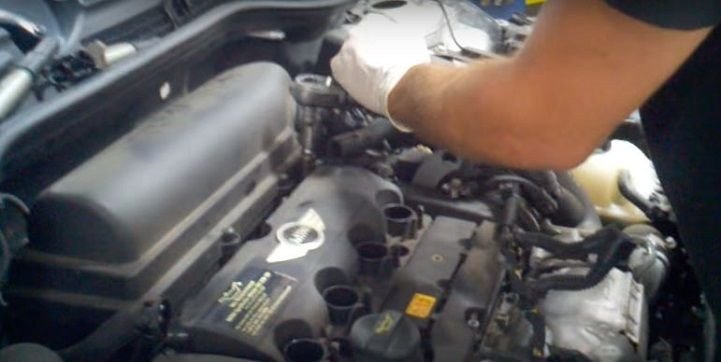
Step 4 – Remove valve cover bolts
There are several valve cover bolts that hold it in place. The two on each side have much longer shafts than the ones in the front and rear, so keep that in mind when you are putting it back together. Also, be very careful with the bolts in the rear that you don't drop them into the engine bay. That is a problem you don't want to have when doing this job. There are also a couple of bolts in between the spark plug ports. Remove all of the bolts and set them to the side. The valve cover is now ready to be removed.
Step 5 – Pull the valve cover
With all the bolts out, the valve cover simply pulls straight up and off. Just take care and don't force it. If you feel resistance, check the tabs or hoses and make sure that everything is disconnected.
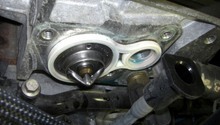
- With the cover is off, make sure that your chain guide looks good and is not cracked or warped.
- Check the mounting surface and clean off any old gasket residue.

Figure 7. With all the bolts removed, the valve cover should come up. 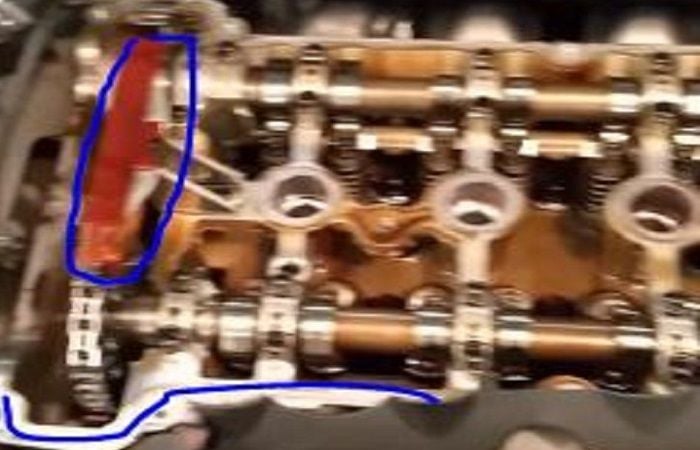
Figure 8. Check the condition of the chain guide and the mounting points for gasket residue. 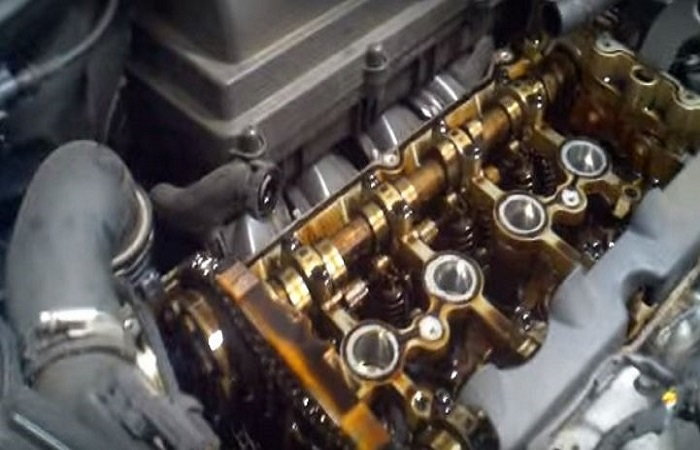
Figure 9. Another view with the cover removed.
Step 6 – Replace gaskets or install new valve cover
If you are replacing your cover and installing a new one, simply drop it in and replace your bolts. The cover is plastic, so be very careful to not over-tighten it. Only tighten them about a 1/4 turn past snug or use the manufacturer's recommended torque settings. If you are only replacing the gasket, turn your original valve cover over and make sure that you scrap the old gasket reside off all the mating surfaces; both on the edge of the cover and around the spark plug ports as well. Use silicone grease over the gasket before installing.
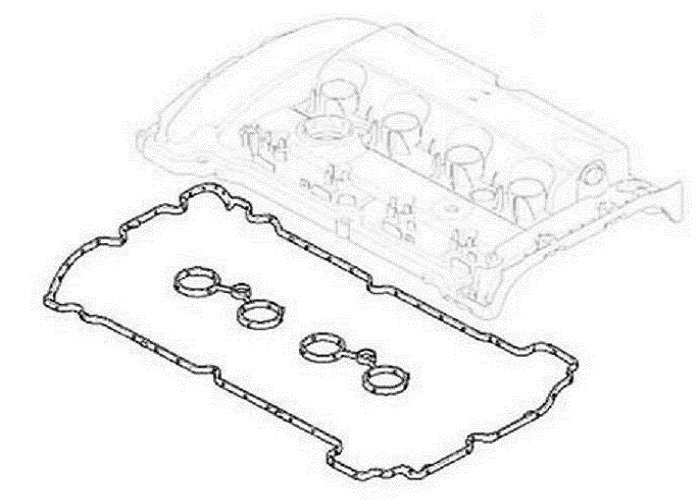
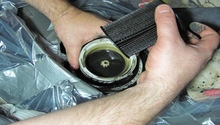
Figure 10. Replacement valve cover gasket set. 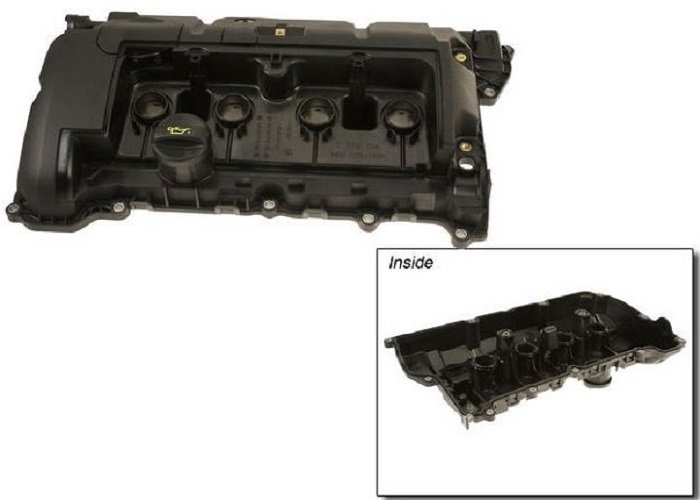
Figure 11. A replacement valve cover kit will come with its own gaskets and oil cap.
Featured Video: Mini R56 Valve Cover Removal
Related Discussions
- Valve Cover Leaking Prematurely - NorthAmericanMotoring.com
- Valve Cover Replacement - NorthAmericanMotoring.com
- Melted Valve Cover - NorthAmericanMotoring.com
- Anyone Else Had Multiple Valve Cover Failures? - NorthAmericanMotoring.com
- Valve Cover Replacement Help - NorthAmericanMotoring.com