Mini Cooper 2007-2013: How to Replace High Pressure Fuel Pump
The modern Mini Cooper has a low pressure fuel pump in the fuel tank that moves the fuel to the motor, but it is the high pressure fuel pump (HPFP) under the bonnet which delivers the pressure the fuel injection system needs.
This article applies to the Mini Cooper (2007-2013).
The high pressure fuel pump (HPFP) accepts fuel from the in tank fuel pump and pushes it through to the injectors at much higher pressure for the gasoline direct injected engine. Mini recognized this part as failing prematurely and extended the warranty on these to 10 years/120,000 mile, so check your VIN with the nearest dealer to see if you qualify before doing this yourself. The pump itself starts at $750 and goes up from there, and the labor is not that involved, but you can still save several hundreds doing it yourself. If you are not still under warranty, read on and we'll talk you through changing it out.

Materials Needed
- Screwdriver with Torx head bits
- Ratchet
- T30 Torx socket bit
- Extension for ratchet
- Inch-pound torque wrench
- 12mm crow foot socket
- 12mm line wrench
- Automatic transmission fluid (small amount for lubrication)
- 1/16" pin punch
- Shop rags
- Magnetic wand
- Flashlight
- Eye protection
- Nitrile gloves
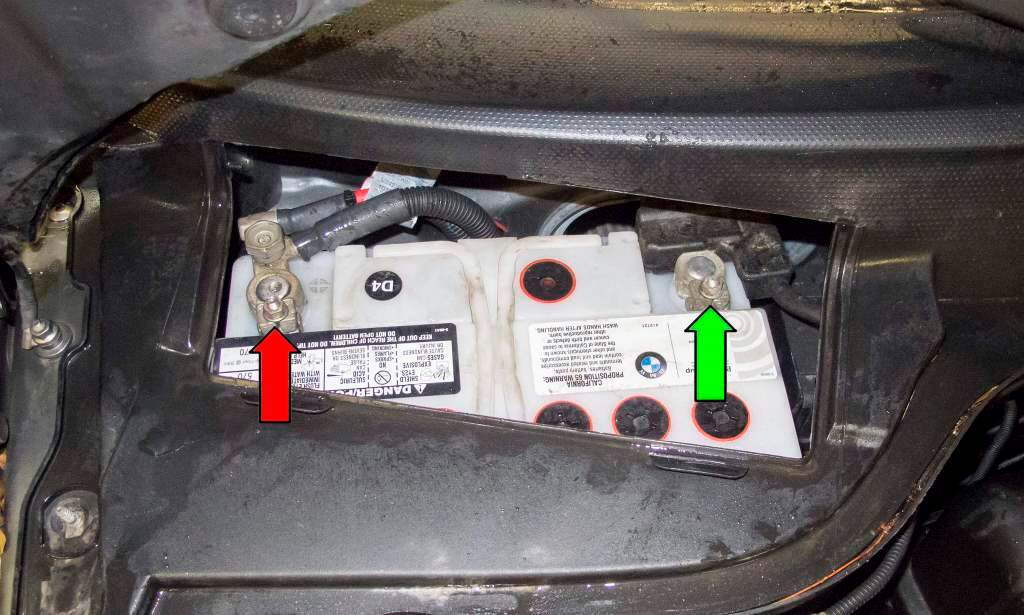
Whenever working on your car, it is wise to disconnect the negative (black) battery terminal first. When working with fuel and its explosive vapors, you would be stupid not to. The battery is under an access panel, on the passenger side up by the windshield.
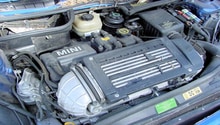
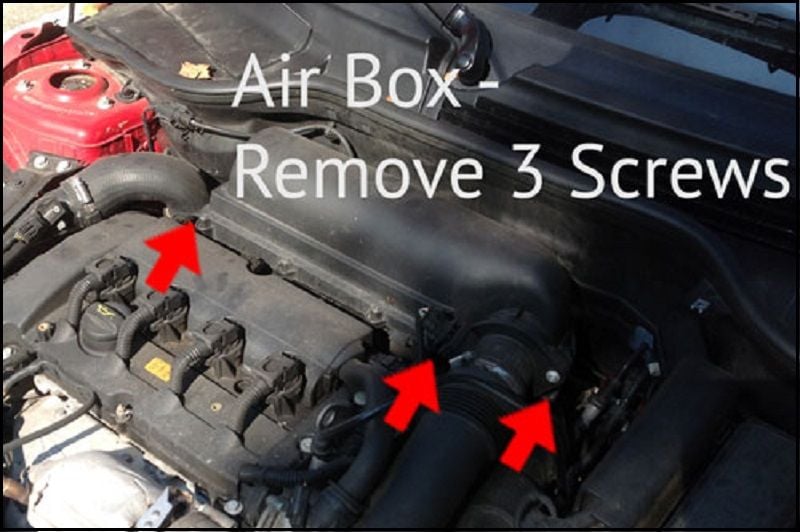
Step 1 – Remove air box
- Remove three Torx head screws in the air box (Figure 2).
- Unscrew the hose clamps holding the intake hose to the air box, then remove the hose.
- Unplug the electrical connector to the mass airflow sensor (MAF).
- Remove the air box and set it aside.
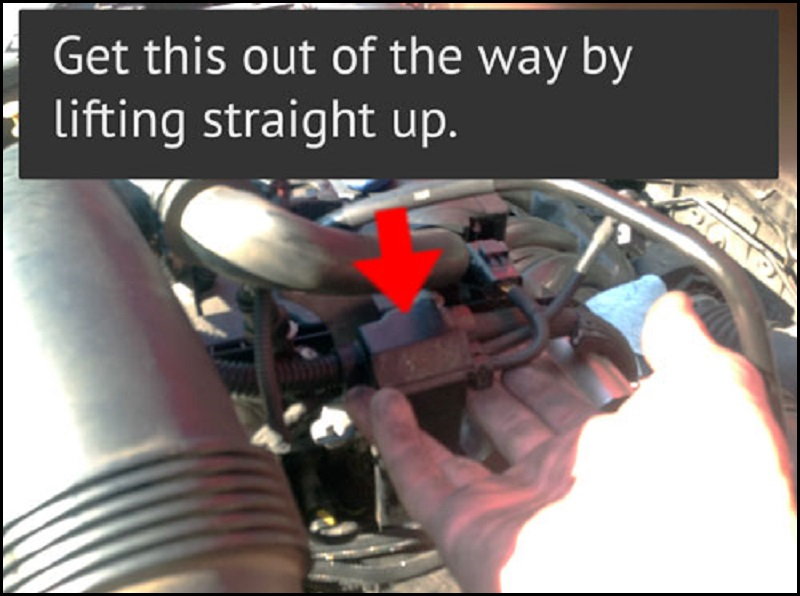
Step 2 – Clear area around the HPFP
- Move all small hoses and electrical connectors out of the way, which block access to the HPFP.
- Pull up on the junction block and move it as far as the slack in the lines allow.
Step 3 – Remove fuel lines from HPFP
- Ensure you have some rags or towels around the connection area to prevent fuel spillage, as some may leak or spray out.
- Using the 1/16" punch, press the black pin on the input fuel line on the passenger side (Figure 4).
- With the pin pressed in, push the quick release connector toward the HPFP, then pull back on the fuel line to release it.
- Next wrap a rag around the threaded fitting and remove the fuel line with the 12mm line wrench (Figure 5).
- These fuel lines are supposed to be replaced whenever they are removed to insure proper sealing.
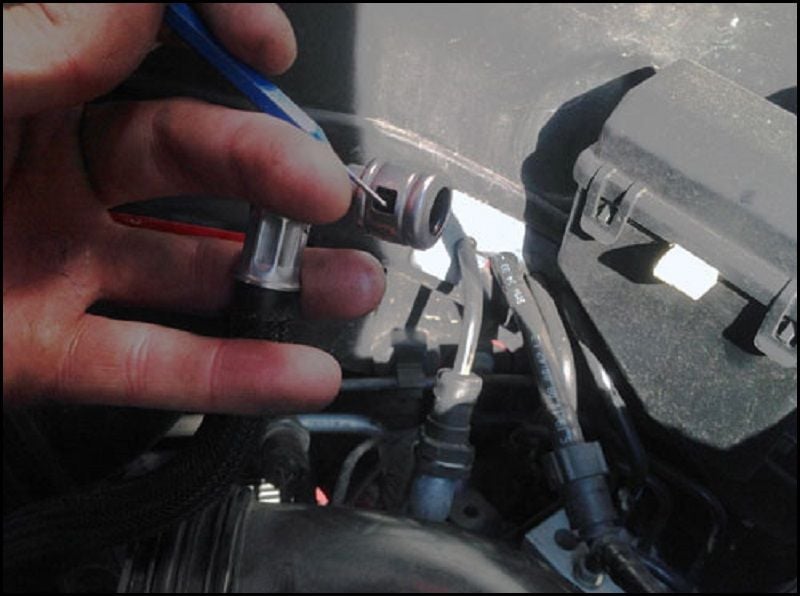
Figure 4. Fuel line removal. 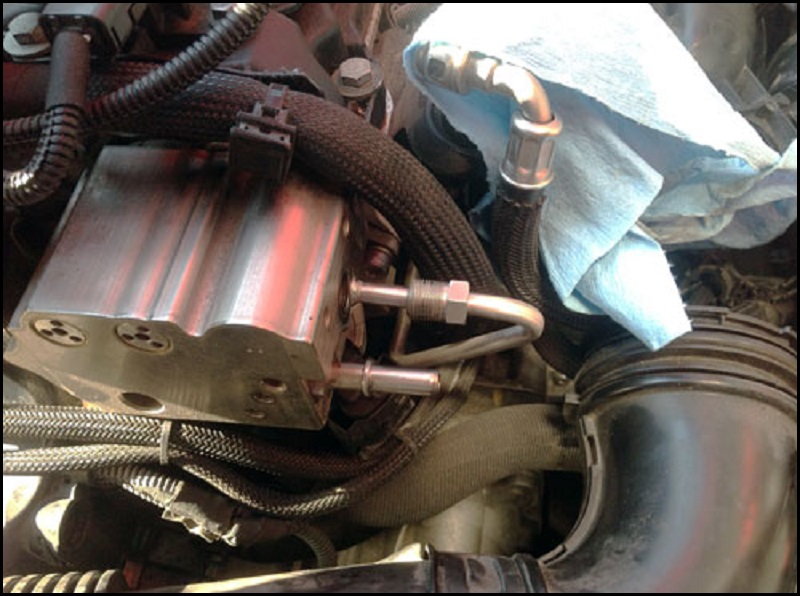
Figure 5. Threaded fuel line removal.
Step 4 – Replace HPFP
- Using the T30 Torx bit, extension, and ratchet, remove the three screws holding the HPFP in place.
- Disconnect the electrical plug on the bottom of the HPFP and pull the pump away from the motor.
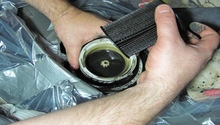
- Place the new pump next to the old pump and align the new pump drive to be at the same angle as the old pump drive (Figure 6) for easier insertion.
- Ensure the O-ring seal is in place on the pump housing, and rub a little oil on it to help prevent it from getting pinched (yellow arrow).
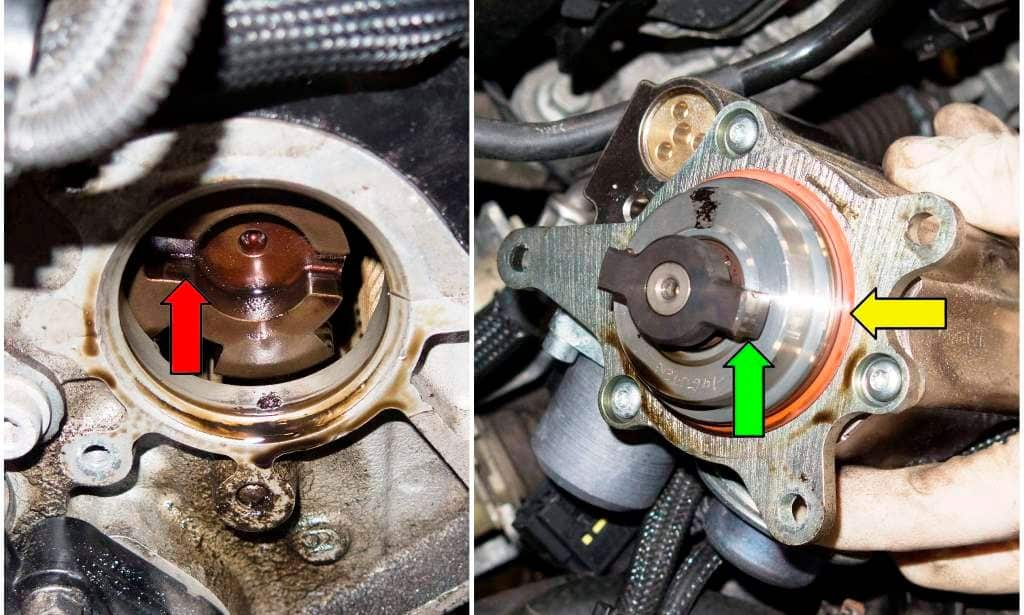
- Officially, you are supposed to replace the fuel lines once removed, but some people choose not to.
- Place a small amount of oil onto the two fuel line seals.
- Connect the threaded line to the pump finger-tight, then push on the other fuel line.
- Place the pump in the pump drive on the cylinder head, and align the screw holes.
- Replace the three T30 bolts to hold pump loosely in place, but do not tighten them at this time.
- Check that the pump is seated correctly in the drive and sitting flat on its mounting surface.
- Torque the mounting bolts down to 97 in-lbs if it is a N14 engine, or 88 in-lbs for a N18 engine.
- Torque the threaded fuel line using the 12mm crows foot socket.
- For N14 engines, torque first to 132 in-lbs, then 292 in-lbs (or 24.3 lb-ft), then to 292 in-lbs after warming the engine up.
- For N18 engine, only a single torque to 229 in-lbs is needed.
- Reassemble any hoses or lines which were moved or removed to clear a path to the HPFP.
- Reattach the junction block, intake hose and air box.
Step 5 – Start engine
- Reconnect the negative battery lead.
- Prime the pump by cranking the motor for 15 seconds at a time for three times.
- Start the engine (it may take several tries before the HPFP is full of fuel again).
- Once started, run the engine for five minutes to warm up.
- Check for leaks and fix. You may need to replace the fuel lines.
- If the engine is a N14, disconnect the battery, remove the air box and re-torque the fuel line to its final tightness.
- Replace the air box and reconnect the battery.
Related Discussion and Site
- High Pressure Fuel Pump Replacement on R56 Mini Cooper - NorthAmericanMotoring.com
- High Pressure Fuel Pump Replacement - PelicanParts.com