When you click on links to various merchants on this site and make a purchase, this can result in this site earning a commission. Affiliate programs and affiliations include, but are not limited to, the eBay Partner Network.
If anyone is looking for a cheap set of DIY tools to walnut blast your intake valves, I found a decent set-up that worked for me with the standard Harbor Freight Blast gun (#37025)
Parts:
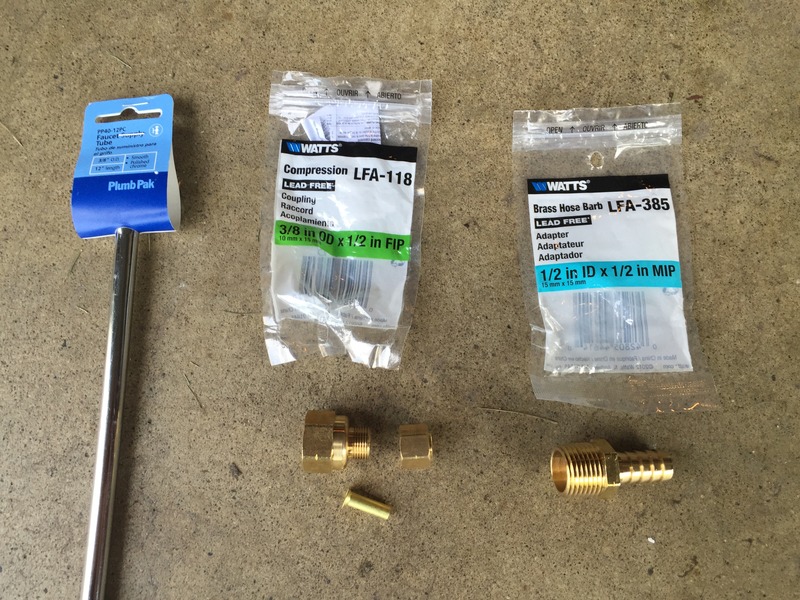
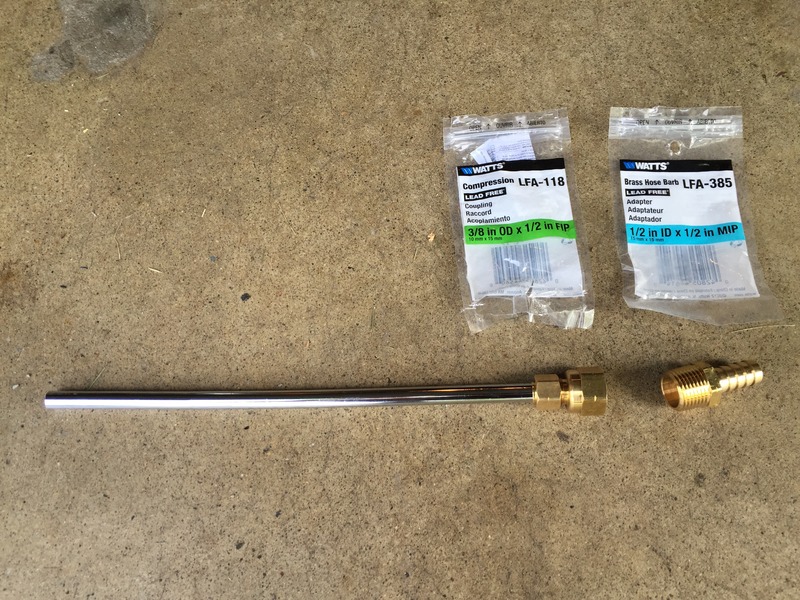
WAND
- Watts LFA-385. Hose barb to go into blast gun. 1/2" MIP threads. $3?
- Watts LFA-118. 1/2" FIP threads to 3/8" compression. $2.89
- 3/8" OD plumbing pipe. I used a 12" faucet supply pipe. $3.09
BLASTING
- Harbor Freight #37025. Media Blaster
- Harbor Freight #92155. Fine Walnut Media
VACUUM
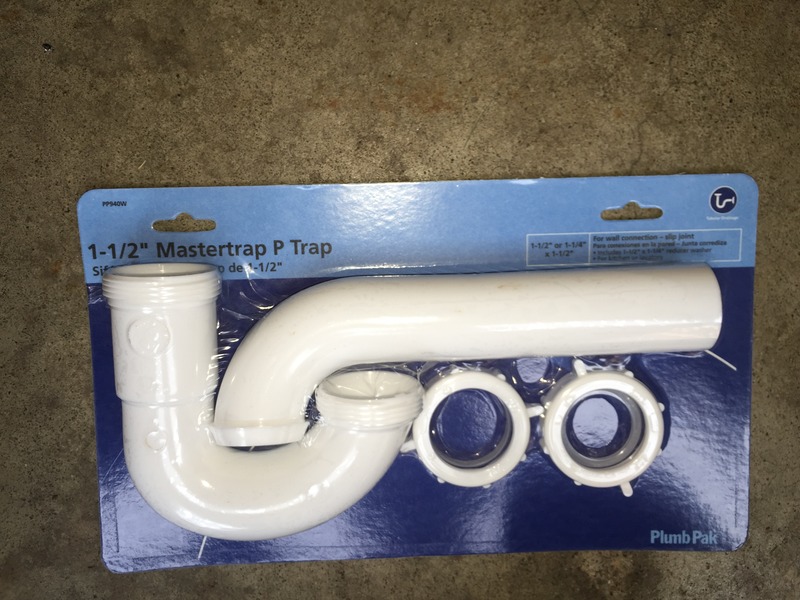
- 1.5" P-Trap pipe.
--------------------------------------------
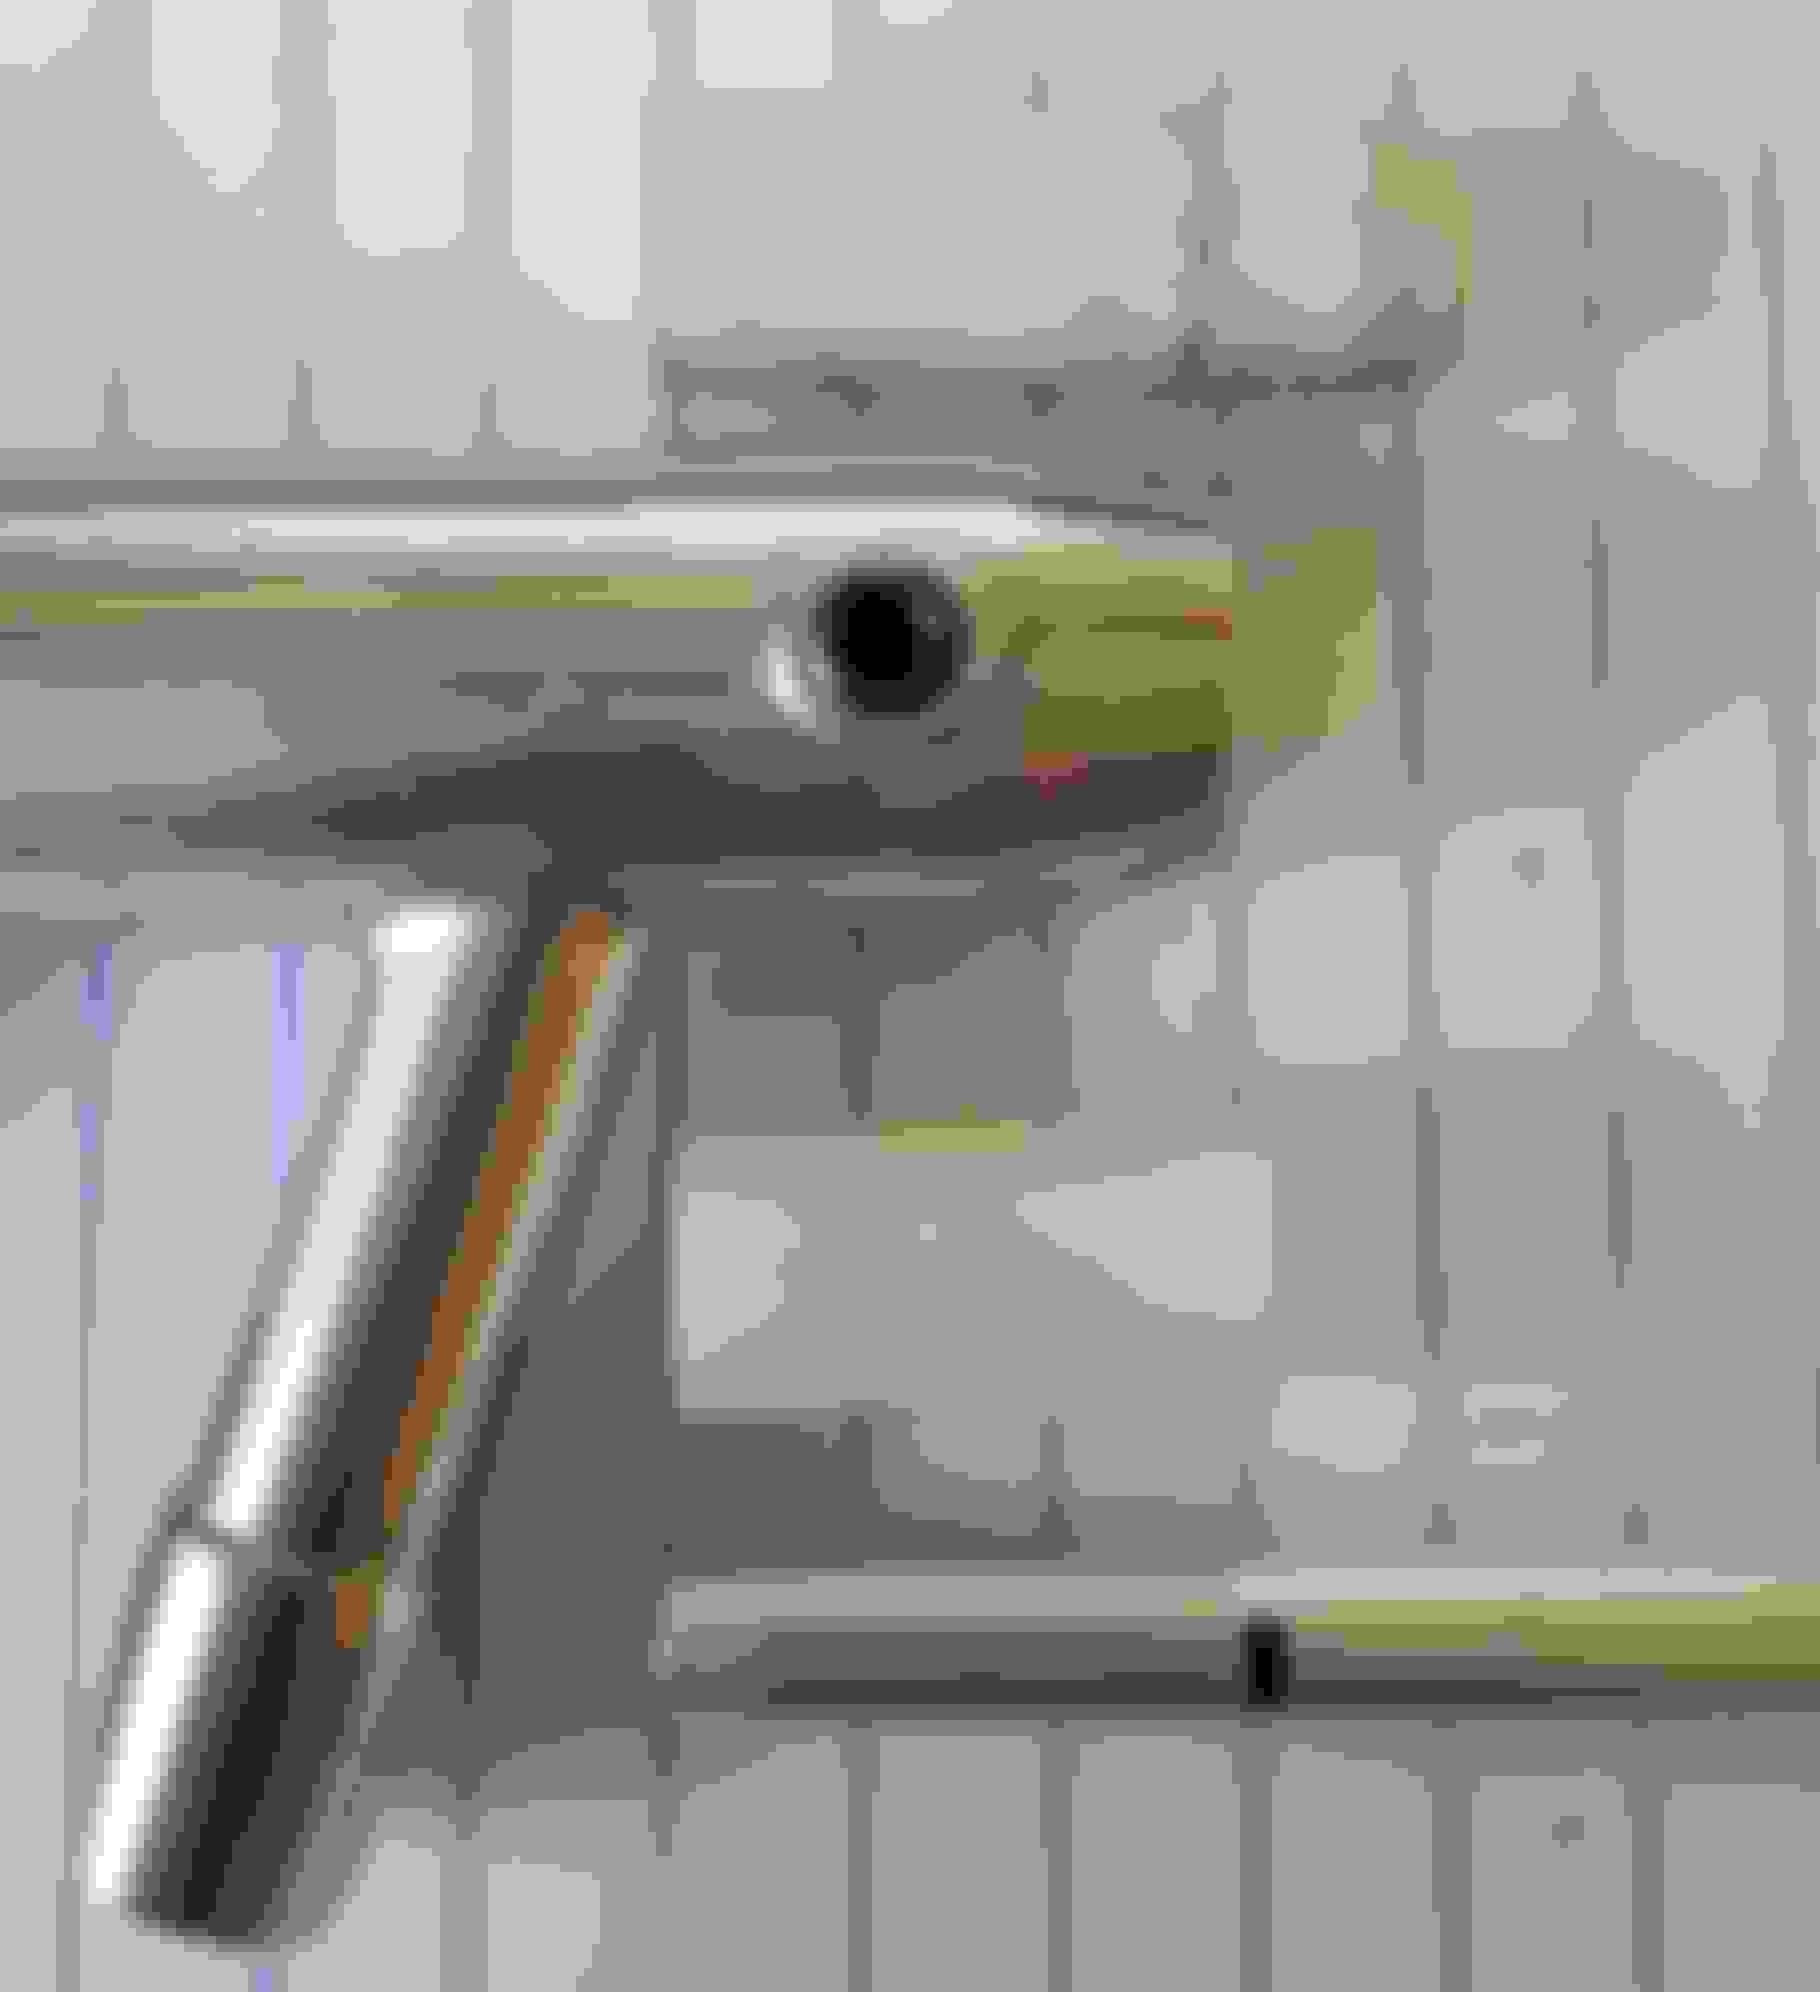
WAND
Assemble the three wand parts. LFA-385 goes into the blast gun like most other DIYs show. LFA-118 threads into that, then the 3/8" OD pipe uses a compression fit into that. Cut the flared end of the 3/8" pipe off it it has one.
VACUUM
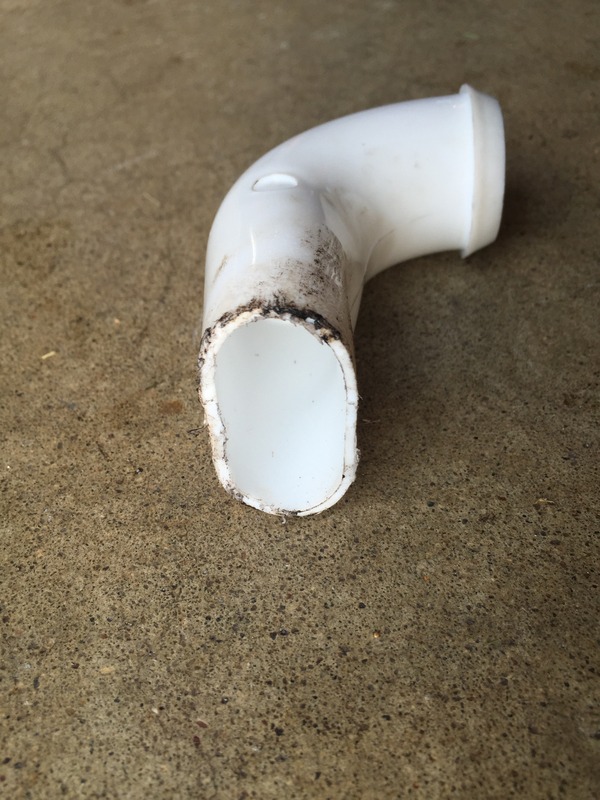
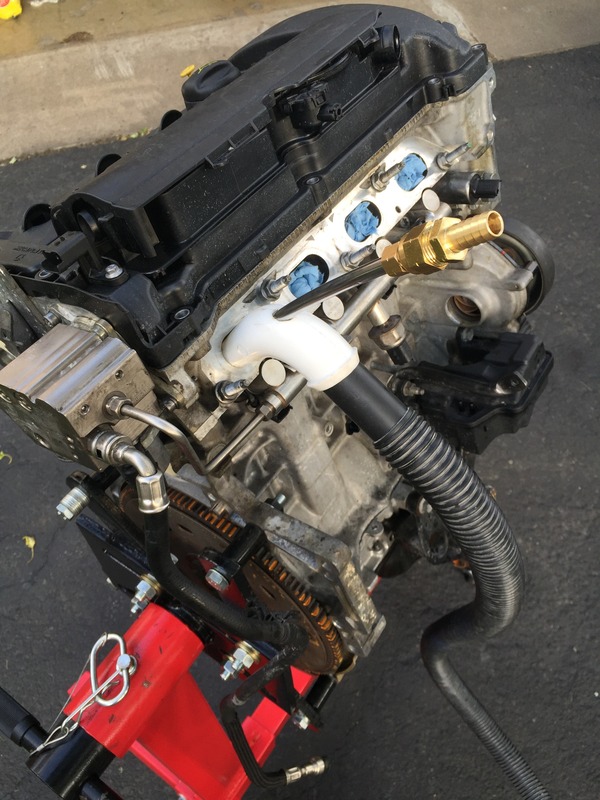
I found a plastic 1.5" P-trap to work perfectly for the vacuum adapter. Cut the upper p-trap piece to your desired length, slowly heat up the cut end with a heat gun until it can be squished into an oval, and then when it's still warm, shove the heated end into the intake port. Let it cool and the piece with set hard into the shape of the intake port. Drill a 3/8" hole in line with the intake opening for the wand to pass through.
Cut and formed
Fully assembled. My shop vac hose friction fit into the p-trap without any adapters or tape.
I did this with an engine out of the car. You'll probably have the adjust your pieces to do this with an installed engine. Mostly bending the wand pipe. You probably need a piece of pipe longer than the 12" piece I used if you're gonna bend it.
*** I also tried this with a 1/4" OD pipe and it did not work. No vacuum for the blast media at the gun. 1/4" must neck down too much and ruin the venturi affect
Total price of the wand and vacuum pieces was about $12.
I couldn't get any good photos yet, but the intake ports and valves look like new
Thanks for posting this! Taking the intake manifold off on the car is a PITA and seeing that hole to the water pump gives me bad flashbacks of changing the thermostat hehe.
I'm not sure if I want to blast myself or take it to someone to do it..$500 seems alot of cash for something that I'm more than capable of...I would need to by a scope to see the valves before and after..to make sure I cleaned them enough..
Super old thread - but wanted to say thank you. Just did the cleaning using this cheapo setup today. Some notes:
I used the 20oz hopper from Harbor Freight.
I had to drill out the feed hole in the hopper with a 1/4 inch drill (after removing the shut-off valve). The hole in the shut-off valve was big enough and didn't need to touch that. Otherwise the blaster clogged instantly.
Also, turned out I only used the compression fitting. I used a saw to reuse the rear inset from the hopper, to allow for the Venturi effect, and cut away the nozzle part so it fits inside the brass fitting. The compression fitting part then screwed on the blaster itself.
I did it in the car. The OD pipe is very flexible and used a hbf pipe bender tool to do a 140 degree turn or so. Left approx 7 inches or so to go into the intake.
The p-trap worked perfect.
I did all the valves one after another. Removed passenger front wheel and two clips of the fender liner. Put a straw in the cylinder, and turned until it started rising. verified the valve being closed by using some carb cleaner and verified it didn't drain in the cylinder. Taped off all spark plugs holes and all other intakes.
Cleaned the valves, inspect, and then removed the remaining debries.
I also wanted to say thanks for this. Loved the melted p-trap adapter (I used a propane torch to get it pliable)! Worked perfectly. One suggestion is to go to HF, get the air blow gun with the extension for $6.99, don't forget your 20% off coupon (Merlin, SKU 63574 which I have always wanted anyway). Get a nylon spacer from Home Depot (SKU 887480150483) for $0.56, slide the 1 foot long tube into the spacer, and replace the ceramic nozzle with the setup. Tighten the set screw to hold the nylon and tube. Make sure you mark the tube so the depth into the gun is the same otherwise you will mess up the media suction. Done. See pictures.
This is the cheapest of any of the suggested setups on NAM, especially if you already wanted (or have) the extended air blow gun. Works great! $6.99 - 20%. Always wanted one. Can't believe how useful it is. $0.56 from Home Depot Measure for depth into the gun. Whole stack of parts. Tighten the set screw to hold the tube with sleeve.