When you click on links to various merchants on this site and make a purchase, this can result in this site earning a commission. Affiliate programs and affiliations include, but are not limited to, the eBay Partner Network.
With One Lap 2022 in the books, the urgency to get things done has lessened a good bit. Like any good project car, there still are things to be done. There always will be...
The last (or currently last) major component needed was a roll bar. It isn't required by OLOA, but it is an important safety component. This car is a "mullet car" (yep, totally made that up) it's business in the front and party in the back. Meaning, most of the interior is still in the front of the car, the back has been mostly gutted. Wanting to keep the car practical for street driving, means that a full cage wasn't in the plan. That left a few options: something pre-fabbed, a bolt-in bar, or a completely custom bar.
Being tall I have the seat all the way back on the sliders while driving. That doesn't leave much/any room behind the factory seat for a bar, so it was looking like something custom was going to be the answer. Before committing I wanted to get the new seat installed and see what the actual spacing was going to be behind the seat.
I reached out to Mark Stewart at Kirk Racing and talked through the options. I settled on the bolt-in bar he offered. There ended up being about 2" of space behind the driver seat when in the full back position. That's a enough space for the bar and the bolt-in is a considerable cost saving over a full custom bar.
I dropped the Mini off last week. Mark had the bar built, painted and installed in a couple days. It actually took me longer to go pick up the car than it did for him to install it. The only negative with the bolt-in bar is that where it mounts behind the seats requires removing the factory seat belt anchor. So, without some modifications, the factory 3-point belts can't be used. For the driver's side, I already have the 5-point harness to install. Just need to decide what to do with the passenger side now.
It has been a bit since I've provided an update, but that doesn't mean there hasn't been activity. The reality is, there has been too much activity. With summer ending, family vacations, school starting back, kids testing for a black belt, the world games, learning to weld, non-stop work and conferences... it's really just sapped my desire to sit down at a computer and write.
I guess that's my way of warning you this will be a long post that will wander over a bunch of different updates. Also, if anyone is wondering why Max is leading (winning) the F1 championship... I'm not saying I helped, but I'm also not saying that I didn't. 6.4s to single handily change the tire.
I guess we'll start at the end, the back end... specifically the trailer. It's long been part of the plan to add a trailer to the Mini. First it'll help with track days, getting race wheels/tires to the track, all the extra equipment and tools, etc. Secondly, it would be great for quality of life in One Lap of America 2023. We can't use race specific wheels/tires, but we can carry a lot more gear, snacks, pillows, the essentials. So when Tim (Aircooled at GRM) came through with some friends and family discounts, that immediately became a trailer.
The trailer hitch was already installed on the Mini, we just needed the trailer to pair it with on our adventures. I went with the Harbor Freight 4x6' lightweight trailer. First step was paint to more or less match the car, then on to assembly. Putting the trailer together was straight forward. I focused keeping things aligned, since pre-reading told me that there were some level of tolerances to expect with cheap Chinese steel.
I took my time and it took about an afternoon to get the build complete. I was out of square by 1/16" I called it good enough. I also was not a fan of how they routed the wiring, so I had to drill a few extra holes to clean up the wire routing. Once that was done, I bolted on some good plywood and the front tool box. Four 245 wide tires juuuuuusssst fit. So this layout probably wouldn't work for your Corvette.
Remaining work on the trailer is mostly on the Mini. I have 8 wheel chocks that I'll bolt on the trailer to add some stability to the tires. Those will come off during OLOA and another box will be added for storage.
Moving on to the Mini. I need to wire up the electric harness still. I hate working on wiring, it's like the least satisfactory work effort. Since I removed the reverse light for the trailer hitch, I need to add another to keep the car street legal. This was solved in the cleanest way possible. I sourced a set of R52 taillights. These lights are direct replacements for the units on the R53, but have an integrated reverse light in them. I have two wiring projects that are related, and will tackle them both at the same time: rewiring the taillights, wiring the trailer harness.
Next on the to-do list was getting the suspension fully sorted out and the car balanced. That meant breaking out the scales and alignment kit. I didn't do a great job of getting pictures of the alignment process, but let's say it was less than graceful. We did get to the result we wanted: -1.3 degrees of camber on the front, and -0.9 on the rear.
The coilovers gave me an excellent chance to work on my metal grinding skills. I'm truly a function over form fabricator.
Once the alignment was settled, it was time to start working on the car balance. That started with a trip to my gym to borrow a 150lbs sand bag and a 70lbs dumbbell. That provides roughly 10lbs of clearance to account for shoes/suits/helmets/etc., and being in 2 pieces allowed us to position the weights in places that nearly exactly matched the weights with me in the driver seat.
Now was time to break out the calculators to determine what are target weights for each corner should be, then tweak corners, settle the suspension, and re-weigh. Rinse and repeat until happy. The internet told us the numbers we needed to hit to make our Mini a Porsche 944:
This process took awhile: roll the car off the scales, jack it up, remove a wheel, adjust the coilover the direction we thought it needed to go to make the numbers move, put the wheel back on, bounce the car a bit, roll the car back up the ramps, measure again. Started working on the rear of the car, and then finally to the driver's side front for the final bit. We ended up at a respectable 49.7:50.3% cross weight, with a 61:39% front to rear weight. Total weight with driver and a full(ish) tank of gas ended up being 2798lbs.
The process wasn't without its trials though. We had planned all this activity so that we could get everything setup and that weekend take the car to the local autocross for some shakedown runs. It would also be the first time my Dad got to take the car out in anger to start getting a feel for how it handles. Nothing gets to be easy with this project car (if you've been following along since the brake upgrade you'll understand). We were already strapped a bit for time due to my work schedule, and then a series of severe thunderstorms took an evening away. I left my Dad unattended for a bit to keep making progress. When I came back, he was sitting in a chair drinking water and asked if I could tighten the lug nuts. Being the trusting person that I am, I grabbed the torque wrench and went to work. On the first swing of the wrench...
I'm not going to say I was setup to fail here, but I'm saying that I didn't put a lot of pressure on that stud. This is Friday afternoon, before a Saturday autocross. We had 2 problems: first getting the broken stud out; second getting a replacement. I called everyone locally that I thought might have some studs, and then called everyone they recommended... no luck. So, that's a lost battle.
There wasn't enough of the stud hanging out to be able to get two nuts on and locked together. The next thought was to cut a nut in half. However, if you saw my work with a grinder above, we are only looking at 25-30% chance of success. Looking at those odds and the time it would take, I decided to phone a friend. I called my buddy Alan. He suggested we drive out to his house/shop and then we could weld a nut on the remaining stud and then should be able to get it out. That's what we did, and it worked.
Temporarily we replaced with stud with a log bolt, but that got us going and able to run the autocross.
The autocross went well. The car handled well despite being 95 degrees, humid and having to deal with 2 drivers. It would get warm after a run, but popping the hood and spraying the intercooler would bring the temps down before the next run. We ran the street tires since the trailer isn't all the way done and they don't fit in the hatch with the rollbar installed. The car started out not rotating as much as I would like, and with 2 opinions on what to change to fix it, we didn't really improve it during the morning session. In the afternoon, with the bright sun and temps up the tires got greasy but I took the lead on tweaking the air pressures to get the car's balance where I liked it. The last 2 runs of the day the car really felt good and we both turned our best time. The last run of the day, I was a full second faster than any run prior... right up until I tried to spin out right in front of the finish line. Probably ended up losing 2 seconds righting the car and crossing the line.
None. It was held locally so we took the kids to several events. It just killed two weekends with activities out in the sun and heat. Who knew sitting in the stands could be so demanding?
My most sincere congratulations to your young'uns, and (his, her, their) progress in the martial arts.
I've practiced for decades, and the very best dojos I've been in had a vibrant, joyful, and hugely helpful junior programs. Any young'un seeking or earning their Shodan rank should be proud.
Took the Mini out for a track day at Talladega Gran Prix (because I hate tires apparently). Mini ran amazing. Ran down Miatas and a Z06 in both of the first 2 sessions.
After the second 20 minute session, I was talking to some other drivers and noticed a spot under the car. I assumed it was there before and ignored it. When I finished the conversation the one spot had become many. ****.
I cleaned up and braved a quick drive home. No lights, no warnings, nothing other than leaking oil down the interstate.
I cleaned up the underneath of the car, did an oil change (hoping it was an issue with the filter). When I started it, it still leaked. Best I can tell it is coming from below the filter and towards the middle of the car.
I've got a million pictures trying to see where I can't get my head.. any help?
Clean the motor with an engine cleaner or brake cleaner (cold motor) and try running it on stands. See if you can see any fresh oil coming out. Also, extended high rpm use will raise crank case pressure causing any weak gaskets to leak. How is your pcv system doing?? I was having problems blowing seals and gaskets (and the oil cap 😳 on our old mustang because I had bypassed most the pcv system. Dont ask lol. It may just be a tired gasket but it may be caused by the pressures generated on track not being able to vent properly. Just a thought.
Ending the year with a bang...
...maybe a pop? Or a hiss? Disappointingly, it probably didn't event make a sound.
With the Autocross season winding down, and my consistency not where I thought it was going to be this year, I wasn't overly concerned about end of year standings. So, when the October double-header event came up and I knew I would only be able to do one of the two days, it wasn't that hard of a decision to do something different and head out to Talladega Gran Prix for one of their open track days.
It had been a bit since I'd been out there, but it is a fun track and a great value for the amount of time you get on track. The downside is that it has a bit of a reputation for destroying tires, more on that later.
It was a great day for racing / driving. It started a bit cool in the morning, but the sun felt nice and the day had a near perfect warm up. The event itself was well run, casual, and had the right number of cars per run group for the track. Pretty normal pattern for track events: 3 run groups (beginner, intermediate, and advanced); each group getting 20 minute sessions. 20 minutes is a lot of laps on a track that short.
First session was really getting dialed into the line and remembering the details of the track, and trying to get a feel for the balance of the car. Coming out of the last Autocross event, I felt the front had more to give and increased the stiffness on the fronts a few clicks. Running the Mini through a few high speed corners, the balance felt pretty good. Turn in and mid corner felt great; corner exit had some understeer. I put that down to being FWD and have 61% front weight bias. The tires and LSD made it really manageable, I could control the car and place it exactly where I wanted it to go.
One of my favorite features of the Mini is how unassuming it is when you bring it to a track. Almost 20 years old, most people won't give it a second look in the paddock/grid. Then after a couple sessions, you suddenly have people coming up and questioning what you've done to it, how much power it makes, etc. After the second session where I passed all but 1 car in the run group, I had a few people intrigued by the Mini.
I did have one exciting moment during the second session. I over cooked it going into the last set of corners and the backend of the car started to come around on me. I was able to catch it and only put 2 wheels in the grass, but the extra bump popped open the glove box. So, I had to pull into the pits to close it (couldn't reach with the harness fastened). Other than that, the car was fast and consistent. I was really happy with how the day was going to that point.
After the session was standing around chatting with the other drivers (another driver had followed my lead and over cooked the last corner and had an even more exciting tank slapper). I looked back over at the Mini and then the day took a turn for the worse. There was a small drop of fluid coming from just behind the passenger side front tire. I watched it for a minute, and the small drops kept coming.
That was immediately game over for the track day. I tried to find the source at the track, but climbing under the car and trying to look over the top, there was nothing easily visible. All I could tell was that it was coming from somewhere on the backside of the engine. After some debate on tow vs. drive, I decided to drive it home.
Made it home with no issues. Put the car up on jack stands and started looking around. Decided to do the low hanging fruit first. Went ahead and did an oil change. Draining the oil showed that the leak wasn't terrible and there was plenty in the engine. Also, after completing the change and ensuring that everything was tightened up properly, the leak was still present.
With the car up on jack stands and the wheel off, I could get a bit of a better view. Best guess at the leak was that it was coming from the oil heat exchanger:
I reached out to Way (Way Motorworks) and talked to him about it. He agreed that was the likely source, but recommended that we replace the entire filter housing and not just the heat exchanger. I looked through what it would take to replace it myself and decided that would be a terrible idea.
That meant I needed to find someone that I trusted to work on a track / modified car locally. Enter Corsa Crew: https://corsacrewrace.com/
I've known Joe for awhile. He and the team provide a number of services, including renting track cars for arrive and drive at a number of tracks. One of the cars he rents is a Mini. Joe was good to handle the fix. I had them flush and change the brake fluid and then had them just look through the car and see if they had other concerns. They did find a soon-to-be issue with the map sensor plug and that was fixed as well.
The Corsa Crew team had the Mini ready to go right when they said they would. Had performed test drives and whip downs and had ensured there were no other leaks when they gave it back to me. I picked it up this last Saturday and it just so happened that there was a HPDE event at Barber's that day. Now, I didn't have time to participate in the HPDE, but they did offer some lunch time parade laps. A good way to put the car through it's paces, and more importantly an opportunity for me to get my son out on the big track!
#TeamRedLineOil
It's great to have the Mini back at home and not leaking oil all over the garage floor. At this point, we're pretty much done for 2022. With the holidays, kids out of school, autocross season over, and it just being cold I'm going into planning and execution for One Lap 2023. Technically, I'm on the wait list again... BUT this time I’m #3 on the list.
As for what little Talladega does for your tires? Well, I’ll leave you with this image of my front right:
Nice write up man - looks like you had a blast! The 'modern classic' status of the R53 isn't for nothing and certainly not just because of the looks. It handles (even in stock form) better than any other car I have ever driven and I don't do track days or autocrosses. I do love watching videos of other people passing BMW's and Porsches on track days though!
Glad it's not leaking oil anymore. I'm curious what you think of the megan coilovers, especially how they are on the street, and are the front strut mounts noisy.
Glad it's not leaking oil anymore. I'm curious what you think of the megan coilovers, especially how they are on the street, and are the front strut mounts noisy.
I think context is important, I don't daily my Mini. The Megan's are stiff for sure, but not terrible. It's really noticeable in the racing seat that has minimal spring/pad. Sharp dips are worse than bumps or pot holes. Noise isn't really much different than before or it was long enough that I didn't notice the difference after the install.
Overall I'm really happy with them. I feel like they enable me to drive in a manner where I'm able to use the grip that the tires provide a lot better. Weight transfer is more predictable. I'm really able to drive around the FWD and front weight bias.
In this social media based economy, with these hyper funded and polished influencers driving the content on every platform, the only way to stand out from the crowd is to be your authentic self ... And I am an idiot.
I've been putting off a part of the project I started last summer, I have plenty of excuses if you need any. A critical part of having a trailer is wiring up a harness so that the lights work. Electric work is like my least favorite thing to do, across the spectrum. I don't like installing light fixtures or ceiling fans, connecting wires on computer motherboards, let alone working with the mess of electronics that come on a car. But.. this had to get done.
Now, being a BMW Mini meant this task wasn't straight forward. Honestly, I don't know if it could have been done with simple splicing, but I do know that Outmotoring sells a specific kit to connect a trailer harness to the R53. Being that this kit exists tells me that it solves some issue; I figured best to do it right rather than the pain and suffering on doing wrong and fighting through that to only end up back at this harness kit.
With all of the excuses out of the way, the rain stopping, and having the wiring kit sitting in my office, it was time to suck it up and get it done. Outmotoring was kind enough to send pre-printed instructions, and enough spare wires that you have options on how you want to complete the install. With the back of my Mini already stripped, half the was already done. The rest of the instructions were pretty easy to follow... right up to the point were I had to connect wires. This too, should be a straight forward process, unless you're colorblind. I am and became immediately befuddled trying to discern the difference between the green wire with blue strip and blue wire with brown stripe. Ugh. I called in reinforcements from my wife, who was surprisingly in good spirits helping with a car project. She too thought the wiring offered by BMW was a bit ridiculous. I called out patterns and she carefully picked out the correct wire for me, a few connector snaps later and we were done with that step. I ran the remaining wires, connected everything and then went for the test. Crap... nothing.
It was getting late, dark and I was done with wires for the night.
The next morning I decided to fix / finish it. What was frustrating was that I didn't have any feedback to work from at all. Car lights worked fine, just as before. Trailer was nothing at all. It wasn't that I got wires crossed or anything like that, it was as if there was no power at all getting to the lights. And that's when it hit me, I thought I saw a fuse in the bag of connectors included in the kit. I went digging and sure enough there it was a nice blue fuse in amongst the blue wire connectors. I popped open the little yellow thing connected to the auxiliary power post, and there was a spot for the exact fuse in my hand. Modern technology is amazing.
Connecting up the trailer and testing, this time with power, and everything worked exactly as it should. Outmotoring tried to create an idiot proof kit, I proved them wrong.
With the trailer all ready to go, I loaded it up and took it for a test drive. I even made the rest of the family follow me on the short drive. Not only did I want to make sure the lights worked, I wanted to test the trailer's road manners. The test drive proved that it tracked straight, the wheels were square with no perceivable wobble, and it didn't cause a significant impact on the drivability of the Mini. All good. Ready to go for the Autocross season and One Lap of America 2023
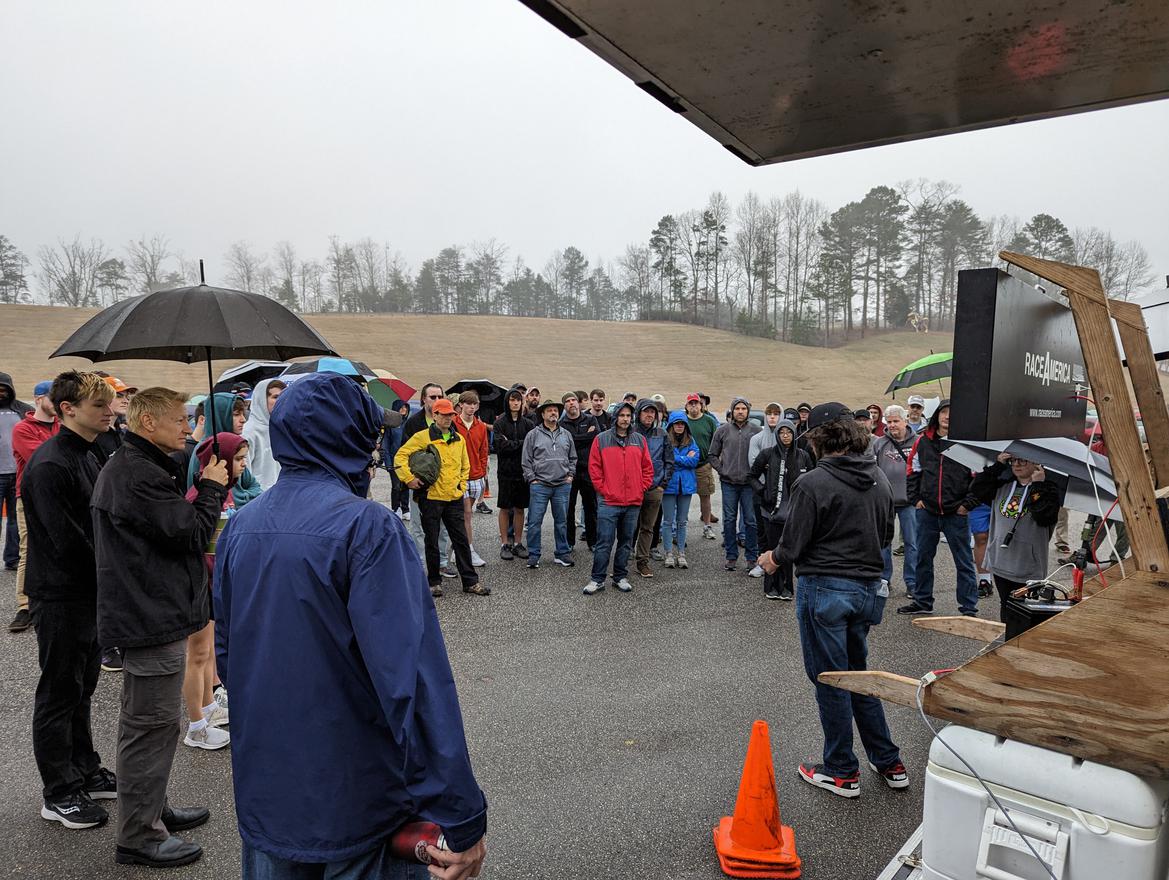
First SCCA event of the 2023 year, and a wet one at that. Not heavy rain, but a constant drizzle to light rain, no drying throughout the day.
Full field turnout despite the weather. Didn't start out great. Had an unexpected call from work that kept me up and working until 1am. I didn't get to pack and prepare before the morning of the event. Sleep deprived, I managed to get most of the things. This was the first official use of the trailer. That all went well. Pulled great, lights worked, and importantly nothing fell off.
I did, however, forget my numbers and to charge the batteries for my impact and air pump.
Tape of shame.
The main goal of this event was to validate that the 15x8s and 245 tires wouldn't rub after all the suspension changes. That meant running slicks... in the rain. Not ideal, but I think in the lighter periods we were right on the edge of where they worked.
That's a great picture, but it doesn't actually show how wet it was all day. Despite the start and the weather, the day was fun. Lots of Novice drivers and several offs, but only minor car injuries.
Balancing traction was the game of the day. Managed to spin once as a result of an over aggressive switch back.
just about anything else (family events excluded... obviously). We're getting into the final stretch before One Lap of America 2023, and we are officially in the event this year. No questions, no waiting list, entry fee paid, hotels booked, all in. All that's left for us is final car prep and shake downs. With a new set of Falken RT660s replacing my Hoosiers, I needed to make sure that they wouldn't rub or cause issues on the street and still perform on the track. An autocross was in order. The ALSCCA was kind enough to schedule 2 of them before we had to head to South Bend for the start of #OLOA23. A bunch of thunderstorms came through in the very early morning, but cleared up and gave way to a perfect spring day in Alabama. #TeamRedLineOilEverything was setting up for a great day of racing.... Until... (This is where you imagine the dramatic music and video effects that go on those true crime shows)...
Until, I signed the waivers and started to drive to the Barber Motorsports Park Proving Grounds. I was greeted by a new light on the Mini. This wasn't a light I liked either. Interestingly the traction control light also came on. The car seemed absolutely fine though. Hoping for the best I pressed on with the event. The car didn't miss a beat or show any kind of bad behavior at all. I pulled the code and it was a P0303, misfire on cylinder #3. I hoped it was a plug, wire, even the coil pack. After the event drove home and pulled the codes again. This time I got the same P0303 and added a P0313 (low fuel). I put the car up and focused on the traditional after racing meal of hot wings and beer.
I googled everything I could find about these codes, and as you can imagine the answers were all over the place. The only thing was to test and try and eliminate some of the simpler issues.
Ok, swapped plugs wires.. no change.
Next swapped the plugs... no change.
Recruit the wife to assist with a compression test (she loves when I make her do car things).
#1 - 145
#2 - 145
#3 - 100... ****.
#4 - 145
Not the results I wanted, but honestly it's really what I expected. This car has all the temperament of a race car, why would it be easy right before its biggest event? It's likely the head that will need to be rebuilt, but I need to get or do a leak down test to provide the next bit of information.
So, for all my fellow XS competitors... I was running on 3 cylinders this weekend. That's my excuse and I'll stick to it.
The tires did really well once they got a bit scrubbed in. I'm pretty happy with them, which is good because it doesn't look like I'll get many other testing opportunities.
No smell of fuel around the engine is there? I kind of wonder if maybe you've got an injector or injector o-ring going bad? or were they replaced when it was in the shop not too long ago. You're probably right, but I'm just trying to think of things that might be and would be cheaper/easier/faster than a head rebuild.
No smell of fuel around the engine is there? I kind of wonder if maybe you've got an injector or injector o-ring going bad? or were they replaced when it was in the shop not too long ago. You're probably right, but I'm just trying to think of things that might be and would be cheaper/easier/faster than a head rebuild.
There are no odors, leaks, or anything that would let you know there is a problem other than the SES light. I'm taking it to Corsa Crew next Wednesday, they'll do the full analysis since it's moved beyond my abilities.
I had those same codes together for months and thousands of miles on my R50. Yes I know, apples to oranges. But it ended up being a burnt exhaust valve in my case. Eventually the drivability went to $#!+ and I was forced to deal with it. If its something in the head its a pretty easy fix. Here's to hoping!


 on our old mustang because I had bypassed most the pcv system. Dont ask lol. It may just be a tired gasket but it may be caused by the pressures generated on track not being able to vent properly. Just a thought.


 https://corsacrewrace.com/


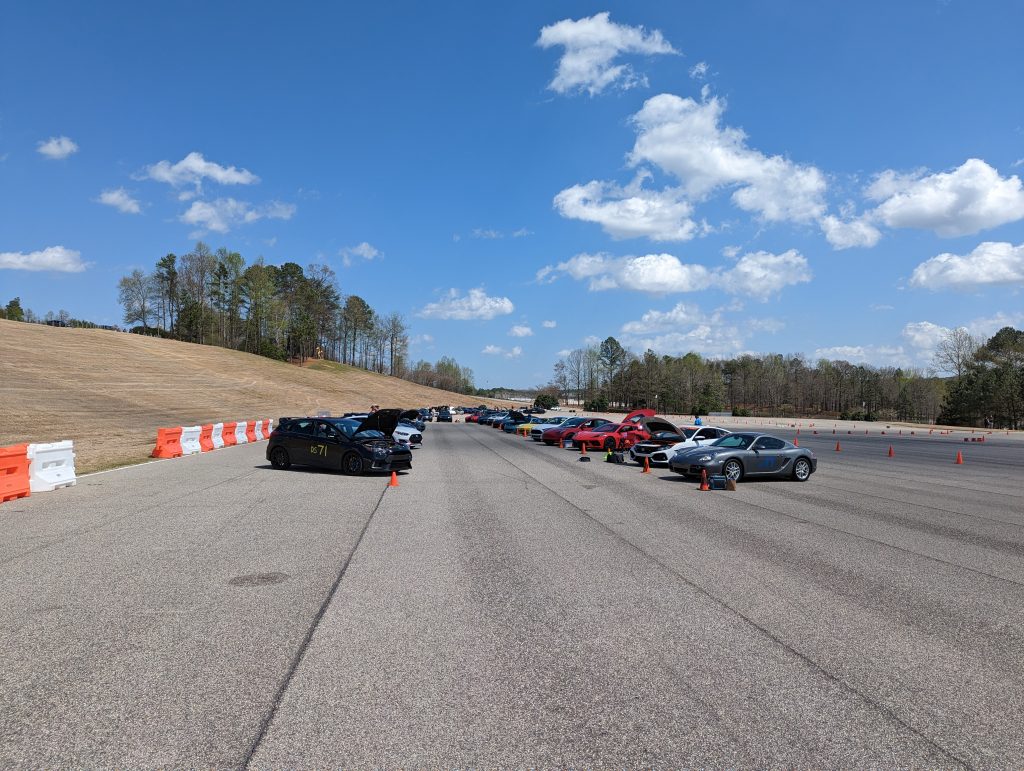 With a new set of Falken RT660s replacing my Hoosiers, I needed to make sure that they wouldn't rub or cause issues on the street and still perform on the track. An autocross was in order. The ALSCCA was kind enough to schedule 2 of them before we had to head to South Bend for the start of #OLOA23. A bunch of thunderstorms came through in the very early morning, but cleared up and gave way to a perfect spring day in Alabama.
 #TeamRedLineOilEverything was setting up for a great day of racing.... Until... (This is where you imagine the dramatic music and video effects that go on those true crime shows)...
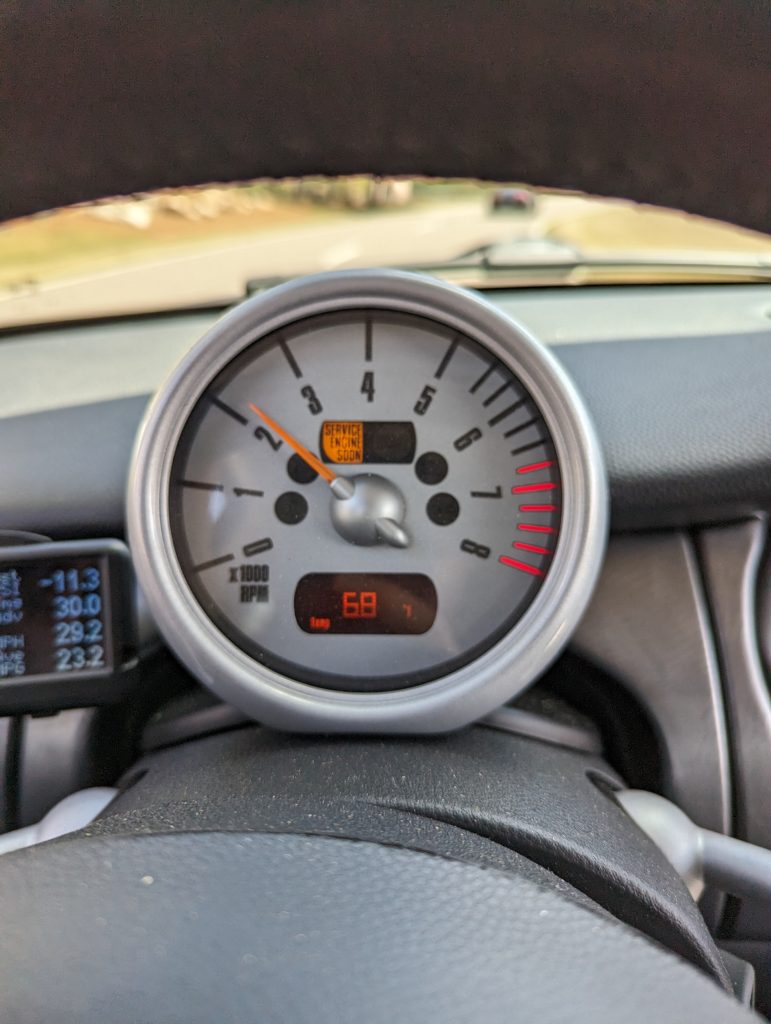 I was greeted by a new light on the Mini. This wasn't a light I liked either. Interestingly the traction control light also came on. The car seemed absolutely fine though. Hoping for the best I pressed on with the event. The car didn't miss a beat or show any kind of bad behavior at all. I pulled the code and it was a P0303, misfire on cylinder #3. I hoped it was a plug, wire, even the coil pack.
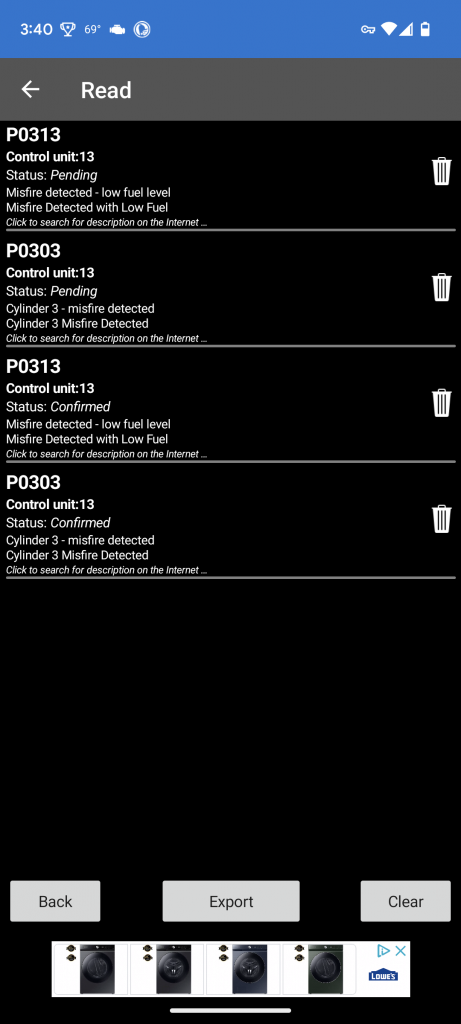 After the event drove home and pulled the codes again. This time I got the same P0303 and added a P0313 (low fuel). I put the car up and focused on the traditional after racing meal of hot wings and beer.