
R50/53 Project: '03 R53 Resurrection


Thread Starter
|
2nd Gear
Joined: Jun 2018
Posts: 90
Likes: 6
I removed the supercharger and belt tensioner tonight. I need to do a bit of clean up to get rid of the "seasoning" from salt, dirt, and oil residue. I'll give the exposed block area a fresh coat of spray-bomb and wipe/spray everything else clean within reach. After cleaning, it'll be time to install the parts I've collected over the past couple week. The list, so far, in random order is:
- fuel filter kit
- hydraulic belt tensioner
- serpentine belt adjustment pulley
- harmonic balancer
- drive belt
- front seal- timing case cover/crankshaft
- crankshaft sensor o-ring
- oil filter housing to heat exchanger gasket
- valve cover gasket incl spark plug tube seals
- oil pan gasket
- oil dipstick tube o-ring
- oil dipstick
- oil, oil filter, drain plug, o-ring..
- camshaft sensor o-ring
- left and right front axles
- supercharger gasket kit
- supercharger oil
- water pump
- alternator
- upper, lower radiator hoses
- heater hoses
- t-stat housing, t-stat, expansion tank
- power steering suction and return lines
- cabin air filter
I already replaced the starter, exhaust manifold gasket, header/muffler flange gasket, and oil filter housing gasket. It's silly to think I've spent more on the above parts than I paid for the car itself. I'm still optimistic I'll be ahead of the game when finished.
Brakes (pads, rotors, fluid. . . hopefully that's it. Front calipers work) and the lower steering shaft will be replaced after the above parts are installed. The PO installed urethane control arm bushings. I'll get a few miles on it before throwing suspension parts at it.
At this stage, is there anything else I should consider or at least investigate for replacing? I overlooked a few items from the order list.
- throttle body gasket
- belt tensioner damper (bought the model w/out it)
- supercharger oil
Thread Starter
|
2nd Gear
Joined: Jun 2018
Posts: 90
Likes: 6
Fun with the blast cabinet. The'll get coating of spray bomb- either Eastwood's detail gray or chassis black depending on the application. Threads will get chased with a die where needed, kissed with anti-seize upon re-installation.
This is the part where it is hard to not completely follow the OCD road. . .
This is the part where it is hard to not completely follow the OCD road. . .

4th Gear
Joined: Mar 2016
Posts: 470
Likes: 100
From: SF Bay Area - Nor Cal
What a difference the blasting makes. 👍🏼
The fastners, screws, and bolts were not all that expensive at the dealer. Quite surprised. If you end up needing more, the replacements won�t be too costly.
Thread Starter
|
2nd Gear
Joined: Jun 2018
Posts: 90
Likes: 6
Well, I have to replace all of the valve cover bolts. (>$100!) Lucky, the short bolts spun off after taping a 7mm socket on to them. It's not hot-as-Hades today, so I'm hopeful of degreasing the engine and subframe while the car is in service mode. After that, it's time to start putting parts on the car.
Thread Starter
|
2nd Gear
Joined: Jun 2018
Posts: 90
Likes: 6
I've just about turned the corner on the "while I'm in FESM mode" maintenance tasks. New parts are going on the car and much of the engine bay is cleaned up. I degreased and pressure washed the car inside my garage. It wasn't too bad and didn't make a huge mess. The degreaser left a pleasant citrus smell that masked the Kroil aroma. Here's a pic of what I'm calling the halfway milestone.
Thread Starter
|
2nd Gear
Joined: Jun 2018
Posts: 90
Likes: 6
Today was productive as I moved new parts on to the car. I installed new CVs on both sides, t-stat housing/stat/gasket, and opened up the supercharger. To my surprise, the oil was full and clean. This one looks to be a pretty good unit. So, net I'll knock the salt off the case and wait for the gasket kit to arrive. Once the gasket kit arrives, the rest of the engine parts will go back on the car.
Despite the horror stories of working on this car, this one has been quite enjoyable. It really helps that any task I'm doing has been done by many others who have provided great write-ups or instructional videos. Many thanks to those who keep this place goin'.
Despite the horror stories of working on this car, this one has been quite enjoyable. It really helps that any task I'm doing has been done by many others who have provided great write-ups or instructional videos. Many thanks to those who keep this place goin'.
Thread Starter
|
2nd Gear
Joined: Jun 2018
Posts: 90
Likes: 6
So, I decided to change the cabin filter. I'm glad I took care of this while the wife was out. . . and before turning on the fan. . I didn't smell, hear, see (living or not), or feel any critters, so hopefully it's moved on. . .


yikes, yep i seen nests and all kind of crazy on the forms. Some people have made a little wire mesh part to put on the outside of the inlet so animal don't get in.
__________________

MINI Guru/ MINI Owner Since 2004 | NEW Lifetime Part Replacement | Local Pickup
Milltek | Genuine MINI | Forge Motorsport | NM Engineering | ECS Performance | M7 Speed
Customer Service Hours: 8am-8pm EST|Sales Team Hours: 8am-11pm | SAT 10am-7pm 800.924.5172
MINI Guru/ MINI Owner Since 2004 | NEW Lifetime Part Replacement | Local Pickup
Milltek | Genuine MINI | Forge Motorsport | NM Engineering | ECS Performance | M7 Speed
Customer Service Hours: 8am-8pm EST|Sales Team Hours: 8am-11pm | SAT 10am-7pm 800.924.5172

I have even seen people use fine net chicken wire.
__________________
MINI Guru/ MINI Owner Since 2004 | NEW Lifetime Part Replacement | Local Pickup
Milltek | Genuine MINI | Forge Motorsport | NM Engineering | ECS Performance | M7 Speed
Customer Service Hours: 8am-8pm EST|Sales Team Hours: 8am-11pm | SAT 10am-7pm 800.924.5172
MINI Guru/ MINI Owner Since 2004 | NEW Lifetime Part Replacement | Local Pickup
Milltek | Genuine MINI | Forge Motorsport | NM Engineering | ECS Performance | M7 Speed
Customer Service Hours: 8am-8pm EST|Sales Team Hours: 8am-11pm | SAT 10am-7pm 800.924.5172
Thread Starter
|
2nd Gear
Joined: Jun 2018
Posts: 90
Likes: 6
After I cleared the cabin filter I ran the ~24" blow gun down the cowl cavities for a couple compressor cycles to clear out the drain and whatnot. Thankfully, or not, I didn't find any critters or evidence of critters. Every electronics feature I tested worked, so I'm hopeful the lil' furry bastards didn't chew any wires.
My tendencies to "just ignore it" are sometimes weak. Case in point. . . running the supercharger through the blast cabinet. I cleaned the mating surfaces to ensure a good surface for attaching masking tape. I packed the cavities with clean shop rags and covered them with 4 layers of masking tape. The masking tape was laid overlapping and each layer perpendicular to the previous. The PCV(?) orifice was plugged with a foam ear plug. I worked the gun firing down as much as possible. I tried not to spray at an angle that would lift the tape. I used my thumb to hold down the tape along the edges I worked, working quickly to not spend much time near the tape or ear plug. I removed the tape using gravity to my benefit so any glass media would fall away from the piece. Then a quick spray of parts cleaner to wash away any dust. I spun the parts in each assembly and didn't hear or feel any grit so I'm feeling confident the prep job worked. Overall, I'm happy with the result. Most won't see the work once it's installed in the car, but to me knowing it's done is all that matters.
I'm thinking of spraying the housings with an aluminum color engine paint.. . . not exactly sure about that yet.
Last edited by Cornfed82; Jul 10, 2018 at 05:53 PM.
Thread Starter
|
2nd Gear
Joined: Jun 2018
Posts: 90
Likes: 6
I couldn't resist temptation, had to spray bomb the supercharger case. I'm stopping here because if not, then the intake horn and manifold get pulled, blasted, and painted. . . and I just don't feel like dealing with that now.
I pulled and cleaned the power steering tank and attached lines. The new lines and cleaned/flush should go on tomorrow afternoon. I'm blasting and painting the bracket during my lunch break It's really tempting to pull the all the heater hoses to clean 'em up, and blast and paint the hose clamps. A man has to have limits. . .
I pulled and cleaned the power steering tank and attached lines. The new lines and cleaned/flush should go on tomorrow afternoon. I'm blasting and painting the bracket during my lunch break It's really tempting to pull the all the heater hoses to clean 'em up, and blast and paint the hose clamps. A man has to have limits. . .
Thread Starter
|
2nd Gear
Joined: Jun 2018
Posts: 90
Likes: 6
Short but eventful evening. I R&R'd the lower steering shaft. One side of the lower UJ was totally seized which made the wheel turn in quarter turns only. Now it's smooth and proper. After installing the shaft, I installed the power steering tank, new suction, and new return hoses. I followed a DIY thread where the lines were attached to the tank on the bench. That seemed to work out quite well. I blasted & painted the s/c horn and intercooler gasket clamps, then reassembled the s/c. So, with any luck and a visit from FedEx I'll have everything I need to get the car back together.
Good times.
Good times.
6th Gear


Joined: Jul 2018
Posts: 2,360
Likes: 753
From: DFW, TX
Hi, folks.
I just replaced the fuel filter in my 2004 MC40. I have the inspection plate off after installation to test for leaks (there are none visible, nor can I smell any fuel).
I've set the key in position 2 a couple of times to prime the pump (which I can hear working) but the car won't start. It's turning over fine and a couple of times while attempting to start it I've heard clicking coming from the fuel filter area (but not every time).
What did I do wrong? Should I simply wait and try again and is it possible that I've disconnected something during the replacement process? Thanks for your help.
6th Gear
Joined: Jul 2018
Posts: 2,360
Likes: 753
From: DFW, TX
Not starting after fuel filter replacement
I've removed and recharged the battery for an hour (from 12.3 to 12.8) since I had the doors open while replacing the fuel filter, and still not starting. I can now hear the clicking sounds coming from my the fuel filter area each time I attempt to start the car.
I removed the filter/housing to examine it, found nothing wrong (nothing disconnected) and put it back together. I did note that when disconnecting the fuel line to the filter that it did not appear to have pressure (no fuel leaking when removed) even though I can hear it priming when in key position 2. I've primed it multiple times with no result.
Anyone have a brilliant solution? What am I missing? Thanks.
6th Gear
Joined: Jul 2018
Posts: 2,360
Likes: 753
From: DFW, TX
Fuel filter replacement/now not starting
I've removed the fuel filter once again to examine it. Found nothing wrong (again). When priming the pump in ignition position 2, I'm no longer getting the clicking sounds heard earlier, yet it still won't start. Again, I removed the fuel line to the filter and there is no fuel leaking from the hose when removed, i.e., doesn't seem to have pressure. The Mini is throwing NO codes. I didn't disconnect the neg terminal on the battery when replacing the filter. Could that have compromised the actual fuel pump in some way?
Thread Starter
|
2nd Gear
Joined: Jun 2018
Posts: 90
Likes: 6
While I wait for the coffee to take effect, I decided to do a budget check. Yes, the often forbidden "don't add the receipts" task.
I have bought 55 unique parts (bulk of which are gaskets & o-rings) at a total cost of $1,956.34 and 5 tools totaling ~$378.84. I began with a car that wouldn't start, turn well, or stop. While I haven't driven the car (yet), it has started, the steering turns smoothly (on jack stands), and the front brakes work (again on jack stands). When looking at the parts list and costs, the most mind-boggling information is the valve cover bolt kit is the 4th most single expensive item (1 crank pulley, 2 alternator, 3 starter), ahead of the deeply discounted FEQ brand axle shafts on sale at ECS Tuning. So, I'm quite happy with how things have gone so far in a relatively short amount of time. Off to the garage.
I have bought 55 unique parts (bulk of which are gaskets & o-rings) at a total cost of $1,956.34 and 5 tools totaling ~$378.84. I began with a car that wouldn't start, turn well, or stop. While I haven't driven the car (yet), it has started, the steering turns smoothly (on jack stands), and the front brakes work (again on jack stands). When looking at the parts list and costs, the most mind-boggling information is the valve cover bolt kit is the 4th most single expensive item (1 crank pulley, 2 alternator, 3 starter), ahead of the deeply discounted FEQ brand axle shafts on sale at ECS Tuning. So, I'm quite happy with how things have gone so far in a relatively short amount of time. Off to the garage.
Thread Starter
|
2nd Gear
Joined: Jun 2018
Posts: 90
Likes: 6
Well, I feel like I've finally turned the corner on this effort. Parts are going back on the engine. I'm replacing most of the heater hoses and AC clutch. So, once those parts arrive I'll put 'em on and get the engine buttoned up. And maybe, just maybe, get out of front end service mode.

I enjoyed reading your build - I'm horrified when I see rust and corrosion being from the south, but it looks like you're doing an incredible job fixing and protecting everything. It's also really nice to see someone as OCD as I am, after my kids go to bed sometimes I just go lay under the car and clean things, lol. Check out my build thread and let me know if you need anything. Keep up the good work!
Thread Starter
|
2nd Gear
Joined: Jun 2018
Posts: 90
Likes: 6
Thanks for the kind words. I read your thread, I really appreciated seeing the amplifier mod. My car has a working HK amp, so if/when d-day happens you've provided useful info.
It's really difficult to not get too carried away with pulling and blasting parts. Case-in-point are the transmission case, mounts, and support structure. If/when I replace the mounts I'll probably deal with those areas at that time. For now, the convenient and important things addressed. . . like cleaning up the oil filter cover during lunch.
I'm replacing the o-rings between the oil heat exchanger and oil filter body. For many, that'd mean clean the mating surfaces, knock the loose crap off, and re-assemble. For me, that entailed scrubbing both parts using an old toothbrush and dilluted Simple Green for ~30min or so. Followed by a healthy flush, blow gun dry, spray of brake/parts cleaner, air dry.

Awesome rebuild tread, keep up the good work. I kinda started in your boat meaning I bought a fixer upper and I have learned allot from this page, but I tend to use other sources to get my parts, I am a tight butt and hate spending name brand prices for parts that you can get that are just as good at half the price. This site has a list of amazing vendors that is a fact. Looking forward to seeing the finished product.
Thread Starter
|
2nd Gear
Joined: Jun 2018
Posts: 90
Likes: 6
I made progress last weekend and last night, though progress was interrupted by a business trip.
Last weekend I installed the NIB "stock replacement" rotors & pads I scored from Craigslist. The installation was tedious as I removed 3 previously broken rotor set screws. I broke the 4th as the conventional methods of freeing the screw didn't work- brass punch, Kroil, heat. I managed to snap a drill bit and M10-1.5 tap during the process. Good times. With that said, all four corners have fresh brakes. I have stainless brake lines for all four corners and rear parking brake cables on the shelf awaiting their turn to join the party. A fresh fuel filter has been installed, in addition to 7 new cooling system hoses. The front accessories have been installed, torqued, etc. .
The MINI almost looks like a MINI again, at least it looks more complete. The 8 short valve cover bolts are delaying me from buttoning up the engine. A vendor not affiliated with this forum shipped me 12 long bolts. I didn't feel like using them as-is or cutting 'em down, so I'm waiting for the exchange game to end. Live and learn I suppose. But once the valve cover bolts go on, the engine gets buttoned up, fluids (oil, coolant, steering) get filled, and I'll fire 'er up.
While I wait for the mail truck, attention is turning to other areas.
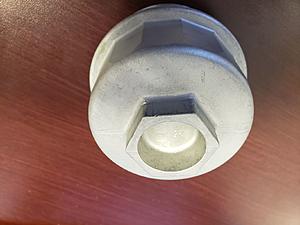
I didn't see where the black plastic part fell from, where does it go?
Last weekend I installed the NIB "stock replacement" rotors & pads I scored from Craigslist. The installation was tedious as I removed 3 previously broken rotor set screws. I broke the 4th as the conventional methods of freeing the screw didn't work- brass punch, Kroil, heat. I managed to snap a drill bit and M10-1.5 tap during the process. Good times. With that said, all four corners have fresh brakes. I have stainless brake lines for all four corners and rear parking brake cables on the shelf awaiting their turn to join the party. A fresh fuel filter has been installed, in addition to 7 new cooling system hoses. The front accessories have been installed, torqued, etc. .
The MINI almost looks like a MINI again, at least it looks more complete. The 8 short valve cover bolts are delaying me from buttoning up the engine. A vendor not affiliated with this forum shipped me 12 long bolts. I didn't feel like using them as-is or cutting 'em down, so I'm waiting for the exchange game to end. Live and learn I suppose. But once the valve cover bolts go on, the engine gets buttoned up, fluids (oil, coolant, steering) get filled, and I'll fire 'er up.
While I wait for the mail truck, attention is turning to other areas.
- interior detailing- It'll be the Mytee Lite III hot water carpet extractor and Tornador show. The overall interior condition is good, but a good scrub will really make it pop.
- transmission fluid change, Redline MTL
- Brake line change and fluid flush
- parking brake cable install
I didn't see where the black plastic part fell from, where does it go?
4th Gear
Joined: Mar 2016
Posts: 470
Likes: 100
From: SF Bay Area - Nor Cal
Good times. 👍🏼
You�re on the right path in making the R53 ready to go. Clean, sorted and refreshed.
Looking forward to your first drive. I�m sure it will be memorable.
My my son and I did a very similar project a couple of years ago. Time flies and the MINI has been a blast as I�m sure you will see.