R50/53 $500 R53 Endurance Racecar Build
#26
 03-21-2018, 12:02 PM


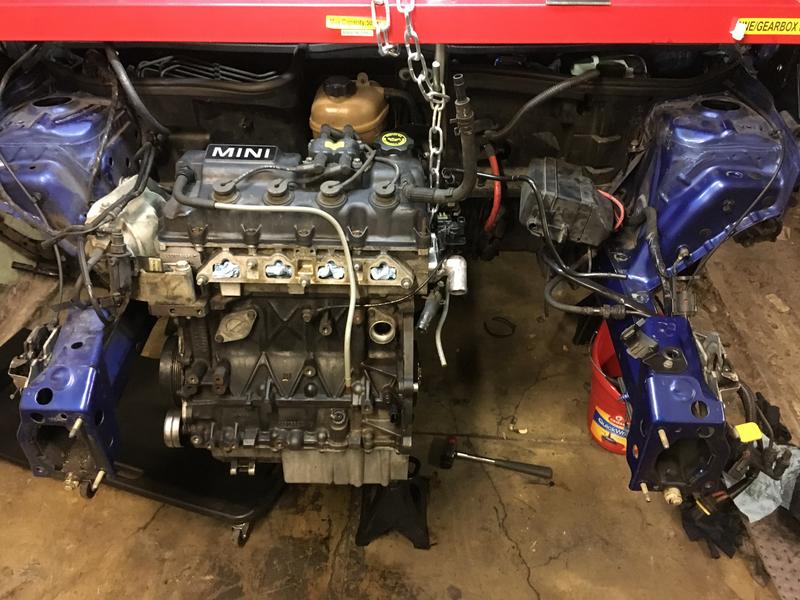
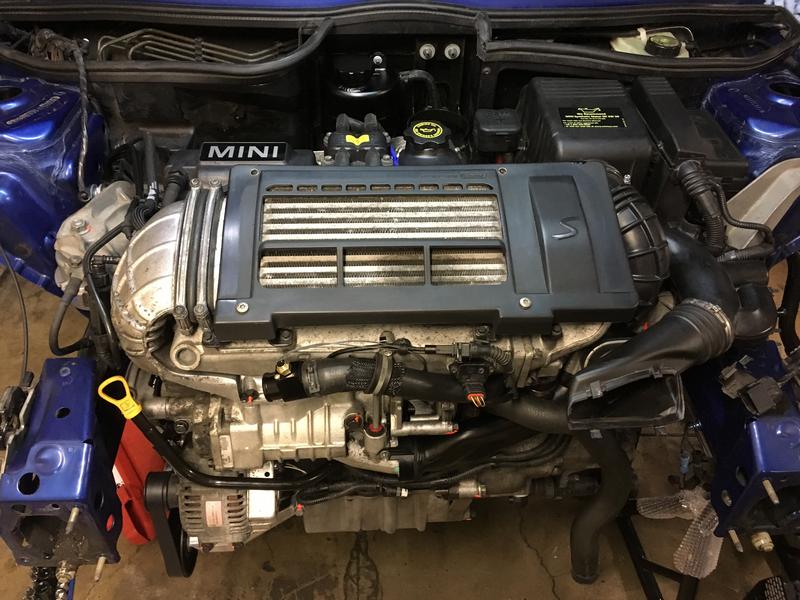
Slowly removing parts from the engine bay while waiting for all the new parts to arrive.
The coolant came out clear and blue which is a good sign, it looks like the cooling system is in good shape without any corrosion/scum/rust in it.
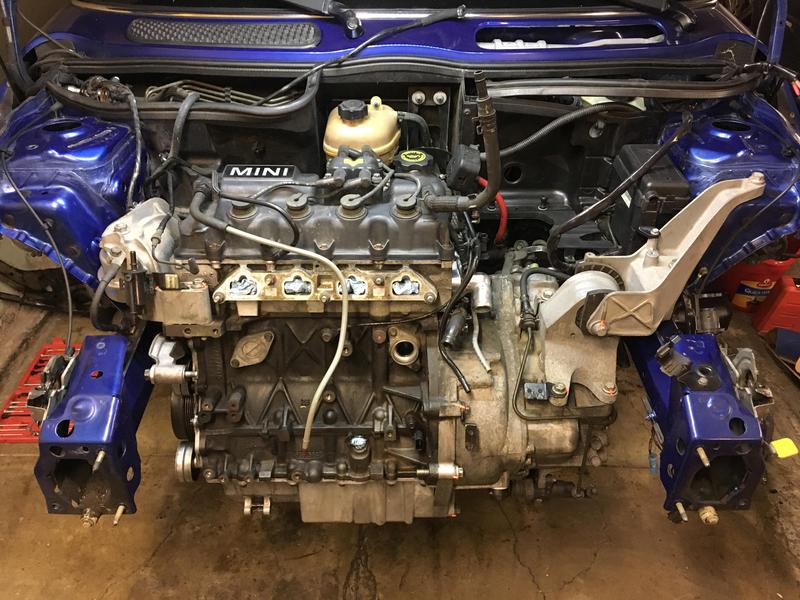
The front came off last night:
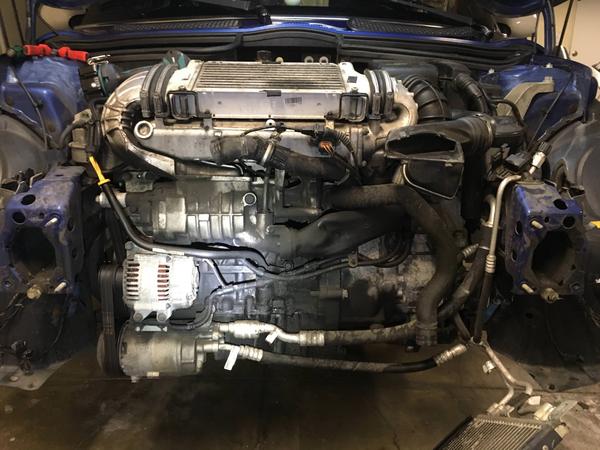
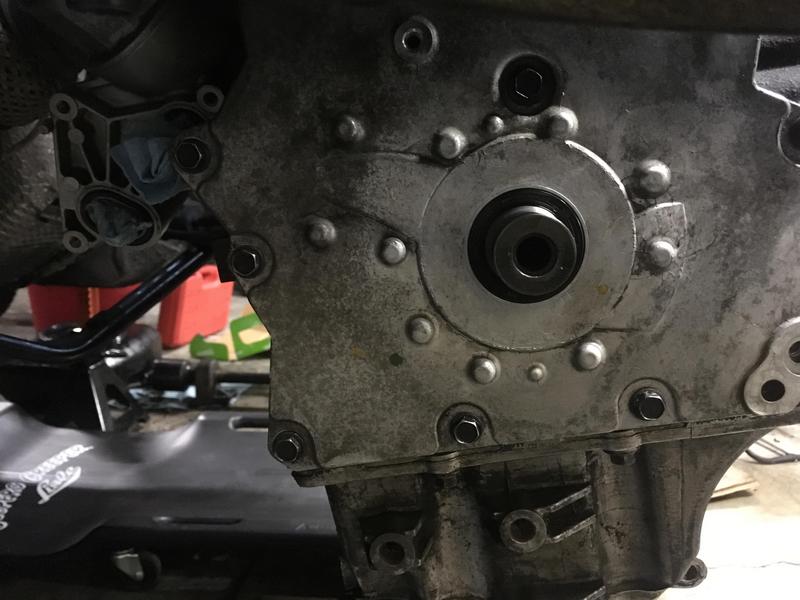
Looks like the crank position sensor might have a small leak, maybe the oil dipstick tube too:
The coolant came out clear and blue which is a good sign, it looks like the cooling system is in good shape without any corrosion/scum/rust in it.
The front came off last night:
Looks like the crank position sensor might have a small leak, maybe the oil dipstick tube too:
#27
04-04-2018, 10:27 AM
A bit of an update in my game of "What else is leaking oil?" 
One of the axle boots was torn and spraying grease all over the oil cooler and subframe, but it's a tiny hole and the CV still seems ok.
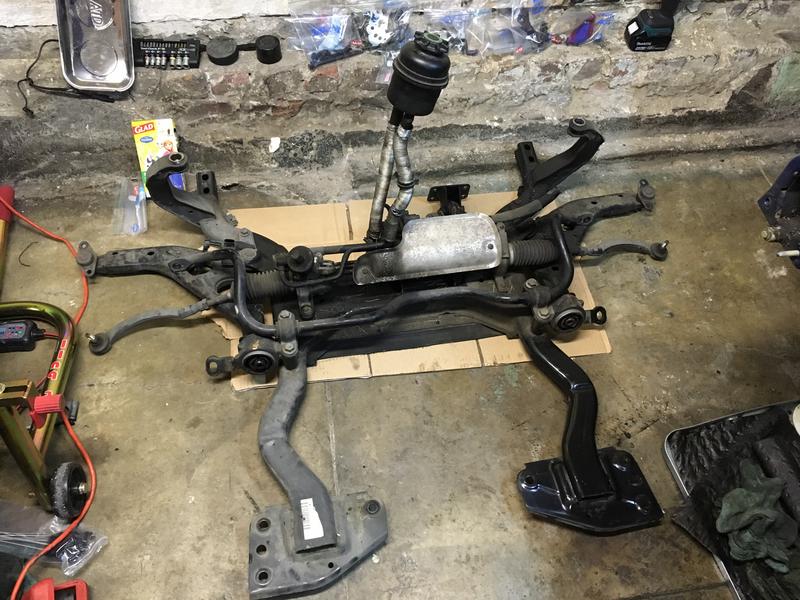
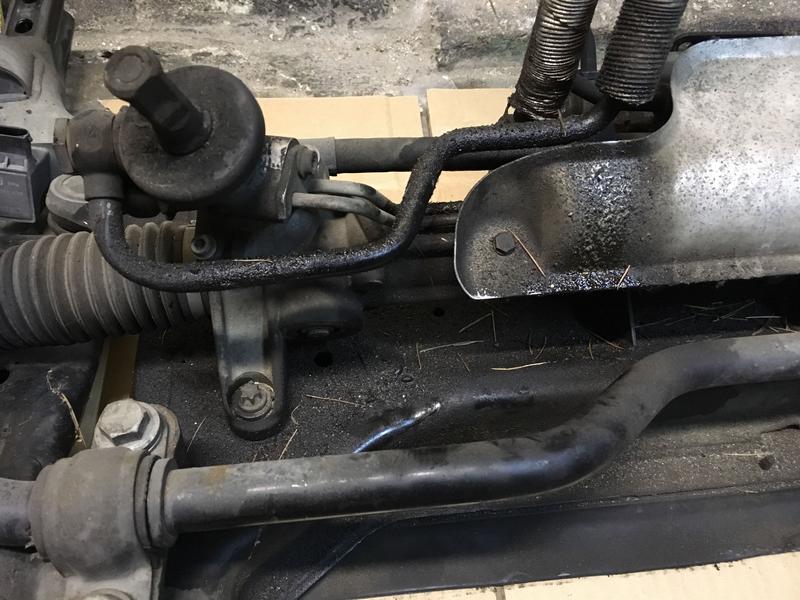
Front subframe is out. Dropping it was easy enough once I worked out that the steering u-joint swiveled up. It needs a good clean-up but all the bushings and ball-joints look good. The control arms and sway bar are getting poly bushings.
I found a second-hand power steering pump and steering rack locally for $50, I'll convert one rack to manual by filling it with grease but keep the power steering for now, with the new pump and hoses.
Dropped the transmission in search for more leaks, found one or two
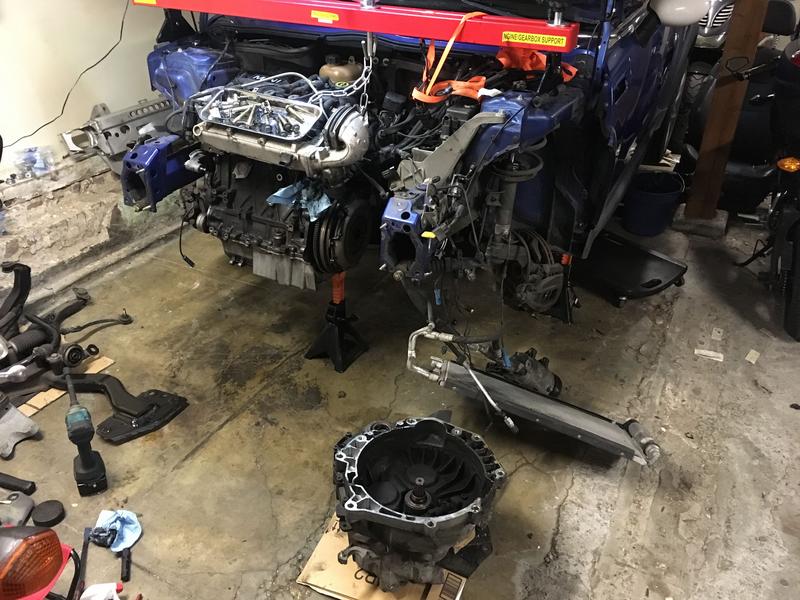
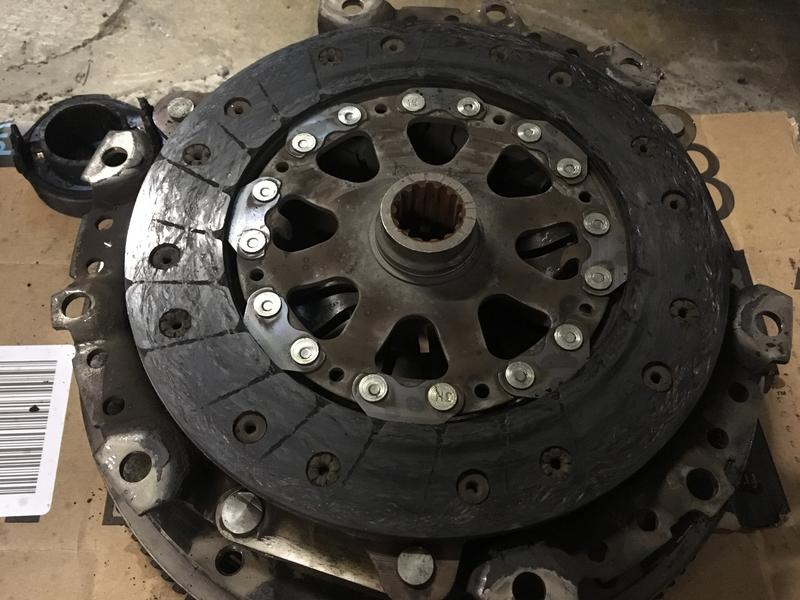
To my surprise the clutch is toast. The paperwork says it's only 30k miles old, so must have been slipping with all the oil in the bell housing. I found a great deal on an unused and unwanted valeo single mass conversion kit, so that will be going back in to replace the stock clutch.
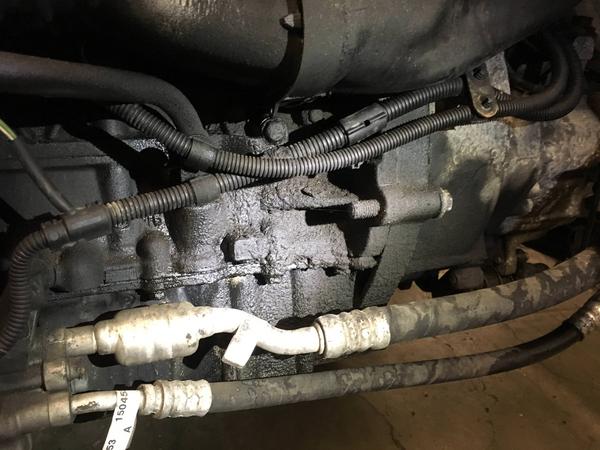
It's not clear if this thick layer of goo is from the rear main seal or the oil pan gasket, both are getting replaced anyway. I'm assuming the transmission input seal is good since the shaft was dry and not oily, although I have a new seal for that too.
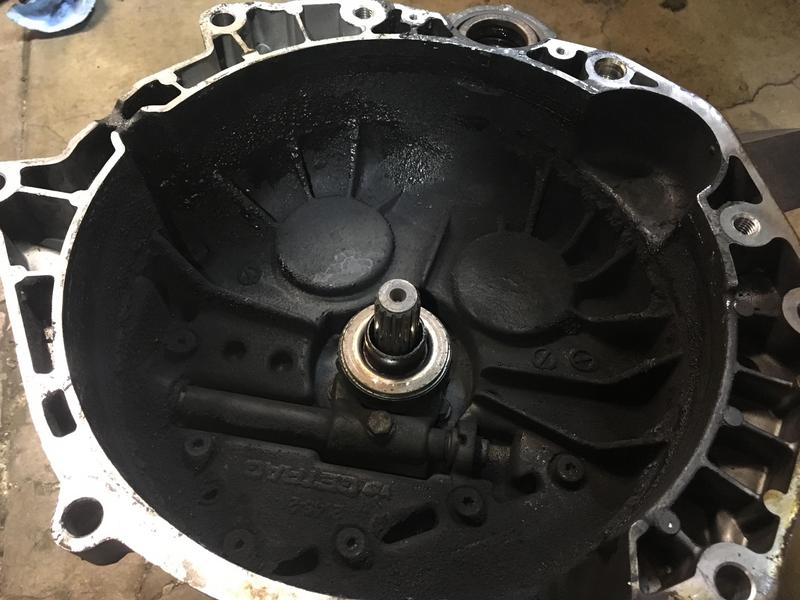
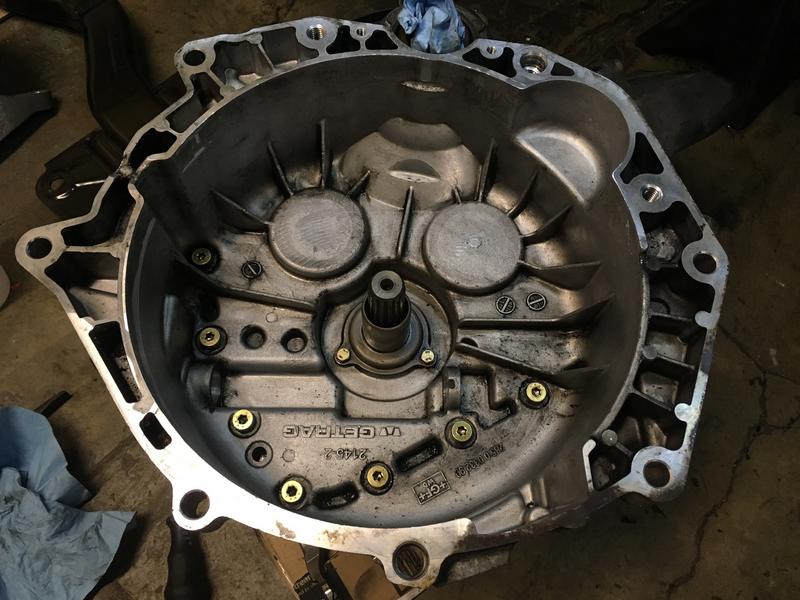
Transmission after a few hours of hand cleaning. No luxury of a parts washer or pressure cleaner in my garage.
I took the clutch release fork out to clean everything up, but I can't seem to find any torque specs on the transmission internals like the shaft to fork or the guide tube. Does anyone know a place to find these?
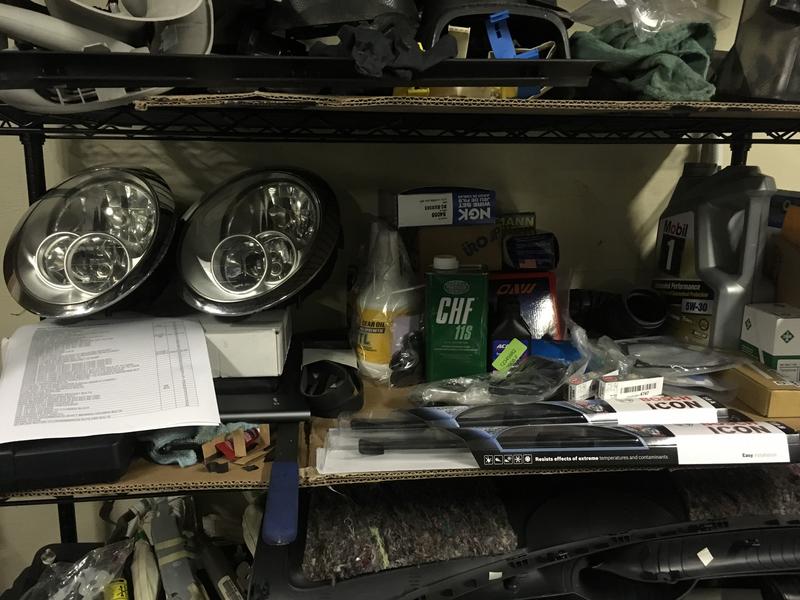
The parts shelf is getting full. I found a good deal on facelift halogen lights so I'll swap those in and sell off the stock xeons for a bit of profit, less weight and some extra simplicity.
One of the axle boots was torn and spraying grease all over the oil cooler and subframe, but it's a tiny hole and the CV still seems ok.
Front subframe is out. Dropping it was easy enough once I worked out that the steering u-joint swiveled up. It needs a good clean-up but all the bushings and ball-joints look good. The control arms and sway bar are getting poly bushings.
I found a second-hand power steering pump and steering rack locally for $50, I'll convert one rack to manual by filling it with grease but keep the power steering for now, with the new pump and hoses.
Dropped the transmission in search for more leaks, found one or two
To my surprise the clutch is toast. The paperwork says it's only 30k miles old, so must have been slipping with all the oil in the bell housing. I found a great deal on an unused and unwanted valeo single mass conversion kit, so that will be going back in to replace the stock clutch.
It's not clear if this thick layer of goo is from the rear main seal or the oil pan gasket, both are getting replaced anyway. I'm assuming the transmission input seal is good since the shaft was dry and not oily, although I have a new seal for that too.
Transmission after a few hours of hand cleaning. No luxury of a parts washer or pressure cleaner in my garage.
I took the clutch release fork out to clean everything up, but I can't seem to find any torque specs on the transmission internals like the shaft to fork or the guide tube. Does anyone know a place to find these?
The parts shelf is getting full. I found a good deal on facelift halogen lights so I'll swap those in and sell off the stock xeons for a bit of profit, less weight and some extra simplicity.
#28
04-04-2018, 10:46 AM

#29
04-04-2018, 11:42 AM
Heck yeah. Lookin good!
The first time I dropped the subframe the steering U-joint was my biggest issue too. I had to walk away and come back before I figured it out. Not one of my best moments, but it took many HARD whacks with a 3lb sledge to get it loose.
I'm about to start my 3rd subframe drop in ~5 months in the coming weeks. As soon as I get my Z off the lift. Shooting for a new record time haha.
#30
04-10-2018, 10:43 AM
The further I dig into the engine the more small parts or seals I need to order which is slowing down progress a little, but I should hit a critical mass soon and be able to put everything back together within the next week.
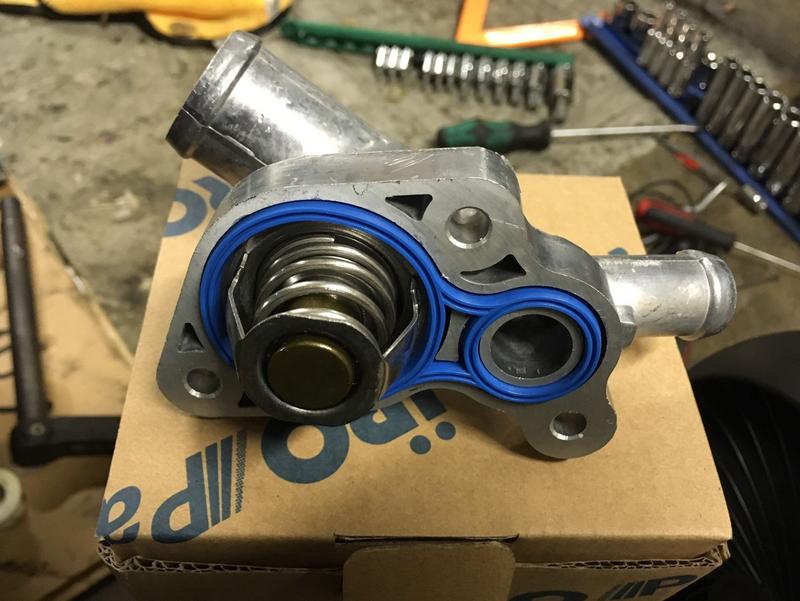
New thermostat housing before installation. The OEM one looked fine and was only 30k miles old, but this metal one was only $14 and now I have the plastic OEM one as spare.
Oil cooler filter housing and cooler is off, which made changing the timing chain tensioner a snap. Whoever tightened the oil drain plug to a few hundred ft/lb also tightened the 36mm oil filter housing to about 1 million ft/lbs.
New rear main seal is in, this should hopefully take care of one of the major oil leaks.
All of the A/C components in the engine bar are removed now, which should make installing the transmission a little easier. The engine wiring harness is also completely removed, so hopefully I can remember where everything goes! The intake is off but there's not much to do there, just some cleaning.
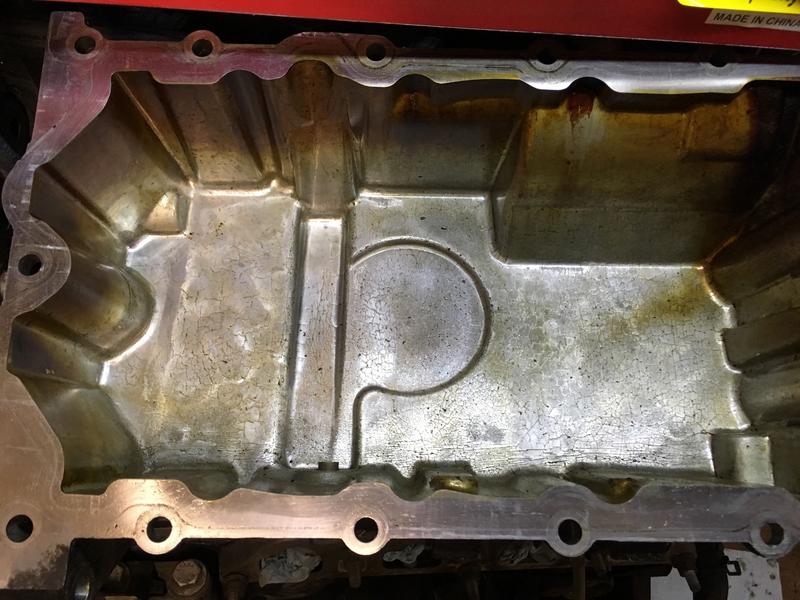
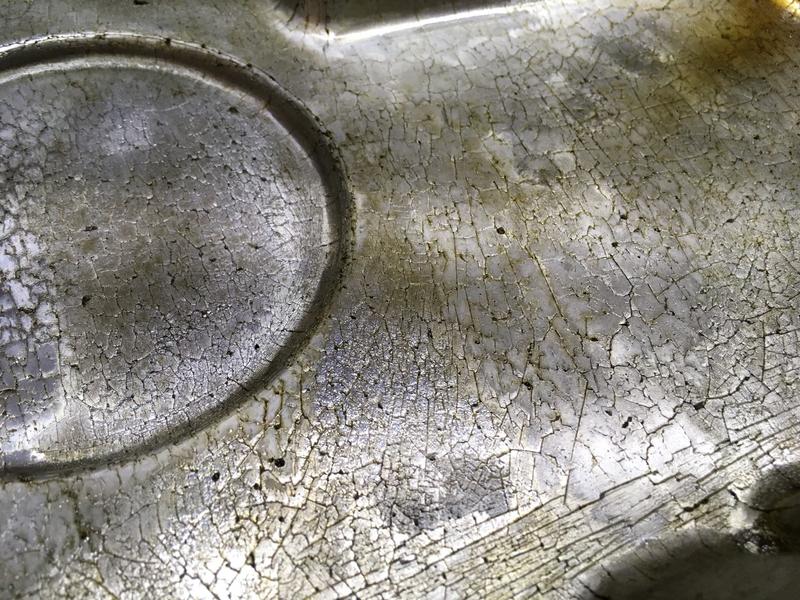
The latest curiosity was hiding in the oil pan. The interior and and exterior surface of the casting has what I can describe best as "scaling" or "crackling", which makes it a huge pain to clean (it's like cleaning coarse sand paper). I kind of doubt that a casting finish like this would pass inspection and leave the factory, so that makes me wonder if this oil pan is starting to show signs of cracking, maybe due to some original manufacturing defect. Has anyone else seen a Mini oil pan like this? It could be normal for all I know, but it does look odd. I'll clean this one up for now but I will be consider a cheap $50 aftermarket pan if this is something out of the ordinary. The last thing I want is to oil up a track.
New thermostat housing before installation. The OEM one looked fine and was only 30k miles old, but this metal one was only $14 and now I have the plastic OEM one as spare.
Oil cooler filter housing and cooler is off, which made changing the timing chain tensioner a snap. Whoever tightened the oil drain plug to a few hundred ft/lb also tightened the 36mm oil filter housing to about 1 million ft/lbs.
New rear main seal is in, this should hopefully take care of one of the major oil leaks.
All of the A/C components in the engine bar are removed now, which should make installing the transmission a little easier. The engine wiring harness is also completely removed, so hopefully I can remember where everything goes! The intake is off but there's not much to do there, just some cleaning.
The latest curiosity was hiding in the oil pan. The interior and and exterior surface of the casting has what I can describe best as "scaling" or "crackling", which makes it a huge pain to clean (it's like cleaning coarse sand paper). I kind of doubt that a casting finish like this would pass inspection and leave the factory, so that makes me wonder if this oil pan is starting to show signs of cracking, maybe due to some original manufacturing defect. Has anyone else seen a Mini oil pan like this? It could be normal for all I know, but it does look odd. I'll clean this one up for now but I will be consider a cheap $50 aftermarket pan if this is something out of the ordinary. The last thing I want is to oil up a track.
#31
04-10-2018, 11:18 AM


#34
04-12-2018, 01:30 PM
Thanks for the replies! It's good to know it's not just mine. I'm thinking about making my own baffle, the off-the-shelf ones are a bit spendy for this budget build.
Now for the next question!
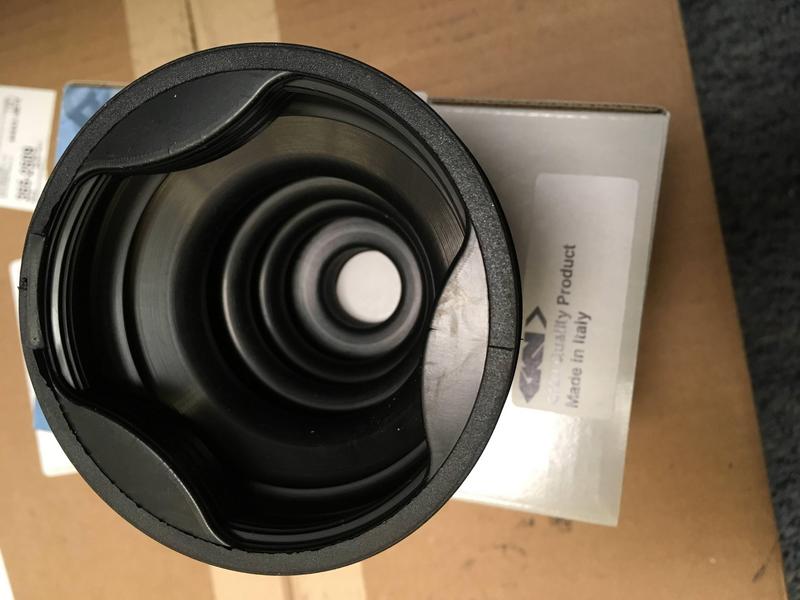
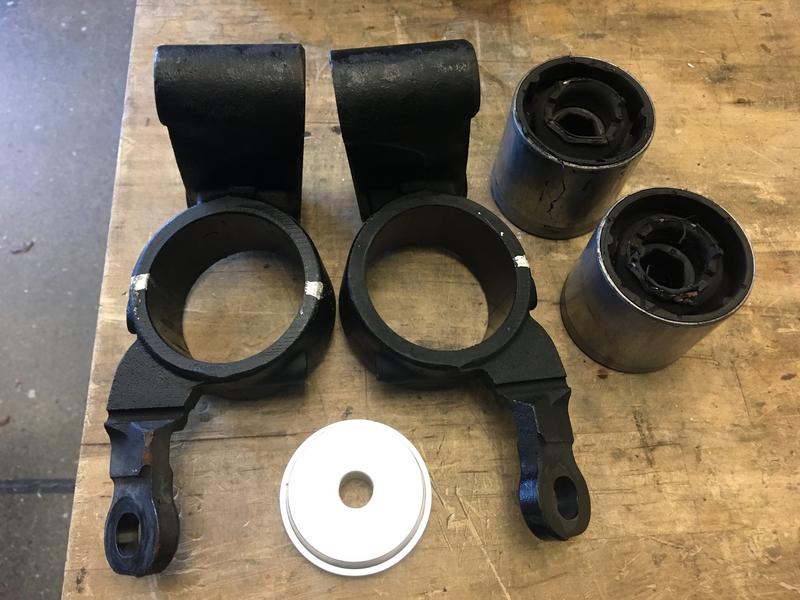
The passenger/RH inner CV boot was torn, so I bought a new Rein boot kit. It wasn't the right boot so I bought a GKN one from a different vendor which is also wrong, now I'm wondering if I have an after-market driveshaft since all the boots I find look like the wrong ones, or perhaps I have a driveshaft from a year other than 2005?
This is the boot style I bought. My broken driveshaft boot doesn't have the three lobes in it, and the mating bearing cup is just a smooth cylinder on the exterior, not the three lobe cup that matches this boot.
Now for the next question!
The passenger/RH inner CV boot was torn, so I bought a new Rein boot kit. It wasn't the right boot so I bought a GKN one from a different vendor which is also wrong, now I'm wondering if I have an after-market driveshaft since all the boots I find look like the wrong ones, or perhaps I have a driveshaft from a year other than 2005?
This is the boot style I bought. My broken driveshaft boot doesn't have the three lobes in it, and the mating bearing cup is just a smooth cylinder on the exterior, not the three lobe cup that matches this boot.

#38
04-18-2018, 05:19 PM
Lots of progress over the last week, now that most of the parts are here.
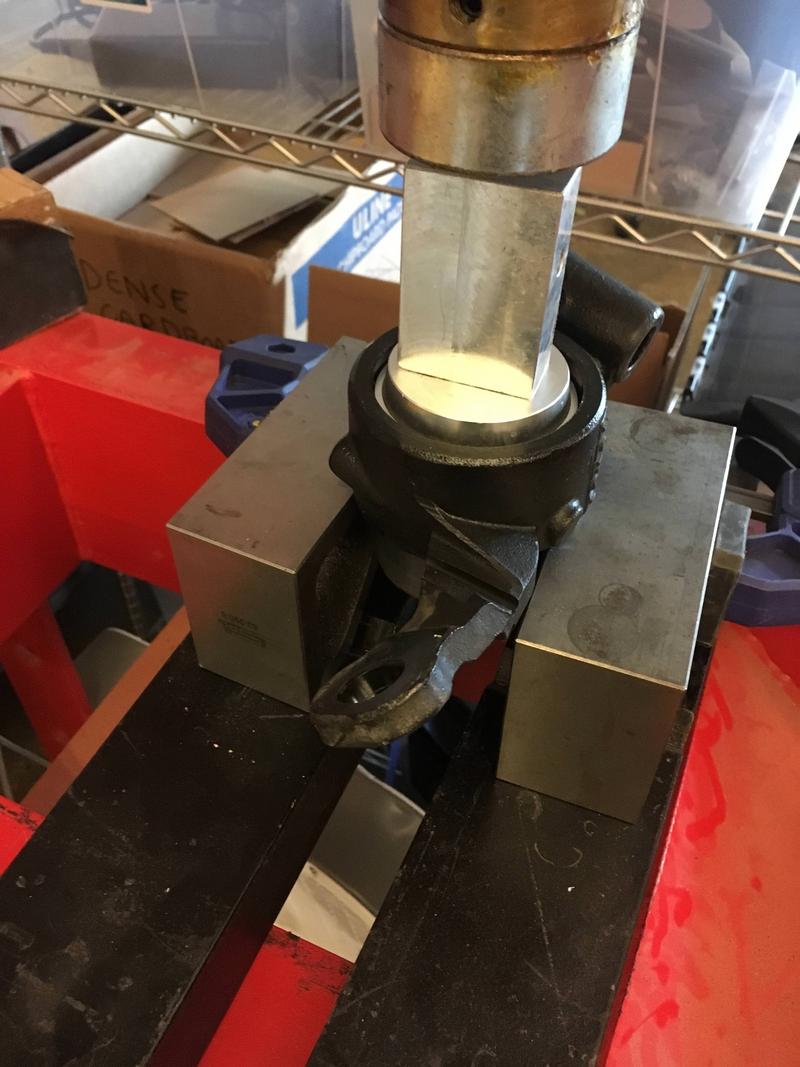
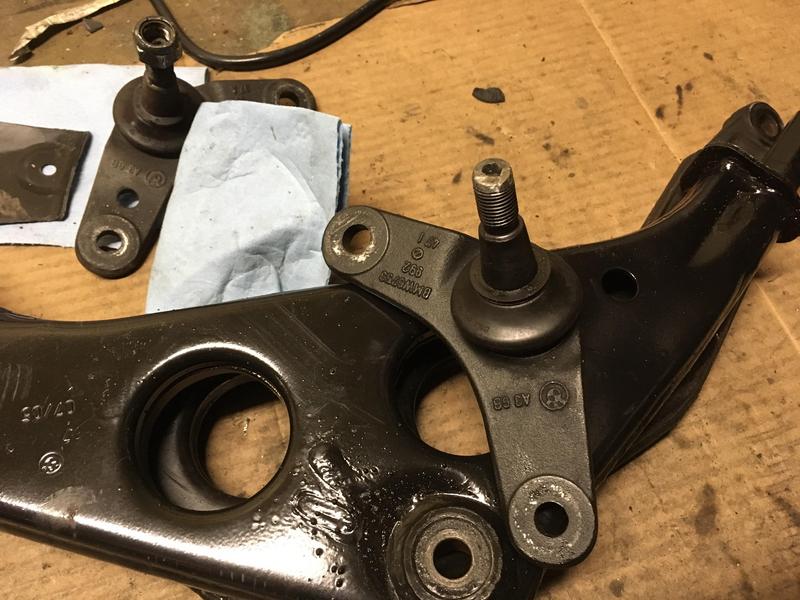
Control arm bushings have been replaced with poly bushings. This was a super quick job using the hydraulic press at work. I had a bearing race install set that had a disc the perfect size for the bushing.
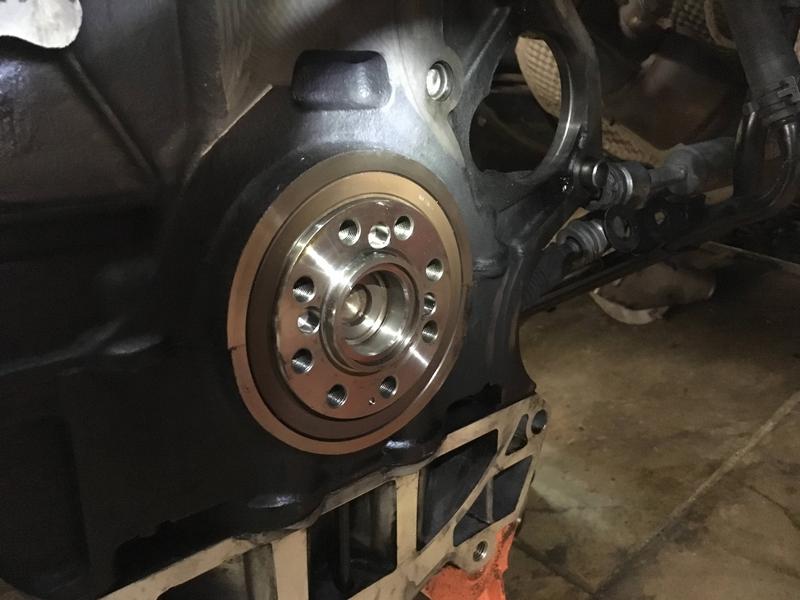
Took the crank pulley off to replace the front crankshaft seal and the timing cover gasket. Pulling the crank pulley was a fun game. I was lucky to have enough punches/rods/bolts to make it work but having some correct length HSS rods would make the job a lot easier next time.
The transmission is finally back in. Since the struts, A/C system, wheel well liners and wiring harness were all removed, getting it into place was actually pretty simple with a ratchet strap from the top and a floor jack from the bottom. Not too difficult with one person, probably easier with two.
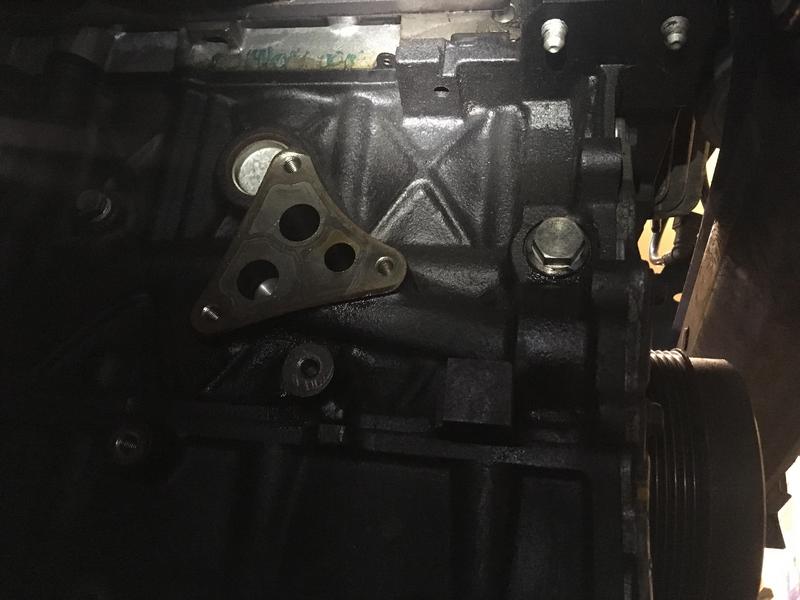
Engine mounts are back in with the leaky mount replaced, which just leaves a lot of the smaller bolt-on's and of course the wiring harness to do next.
Control arm bushings have been replaced with poly bushings. This was a super quick job using the hydraulic press at work. I had a bearing race install set that had a disc the perfect size for the bushing.
Took the crank pulley off to replace the front crankshaft seal and the timing cover gasket. Pulling the crank pulley was a fun game. I was lucky to have enough punches/rods/bolts to make it work but having some correct length HSS rods would make the job a lot easier next time.
The transmission is finally back in. Since the struts, A/C system, wheel well liners and wiring harness were all removed, getting it into place was actually pretty simple with a ratchet strap from the top and a floor jack from the bottom. Not too difficult with one person, probably easier with two.
Engine mounts are back in with the leaky mount replaced, which just leaves a lot of the smaller bolt-on's and of course the wiring harness to do next.
#39
04-19-2018, 04:43 AM
#40
05-07-2018, 11:39 AM
It's been a while since the last update, things are still moving along just a little slower with the other race car taking some time away from the Mini.
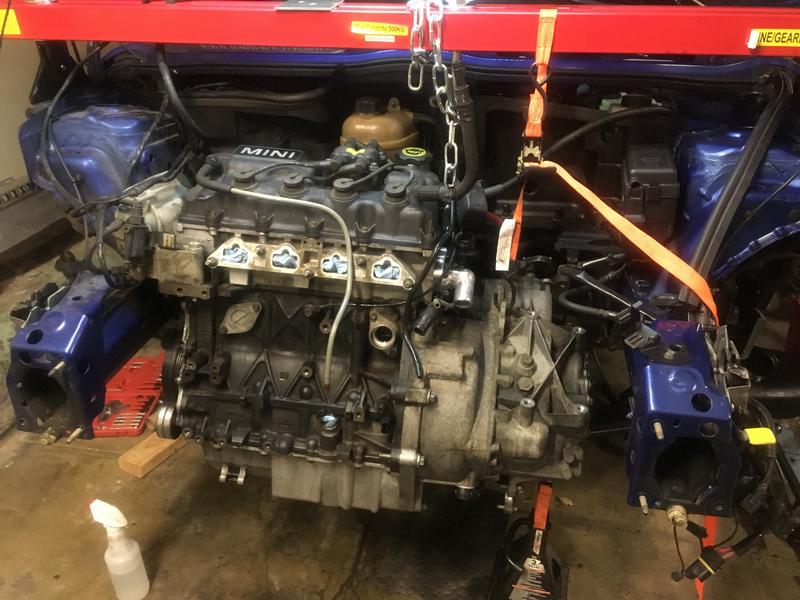
Engine is all back together. I hung the radiator for a quick startup test and everything runs nicely, no leaks or parts falling off yet I'm pretty pleased that everything just worked and the engine fired right up, given this is the most I've ever torn apart an engine bay.
I wasn't sure how to prime the oil system since it was totally drained, so I just cranked the engine for 10s with the fuel pump removed.
Almost hidden in this photo are the new plugs/wires and cheap-o aluminium coolant tank I picked up in China.
The front subframe needs a few more things to be bolted back on then it will be reinstalled, and that will be the end of the major front-end maintenance work. Then it's time to check over the rear end while I work on the interior.
Getting the front lower control arm inner ball joints out was not easy! Using the BFH failed pretty quickly, then the ball joint removal tool started bending itself and the threaded ends of the ball joint, even after soaking everything in penetrating oil and applying liberal heat. I decided to go for overkill and put them in the hydraulic press at work. After about 6-7 tons of pressure they finally popped out with a nice loud bang.
Starting with the press could have saved a few hours of manual work, there's nothing quite like the right (over-sized) tool for the job.
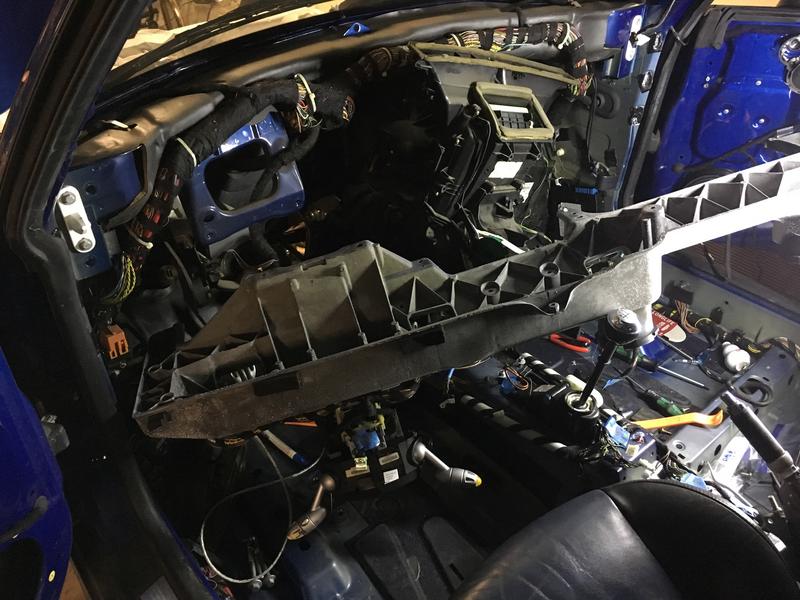
While taking a break from the ball joints I decided to "just" take out the heater matrix blower fan A/C evaporator monstrosity behind the dash.
The dash pad comes off pretty easy once you read the TIS, then the dash frame/trim almost falls off. I tried for a while to see how the matrix monster would come out but eventually just removed the dash frame/cross-member and the matrix just lifted out. It must be one of the first things installed in the interior after the sound deadening and wiring loom.
The heating/cooling matrix is huge and weighs a good amount, so it's good to get rid of it, although now it's taking up valuable garage space.
With most of the interior parts removed now I'm getting a good mental map of how the interior wiring loom looks. Next up for the interior will be pulling all the sound deadening out, then pulling the loom out and removing all the unused copper.
Engine is all back together. I hung the radiator for a quick startup test and everything runs nicely, no leaks or parts falling off yet
I'm pretty pleased that everything just worked and the engine fired right up, given this is the most I've ever torn apart an engine bay.I wasn't sure how to prime the oil system since it was totally drained, so I just cranked the engine for 10s with the fuel pump removed.
Almost hidden in this photo are the new plugs/wires and cheap-o aluminium coolant tank I picked up in China.
The front subframe needs a few more things to be bolted back on then it will be reinstalled, and that will be the end of the major front-end maintenance work. Then it's time to check over the rear end while I work on the interior.
Getting the front lower control arm inner ball joints out was not easy! Using the BFH failed pretty quickly, then the ball joint removal tool started bending itself and the threaded ends of the ball joint, even after soaking everything in penetrating oil and applying liberal heat. I decided to go for overkill and put them in the hydraulic press at work. After about 6-7 tons of pressure they finally popped out with a nice loud bang.
Starting with the press could have saved a few hours of manual work, there's nothing quite like the right (over-sized) tool for the job.
While taking a break from the ball joints I decided to "just" take out the heater matrix blower fan A/C evaporator monstrosity behind the dash.
The dash pad comes off pretty easy once you read the TIS, then the dash frame/trim almost falls off. I tried for a while to see how the matrix monster would come out but eventually just removed the dash frame/cross-member and the matrix just lifted out. It must be one of the first things installed in the interior after the sound deadening and wiring loom.
The heating/cooling matrix is huge and weighs a good amount, so it's good to get rid of it, although now it's taking up valuable garage space.
With most of the interior parts removed now I'm getting a good mental map of how the interior wiring loom looks. Next up for the interior will be pulling all the sound deadening out, then pulling the loom out and removing all the unused copper.
#41
11-21-2018, 03:26 PM
It's been a long time without and update, so here's a video of the Mini at it's first time out on the track (out of the garage even!) from last weekend at Laguna Seca.
The track day went well with only a few minor issues. I blew out an exhaust hanger and had a small oil leak from the oil pressure sensor I installed. Otherwise the car pulls hard and handles decently for a stock R53 on 4 year old street tires It was a cool day (~18C) and the coolant temps reached about 110C and oil peaked at 115C.
A lot has changed in the last 6 months. With the big addition being the cage, seat and harness. The first race for this mini is in two weeks and only a few big ticket items are left, mainly patching the huge sunroof hole and the firewall holes left by the removed A/C.
The track day went well with only a few minor issues. I blew out an exhaust hanger and had a small oil leak from the oil pressure sensor I installed. Otherwise the car pulls hard and handles decently for a stock R53 on 4 year old street tires
It was a cool day (~18C) and the coolant temps reached about 110C and oil peaked at 115C.A lot has changed in the last 6 months. With the big addition being the cage, seat and harness. The first race for this mini is in two weeks and only a few big ticket items are left, mainly patching the huge sunroof hole and the firewall holes left by the removed A/C.


#45
12-04-2018, 06:56 PM
It went pretty well for it's first race! Here's the 6hr video from Sunday below. What car were you in DrZ?
Saturday morning we passed tech with flying colours (my first goal for the weekend) and after about 20 minutes of the judges threatening to give us the difference in weight from the original mini to the R53 in penalty laps, we got placed in class A with zero laps.
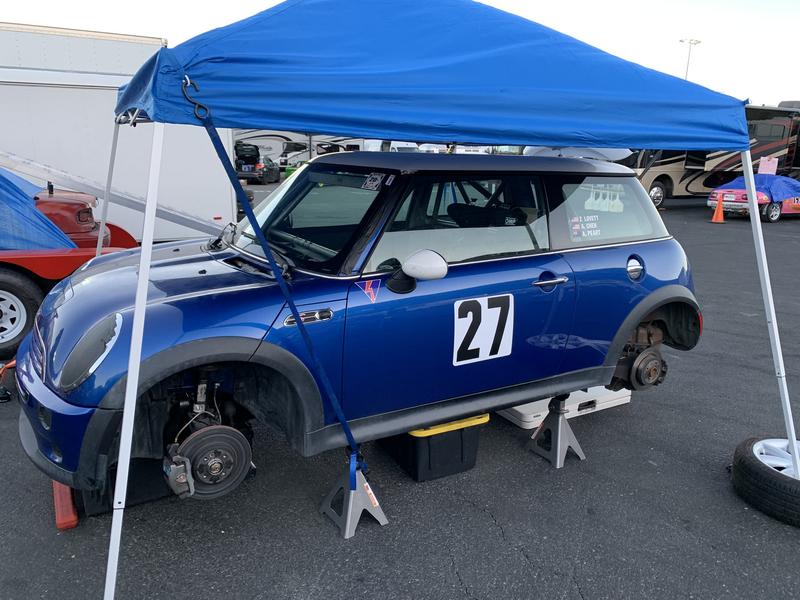
About 2hr45min into the starting session on Saturday morning the car cut power on me and threw a P1688 code. I limped it in, lifted it up and went straight to the (still stock, 120k mile) crank damper. Sure enough it was shot, total separation of the pulley from the damper. Thankfully it didn't fly apart! No worries I thought, I bought a PRW fluid damper two days before the race "just in case", because I had a feeling. I forgot to being the harmonic damper puller, so had to wait 1hr for my team to go fetch one from autozone.
The real problem was when I put the new PRW damper on and it slipped right on, and spun on the crankshaft... So the spare I had was useless! So much for being prepared. That right there killed the rest of Saturday for us, otherwise we would have been back out on track by 2pm. We tracked down a generic OEM replacement in Oakland (for $340 :( and a 2hr round trip), picked it up and fitted it in about 10 minutes and were done by about 6pm that evening.
Sunday morning before the track went hot the car was still throwing the P1688 code as a "current fault", but the new damper was on tight and the car pulled hard up to redline (yay for a street legal racecar!), so I sent it out and crossed my fingers. I haven't looked if the code is still there, but it seems like it was just the DME being confused about something or learned some bad values.
Sunday was gloriously uneventful. We ended up taking the car off track ~30min before the checkered because the front rotors were very badly warped. My best guess was because my other drivers left the ACS enabled and it was working the brakes overtime in every corner, the constant pulsing of the brakes caused the rotors to overheat and warp. Nevertheless we were able to drive the car home without any new marks or scrapes, so I'm calling the race a success!
I'm really happy with the car overall. It's an order of magnitude more comfortable than our old lemons car and just nicer to work on and drive. Our best time for the weekend was a 2:04, which I think is really good for a bone stock R53 on 200TW tires and race pads, and only ~5s off the leaders race pace.
Next Lemons race for the car isn't until March, but I'll probably take the car out to a few track days between now and then, it's a lot of fun.
Saturday morning we passed tech with flying colours (my first goal for the weekend) and after about 20 minutes of the judges threatening to give us the difference in weight from the original mini to the R53 in penalty laps, we got placed in class A with zero laps.
About 2hr45min into the starting session on Saturday morning the car cut power on me and threw a P1688 code. I limped it in, lifted it up and went straight to the (still stock, 120k mile) crank damper. Sure enough it was shot, total separation of the pulley from the damper. Thankfully it didn't fly apart! No worries I thought, I bought a PRW fluid damper two days before the race "just in case", because I had a feeling. I forgot to being the harmonic damper puller, so had to wait 1hr for my team to go fetch one from autozone.
The real problem was when I put the new PRW damper on and it slipped right on, and spun on the crankshaft... So the spare I had was useless! So much for being prepared. That right there killed the rest of Saturday for us, otherwise we would have been back out on track by 2pm. We tracked down a generic OEM replacement in Oakland (for $340 :( and a 2hr round trip), picked it up and fitted it in about 10 minutes and were done by about 6pm that evening.
Sunday morning before the track went hot the car was still throwing the P1688 code as a "current fault", but the new damper was on tight and the car pulled hard up to redline (yay for a street legal racecar!), so I sent it out and crossed my fingers. I haven't looked if the code is still there, but it seems like it was just the DME being confused about something or learned some bad values.
Sunday was gloriously uneventful. We ended up taking the car off track ~30min before the checkered because the front rotors were very badly warped. My best guess was because my other drivers left the ACS enabled and it was working the brakes overtime in every corner, the constant pulsing of the brakes caused the rotors to overheat and warp. Nevertheless we were able to drive the car home without any new marks or scrapes, so I'm calling the race a success!
I'm really happy with the car overall. It's an order of magnitude more comfortable than our old lemons car and just nicer to work on and drive. Our best time for the weekend was a 2:04, which I think is really good for a bone stock R53 on 200TW tires and race pads, and only ~5s off the leaders race pace.
Next Lemons race for the car isn't until March, but I'll probably take the car out to a few track days between now and then, it's a lot of fun.
#46
12-05-2018, 01:15 PM
I was meant to be in #670 (the white Volvo 240 wagon), but sadly we lost the diff early Saturday afternoon and had to put it back on the trailer before I got a chance to drive. 8(
#47
12-05-2018, 01:21 PM
The Bernal Dads Volvo! You guys were scary fast and leading for a while. That's a shame about the diff, it would be cool to see a volvo take the win.
#48
12-05-2018, 01:55 PM

5th Gear
#49
12-05-2018, 02:17 PM
Really awesome build! I'd love to do something like this. I know you've only had one race, but would you recommend the R53 as decent lemons car? With cheaper prices on the high mileage cars, i could see this being a good starting point as long as the motor stays together.
The engine, if taken care of seems fairly solid. I plan on keeping it at stock power for the time being. I put a baffled the oil pan/pickup since oil starvation is a known problem. The damper is another weak point but once replaced with a fluid type should be solid. The 6 speed getrag transmission from what I've heard, is very solid especially at the stock power levels. I'm a little concerned about the life of the supercharger, especially since I don't think mine is holding fluid, so that's something I will keep an eye on and perhaps keep a spare around. I've also pulled the entire front end apart and then put it back together again now, so I know everything is torqued correctly and all the seals are new. All the critical engine/suspension bolts are marked so I can tell if they are loosening or backing out. That kind of preparation goes a long way in my experience.
As for lemons suitability... You will get given a hard time for having a British car and for a modern car, and it is harder to find parts at pick-n-pull or parts stores in a pinch. Something like a Ford Focus ZX3/5 would be a much safer and boring option, but I think the Mini is a lot more fun. It really depends on your goals. Do you want the challenge of building/fixing something, or the seat time, or to win?
We didn't get to race for the whole weekend, but even 1.5 days of racing lemons in something that's basically stock off the street is a petty good test for the reliability of a car, and I think the Mini did really well on that front. I'd recommend it for sure, just plan on spending a lot more than the initial $500-1.5k price of the car on making it reliable
#50
12-05-2018, 04:49 PM
You'd think the Focus would be great, but it's weak in the front end & generally doesn't survive kerb-hopping much.
All MHO, but I think that if you can keep the MINI cool and lubricated, you have a solid chance of making it through the weekend. You don't need more power to have fun - the Volvo makes well under 200hp - you need it not to break. 8)
All MHO, but I think that if you can keep the MINI cool and lubricated, you have a solid chance of making it through the weekend. You don't need more power to have fun - the Volvo makes well under 200hp - you need it not to break. 8)