
R50/53 front bumper alignment


Thread Starter
|
2nd Gear
Joined: Feb 2014
Posts: 70
Likes: 0
From: Norman okieHOMER
front bumper alignment
Is there a way of shimming or aligning my front bumper to make it level?
Looking at the front of the car, the gap on the driverside in relationship to the hood is about an inch, compaired to the passenger side.
Looking at the front of the car, the gap on the driverside in relationship to the hood is about an inch, compaired to the passenger side.

5th Gear
Joined: Apr 2006
Posts: 778
Likes: 1
From: Anaheim, CA
First make sure your hood is completely latched on both sides. Get some measurements of the gap at the edge of the grill. Open hood and on either side of the radiator there are screws that attach the bumper to the car, they are slotted, loosen the screw a little and move the bumper up according to your measurements, but leave a gap, don't want the hood to hit the bumper. Snug screw and repeat on the other side. Close hood and inspect. Repeat adjustment as needed.


The two torx screws on top of bumper that go thru the top bumper lobes are not really for alignment so much as they are to hold it there. The holes if oblong shaped are like that from wear, and not that way from factory.
If you look at #6 in diagram below there are two adjustment pieces on either side of the car and are accessed from under the front wheel well openings. They are called risers. You have to turn the front wheels either all the way to left or right to get in there with an 8mm socket.
Part # 6 have accordion shaped plastic pieces which flex up and down and when the 8mm cap screws are loosened the top of that part rises and since the top is attached to the bumper, bumper moves with it....once you have it adjusted re-tighten the cap screw, close the bonnet and recheck your work.

1st Gear
Joined: Feb 2005
Posts: 23
Likes: 1
The above is sort of correct. Bolt 8 which attaches bracket 6 allows the ends of the bumper casing to be tweaked slightly. The bumper casing (the plastic bit) is attached to the underlying alloy bumper, which intern is attached to the front chassis rail and crash tubes. If the modular front end (MFE) has been detached to allow servicing etc and 100mm M8 bolts rather than the correct service tools been used, then the whole bumper and casing can sag slightly. You can overcome this by loosely attaching all components and then use a trolley jack to raise everything into position before tightening all the attachment bolts.
However, as the others have said, its probably the bonnet not latching on the LH side.
However, as the others have said, its probably the bonnet not latching on the LH side.
Trending Topics
Sorta ?
Bumper frame is not sagging, Op says the bumper cover is "not level". And the mounting holes for those parts you describe are not oblong and in any case would never take up an inch of travel as in this case specified by the OP.......the risers however will align it with the hood as is the issue here.
Bumper frame is not sagging, Op says the bumper cover is "not level". And the mounting holes for those parts you describe are not oblong and in any case would never take up an inch of travel as in this case specified by the OP.......the risers however will align it with the hood as is the issue here.
1st Gear
Joined: Feb 2005
Posts: 23
Likes: 1
OP, good to hear you sorted your problem. What was it in the end?


This is for the bumper / Core support out. 51117053000
https://www.northamericanmotoring.co...ification.html
#6 above and the locking latch bring the seam between the bumper and the hood together.
#6 Bumper Mount Bracket Set - Priced As Set 51717039262
http://www.ecstuning.com/Search/SiteSearch/51717039262/


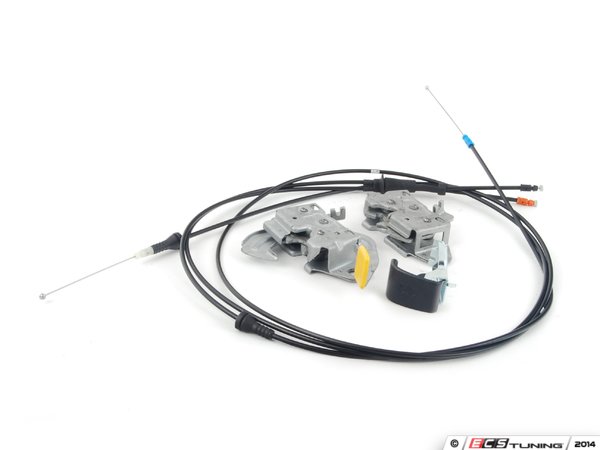
And the latches. Which mount to the side rockers of the engine bay. They can be adjusted. So the clam-shale hood will line up.

You can see them in our hood lock release kit. 51237112440KT
http://www.ecstuning.com/Search/SiteSearch/51237112440KT/ES2581891/
Thanks
https://www.northamericanmotoring.co...ification.html
#6 above and the locking latch bring the seam between the bumper and the hood together.
#6 Bumper Mount Bracket Set - Priced As Set 51717039262
http://www.ecstuning.com/Search/SiteSearch/51717039262/
And the latches. Which mount to the side rockers of the engine bay. They can be adjusted. So the clam-shale hood will line up.
You can see them in our hood lock release kit. 51237112440KT
http://www.ecstuning.com/Search/SiteSearch/51237112440KT/ES2581891/
Thanks
__________________

MINI Guru/ MINI Owner Since 2004 | NEW Lifetime Part Replacement | Local Pickup
Milltek | Genuine MINI | Forge Motorsport | NM Engineering | ECS Performance | M7 Speed
Customer Service Hours: 8am-8pm EST|Sales Team Hours: 8am-11pm | SAT 10am-7pm 800.924.5172
MINI Guru/ MINI Owner Since 2004 | NEW Lifetime Part Replacement | Local Pickup
Milltek | Genuine MINI | Forge Motorsport | NM Engineering | ECS Performance | M7 Speed
Customer Service Hours: 8am-8pm EST|Sales Team Hours: 8am-11pm | SAT 10am-7pm 800.924.5172
Last edited by ECSTuning; Nov 5, 2014 at 04:59 AM.
Thread Starter
|
2nd Gear
Joined: Feb 2014
Posts: 70
Likes: 0
From: Norman okieHOMER
Everything was loose. The car was electric blue and a prior owner had it repainted white. I guess they got in a hurry. Anyway Ive got a day of checking every bolt to make sure they're all tight.
You are welcome. 
__________________
MINI Guru/ MINI Owner Since 2004 | NEW Lifetime Part Replacement | Local Pickup
Milltek | Genuine MINI | Forge Motorsport | NM Engineering | ECS Performance | M7 Speed
Customer Service Hours: 8am-8pm EST|Sales Team Hours: 8am-11pm | SAT 10am-7pm 800.924.5172
MINI Guru/ MINI Owner Since 2004 | NEW Lifetime Part Replacement | Local Pickup
Milltek | Genuine MINI | Forge Motorsport | NM Engineering | ECS Performance | M7 Speed
Customer Service Hours: 8am-8pm EST|Sales Team Hours: 8am-11pm | SAT 10am-7pm 800.924.5172

Thread
Thread Starter
Forum
Replies
Last Post
JHolland
R56 :: Hatch Talk (2007+)
1
Aug 13, 2015 10:47 PM