
R57 MINI R57 Roof Leak Repair Guide


Thread Starter
|
Neutral
Joined: Aug 2018
Posts: 1
Likes: 3
MINI R57 Roof Leak Repair Guide
MINI R57 Roof Leak Repair Guide
I have had this MINI for 3 months now and always noticed a bit of a damp smell in the car which has been annoying me.
Being fairly knowledgeable and aware of how mechanical parts of a car operate I noted that the convertible top fabric on my car was not a tight as it should be on the sides, I didn�t give it too much thought.
We recently had some hectic rainfall (our area currently in a drought) and thats when I knew I had a problem....
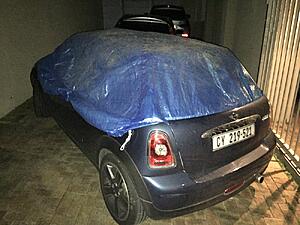
I tried to prevent further ingress in the best way possible, an old pool cover:
Now knowing there was absolutely a problem I had two tasks to handle.
A) Damage Control
B) Repair
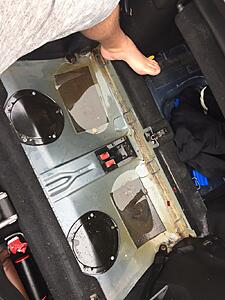
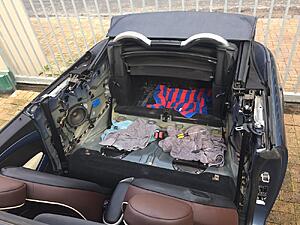
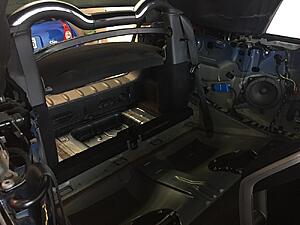
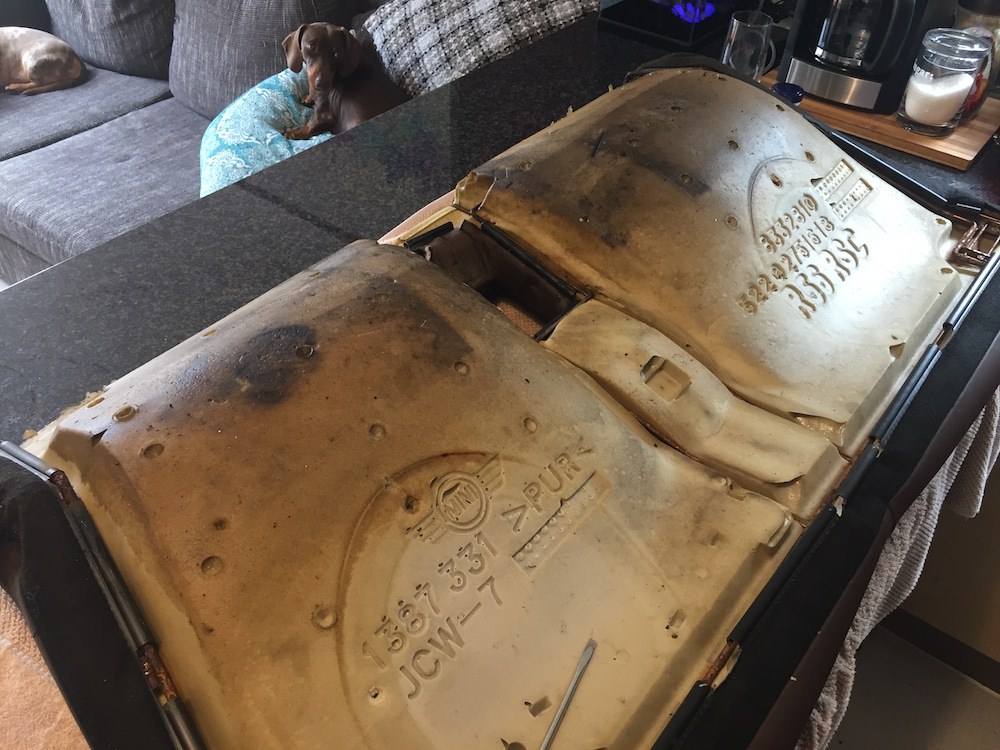
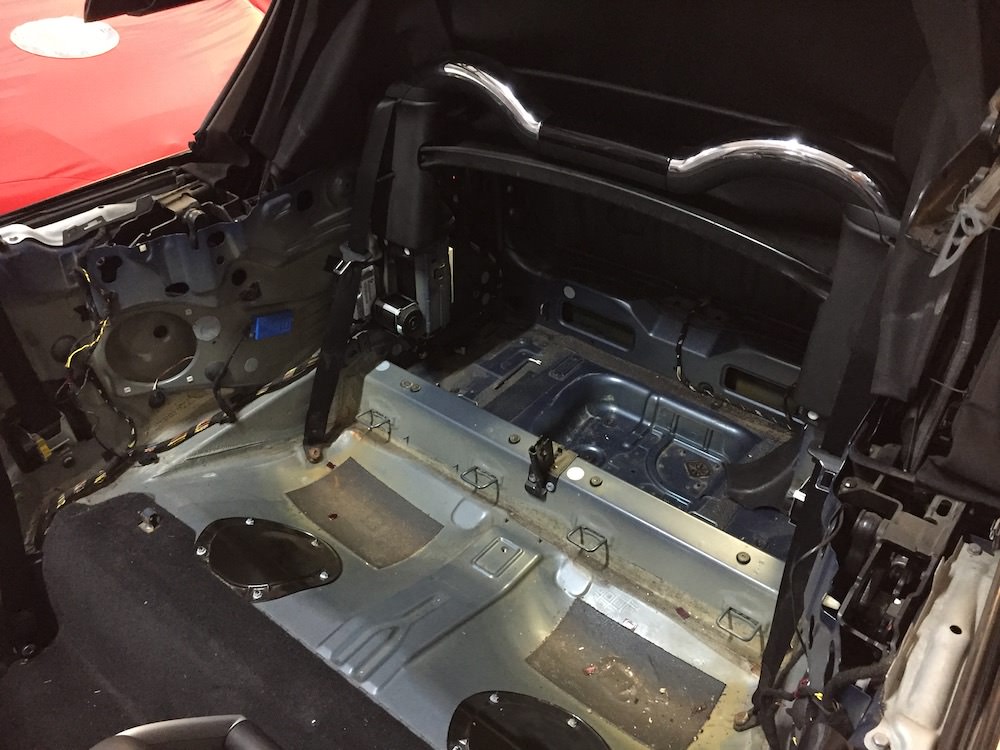
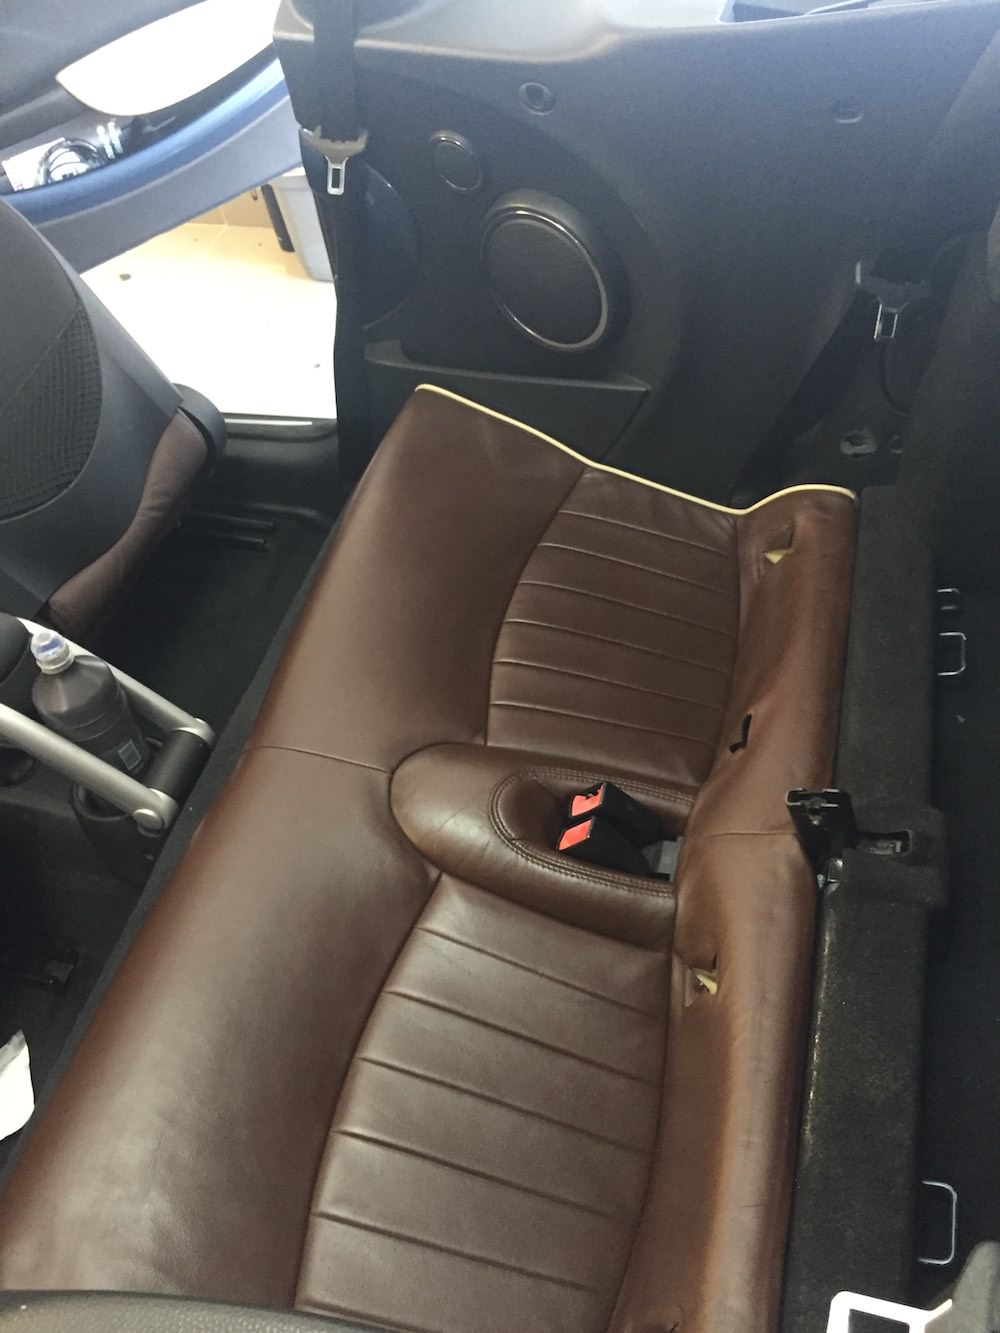
I started by stripping out the rear of the car and was immediately informed that this was not a new problem on the car.

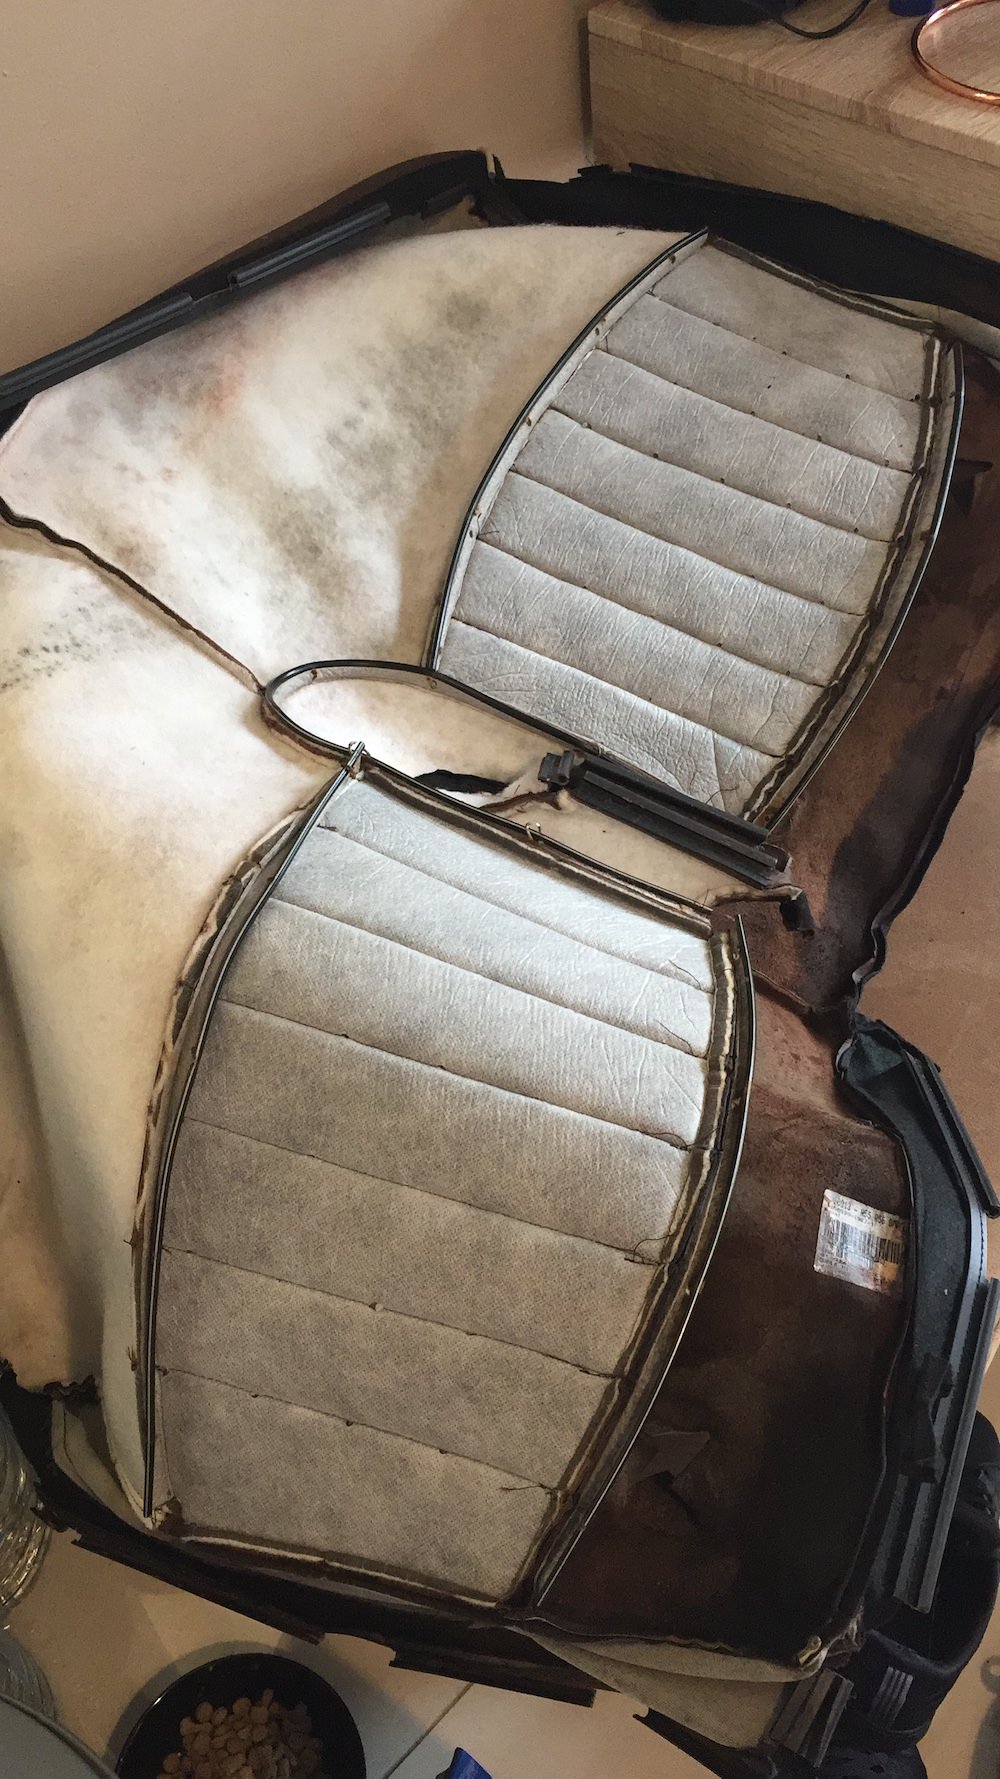
The seat foam, frames and parts were soaking wet, I had no choice but to separate the frame, foam and leather for repair.

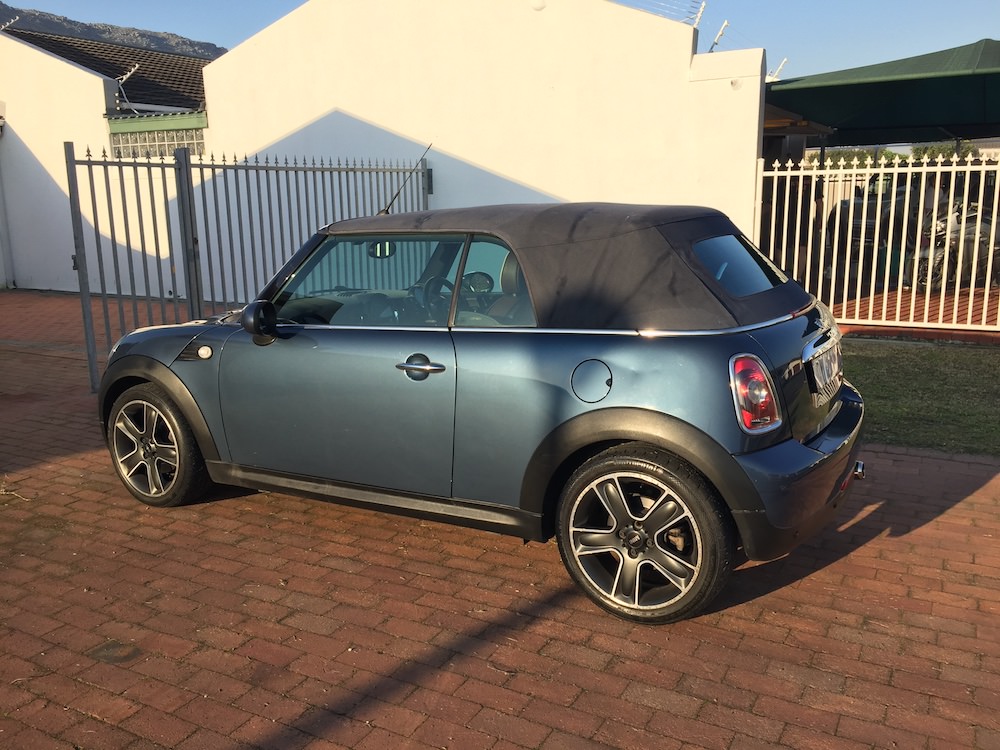
The car in the meantime was left outside waiting for the rain to come again:
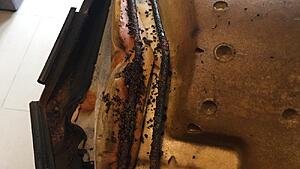
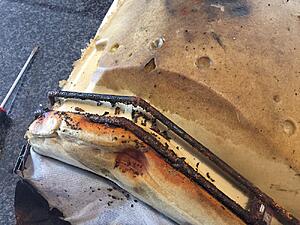
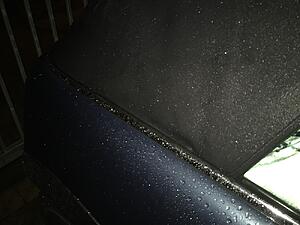
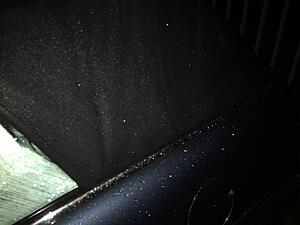
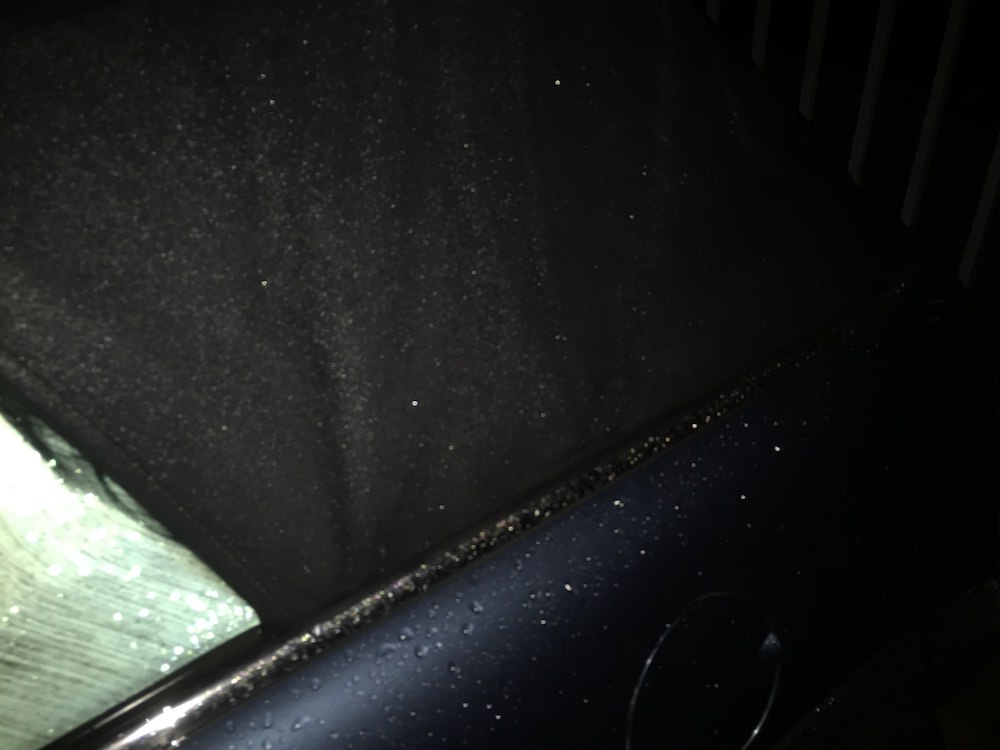
The next heavy downpour found me outside in the car diagnosing the leak, my suspicions were confirmed, the loose sidepanels of the roof had been allowing water to drip into the car:
I did some research and found a roof repair kit that could be purchased from BMW/MINI but it required the fabric roof be removed, the kit itself, also cost over a grand and upon closer inspection I noted my roof had already had the repair kit actioned, so this clearly is a very weak part of design for this car.
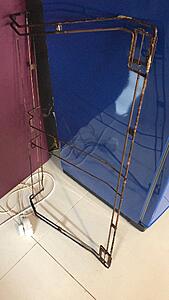
With it now being dark, and not one to simply put things back that I know are not right I spent about 2 hours sanding down the metal frame for the rear seats and chucked the leather into the washing machine with some warm soapy water on the �wool� setting.
The frame was then painted with anti-rust and sprayed with a metal spraypaint:
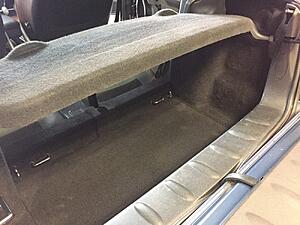
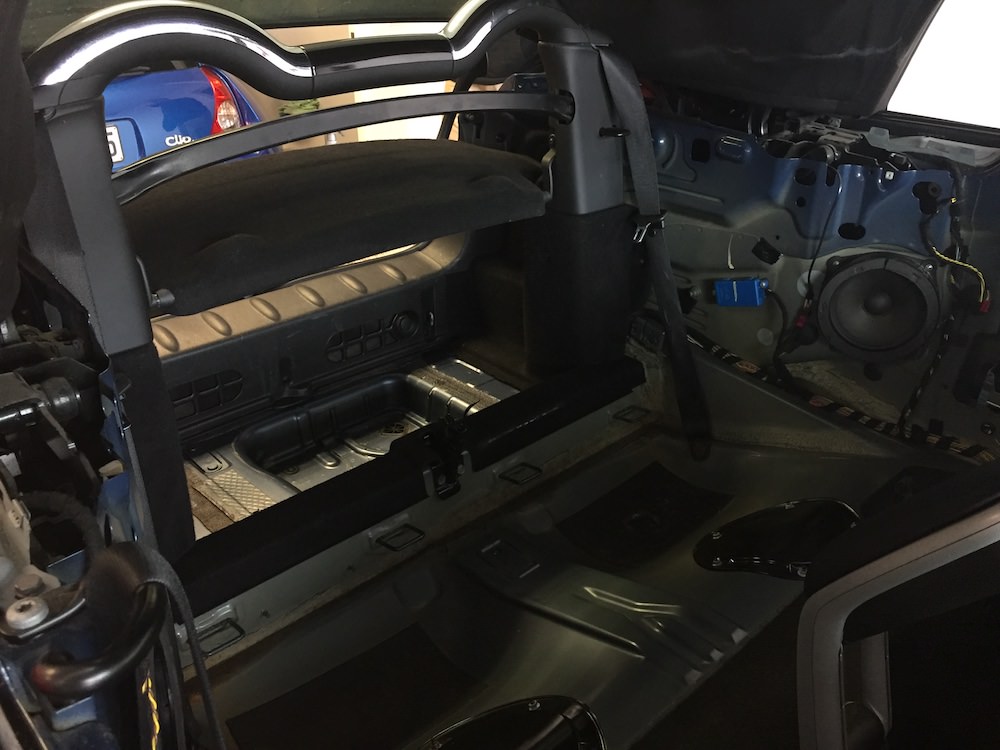
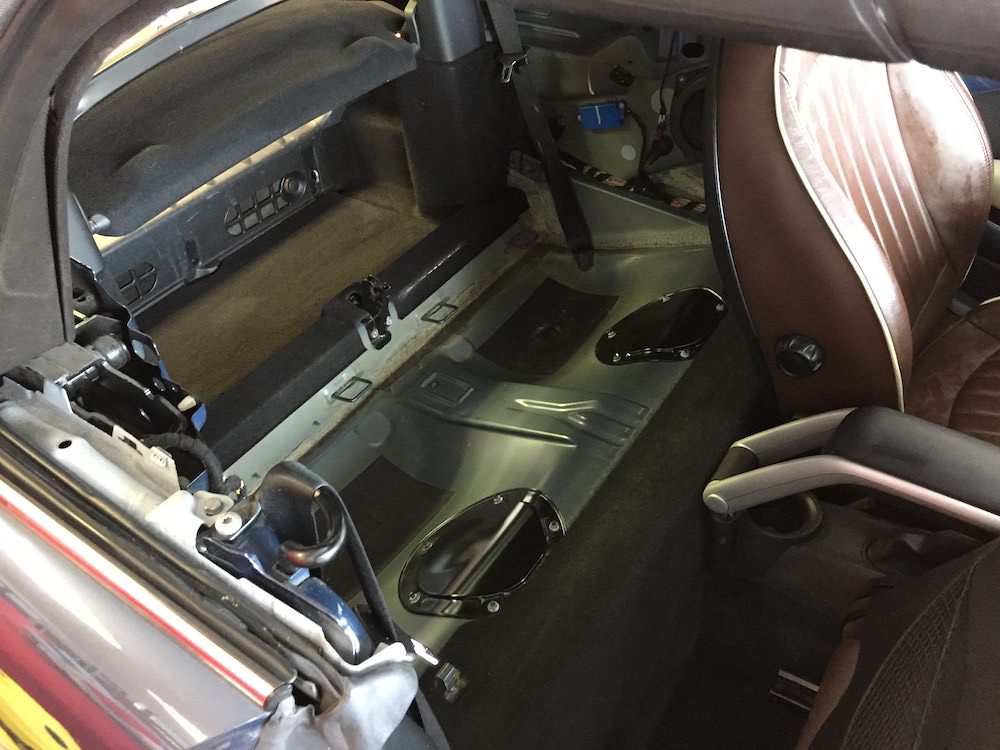
I was not satisfied that all my effort may not be conclusive, so the following day I stripped out and detailed the remainder of the boot and its bits and bobs:
MUCH better, and with the fabrics all washed and sealed I was certain there would be no funny smells either.
In between I set to re-assembling the rear bench. Using spray contact adhesive and some 5L bottles I glued and clamped the seat back to the frame, with my fiance dropping both off at the trimmer for the leather to be re-attached.
Now onto the actual fix!
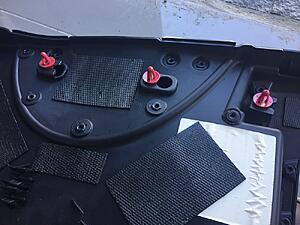
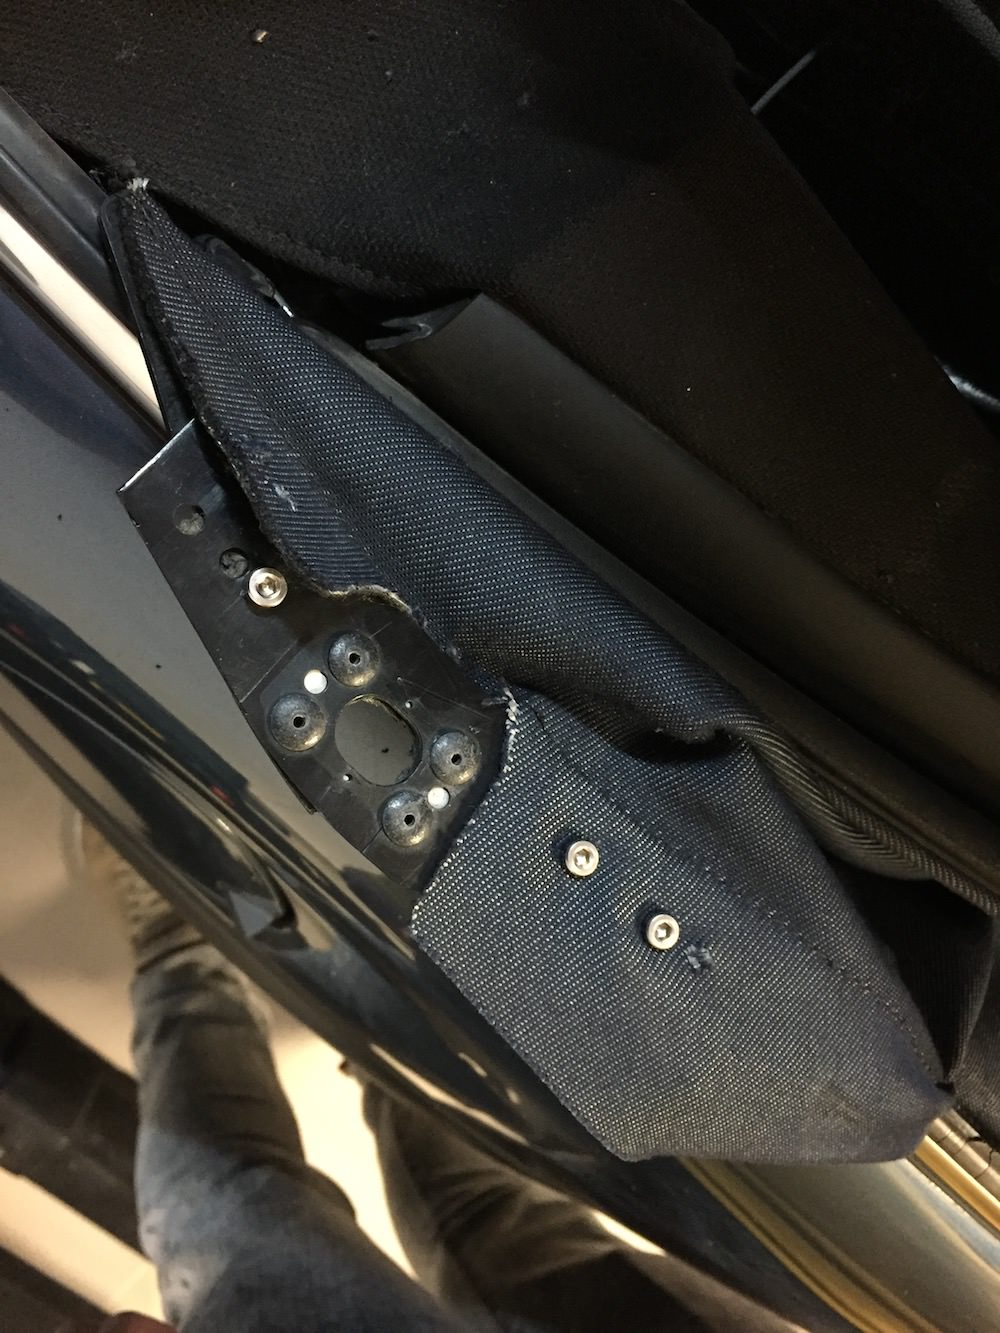
I shot down to our local hardware and grabbed 6x nuts / bolts with locked threads. I then took a 6mm drill piece (Metal with the sharp pointy end) and drilled in new holes after lining the plastics up as best as possible. The end result:
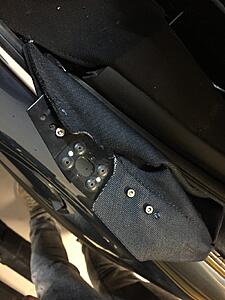
These were then re-attached to the car with brand new circlips. Now, these circlips are not on BMW's parts system listed under the roof, not even under the clip kit they supply. The circlip is used on the clutch pedal assembly, and its called a �FUSE�.
Me paying for the cheapest part I have ever bought from BMW (note the part number):

Quick test that the fix works! It does!
Boot re-assembly coming along nicely:

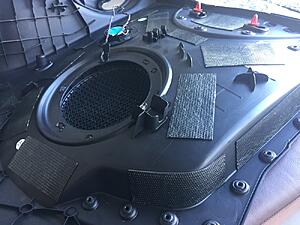
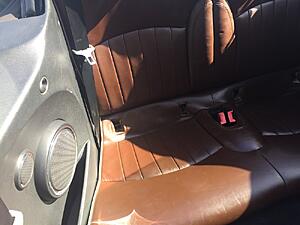
While I had the rear plastic panels out I decided to add some sound-deadening. These panels are held in place with 3 clips and 2 push rivets and tend to rattle to hell and back with most music put through the speakers.... So, new clips, sound deadening and voila!
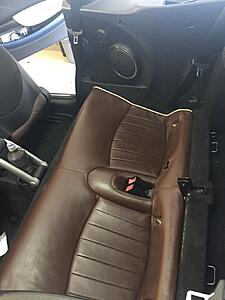
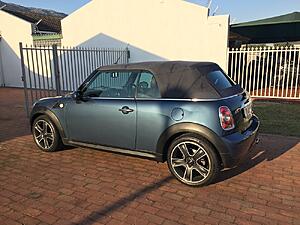
And the seats returned and the little machine given a bath!
No leaks in a month since the repair, there is less wind noise and with the roof cycling at least 50 times since there are no signs that the repair will not last. The deadening added bass to the rear of the car and reduced vibrations so I am well happy with that.
In hindsight, a shorter bolt and nut setup would be better (it might eat at the rubbers over time) but I already traded the car in, so there it is.
Total Cost. R15.00 for the bolts and Nuts and R8.80 for the two Circlips and about 3 days of my life.
Please ask if you have any questions!
Mike
I have had this MINI for 3 months now and always noticed a bit of a damp smell in the car which has been annoying me.
Being fairly knowledgeable and aware of how mechanical parts of a car operate I noted that the convertible top fabric on my car was not a tight as it should be on the sides, I didn�t give it too much thought.
We recently had some hectic rainfall (our area currently in a drought) and thats when I knew I had a problem....

I tried to prevent further ingress in the best way possible, an old pool cover:

Now knowing there was absolutely a problem I had two tasks to handle.
A) Damage Control
B) Repair
I started by stripping out the rear of the car and was immediately informed that this was not a new problem on the car.

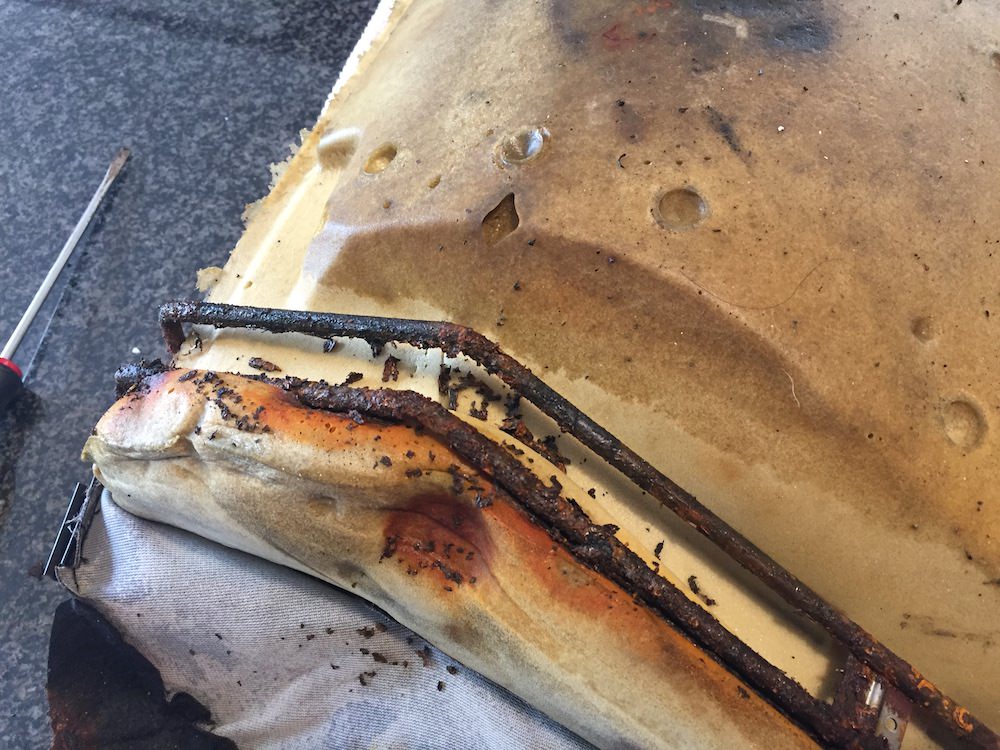
The seat foam, frames and parts were soaking wet, I had no choice but to separate the frame, foam and leather for repair.

The car in the meantime was left outside waiting for the rain to come again:

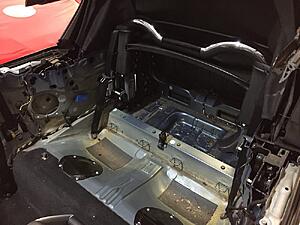
The next heavy downpour found me outside in the car diagnosing the leak, my suspicions were confirmed, the loose sidepanels of the roof had been allowing water to drip into the car:

I did some research and found a roof repair kit that could be purchased from BMW/MINI but it required the fabric roof be removed, the kit itself, also cost over a grand and upon closer inspection I noted my roof had already had the repair kit actioned, so this clearly is a very weak part of design for this car.
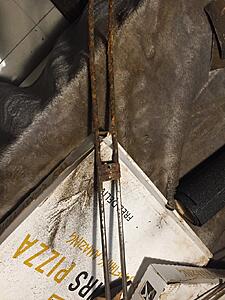
With it now being dark, and not one to simply put things back that I know are not right I spent about 2 hours sanding down the metal frame for the rear seats and chucked the leather into the washing machine with some warm soapy water on the �wool� setting.

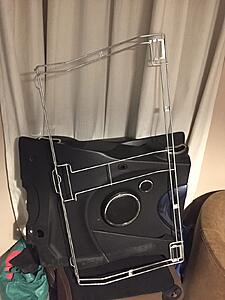
The frame was then painted with anti-rust and sprayed with a metal spraypaint:


I was not satisfied that all my effort may not be conclusive, so the following day I stripped out and detailed the remainder of the boot and its bits and bobs:
MUCH better, and with the fabrics all washed and sealed I was certain there would be no funny smells either.
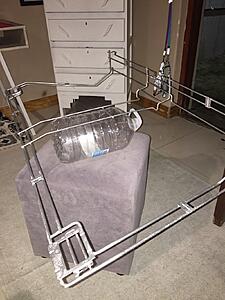
In between I set to re-assembling the rear bench. Using spray contact adhesive and some 5L bottles I glued and clamped the seat back to the frame, with my fiance dropping both off at the trimmer for the leather to be re-attached.
Now onto the actual fix!
I shot down to our local hardware and grabbed 6x nuts / bolts with locked threads. I then took a 6mm drill piece (Metal with the sharp pointy end) and drilled in new holes after lining the plastics up as best as possible. The end result:
These were then re-attached to the car with brand new circlips. Now, these circlips are not on BMW's parts system listed under the roof, not even under the clip kit they supply. The circlip is used on the clutch pedal assembly, and its called a �FUSE�.
Me paying for the cheapest part I have ever bought from BMW (note the part number):

Quick test that the fix works! It does!
Boot re-assembly coming along nicely:

While I had the rear plastic panels out I decided to add some sound-deadening. These panels are held in place with 3 clips and 2 push rivets and tend to rattle to hell and back with most music put through the speakers.... So, new clips, sound deadening and voila!


And the seats returned and the little machine given a bath!

No leaks in a month since the repair, there is less wind noise and with the roof cycling at least 50 times since there are no signs that the repair will not last. The deadening added bass to the rear of the car and reduced vibrations so I am well happy with that.
In hindsight, a shorter bolt and nut setup would be better (it might eat at the rubbers over time) but I already traded the car in, so there it is.
Total Cost. R15.00 for the bolts and Nuts and R8.80 for the two Circlips and about 3 days of my life.
Please ask if you have any questions!
Mike

4th Gear

Joined: May 2016
Posts: 496
Likes: 106
I doubt you'll get a response, as the OP only had this one post 7+ years ago, and said he traded the car in before the post. I interpreted his instructions as he worked with the parts that were on his MINI. I didn't get the impression that he remade the side pieces, just reattached them with bolts. He said his car had some repair kit installed, so if yours doesn't have the same pieces, perhaps that's the difference?

Neutral
Joined: May 2026
Posts: 2
Likes: 0
I doubt you'll get a response, as the OP only had this one post 7+ years ago, and said he traded the car in before the post. I interpreted his instructions as he worked with the parts that were on his MINI. I didn't get the impression that he remade the side pieces, just reattached them with bolts. He said his car had some repair kit installed, so if yours doesn't have the same pieces, perhaps that's the difference?


Yep, has not been updated. We have alot of the R57 convertible stuff here also.
https://www.ecstuning.com/Search/Sit...h/54347276922/ repair kit above.
http://www.northamericanmotoring.com...roblems-5.html
https://www.ecstuning.com/Search/Sit...h/54347276922/ repair kit above.
http://www.northamericanmotoring.com...roblems-5.html
__________________

MINI Guru/ MINI Owner Since 2004 | NEW Lifetime Part Replacement | Local Pickup
Milltek | Genuine MINI | Forge Motorsport | NM Engineering | ECS Performance | M7 Speed
Customer Service Hours: 8am-8pm EST|Sales Team Hours: 8am-11pm | SAT 10am-7pm 800.924.5172
MINI Guru/ MINI Owner Since 2004 | NEW Lifetime Part Replacement | Local Pickup
Milltek | Genuine MINI | Forge Motorsport | NM Engineering | ECS Performance | M7 Speed
Customer Service Hours: 8am-8pm EST|Sales Team Hours: 8am-11pm | SAT 10am-7pm 800.924.5172

Thread
Thread Starter
Forum
Replies
Last Post
phil@detailersdomain
Detailing 101
6
Jan 10, 2016 05:39 PM
phil@detailersdomain
Detailing 101
5
Jan 29, 2014 05:20 PM
phil@detailersdomain
Detailing 101
2
Dec 30, 2013 10:48 AM