
R50/53 R53 Bi-Xenon Journey


Thread Starter
|
1st Gear
Joined: Oct 2013
Posts: 22
Likes: 1
R53 Bi-Xenon Journey
I have recently gotten a little into customizing headlights. Owning an R53, I got tired of the dull and murky projector lenses. So, I wanted to upgrade the lenses. Then I figured bi-xenon would be the best way to go. I feel as though bi-xenon projector lights are more efficient than any other form of lighting in cars (other than led's potentially). So anyways, I wanted to make my 2006 Mini's lights bi-xenon. Thus begins my journey:
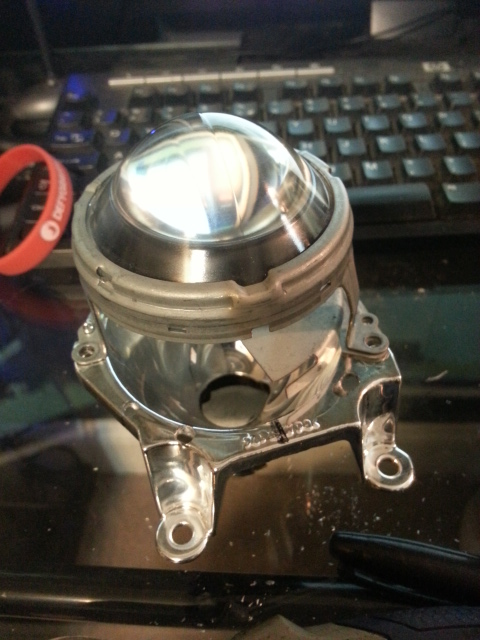
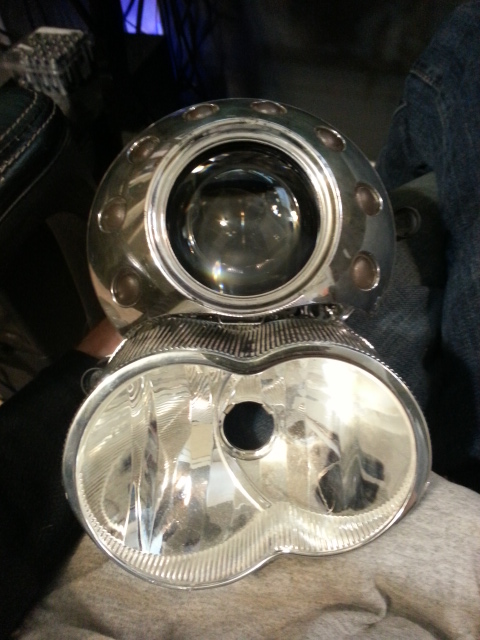
I started out by taking the headlight apart (obviously). And if anyone is wondering how to take the headlight apart, there are many threads out there that you can find. After disassembling the headlight, I took out the projector assembily.
And here is the lens assembly I am replacing it with.
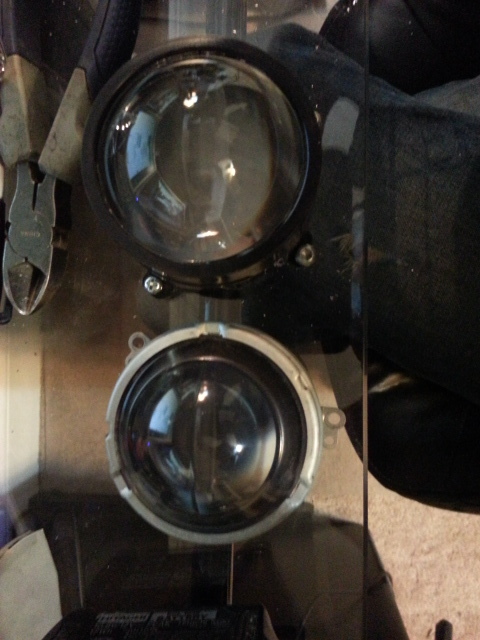
As you can probably tell it is comparatively crystal clear.
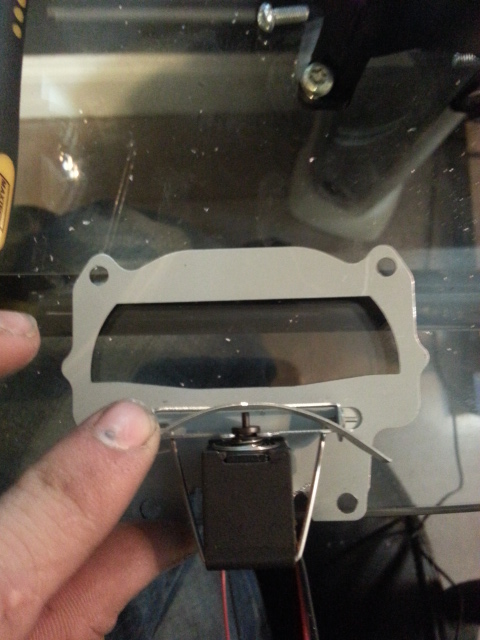
And here's what makes a bi-xenon light....bi.
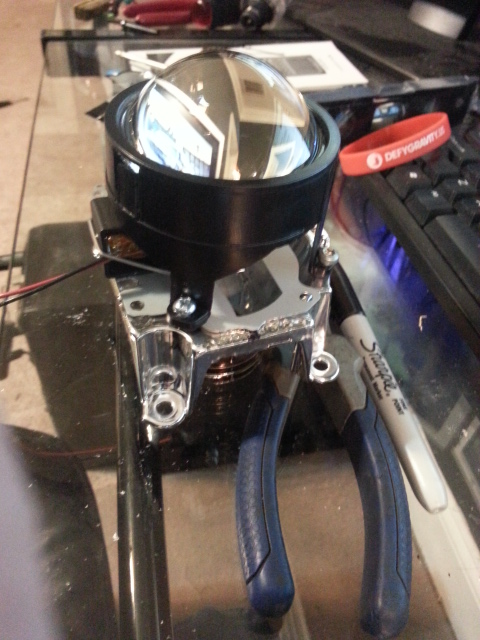
Now the fun part is getting it to fit onto my oem reflector.
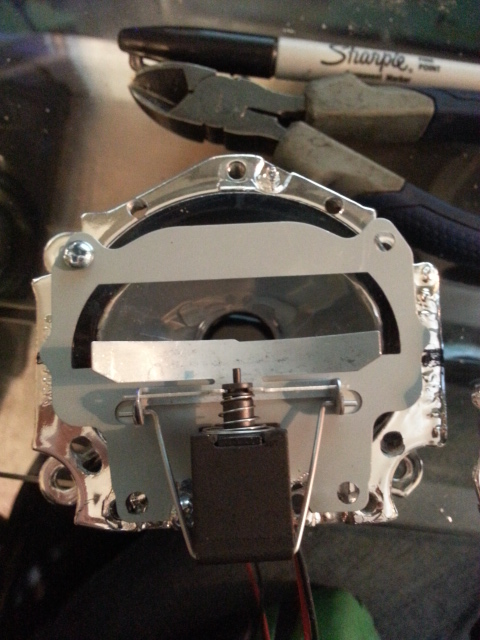
A little drilling was required to get it to work, but no big deal really!
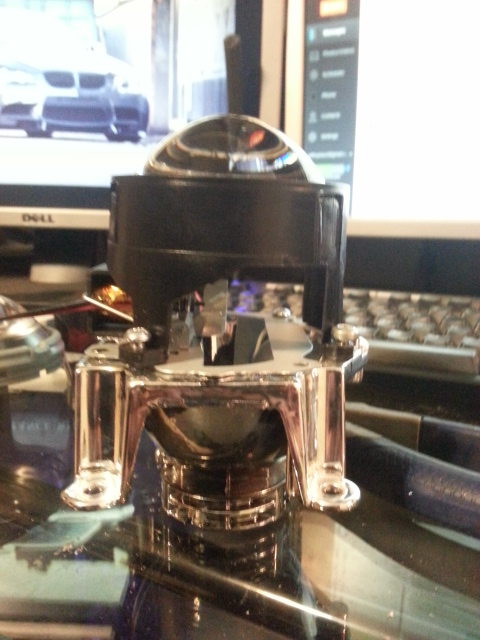
Now here's a picture of what the final projector assembly looks like.

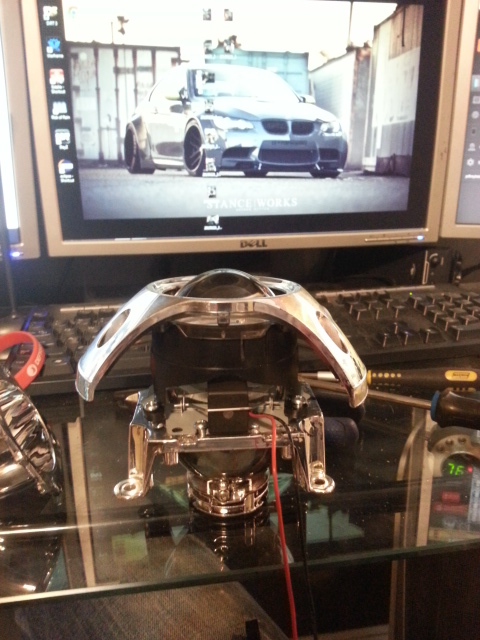
And my favorite part, the stock shrouding will fit after a grind a couple of grabby thingys. Wooohoooo, oem look is always best.
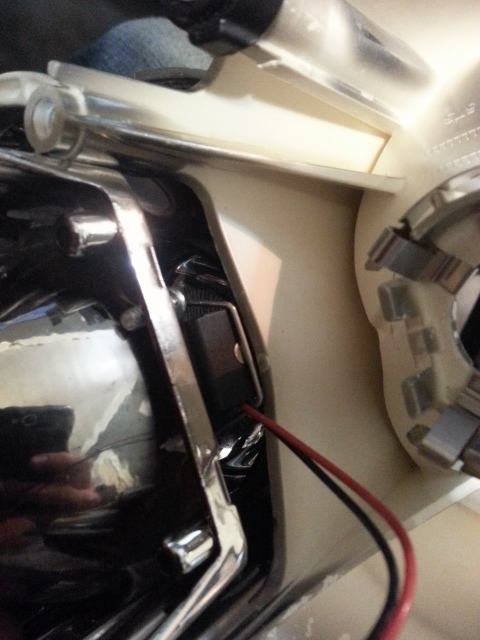
Unfortunately the solenoid is too boxy so I will have to grind into the bracket that holds everything.
Now all I have to do is a couple of things and they will be ready to go back into the headlight and hit the road. I will post more pictures as I go, now all I need is more time to work on them! Ahhhhh.
I started out by taking the headlight apart (obviously). And if anyone is wondering how to take the headlight apart, there are many threads out there that you can find. After disassembling the headlight, I took out the projector assembily.
And here is the lens assembly I am replacing it with.
As you can probably tell it is comparatively crystal clear.
And here's what makes a bi-xenon light....bi.
Now the fun part is getting it to fit onto my oem reflector.
A little drilling was required to get it to work, but no big deal really!
Now here's a picture of what the final projector assembly looks like.
And my favorite part, the stock shrouding will fit after a grind a couple of grabby thingys. Wooohoooo, oem look is always best.
Unfortunately the solenoid is too boxy so I will have to grind into the bracket that holds everything.
Now all I have to do is a couple of things and they will be ready to go back into the headlight and hit the road. I will post more pictures as I go, now all I need is more time to work on them! Ahhhhh.
Thread Starter
|
1st Gear
Joined: Oct 2013
Posts: 22
Likes: 1
Thanks Mark! They are actually some Morimoto knock offs that I ordered off of amazon. I put them in my girlfriends Toyota Corolla around Christmas time and I was impressed with the output so I ordered the same ones again.

Neutral
Joined: Feb 2015
Posts: 4
Likes: 0
Really? Can you post the link?

5th Gear
Joined: Apr 2013
Posts: 731
Likes: 5
From: Near Portland, OR, USA
I put Morimoto mini h1's in mine.
I'll give away this free idea: someone with a 3D printer, print up a bracket of some sort that will replace the halogen reflector in our factory headlight assembly, and be the perfect dimension to accept a Morimoto projector without all the grinding/dremel work.

do you have the light output. i put some s2000 projectors in mine before. but i sold the car and now i got a new one. i changd my bulbs to a cbi however, still lacking from my previous retrofit.
Trending Topics
Neutral
Joined: Feb 2015
Posts: 4
Likes: 0
I was thinking the same thing.
I put Morimoto mini h1's in mine.
I'll give away this free idea: someone with a 3D printer, print up a bracket of some sort that will replace the halogen reflector in our factory headlight assembly, and be the perfect dimension to accept a Morimoto projector without all the grinding/dremel work.
I put Morimoto mini h1's in mine.
I'll give away this free idea: someone with a 3D printer, print up a bracket of some sort that will replace the halogen reflector in our factory headlight assembly, and be the perfect dimension to accept a Morimoto projector without all the grinding/dremel work.

Thread
Thread Starter
Forum
Replies
Last Post
Interior/Exterior Unboxing Video of Sneed4Speed R53 Brake Cooling Kit
Gremothra
Interior/Exterior
3
Sep 9, 2015 08:42 PM