
R50/53 Home Made GP Intercooler Diverter


Thread Starter
|
2nd Gear
Joined: Jun 2010
Posts: 83
Likes: 0
From: Aurora, CO
Home Made GP Intercooler Diverter
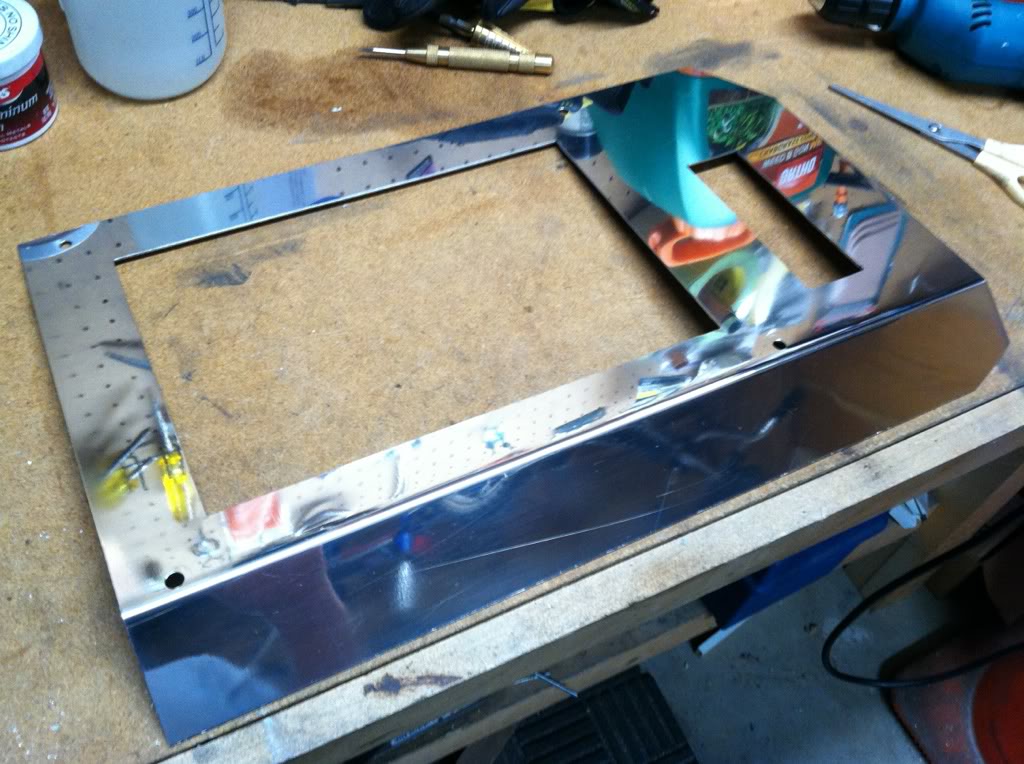
I recently bought the GP Intercooler, so obviously I was going to need a new Diverter to fit it. When I looked at the options, I was kinda disappointed. OEM was obviously too expensive, and the DDM Works diverter, although more effective than OEM and cheaper too, was still too expensive for my taste. It seemed like such a simple thing to make, all I would need really is a flat piece of metal with a hole cut in it and some foam on the hood to seal it. So I decided to make one instead.
I was able to get a 2'x2' piece of .050" aluminum from the scrap bin at a local metal shop, For Free!!!! The guy that owned the shop was nice enough to let me use his shear, so I cut it to size. I also decided to put a bend along the front side of it, kinda like you see on the DoS intercooler. Thankfully, he let me use his brake as well which made things much easier. Upon leaving the shop, I tried to pay him for helping me out, but he wasn't having it.
I went home and made a quick template out of legal sized construction paper. I bolted it on and that's when I learned I was gonna have to cut a hole so the post IC clamp would clear the flat piece of metal, something I had overlooked. I cut a hole in the template for the calmp, and went to work on the real thing with a sharpie. Once everything was laid out, I drilled some holes, did some cutting with a hack saw and spent lots of time filing to make it perfect. Test fit on the car, then a quick polish with my buffer and it was done. And my brother is gonna get me some foam from his work so I can redo the underhood foam to create a seal on the new learger diverter surface.
Total cost: $5.37 (I had to buy some polishing compound)
Time spent: About 6 hours
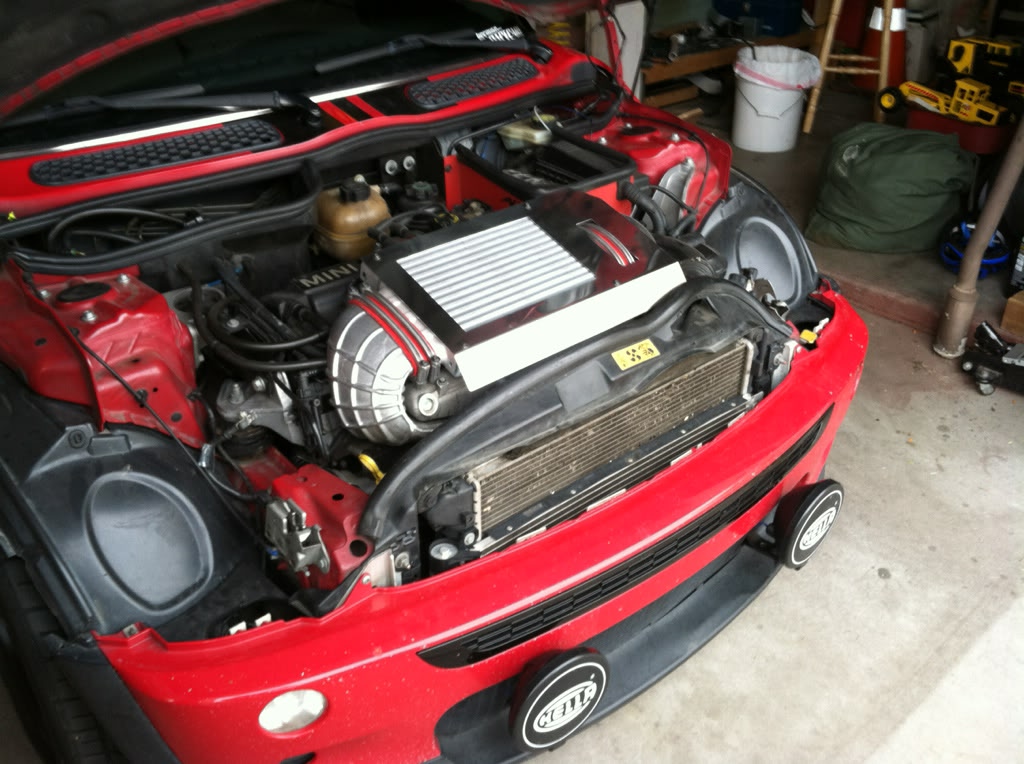
And here is the Final Product, What do you guys think?

I was able to get a 2'x2' piece of .050" aluminum from the scrap bin at a local metal shop, For Free!!!!
The guy that owned the shop was nice enough to let me use his shear, so I cut it to size. I also decided to put a bend along the front side of it, kinda like you see on the DoS intercooler. Thankfully, he let me use his brake as well which made things much easier. Upon leaving the shop, I tried to pay him for helping me out, but he wasn't having it. I went home and made a quick template out of legal sized construction paper. I bolted it on and that's when I learned I was gonna have to cut a hole so the post IC clamp would clear the flat piece of metal, something I had overlooked. I cut a hole in the template for the calmp, and went to work on the real thing with a sharpie. Once everything was laid out, I drilled some holes, did some cutting with a hack saw and spent lots of time filing to make it perfect. Test fit on the car, then a quick polish with my buffer and it was done. And my brother is gonna get me some foam from his work so I can redo the underhood foam to create a seal on the new learger diverter surface.
Total cost: $5.37 (I had to buy some polishing compound)
Time spent: About 6 hours
And here is the Final Product, What do you guys think?
Thread Starter
|
2nd Gear
Joined: Jun 2010
Posts: 83
Likes: 0
From: Aurora, CO
Thanks! Haha yeah those things are a huge pain to get on! The first time I believe it took nearly an hour, and 3 butter knives. They loosen up a little bit though. Works best with two people, put the small end on first, and with the large coupler on the SC horn, one guy pulls the intercooler to the drivers side as hard as he can while the other guy guides it down onto the coupler. The further you can pull the coupler down the horn, the easier it will be.

6th Gear
Joined: Nov 2004
Posts: 2,607
Likes: 316
From: Arnold, MO.
Thats excellent work and please don't take this the wrong way, but please hurry & get the foam work done, until then all you've got is an I/C cover, since there's nothing to divert the air through the I/C.
As far as air cooling properties you probably would be better off without it until then, (as long as you secure the I/C of course) at least that way you would let the whole I/C shed heat instead of covering it up. But that being said, when you do get the foam in place you will probably be better off than those of us with the DDM unit, as the aluminum will disipate heat better than the Stainless we have, don't forget, heat disipation is one of the reasons the factory uses plastic.
Oh, and I had to look twice at the first picture....I thought your metal was perferated....
3rd Gear
Joined: Aug 2012
Posts: 217
Likes: 3
From: Bel Air, MD
Thanks! Haha yeah those things are a huge pain to get on! The first time I believe it took nearly an hour, and 3 butter knives. They loosen up a little bit though. Works best with two people, put the small end on first, and with the large coupler on the SC horn, one guy pulls the intercooler to the drivers side as hard as he can while the other guy guides it down onto the coupler. The further you can pull the coupler down the horn, the easier it will be.
Trending Topics

1st Gear
Joined: Apr 2012
Posts: 23
Likes: 0
great looks but doesn't a diverter have a couple of fins inaddition to the foam to spread the air flow evenly in the IC?
otherwise most of the flow will stack to the back of the IC and almost none to the front and middle.
good looking but I think an important part is missing
otherwise most of the flow will stack to the back of the IC and almost none to the front and middle.
good looking but I think an important part is missing

2nd Gear
Joined: Sep 2012
Posts: 143
Likes: 2
From: Northern KY
looks to be diverting air from the bottom (just behind the radiator) and up the sides, which should work just fine, considering you have a grill on the front of you car that breathes rather well. its usually overlooked though.


6th Gear
Joined: Sep 2010
Posts: 1,807
Likes: 14
From: FL
i agree with above. Make some basic diverting rows of metal to force air Downward, through the IC. Should be fairly easy, you could use some flat or L bracket aluminum pieces from a hardware store. Some basic bending and bolting should do the trick. But you want something similar to pic below:


Where did you pick up a GP inter cooler? Correct me if I'm wrong, but isn't the GP inter cooler just an additional two rows literally welded on a stock unit? If that's the case, I may just buy two units and make one myself.
http://www.clubscmm.com/board/index.php?topic=7325.0
http://www.clubscmm.com/board/index.php?topic=7325.0
Last edited by Noir2005; Nov 2, 2012 at 09:30 AM.
6th Gear
Joined: Sep 2010
Posts: 1,807
Likes: 14
From: FL
i dont have one, yet, but YES, it is basically a stock unit w/ 2 rows welded on. ive seen them up close and off the car. not sure why 2 rows should cost so much $$, but what can you do :(
if you successfully make one (you have tools / knowledge to weld aluminum?) show us how! lots of pics! then make me one! lol
i always wanted to make one both wider and Longer. if you look into our scoops, only 2/3 of the free space is actually being used by the IC. now, if you made one longer by welding 2 units together, you could potentially fill the entire space of the scoop.
you would have to make an extension piece however, (see pic) that would simply extend the SC horn farther away from the intake manifold. how easy that would be, i dont know, but like anything, enough time, blood, sweat and tears!
3rd Gear
Joined: Aug 2012
Posts: 217
Likes: 3
From: Bel Air, MD
Here's a pic I took comparing my old OEM to the new GP.

Here's how I cut to fit the stock diverter for now..
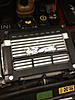
(The foil is a hot dog. We had no power when Sandy hit, i was hungry and I was bored. Yes it worked.)

Here's how I cut to fit the stock diverter for now..

(The foil is a hot dog. We had no power when Sandy hit, i was hungry and I was bored. Yes it worked.)

Former Vendor
Joined: Mar 2011
Posts: 435
Likes: 4
From: Baltimore MD Area
Nice job MCS, I remember a book called "intake manifold cooking" or something to the effect, when back in the day you could nestle a baked potato in foil, on each side of the old Rochester 4 barrel and cook it on the way to the lake. I guess this is the 2010s equivalent, good stuff.
Former Vendor
Joined: Mar 2011
Posts: 435
Likes: 4
From: Baltimore MD Area
Michael, nice fab job, very creative on the material sourcing and nice quality on the cutting and bending, Ive made a few pieces in my dad's workshop in the back of his house (back in the day when I still lived there) and they didn't come out as nice as this. The extra time spent in detailing the cutouts is evident. I hope it turns out to be very bit as effective as you hoped. Kudos.

1st Gear
Joined: Oct 2012
Posts: 27
Likes: 0
From: Itasca Illinois
Here's a pic I took comparing my old OEM to the new GP.
Attachment 66499
Here's how I cut to fit the stock diverter for now..
Attachment 66500
(The foil is a hot dog. We had no power when Sandy hit, i was hungry and I was bored. Yes it worked.)
Attachment 66499
Here's how I cut to fit the stock diverter for now..
Attachment 66500
(The foil is a hot dog. We had no power when Sandy hit, i was hungry and I was bored. Yes it worked.)

i dont have one, yet, but YES, it is basically a stock unit w/ 2 rows welded on. ive seen them up close and off the car. not sure why 2 rows should cost so much $$, but what can you do :(
if you successfully make one (you have tools / knowledge to weld aluminum?) show us how! lots of pics! then make me one! lol
if you successfully make one (you have tools / knowledge to weld aluminum?) show us how! lots of pics! then make me one! lol
That right there is genius....and makes me hungry, damn you.
i always wanted to make one both wider and Longer. if you look into our scoops, only 2/3 of the free space is actually being used by the IC. now, if you made one longer by welding 2 units together, you could potentially fill the entire space of the scoop.
you would have to make an extension piece however, (see pic) that would simply extend the SC horn farther away from the intake manifold. how easy that would be, I don't know, but like anything, enough time, blood, sweat and tears!
you would have to make an extension piece however, (see pic) that would simply extend the SC horn farther away from the intake manifold. how easy that would be, I don't know, but like anything, enough time, blood, sweat and tears!
3rd Gear
Joined: Aug 2012
Posts: 217
Likes: 3
From: Bel Air, MD
Deeeeeeeeelicious!!!! A 'hot' dog during a power outage was heavenly. I also ate it while watching TV that was powered by my mini (410w inverter). I felt like Einstein.
Thread Starter
|
2nd Gear
Joined: Jun 2010
Posts: 83
Likes: 0
From: Aurora, CO
Thanks for all the input guys!
@BLWNAWAY:
Yeah I left the stock foam under the hood which does seal to my diverter surface, it just covers up the extra two rows on the GP Intercooler. I got the foam from my brothers work but it was too stiff and didnt have very good memory. You push it down and it never fully recovered haha so that won't work. The heat disipation properties is another reason why I have the bent bit above the radiator. I figure it's just one big heat sink that will always be getting airflow. I've been on a few drives so far and the post IC horn is always nice and cool right after, so I figure I have some time to sort out the foam. And it's been nice and cool in denver so I have that on my side too. Haha the perforations is the peg board on tha wall.
@BOUDDHA:
Very good point, hopefully it doesn't all just flow through the back, I modeled it after what the guys over at DoS have done with their design. They just have foam sealing it to the hood and they have achieved very impressive numbers. But we will see, I'll have to do a few hard pulls and feel all over the intercooler right after. Here is an example of what DoS did:
http://cdn1.bigcommerce.com/server41...66.800.800.jpg
@NOIR2005:
Yeah it is just two rows welded on, if you are interested I would definitley be down to sell you my stock unit. PM me for it, it would be awesome to add 3 maybe even 4 rows haha
@CLUBMAN S TURBO:
Thanks man! I can be kind of a perfectionist with this kinda thing. The scratches from rattling around the scrap bin kinda bother me but you can't argue with free! I'm an A&P Mechanic, so I've had a bit of experience with Aluminum.
@BLUEMEANIE01:
Exactly! The sense of self satisfaction can't be beat! Doing this really really makes me wanna get an E30 again and do a full turbo build...
@MCS 5:
Haha I like what you did with the stock Diverter! I never thought of that! Hope you were able to get the silicone PITA's on. I can't believe you watched TV powered by the MINI during a power outtage while eating a 'hot' dog cooked by it. 'MURICA!
Thread Starter
|
2nd Gear
Joined: Jun 2010
Posts: 83
Likes: 0
From: Aurora, CO
@NOIR2005:
I forgot to include, I bought the GP Intercooler from WAY MOTOR WORKS.
http://www.waymotorworks.com/gp-inte...r-for-r53.html
I forgot to include, I bought the GP Intercooler from WAY MOTOR WORKS.
http://www.waymotorworks.com/gp-inte...r-for-r53.html
I'm already having a problem with cost effectiveness, all the stock intercoolers I find are in the 100-200 dollar range. I thought I'd be able to pick a couple up for like 50-75 bucks each. I'm going to have to find a couple people who are parting cars out just to get rid of the stuff.

Thread
Thread Starter
Forum
Replies
Last Post
Mini Mania
Vendor Announcements
0
Aug 11, 2015 09:01 AM
Ambient Thermal Management
Drivetrain (Cooper S)
0
Aug 7, 2015 12:27 PM