
Interior/Exterior Way Motors brake ducts... install in Aero Kit bumper


Way Motors brake ducts... install in Aero Kit bumper
GNAT gets another week at the Spa...
I'll try to keep up with photos as the week goes on this time. Kinda hard unless I hang there but that slows stuff down. Since I had both the Mini and my Jeep there today I was able to hang out for a while. Jeep is getting AC work btw.
The plan for this week is to add the brake ducts and fix a boo boo in the front bumper cover, rear larger Wilwood slotted rotors, rear SS brake lines, caliper bushings flush and fill brake system with Wilwood fluid (thanks Todd) and Hawk pads on rear. Also working on the custom 4 gauge A pillar, G2X install and change out gauge faces to the new white ones from Out Motoring that match the 6 G2X gauges. Also going to sawp the side mirrors fr the CF Kraft ones I've had for while, add the tensioner strap and swap out the M7 400cc injectors for JCW 380's. If time allows we'll add the Braille 11lb battery, new pedals from Ultimate Pedals, create a custom mount for the Garmin 350, swap all the light grey pillars for new ones in anthracite, wrap the CAI in heat resistant coating, and install the V1 remote in the rear view mirror. I think that covers the list for now...
Some pictures...
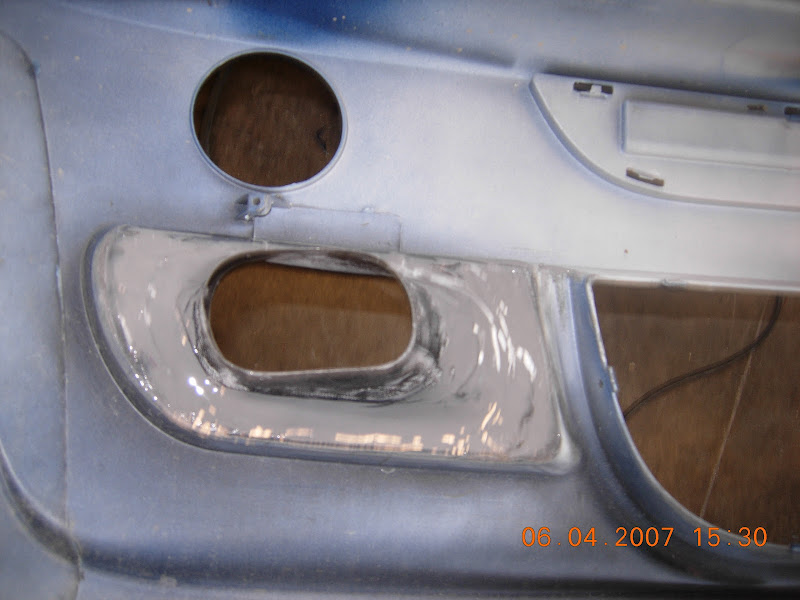
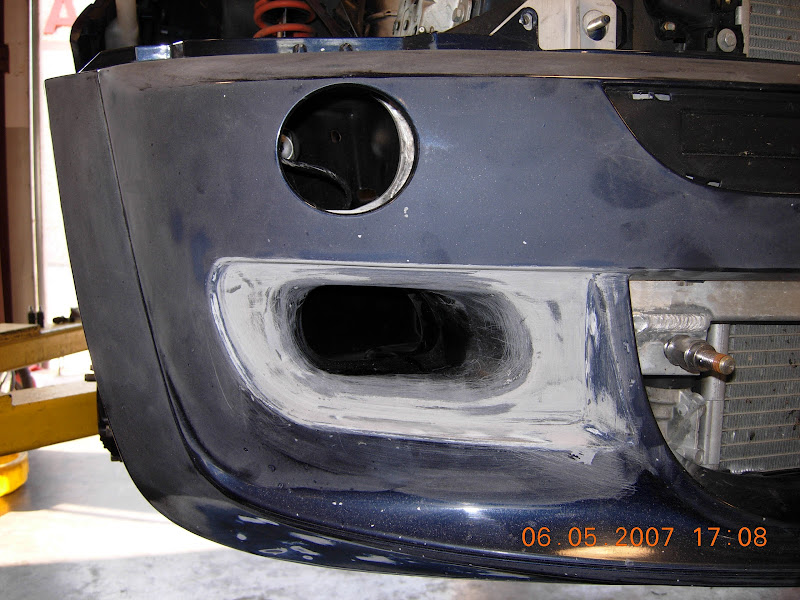
Opening for Brake Duct. Keep in mind the brake ducts from Way Motors are designed for the standard front bumper cover. I have the Aero Kit.
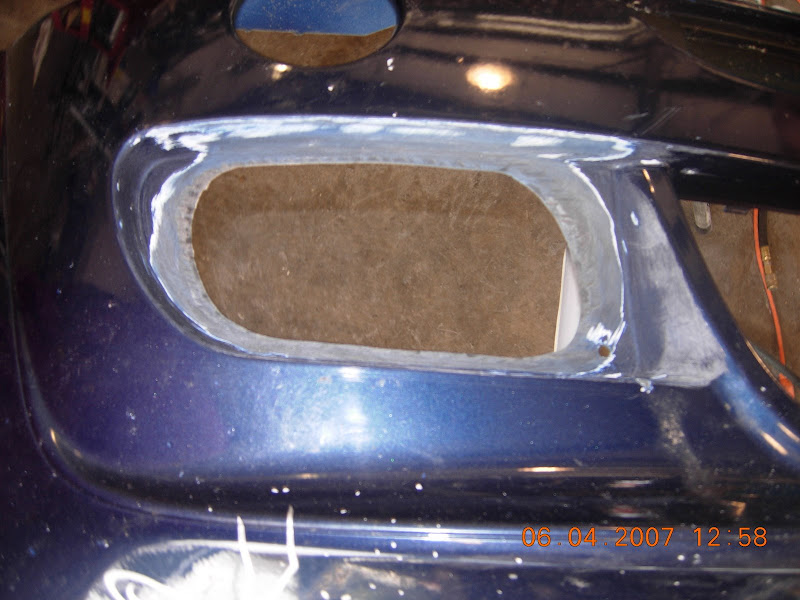
Duct Fitted to opening

Pop riveted in place and filled with a 3M flexible adhesive
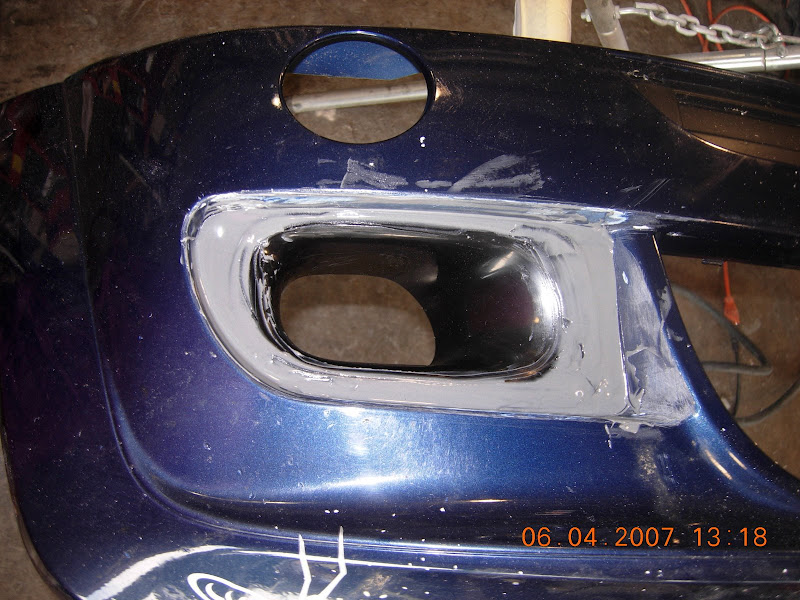
After a second coating of the 3M adhesive material and sanding, lots of sanding
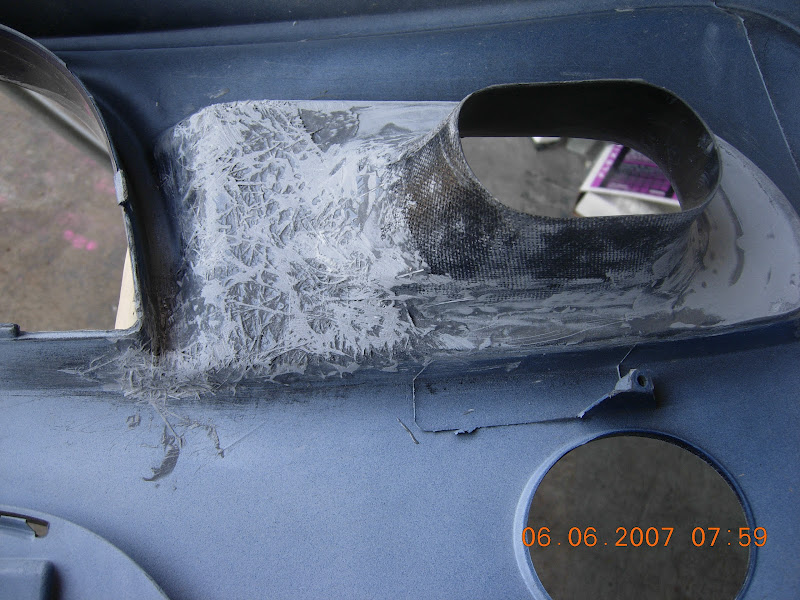
View from the back
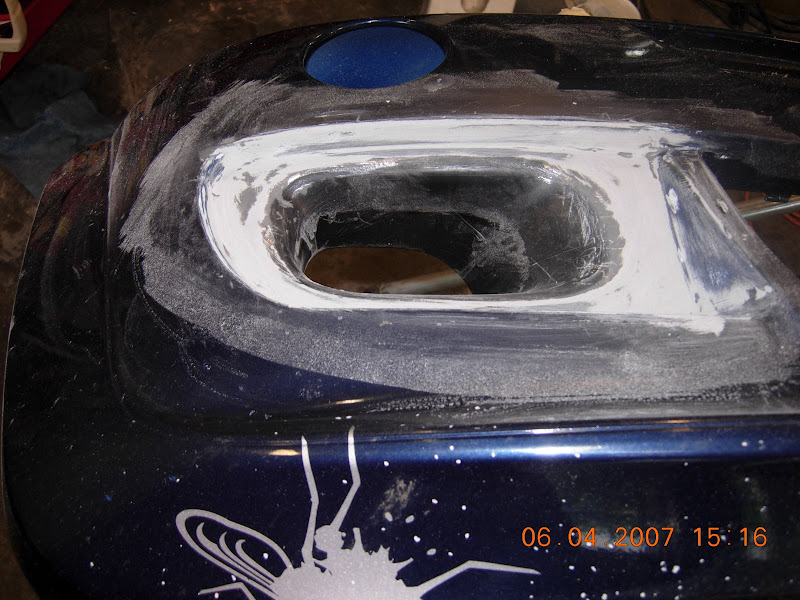
A coating of the 3M adhesive
After the adhesive has set overnight to fully cure the plan is to come back and add a few layers of fiberglass cloth using the 3M product as resin. This should strengthen the area yet allow it to give some. Then it's off to paint.
I'll try to keep up with photos as the week goes on this time. Kinda hard unless I hang there but that slows stuff down. Since I had both the Mini and my Jeep there today I was able to hang out for a while. Jeep is getting AC work btw.
The plan for this week is to add the brake ducts and fix a boo boo in the front bumper cover, rear larger Wilwood slotted rotors, rear SS brake lines, caliper bushings flush and fill brake system with Wilwood fluid (thanks Todd) and Hawk pads on rear. Also working on the custom 4 gauge A pillar, G2X install and change out gauge faces to the new white ones from Out Motoring that match the 6 G2X gauges. Also going to sawp the side mirrors fr the CF Kraft ones I've had for while, add the tensioner strap and swap out the M7 400cc injectors for JCW 380's. If time allows we'll add the Braille 11lb battery, new pedals from Ultimate Pedals, create a custom mount for the Garmin 350, swap all the light grey pillars for new ones in anthracite, wrap the CAI in heat resistant coating, and install the V1 remote in the rear view mirror. I think that covers the list for now...
Some pictures...
Opening for Brake Duct. Keep in mind the brake ducts from Way Motors are designed for the standard front bumper cover. I have the Aero Kit.
Duct Fitted to opening
Pop riveted in place and filled with a 3M flexible adhesive
After a second coating of the 3M adhesive material and sanding, lots of sanding
View from the back
A coating of the 3M adhesive
After the adhesive has set overnight to fully cure the plan is to come back and add a few layers of fiberglass cloth using the 3M product as resin. This should strengthen the area yet allow it to give some. Then it's off to paint.


3rd Gear
Joined: May 2006
Posts: 187
Likes: 0
From: Nashville,TN
Looks great. I'm inspired now. I have the standard S cover, but the riveted approach just didn't feel right to me. I like the molded in look. Will make for a clean look. Looking forward to seeing the finished result.

Update
Over the past few days there has been a considerable amount of work.
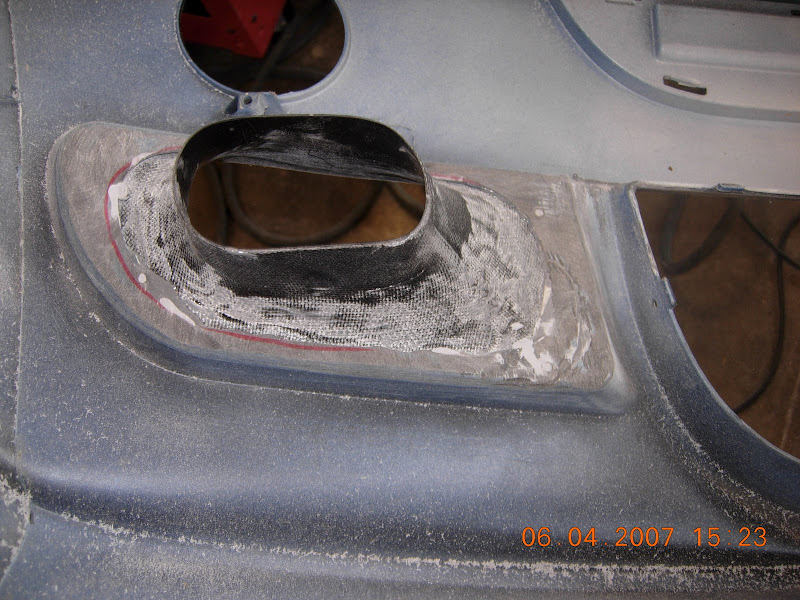
Ducts from the rear, fully glassed in now.
Fixing all the little rock chips.
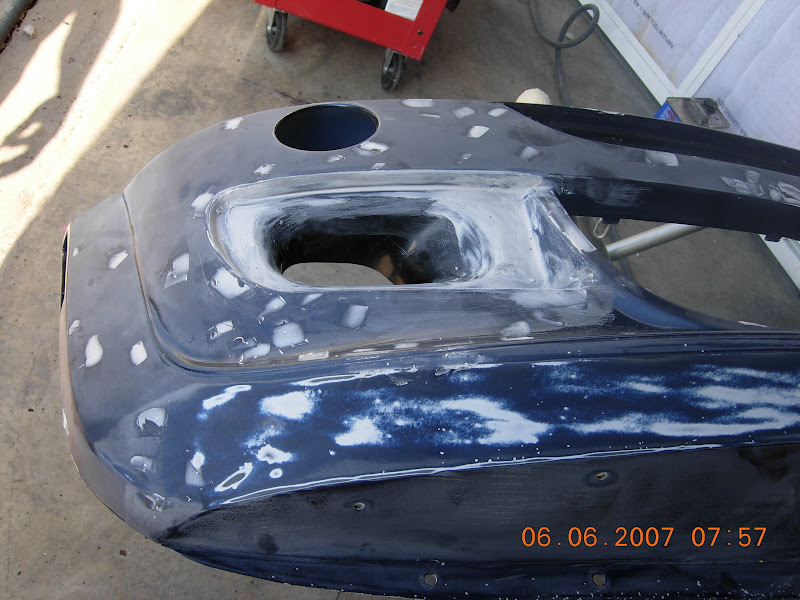
When I stopped in late today the bumper cover had a new coat of primer on it and was being sanded to remove the imperfections.
Fitted on Mini to measure where to trim.
A little trimming
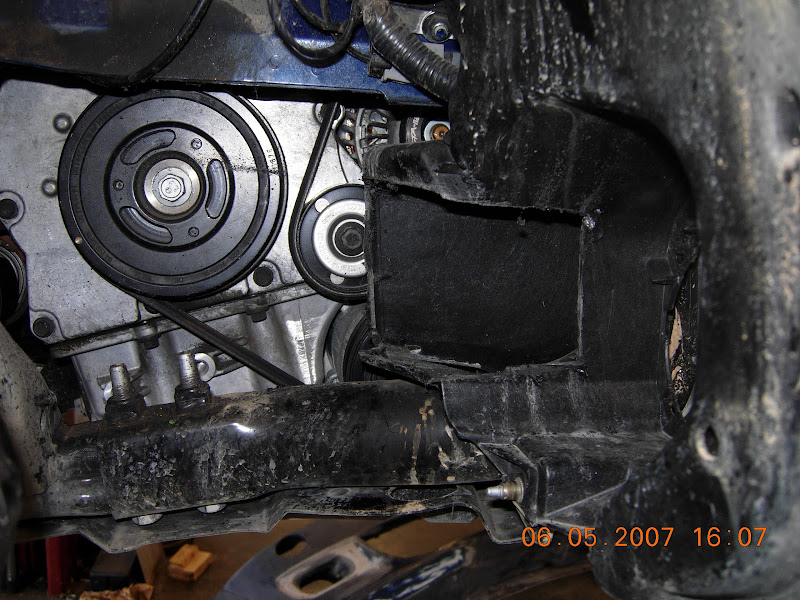
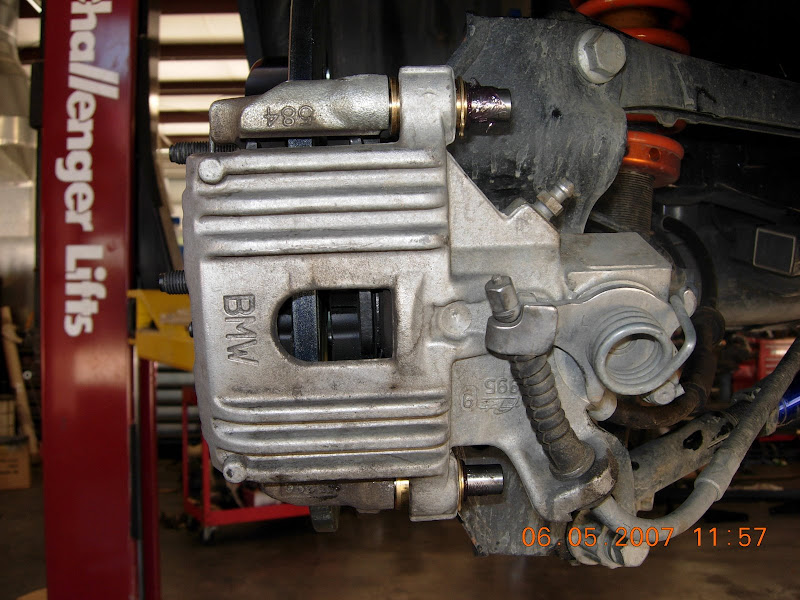
Makes room for this...
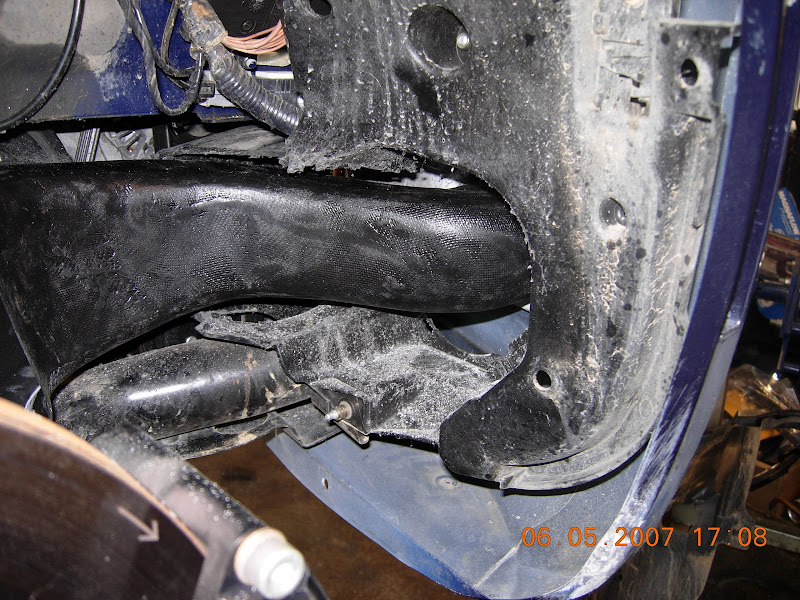
Sure do have to remove a bit of plastic...
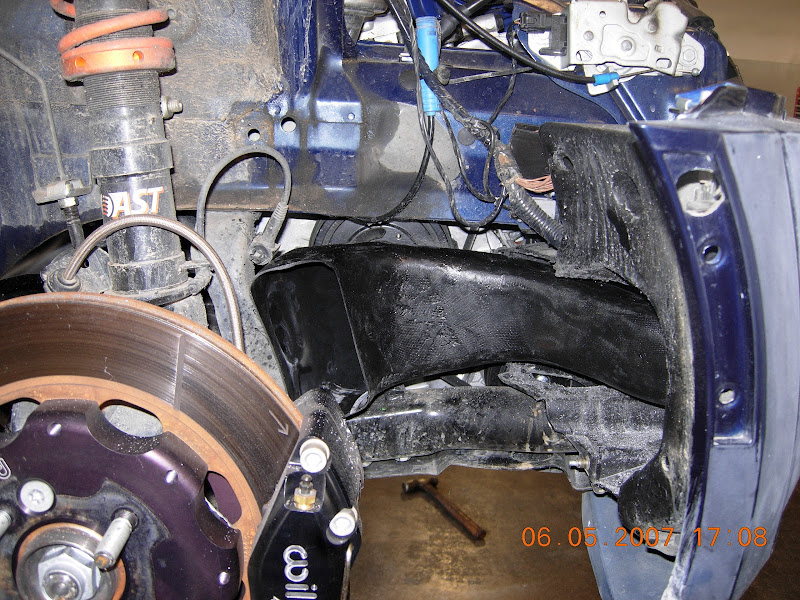
A little more rotor in the rear...
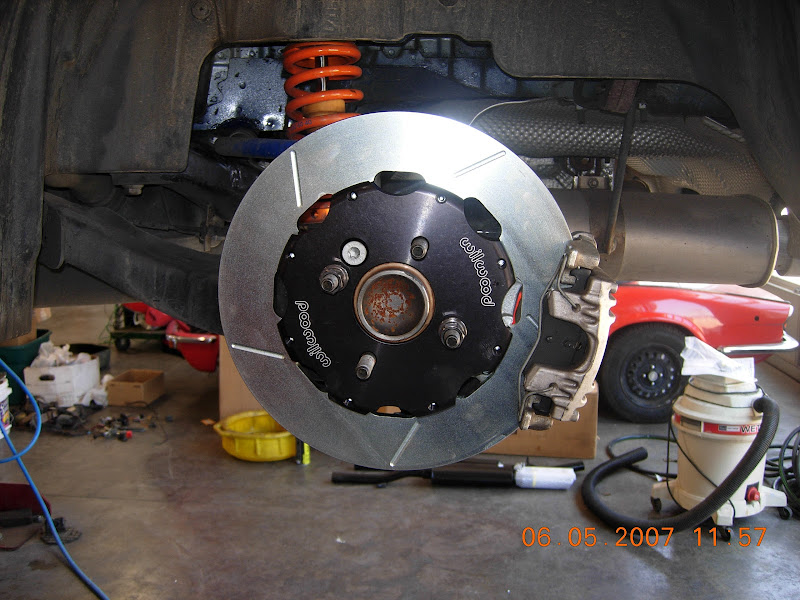
Fills the wheel better
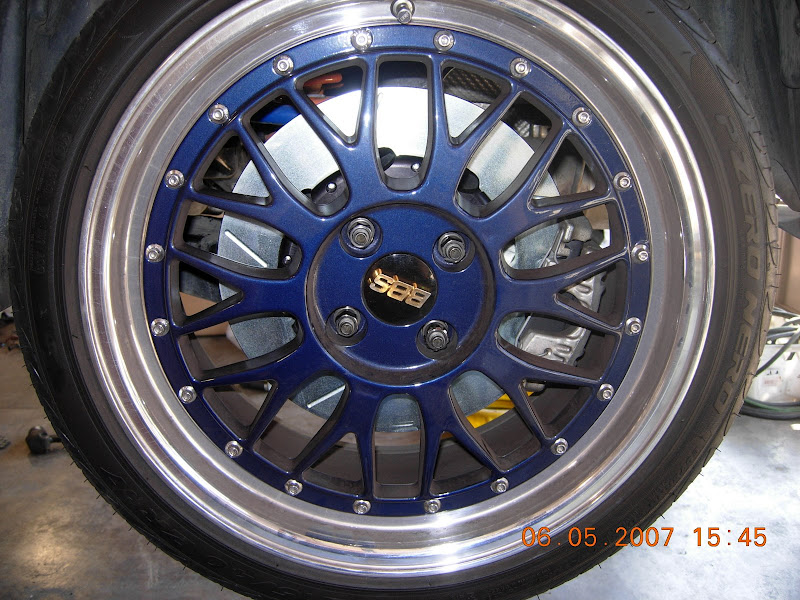
Why yes...of course we added uprated bushings and SS lines while back there
Stay tuned for more...
Over the past few days there has been a considerable amount of work.
Ducts from the rear, fully glassed in now.
Fixing all the little rock chips.
When I stopped in late today the bumper cover had a new coat of primer on it and was being sanded to remove the imperfections.
Fitted on Mini to measure where to trim.
A little trimming
Makes room for this...
Sure do have to remove a bit of plastic...
A little more rotor in the rear...
Fills the wheel better
Why yes...of course we added uprated bushings and SS lines while back there
Stay tuned for more...

I LOVE YOUR WHEELS!!!!!!!!!!!!!!!!!!!!!!!!!!!!!!!!!!!!!!!!
And great install too!
And great install too!
Trending Topics


The install was a team effort. I use a shop here Lewisville TX, Bob's Tire and Auto, yes a very unassuming name. The Tech there, Will, he is incredible. He undertands what I am looking for in the finished product and then pulls it off. We say " Where there is a Will, there is a way" as he does not dissapoint. They recently added a new guy to their paont shop, Rick, he's the one that did all the magic in moulding in teh ducts so they look like they came right from the factory.
So while ya'll are giving me credit, it really lies elsewhere. I'll be sure to pass your kind words on to those behind the magic.
Thanks

6th Gear
Joined: Sep 2004
Posts: 5,149
Likes: 0
I can't take the credit of rhe work, I only come up with the ideas, then I find the best people I can to do the work.
The install was a team effort. I use a shop here Lewisville TX, Bob's Tire and Auto, yes a very unassuming name. The Tech there, Will, he is incredible. He undertands what I am looking for in the finished product and then pulls it off. We say " Where there is a Will, there is a way" as he does not dissapoint. They recently added a new guy to their paont shop, Rick, he's the one that did all the magic in moulding in teh ducts so they look like they came right from the factory.
So while ya'll are giving me credit, it really lies elsewhere. I'll be sure to pass your kind words on to those behind the magic.
Thanks
Really nice..... I hope to follow your lead

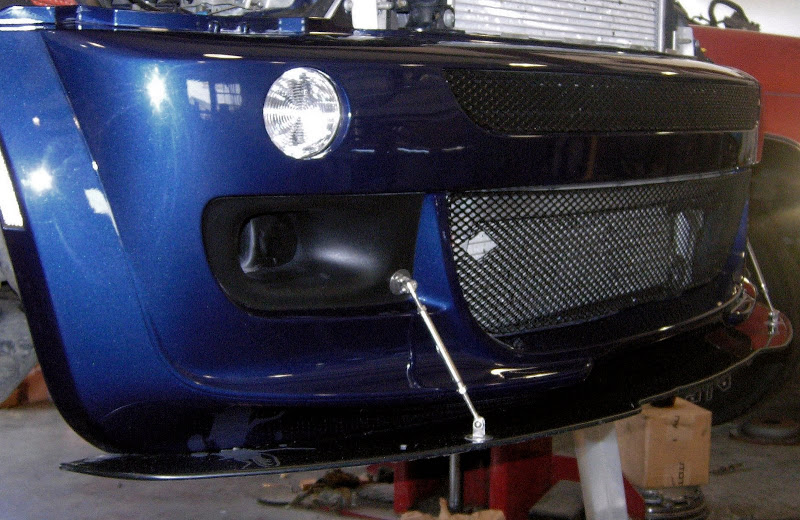
Here is a much better shot, shows how it all comes together. The ducts, the cowl scoops and Kraft mirrors. Thanks to dickdavid for the image taken today at the MetroplexMini monthly meeting.


OVERDRIVE


Joined: May 2003
Posts: 7,926
Likes: 40
From: Greensboro, NC
Sweet Nathan...welcome to the CraftSquare Club...you're One of 5 in the states I think...
I can't believe how clean your Mini is...I thought it was permanently covered in mud from what I saw at the Dragon...
I can't believe how clean your Mini is...I thought it was permanently covered in mud from what I saw at the Dragon...


4th Gear
Joined: Oct 2003
Posts: 461
Likes: 1
From: Magnolia, Texas
Nathan,
That is beautiful!
That one area of the aero bumper always looked unfinished to me. Your mod makes it look like a functional factory part. i'm amazed how nicely this integrates into the overall look of the car.
I originally saw this on dickdavid's Flickr site (great photos) and tracked down the original thread to find out the rest of the story.
John