
Interior/Exterior DIY MINI Halon Fire Extinguisher Brey-Krause


DIY MINI Halon Fire Extinguisher Brey-Krause
Now that I've got my new 2005 MCS running smoothly, I've been wanting to get a fire extinguisher for a little bit of extra peace of mind. After searching here on NAM, I decided that the Brey-Krause design would suit me best. The instructions left a lot to be desired. This is what I learned during my install today. You don't need to fully remove the seats from the MINI. You need to remove 8 bolts total. 4 bolts hold the seat rails to the floor. Then the fronts of each seat mount need to be removed. Then you can simply tilt the seat back in its place and slide the bracket into place and then bolt everything back down again. Make sure to use blue locktite when refastening them.
Tools Required: T15, T40, and T50, 1/4" wrench, 1/4" driver
Supplies: Blue locktite
Time: 30 to 45 minutes
Tips:
1. Slide the seat forward and backward to access the 4 bolts that hold the rails downs
2. No need to remove the seat from the MINI
3. Unplug the connectors underneath the seat before doing any work
4. Make sure key isn't in ignition!
5. Fasten the fire extinguisher bracket assembly to the mount before attach it so that you can mount the whole assembly for easy access. If you have the optional bracket for the extinguisher, mount that as well.
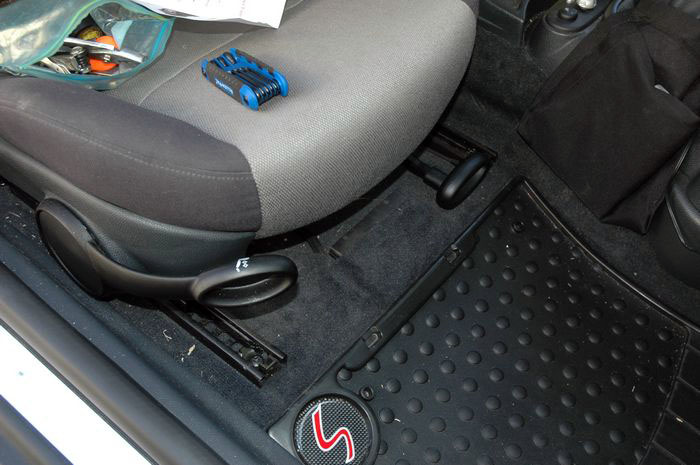
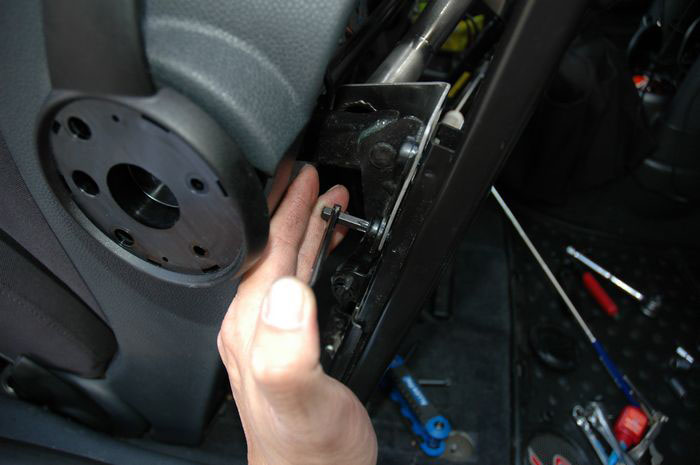
This is where the extinguisher is going to go. I've got my Torx wrenches ready!
There are 4 bolts that need to be removed--these hold the seat rails to the floor. Sorry for the dirty floor--I vacuumed this AFTER this install.
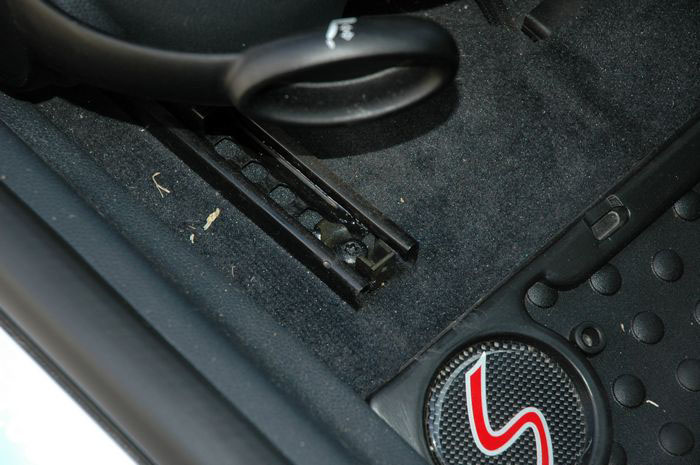
One of the forward T50 rail bolts that needed to be removed
Although the bolt can be accessed, it's held on tight, so a 1/4" driver is better. I resecured this with blue locktite when I reassembled everything.

The instructions say to remove all the connectors then pull out the seat, but the connectors are clipped to the underside, and I didn't want to remove those as well, so disconnecting them, but leaving the seat in place worked fine. Remember to keep the ignition off and don't turn it on before you're finished unless you want an airbag light triggered! While removing the negative wire on the battery is a good precaution, I didn't bother.
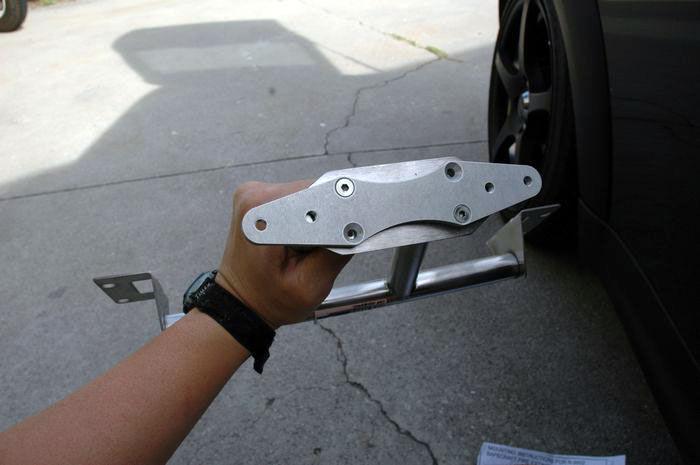
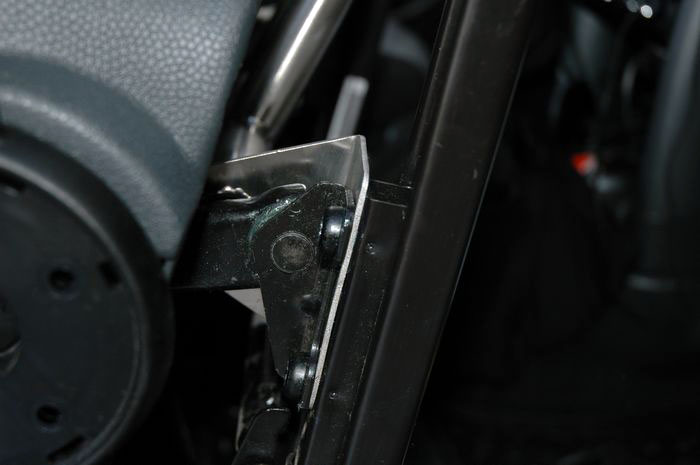
I was disappointed that this bracket didn't even align with the 4 holes! Two screws still fit, so I put them diagonally. (EDIT: Livermore support acknowledged this problem. They weren't aware of it until I told them, so they are now taking action to solve the problem)
You can see that the threads don't even come out far enough past the plate to thread on the locking nut. (EDIT: Livermore support said that I should get longer screws. This issue may be fixed by the time you purchase one)
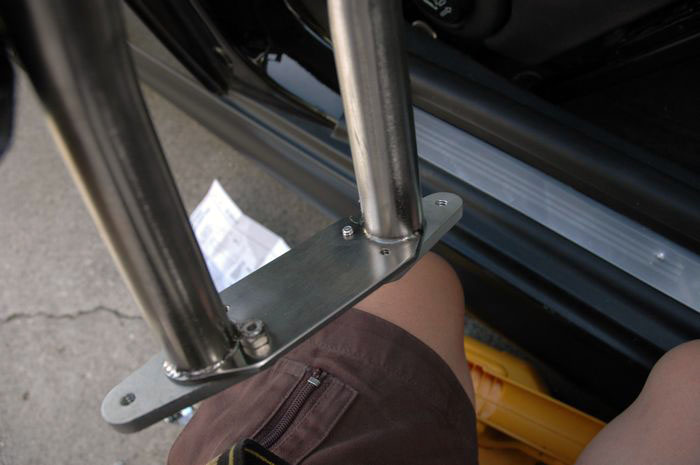
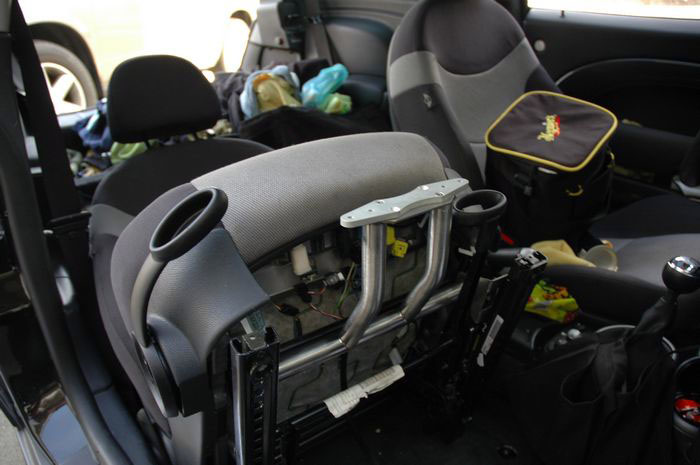
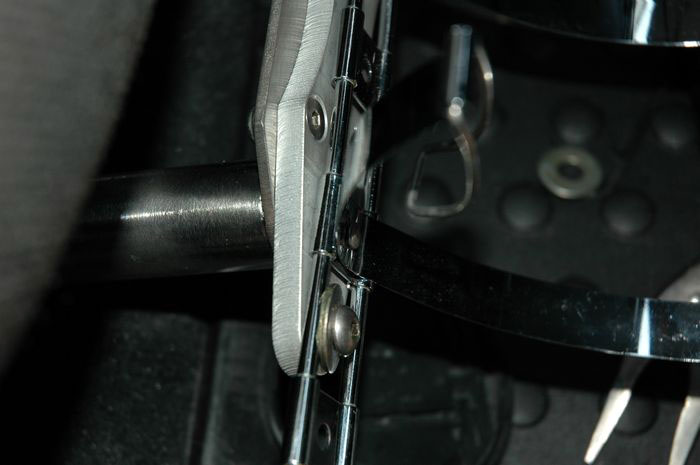
This is the WRONG way to install the bracket. It needs to be sandwiched between the rail and the seat, not the rail and the floor! If you try this way, you'll find that the bracket gets in the way of the seat levers and you'll be left wondering
what's wrong. The bracket is designed to move with the seat, so it fastens to the seat, and not the floor!
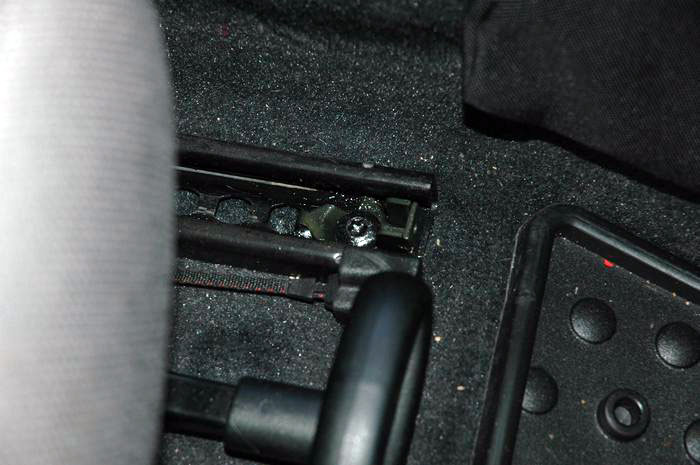
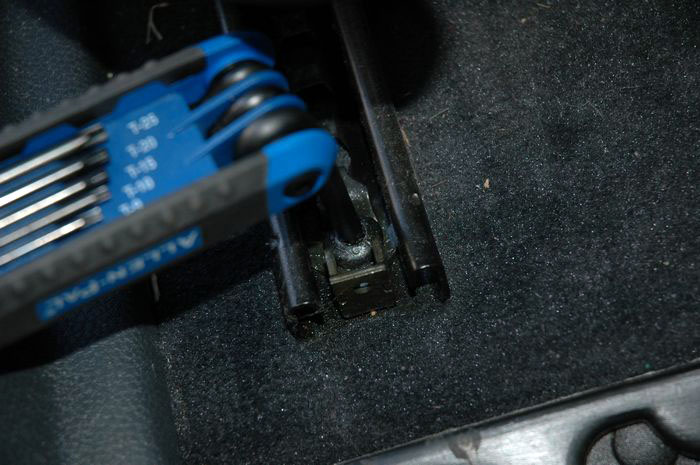
My BMW mechanic neighbor showed me this little trick to access these T40 bolts using a 1/4" wrench to twist the T40 bit.

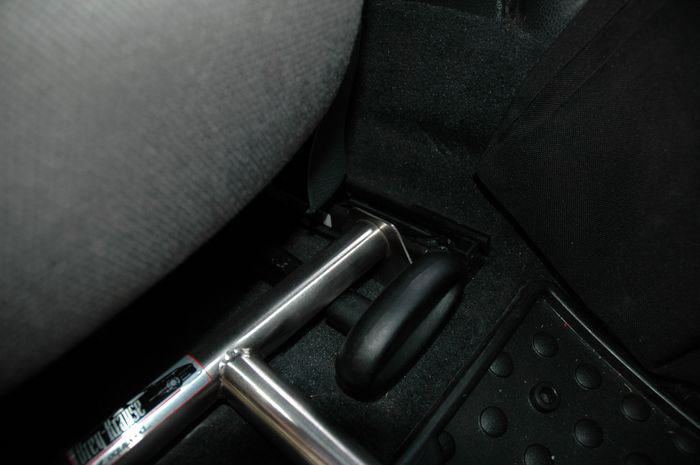
Fire Extinguisher Bracket Installed
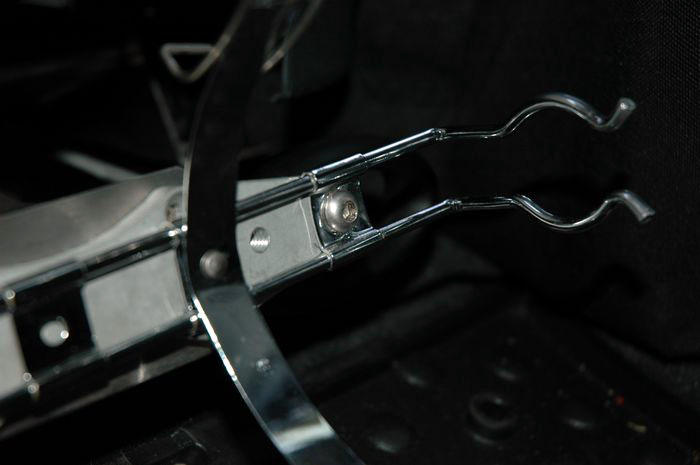
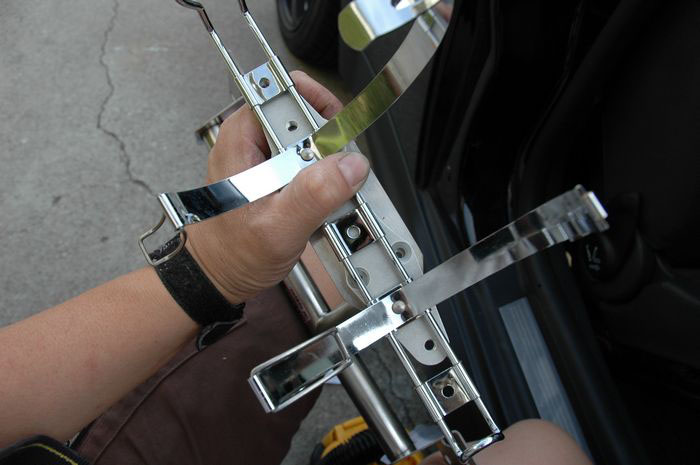
Another design issue, the holes of the custom bracket didn't even align with the holes of the extinguisher bracket which they also sold me. Considering they sold me the bracket, extinguisher, and plate as a kit, I expected everything to fit together. (EDIT: The holes on the fire extinguisher bracket move with a hard tap with a hammer. When I got them to move, the metal was all rusted)
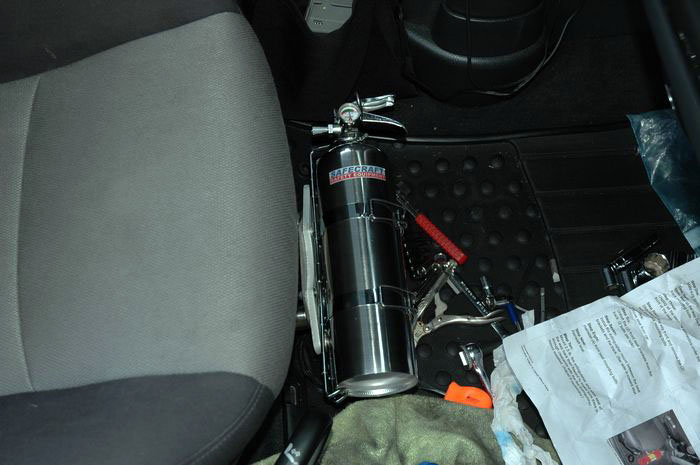
Here it is! All finished!

Fire Extinguisher Bracket Installed
EDIT:
Since I took these pictures, I went for a drive and hit a pretty big bump, and it dislodged the fire extinguisher. I called Livermore support and they told me that those little holes in the square plates will move to the correct position. They aren't welded in place, though they look like it--and are super tight. So I used a hammer and a screw driver and gave it about 6 large wacks, and sure enough it moved enough so the spacing was correct. I now have it properly mounted. As for the 4 holes not lining up, they discovered that the ones they have in stock also do not line up correctly, so they are now taking action to correct the situation.
Related thread:https://www.northamericanmotoring.co...e+extinguisher
Purchased from: http://www.livermoreperformance.com/...#Brey%20Krause
Tools Required: T15, T40, and T50, 1/4" wrench, 1/4" driver
Supplies: Blue locktite
Time: 30 to 45 minutes
Tips:
1. Slide the seat forward and backward to access the 4 bolts that hold the rails downs
2. No need to remove the seat from the MINI
3. Unplug the connectors underneath the seat before doing any work
4. Make sure key isn't in ignition!
5. Fasten the fire extinguisher bracket assembly to the mount before attach it so that you can mount the whole assembly for easy access. If you have the optional bracket for the extinguisher, mount that as well.
This is where the extinguisher is going to go. I've got my Torx wrenches ready!
There are 4 bolts that need to be removed--these hold the seat rails to the floor. Sorry for the dirty floor--I vacuumed this AFTER this install.
One of the forward T50 rail bolts that needed to be removed
Although the bolt can be accessed, it's held on tight, so a 1/4" driver is better. I resecured this with blue locktite when I reassembled everything.
The instructions say to remove all the connectors then pull out the seat, but the connectors are clipped to the underside, and I didn't want to remove those as well, so disconnecting them, but leaving the seat in place worked fine. Remember to keep the ignition off and don't turn it on before you're finished unless you want an airbag light triggered! While removing the negative wire on the battery is a good precaution, I didn't bother.
I was disappointed that this bracket didn't even align with the 4 holes! Two screws still fit, so I put them diagonally. (EDIT: Livermore support acknowledged this problem. They weren't aware of it until I told them, so they are now taking action to solve the problem)
You can see that the threads don't even come out far enough past the plate to thread on the locking nut. (EDIT: Livermore support said that I should get longer screws. This issue may be fixed by the time you purchase one)
This is the WRONG way to install the bracket. It needs to be sandwiched between the rail and the seat, not the rail and the floor! If you try this way, you'll find that the bracket gets in the way of the seat levers and you'll be left wondering
what's wrong. The bracket is designed to move with the seat, so it fastens to the seat, and not the floor!
My BMW mechanic neighbor showed me this little trick to access these T40 bolts using a 1/4" wrench to twist the T40 bit.
Fire Extinguisher Bracket Installed
Another design issue, the holes of the custom bracket didn't even align with the holes of the extinguisher bracket which they also sold me. Considering they sold me the bracket, extinguisher, and plate as a kit, I expected everything to fit together. (EDIT: The holes on the fire extinguisher bracket move with a hard tap with a hammer. When I got them to move, the metal was all rusted)
Here it is! All finished!
Fire Extinguisher Bracket Installed
EDIT:
Since I took these pictures, I went for a drive and hit a pretty big bump, and it dislodged the fire extinguisher. I called Livermore support and they told me that those little holes in the square plates will move to the correct position. They aren't welded in place, though they look like it--and are super tight. So I used a hammer and a screw driver and gave it about 6 large wacks, and sure enough it moved enough so the spacing was correct. I now have it properly mounted. As for the 4 holes not lining up, they discovered that the ones they have in stock also do not line up correctly, so they are now taking action to correct the situation.
Related thread:https://www.northamericanmotoring.co...e+extinguisher
Purchased from: http://www.livermoreperformance.com/...#Brey%20Krause
Last edited by OctaneGuy; Nov 6, 2006 at 04:46 PM.


I contacted Livermore Performance about the issues I had and they are working to resolve them. The problems are fairly minor, but they are taking action to make things right. For my own install, I'll just redrill the parts that don't align.

Thanks!! That's very good advice. Hmmm, I'd imagine that considering this is Halon that an accidental discharge won't be damaging to my MINI--though a recharge isn't inexpensive either.

IT's a good unit...
I wish I'd known about the bit and the 1/4" wrench, would have saved some hassle...
The only issue I have (I got the machined Al mount, not the band clamps) is that the pin and the trigger stuff on my extinguisher rattle over bumps. Some electrical tape and shink wrap ought to solve the issue... It's just when I'm home, I forget about fixing it because it's not making any noise!
Anyway, it's a good unit, and that it moves with the seat is a real plus.
Matt
Trending Topics
Yeah I wasted a good amount of time trying to figure out how to remove those bolts. I started removing the plastic around the base of the seat, and you can see I popped the cover off the ratcheting lever to see what was there, and it was starting to become ridiculous! My 1/4" ratchet with adaptor to hold the Torx bit was just a tad too tall. I had a mini ratchet but I ended up breaking it--too much stress on the tool. If anyones thinking about doing this, get the Craftsman 1/4" wrench. It's thick!! Lots to hold onto as you're trying to break loose the loctited bolts.
I wish I'd known about the bit and the 1/4" wrench, would have saved some hassle...
The only issue I have (I got the machined Al mount, not the band clamps) is that the pin and the trigger stuff on my extinguisher rattle over bumps. Some electrical tape and shink wrap ought to solve the issue... It's just when I'm home, I forget about fixing it because it's not making any noise!
Anyway, it's a good unit, and that it moves with the seat is a real plus.
Matt
The only issue I have (I got the machined Al mount, not the band clamps) is that the pin and the trigger stuff on my extinguisher rattle over bumps. Some electrical tape and shink wrap ought to solve the issue... It's just when I'm home, I forget about fixing it because it's not making any noise!
Anyway, it's a good unit, and that it moves with the seat is a real plus.
Matt
It's a 2.5. Not sure of the weight. I'll weigh it and repost. The bottle came from the same guys who sell the mount--I just asked for everything I need, lol

1st Gear
Joined: Nov 2006
Posts: 23
Likes: 0
From: Atlanta, GA USA
GP Halon Mount
Great job, OctaneGuy, with a true OEM look. I hadn't found this thread when I was figuring out how to mount a halon extinguisher in my GP. The tab on the passenger side of the "luggage bar" is supposedly for a child seat, but it is really quite ugly. I have no kids, so it became a quick and simple mounting point for the extinguisher. A standard bracket, 1 1/4" SS washer, 1 1/4" neoprene washer, 1/4 20 x 5/8 bolt, nylon lock-nut and it was done. I hope my GP never fries, but maybe I can help someone else one day.

Thanks! The only drawback I've seen with this mount is that if I don't have the seat pushed all the way forward, I tend to get an annoying vibration from the extinguisher and mount. Pushing the seat forward seems to solve that problem.
Your GP solution looks great!
Your GP solution looks great!
If you've got rattles...
it's in either the head of the fire extinguisher it's mount. Probably the head. I had the same thing and used a rubber band on it, and no more rattle! Just make sure you run the band so it doesn't interfere with the extinguisher operation.
Matt
Matt

6th Gear
Joined: Nov 2003
Posts: 2,349
Likes: 2
From: Concord, California
Installed mine today.
All bolts line up well.
The clips that Octaine Guy (thanks for the great DIY) did not remove really are easy to just pull off and push back on .
Much easier to do with the seat all the way out
All bolts line up well.
The clips that Octaine Guy (thanks for the great DIY) did not remove really are easy to just pull off and push back on .
Much easier to do with the seat all the way out
Anyone who has done this mount - does the extinguisher get in the way of your passengers getting in and out? Any issues? I love the idea, look and placement, but I'm concerned that my wife is going to hate having it there. I guess I could roll up a towel or something similar size and stick there for a few days to see... but would love any feedback on passenger-friendliness of this mount!
Only issue I have is a slight rattle that I haven't fixed yet when the seat is pushed back. Pulling it all the way forward solves the problem. My wife sits in front and no issues getting in or out. Your feet are well forward of the extinguisher.
Anyone who has done this mount - does the extinguisher get in the way of your passengers getting in and out? Any issues? I love the idea, look and placement, but I'm concerned that my wife is going to hate having it there. I guess I could roll up a towel or something similar size and stick there for a few days to see... but would love any feedback on passenger-friendliness of this mount!

4th Gear
Joined: Aug 2005
Posts: 441
Likes: 0
From: NW NC, USA, Earth
I have mine on the driver's side, and once you get used to it, it really doesn't bother me. If I was going to go on a long trip, I'd probably unscrew the mount and put it in the boot, just so my feet have more room to move around.
I did my B-K mount install tonight - thanks to all the tips here, it was pretty darn easy. Note that on my 2006 MCSC, All 8 seat bolts are T40 - no T50s. I unclipped the cables and pulled the seat out - very easy, and the cables clip right back on, no worries. It would have been MUCH harder without the T40 bit / wrench trick... I broke my tiny 1/4" wrench trying to break loose the bolts - but found that I could use my 8" adjustable wrench to get lots of leverage to break them loose, then use the 1/4" wrench to do the rest of the turning (or a mini socket if I had one).
Well, took the wife for a spin for the first time with the BK mount installed. She makes a groan as she gets in the car. Then another when she realizes that she can't put her purse where she usually does (under her legs). Then she notices the sharp edge on the bottom of the safecraft extinguisher. Then she says "I'm going to ask this VERY nicely - can you PLEASE move this before we go on the roadtrip to the Dragon?"
Oh Well.
I gotta pull the seats again anyway to finish my rear footwell LED install. So I guess I'll try it on the driver's side for a bit...
Oh Well.
I gotta pull the seats again anyway to finish my rear footwell LED install. So I guess I'll try it on the driver's side for a bit...
Well, I've driven the 4.5 hrs to Las Vegas with the wife in the passenger seat, and vice versa--her driving and me in the passenger seat. No problem with the fire extinguisher being in the way. The wife puts her purse in the foot well behind the seats (rear seat area) or in front of her feet or to the side in the front foot well. Actually I'd call it more of a bag than a small purse. 
As for sharp edges, that certainly hasn't been an issue or concern for us--never even noticed.
The only problem that the extinguisher caused for me was the wife asking---uhm...are you afraid the car is going to catch on fire????
As for sharp edges, that certainly hasn't been an issue or concern for us--never even noticed.
The only problem that the extinguisher caused for me was the wife asking---uhm...are you afraid the car is going to catch on fire????
Well, took the wife for a spin for the first time with the BK mount installed. She makes a groan as she gets in the car. Then another when she realizes that she can't put her purse where she usually does (under her legs). Then she notices the sharp edge on the bottom of the safecraft extinguisher. Then she says "I'm going to ask this VERY nicely - can you PLEASE move this before we go on the roadtrip to the Dragon?"
Oh Well.
I gotta pull the seats again anyway to finish my rear footwell LED install. So I guess I'll try it on the driver's side for a bit...
Oh Well.
I gotta pull the seats again anyway to finish my rear footwell LED install. So I guess I'll try it on the driver's side for a bit...

Yeah, I got a bit of that, too. Just a deterrent to keep her from borrowing the MINI...
