
Interior/Exterior Just installed my OEM Mini LED DRLs


Thread Starter
|
2nd Gear
Joined: Mar 2014
Posts: 63
Likes: 0
From: Central FL area
Just installed my OEM Mini LED DRLs
I'd been looking to replace the bulbs in my DRL housings but I kept having issues with the computer telling me the bulb(s) were out. So I came across on a good deal on a set of the OEM Mini LED DRLs and I took the chance.
The instructions say typical install time is roughly 1.5 hours which is a joke. The job took me and my friend easily 4 to 5 hours. I have no idea how in the world this job can be done in 1.5 hours. The amusing part is that the instructions say to remove the front bumper which made my mouth drop. I cringed at the thought but thankfully we were about to install the lights w/o removing the bumper. The instructions also say to mount the lighting module between the power dist block and the strut tower which I didn't like. So we mounted it on top of the power box where it'll get some good airflow. It looks like it came there from the factory.
The lighting pics don't do them justice but they are awesome. They look 1000 times better than the OEM DRLs that came on my '13 MCS. This is how these cars should come from the factory.
Last edited by miniforozzie; Apr 27, 2014 at 05:18 PM.

Thread Starter
|
2nd Gear
Joined: Mar 2014
Posts: 63
Likes: 0
From: Central FL area
the hardest part was installing the light on the driver's side. the instructions said to remove the bumper which like I said above, the thought of doing that made me cringe. so we were able to loosen the windshield washer fluid tank which gave us enough room to remove the two lower screws that hold the light in place.
the other time was spent routing the cables and such to where everything looked like it came from the factory. this is why my install times are usually longer than other peoples' times. I go nice and slow so I make sure it's done perfectly the first time.
the other time was spent routing the cables and such to where everything looked like it came from the factory. this is why my install times are usually longer than other peoples' times. I go nice and slow so I make sure it's done perfectly the first time.

Neutral
Joined: Apr 2014
Posts: 3
Likes: 0
From: Buxton Debyshire UK
There is a step by step posting on one of the UK sites. Full set of pictures.
The 1.5 hours s a joke, two dealers say that real time in the workshop is closer to 3 hours.
Will try to find the site link and post later.
ps the led lights on the 3thd gen look really good.
The 1.5 hours s a joke, two dealers say that real time in the workshop is closer to 3 hours.
Will try to find the site link and post later.
ps the led lights on the 3thd gen look really good.
Neutral
Joined: Apr 2014
Posts: 3
Likes: 0
From: Buxton Debyshire UK
This is a link to UK site for DIY fitting of LED daytime lights.
http://www.totalmini.com/forum/18-20...ing-guide.html
http://www.totalmini.com/forum/18-20...ing-guide.html


I really like your pics.  Those lights are bright. I think as long as you don't have a strut tower brace I think your module relocation works.
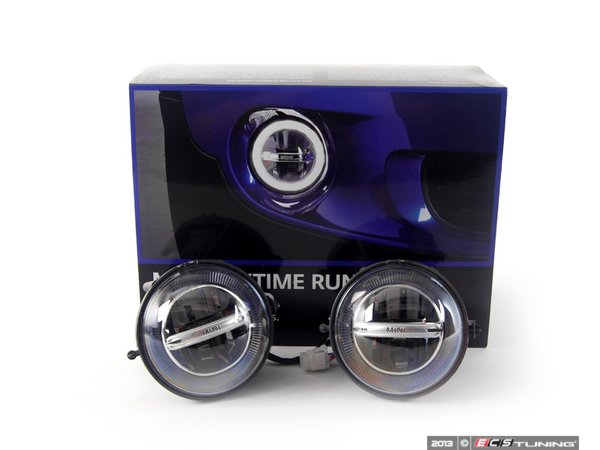
  They come in a nice box also as a kit.
We have the kits here in stock currently:
http://www.ecstuning.com/Search/SiteSearch/63122338554/
Those lights are bright. I think as long as you don't have a strut tower brace I think your module relocation works. They come in a nice box also as a kit. We have the kits here in stock currently:
http://www.ecstuning.com/Search/SiteSearch/63122338554/
__________________

MINI Guru/ MINI Owner Since 2004 | NEW Lifetime Part Replacement | Local Pickup
Milltek | Genuine MINI | Forge Motorsport | NM Engineering | ECS Performance | M7 Speed
Customer Service Hours: 8am-8pm EST|Sales Team Hours: 8am-11pm | SAT 10am-7pm 800.924.5172
MINI Guru/ MINI Owner Since 2004 | NEW Lifetime Part Replacement | Local Pickup
Milltek | Genuine MINI | Forge Motorsport | NM Engineering | ECS Performance | M7 Speed
Customer Service Hours: 8am-8pm EST|Sales Team Hours: 8am-11pm | SAT 10am-7pm 800.924.5172

Neutral
Joined: Apr 2014
Posts: 3
Likes: 0
the hardest part was installing the light on the driver's side. the instructions said to remove the bumper which like I said above, the thought of doing that made me cringe. so we were able to loosen the windshield washer fluid tank which gave us enough room to remove the two lower screws that hold the light in place.
the other time was spent routing the cables and such to where everything looked like it came from the factory. this is why my install times are usually longer than other peoples' times. I go nice and slow so I make sure it's done perfectly the first time.
the other time was spent routing the cables and such to where everything looked like it came from the factory. this is why my install times are usually longer than other peoples' times. I go nice and slow so I make sure it's done perfectly the first time.
Trending Topics
Thread Starter
|
2nd Gear
Joined: Mar 2014
Posts: 63
Likes: 0
From: Central FL area
I removed both headlights and the front part of the inner fender liner. You should have enough room on the passenger side with just doing those two things. The driver's side has the windshield water tank that has to be loosened from the bottom and from the top. This will give u enough room to access the two screws on the bottom of the driving lights. There's also one screw on the top that's easy to get to. Both lights should come out w/o taking anything else apart.
Thread Starter
|
2nd Gear
Joined: Mar 2014
Posts: 63
Likes: 0
From: Central FL area
that should do the trick. you only want to take the bumper off as a desperate last resort. why in the world they recommend removing the bumper boggles my mind.

Thread
Thread Starter
Forum
Replies
Last Post
igzekyativ
MINIs & Minis for Sale
34
Jul 16, 2020 12:54 PM
1chaos52
F55/F56 :: Hatch Talk (2014+)
4
Aug 24, 2015 01:28 PM