
Interior/Exterior Post your driving light kits


6th Gear

Joined: Jan 2013
Posts: 2,257
Likes: 15
From: Dover, NH
Finnally got my lights on this weekend! not my original plan, and i couldnt hide these badboys behind the grill they are too big haha.
im super pleased on the way they turned out, granted it took 10 hours to complete, but i wanted it done the right way. i also had to run to the homedepot and get a few supplies. Took about 5 hours to mount, wire and test basics, understand what was going on and run to the depot. the next 5 hours was finalizing the setup and figuring out what went wrong, come to find out both the inline fuses that came with the kit that sent power to the switches were bad, but we have checked all the other wires, the switches, lights, and the relays..... this was the most frustrating part! glad its done tho, and all the wiring is clean, mounted the switches right next to the sunroof switch. 2 switches: outers and inners
mounting kit: none, just drilled holes right into the plastic front lip

6th Gear
Joined: Apr 2013
Posts: 1,894
Likes: 8
From: Philly PA
In the process of wiring mine up. Anyone know a good wire to tie into on the r55/56 LCI cars with Xenons for the high beam?
Looking at wire diagrams it's hard to make sense of what's going on out at the headlight in terms of high/low beam versus leveling motors..
I'd rather tie I to the footwell module in the driver's kick panel.. (Pin 4? 41?)
Looking at wire diagrams it's hard to make sense of what's going on out at the headlight in terms of high/low beam versus leveling motors..
I'd rather tie I to the footwell module in the driver's kick panel.. (Pin 4? 41?)


6th Gear
Joined: Feb 2007
Posts: 1,521
Likes: 17
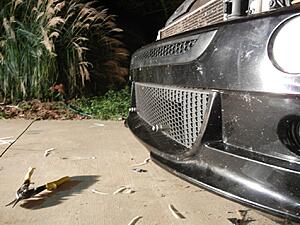
Here my 2nd rendition of behind the grille driving lights. Need to try to raise them a touch but they won't come up as far as they really need too due to the bumper brace is right there and what these are bolted too. Went with green tint to be different but have other colors to maybe swap out down the road..

4th Gear
Joined: Jun 2013
Posts: 473
Likes: 2
Got mine off eBay shipped from the UK $160AUS + $5 for ebay LEDs ran them off the park lights use them as LED day time running lights, park lights + driving lights. At night they light up with xenon's, sorry no pictures but for $160 I'm happy.
Kit came with a template to cut the front grill along with lights, brackets wire as well as a relay and switch which I didn't use.
Kit came with a template to cut the front grill along with lights, brackets wire as well as a relay and switch which I didn't use.

5th Gear
Joined: Aug 2008
Posts: 1,100
Likes: 13
From: Inman, SC
cross post of an older post in my build thread over in the drivetrain section:
I HAD an alta bar, but with my putting in a large-ish A2W heat exchanger and KEEPING my A/C, I no longer had room for the alta bar and the way it mounted, so to the drawing board I went and here are the results!
in summary
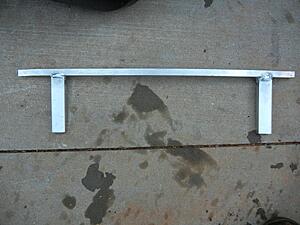
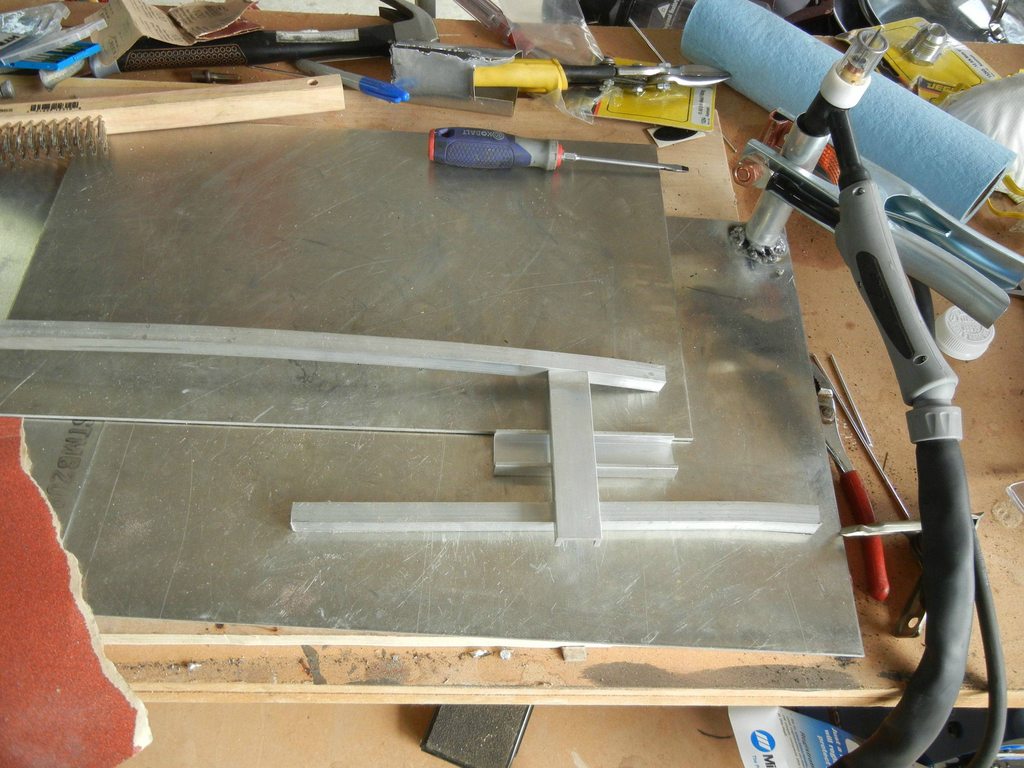
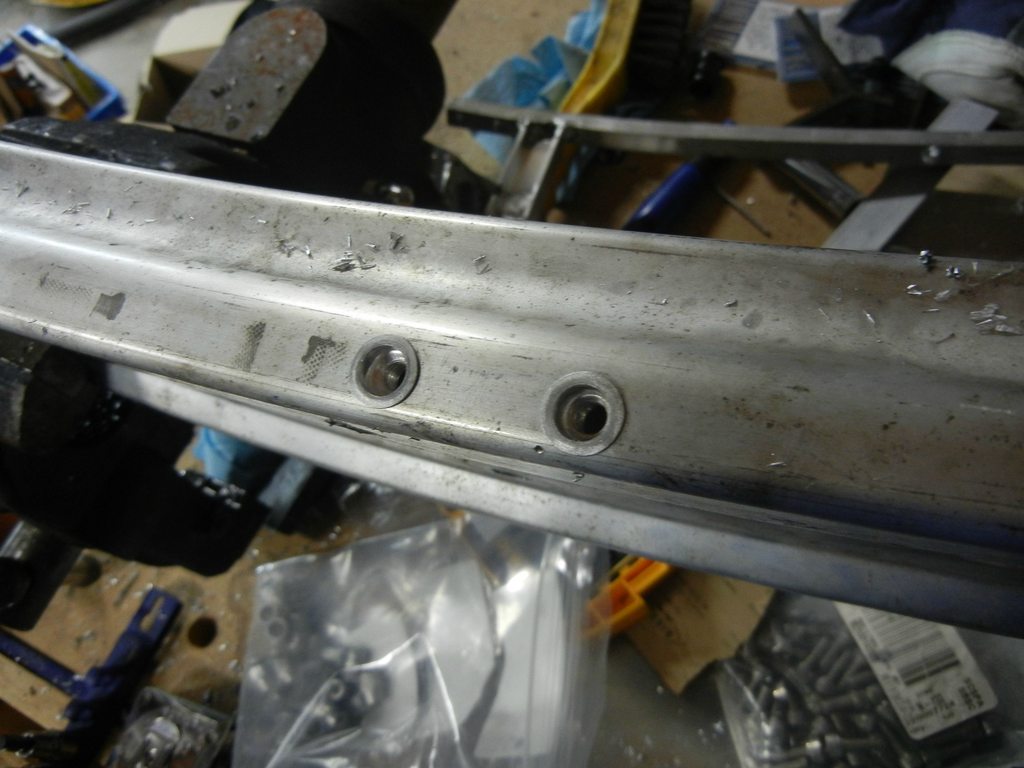
bent 1/2" square stock to bumper profile. This will mount to underside of bumper using rivnut inserts into the bumper, and M6 bolts.
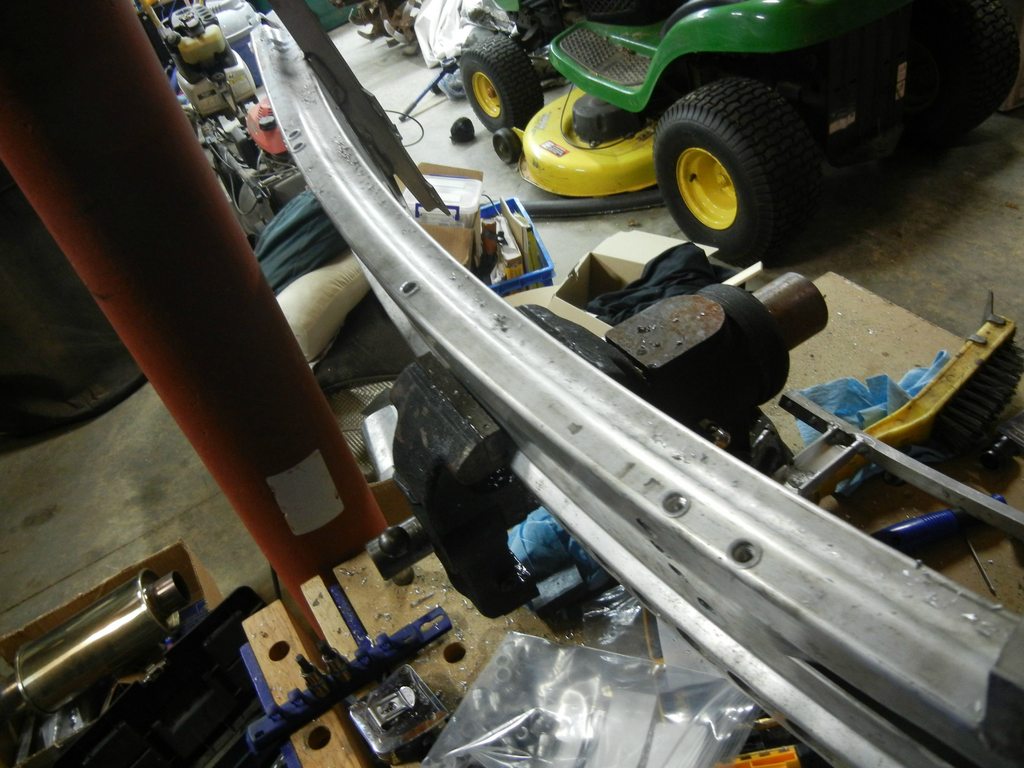
Using 1"x.5"x.125" channel for the "drops" as they are rigid in both directions.
here is one side "jigged" up before welding

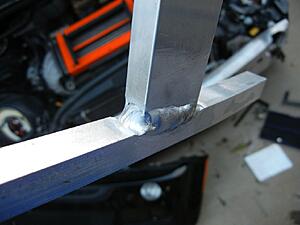
welded (this is when I was quite new to aluminum)
Rough shape of the inside portion of the mounting bracket
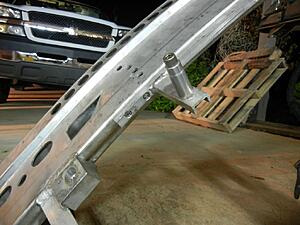
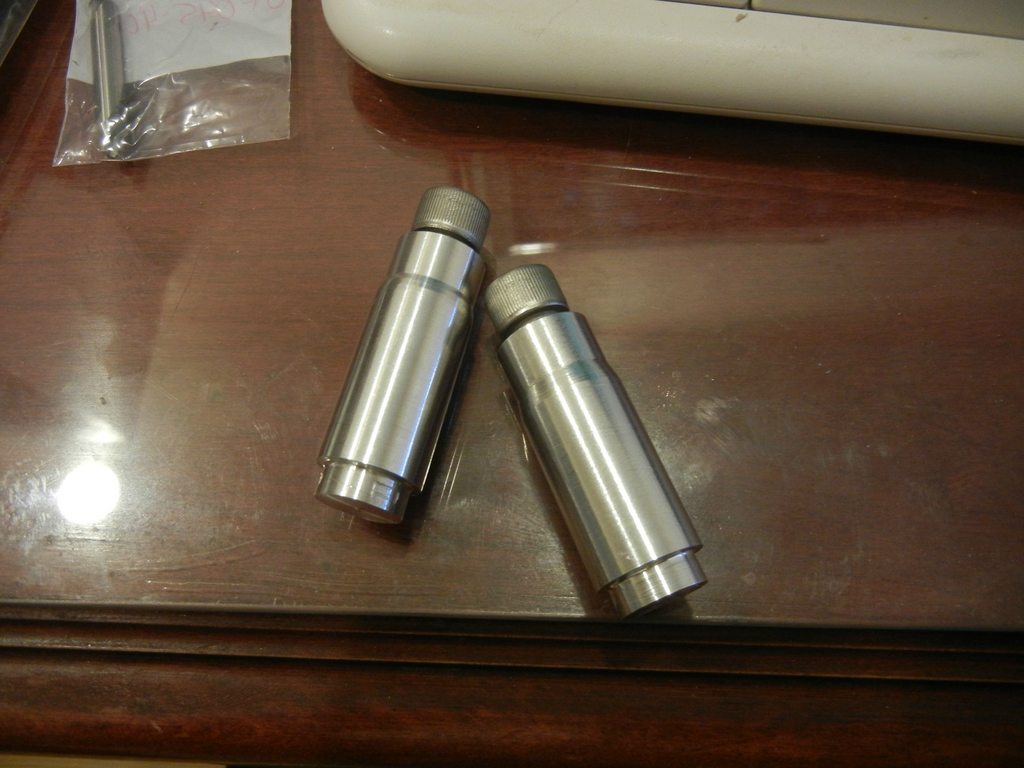
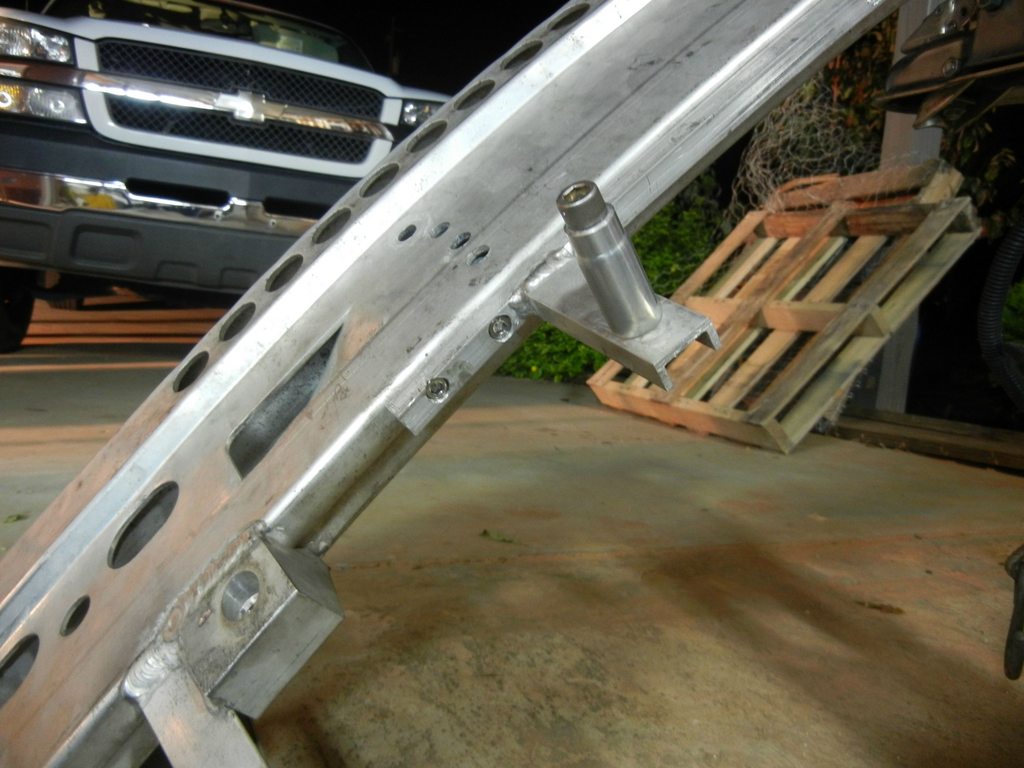
turned some mounting points on the lathe out of 6061

welded them on from the back side

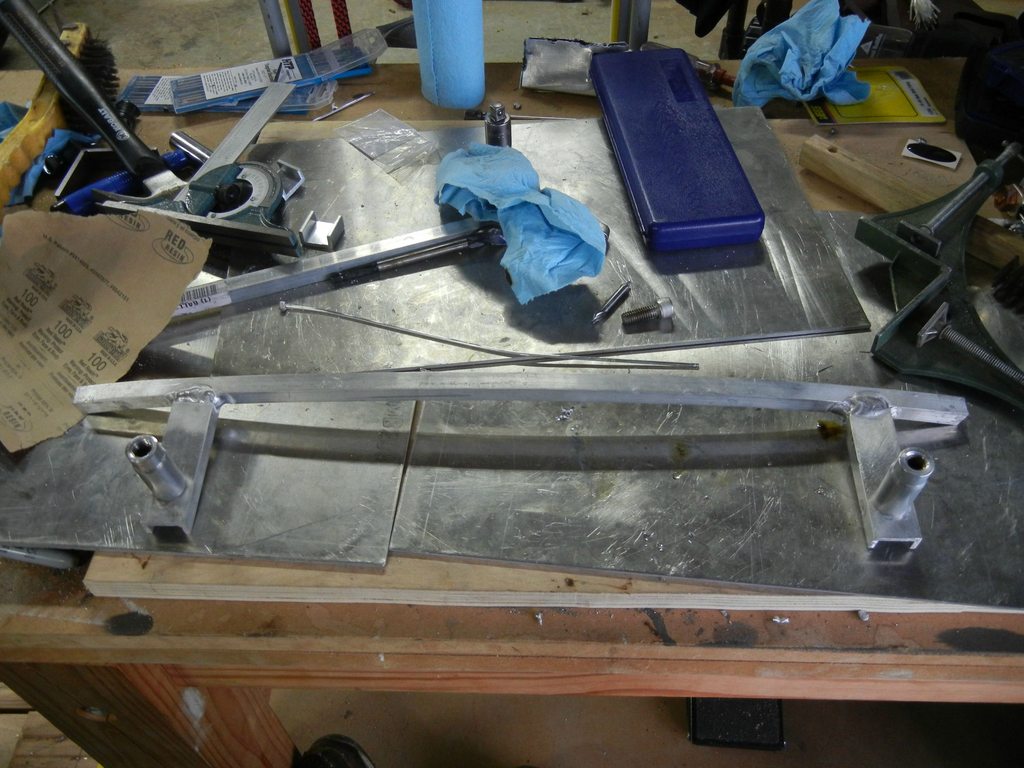
And then to mount it to the bumper I used rivnut inserts to put them into the bottom of the bumper (not the back and using bolts like is common.
Rivnuts are simply threaded inserts that are installed much like a rivet. Drill a hole through thin (ish) metal, put one in, squeese, the back side expands, and then viola! you have a threaded mounting point through a thin walled base material!
before use:

close up of install :

bumper

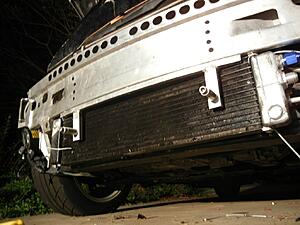
I then drilled holes for clearance and counter sink into the bracket I made, and bolted her onto the bumper!

Lines up nicely!
installed with the w2A exchanger mocked up.
sticking through the grill
And with the exterior mounting bar bolted on

Hope you all enjoyed! I have lights now mounted to the outside bar, but the car is currently apart for the build, so no newer pictures than these.
hope you enjoyed!
the lights are 6" PIAA lamps though with a 55watt HID kit dropped in.
Not to ever be used on the street if any traffic is around, but they make for a nice 180� (almost) of light coverage on those mountain twisties at night!
I HAD an alta bar, but with my putting in a large-ish A2W heat exchanger and KEEPING my A/C, I no longer had room for the alta bar and the way it mounted, so to the drawing board I went and here are the results!
in summary
bent 1/2" square stock to bumper profile. This will mount to underside of bumper using rivnut inserts into the bumper, and M6 bolts.
Using 1"x.5"x.125" channel for the "drops" as they are rigid in both directions.
here is one side "jigged" up before welding
welded (this is when I was quite new to aluminum)

Rough shape of the inside portion of the mounting bracket

turned some mounting points on the lathe out of 6061
welded them on from the back side
And then to mount it to the bumper I used rivnut inserts to put them into the bottom of the bumper (not the back and using bolts like is common.
Rivnuts are simply threaded inserts that are installed much like a rivet. Drill a hole through thin (ish) metal, put one in, squeese, the back side expands, and then viola! you have a threaded mounting point through a thin walled base material!
before use:

close up of install :
bumper
I then drilled holes for clearance and counter sink into the bracket I made, and bolted her onto the bumper!

Lines up nicely!
installed with the w2A exchanger mocked up.

sticking through the grill

And with the exterior mounting bar bolted on

Hope you all enjoyed! I have lights now mounted to the outside bar, but the car is currently apart for the build, so no newer pictures than these.
hope you enjoyed!
the lights are 6" PIAA lamps though with a 55watt HID kit dropped in.
Not to ever be used on the street if any traffic is around, but they make for a nice 180� (almost) of light coverage on those mountain twisties at night!

Thread
Thread Starter
Forum
Replies
Last Post
igzekyativ
MINIs & Minis for Sale
34
Jul 16, 2020 12:54 PM
Wohnson89
R50/R53 :: Hatch Talk (2002-2006)
4
Jun 10, 2020 04:53 AM
igzekyativ
MINIs & Minis for Sale
28
Dec 23, 2015 10:36 AM
ryGuyMCS
MINI Parts for Sale
2
Oct 20, 2015 02:24 PM