
Interior/Exterior DIY R50/R53 Mood Lighting!


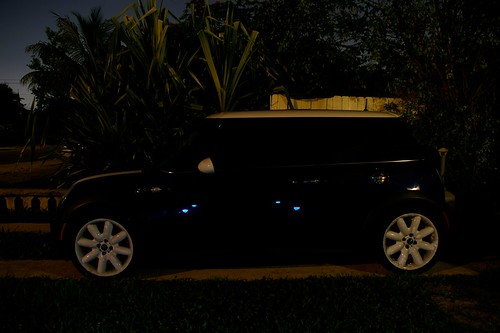
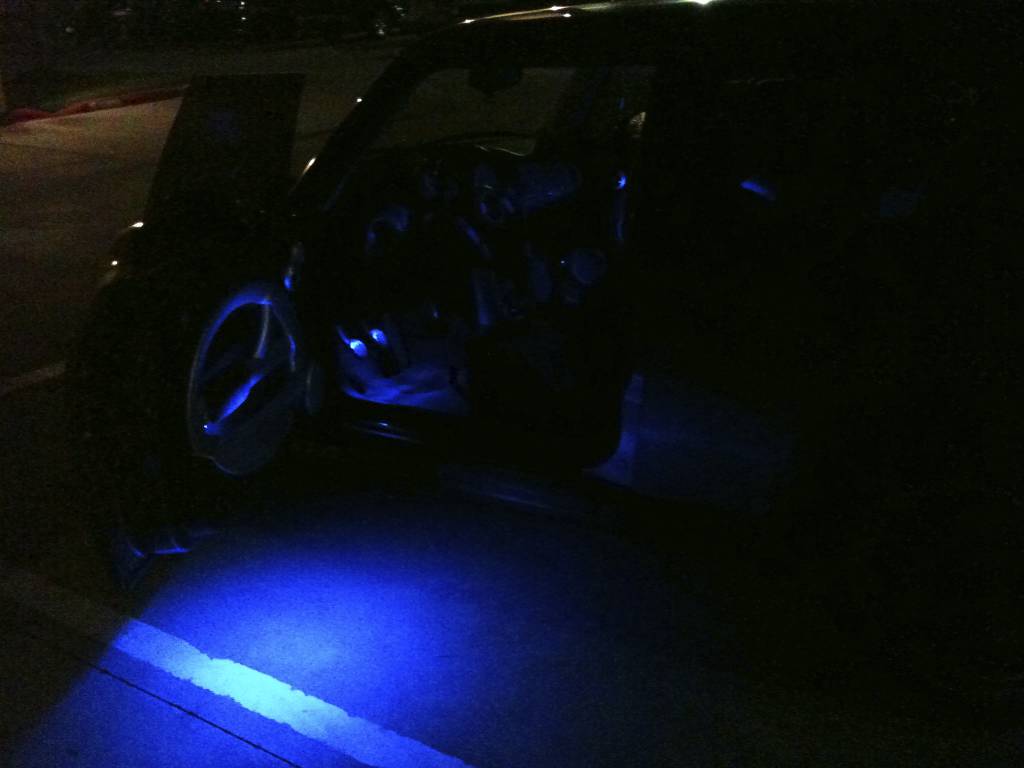
Here's some more LED's that we added last night. We put on his "wheel well" lights...
Ignore the horrible blur...I didn't have a tripod on me.
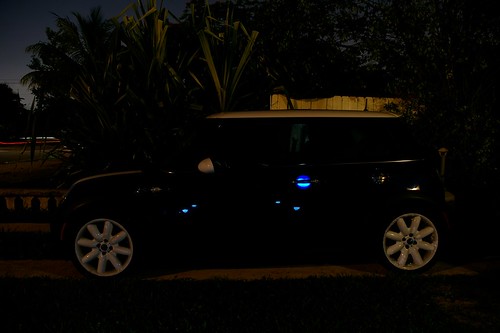
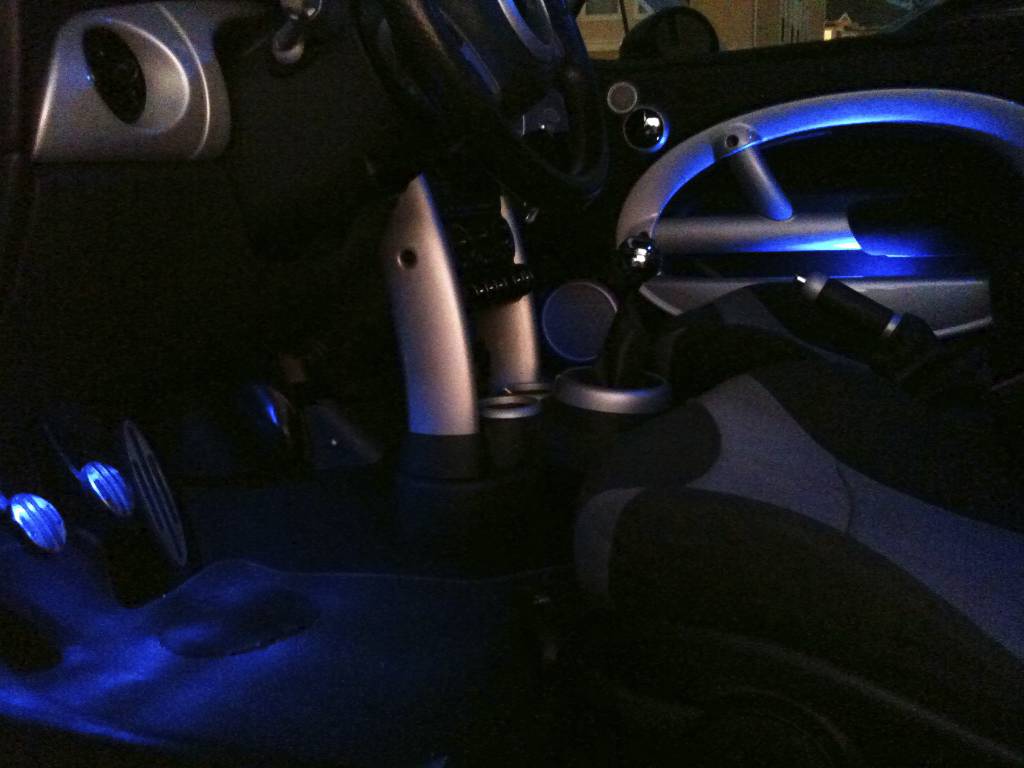
Here's a better picture of the vents all lit up


Ignore the horrible blur...I didn't have a tripod on me.
Here's a better picture of the vents all lit up


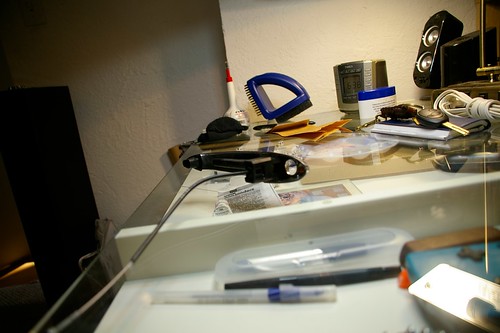
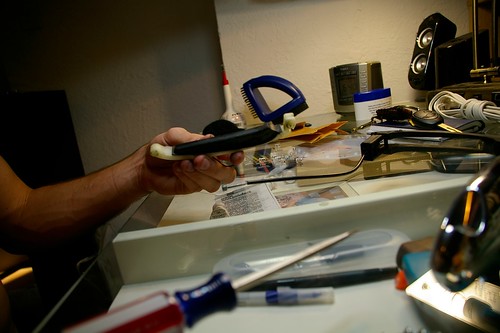
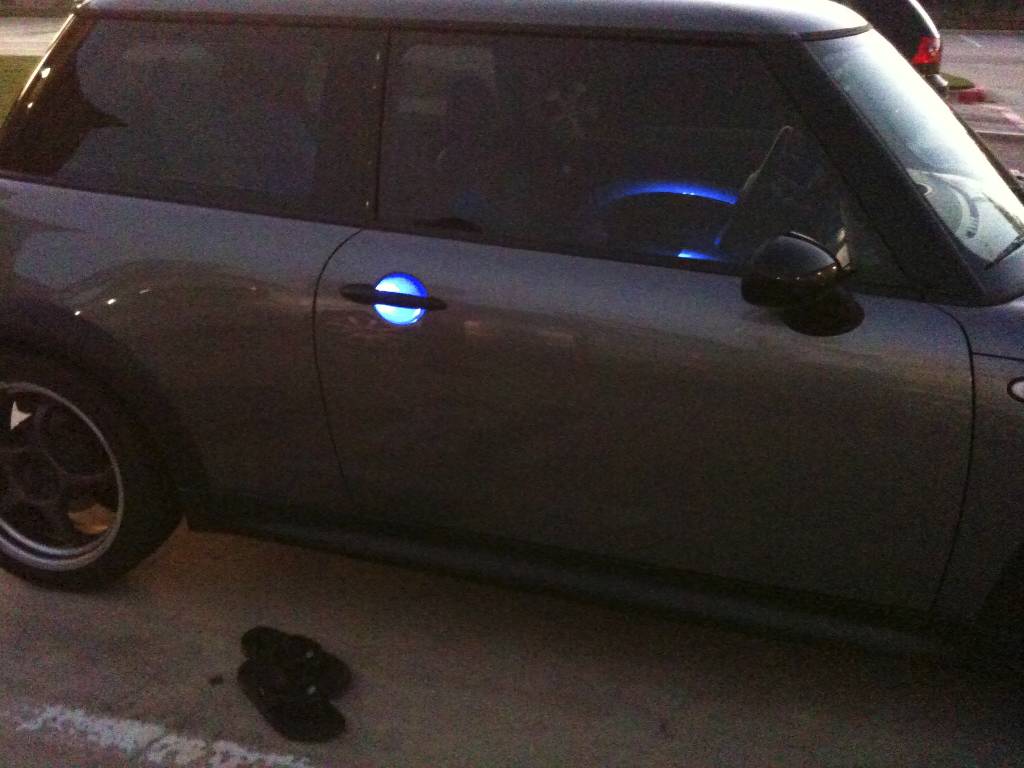
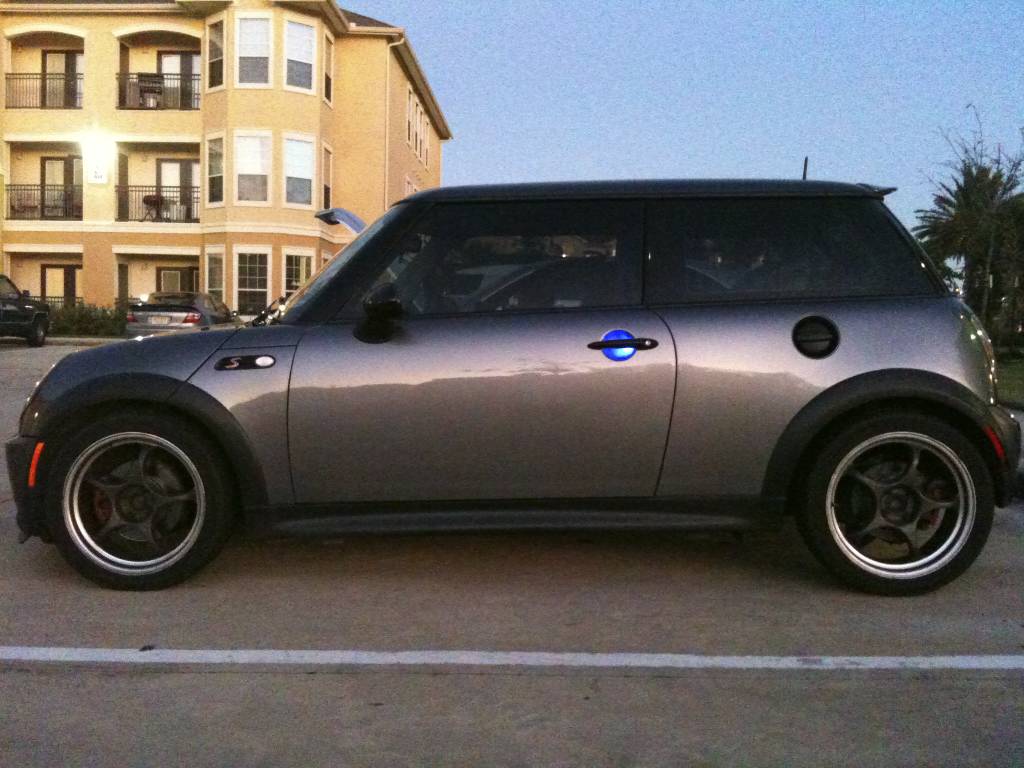
Well, I just finished doing one door handle on my MINI, and I will be doing the other tomorrow morning.
I got my beginning info HERE
I posted the same info on both threads...
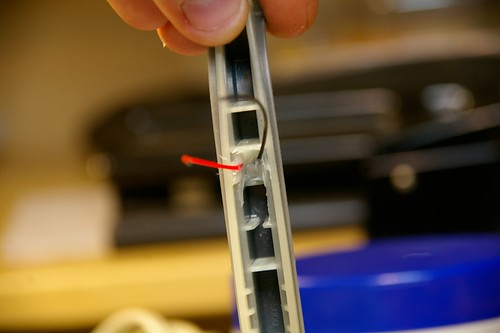
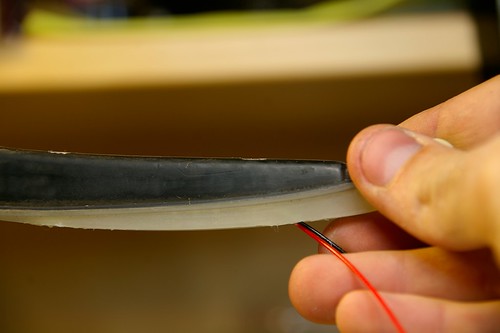
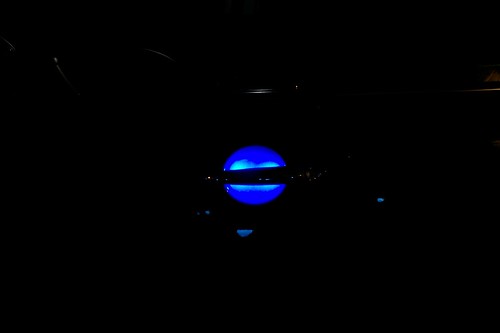
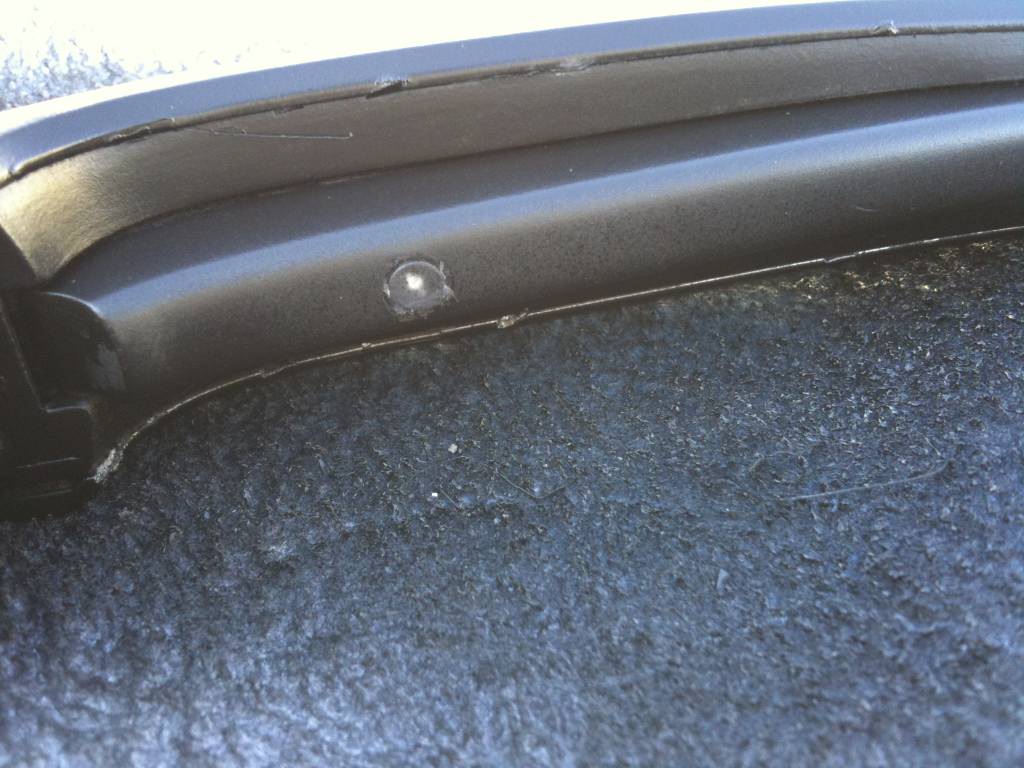
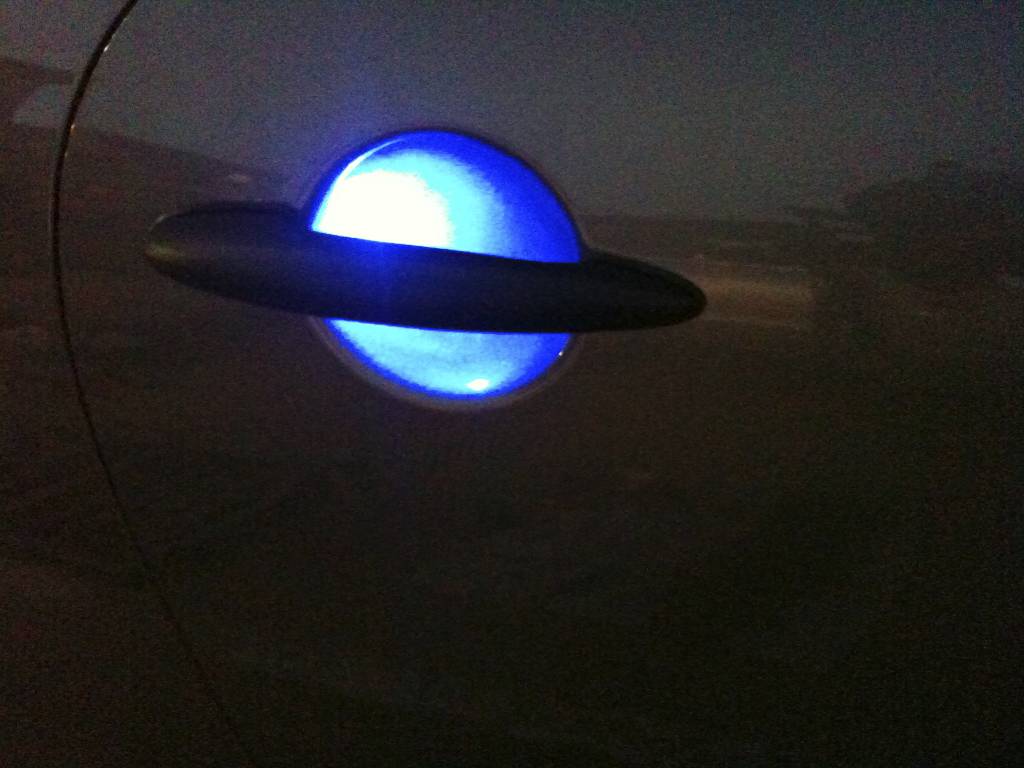
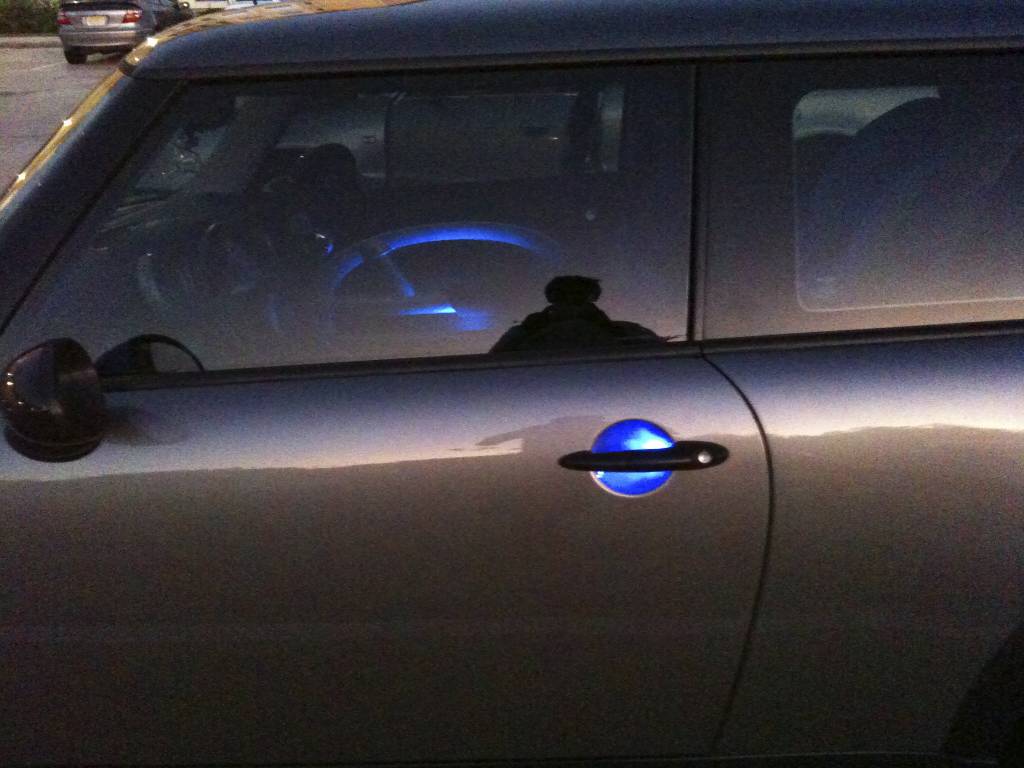
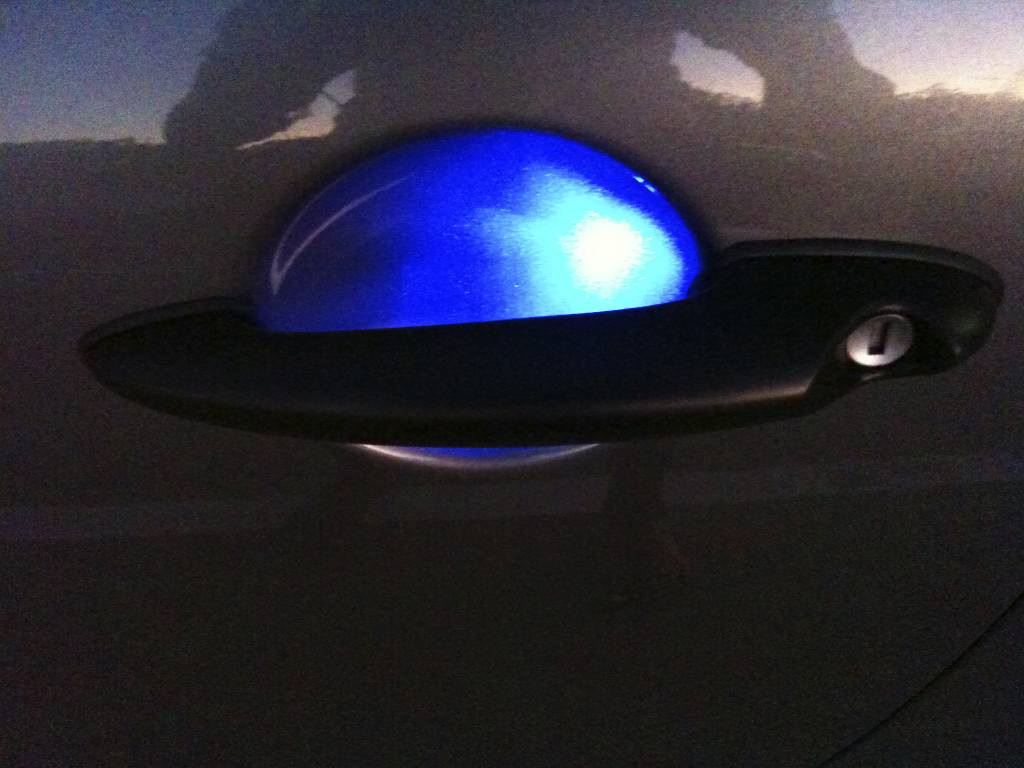
Here is the handle:
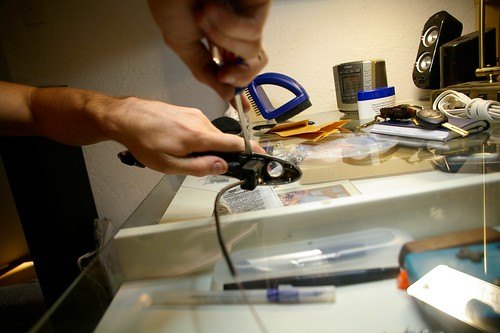
To get to the inside, you need to pry off the chrome (in my case) part. Just use a flat head and work your way around. It has a few clips along with some glue:
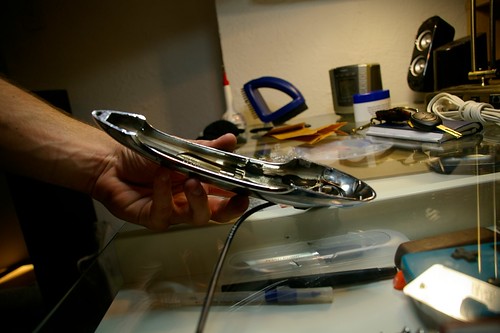
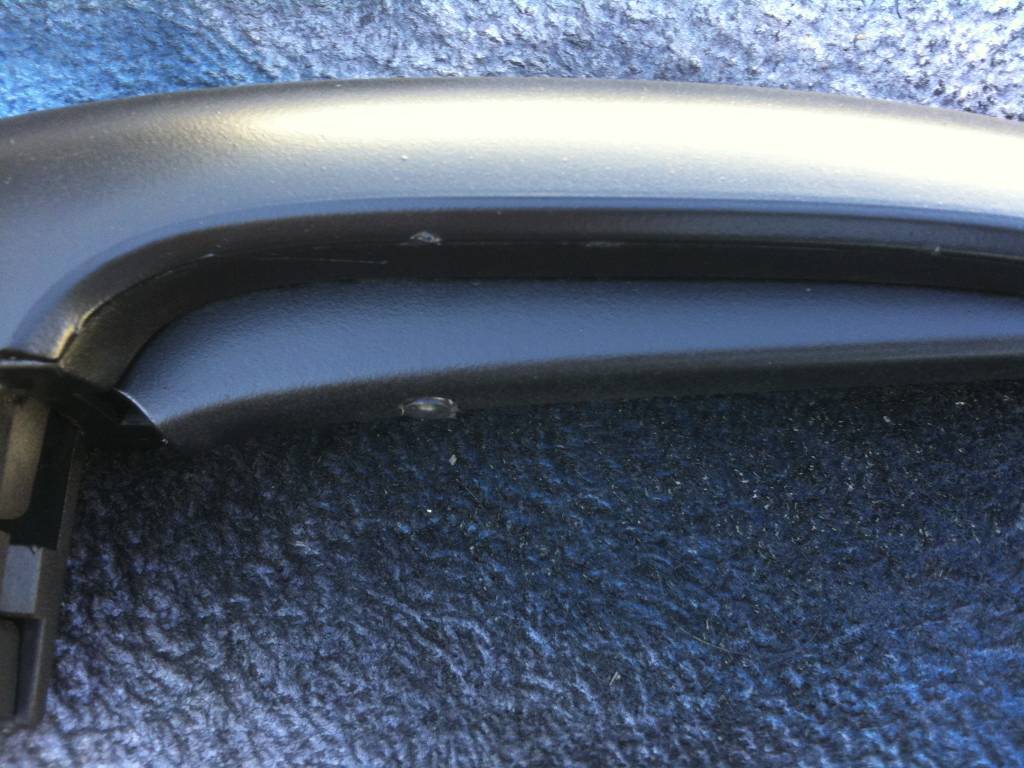
Once all the glue is broken off you can simply pull it apart with your hands:

Chrome. A good time to black out if wanted.
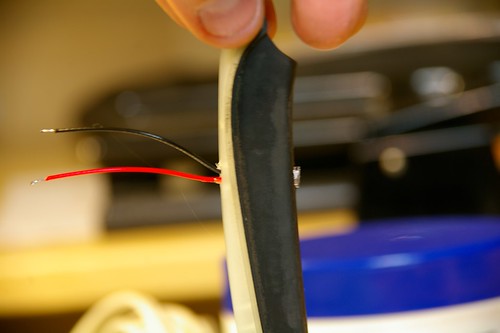
Then you need to pull the grab latch out of the black housing. Its very easy. Just pull and twist.
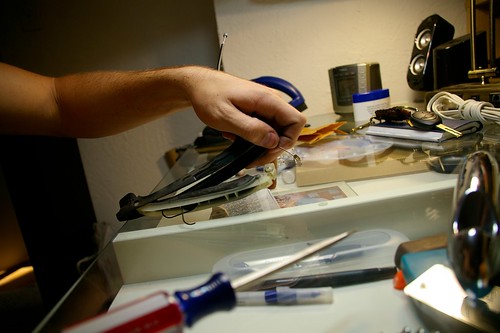
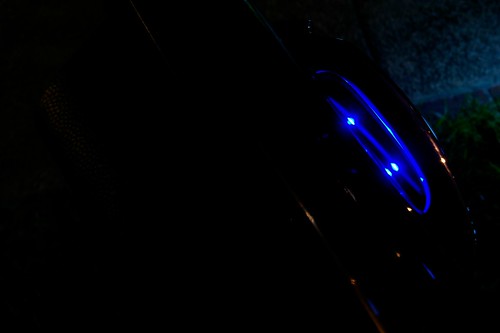
Here is what that looks like:
Be careful not to lose the spring inside, that give the whole handle its resistance.
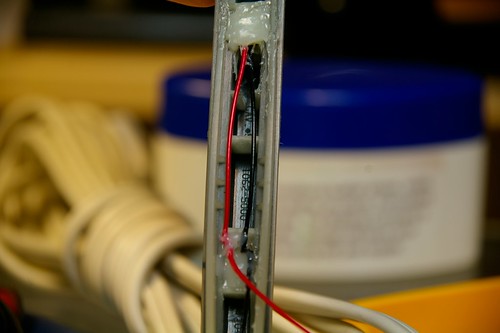
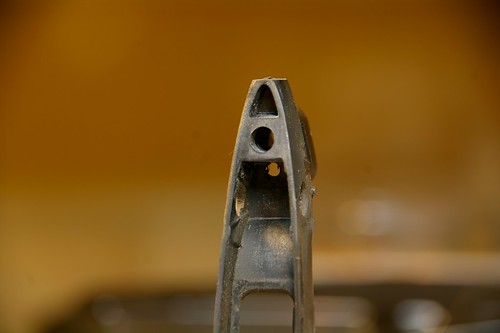
Inside:

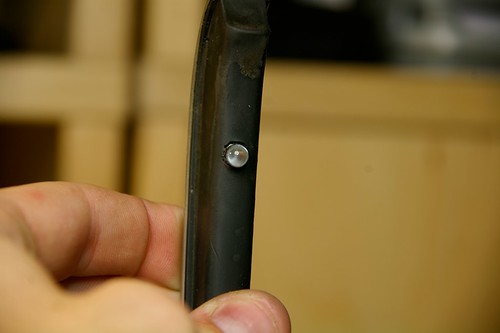
I drilled my hole using the tiniest drill bit I could, to give it a snug fit. This is a 5mm LED in the grab latch.
And from the inside:

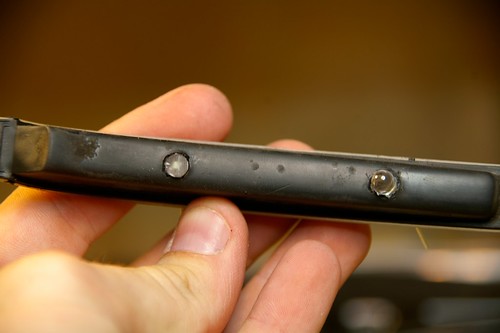
I used two LEDs. Plenty of light. Any more would be over kill!
This is one of them partially ground down.

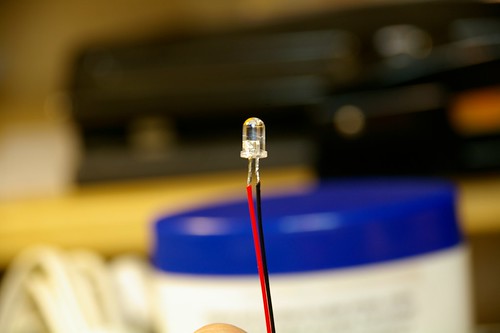
Soldering my leads on to my LEDs.
Glued in from the inside! I used 5 minute plastic epoxy, its OKay. Not great.
Its getting closer!
Both LEDs soldered and glued in place.
I drilled a TINY hole in the mounting bracket, I used telephone wire so everything is smaller scale.
Both ground flush with the grab handle.

SEE!!!
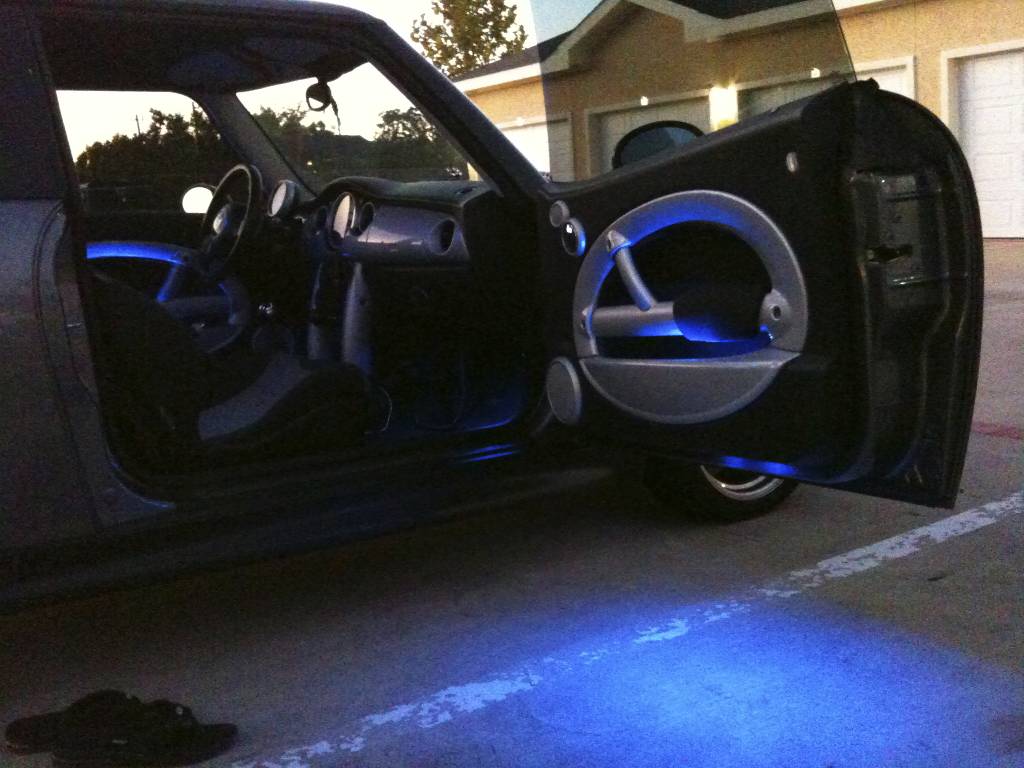
Handle all put back together...
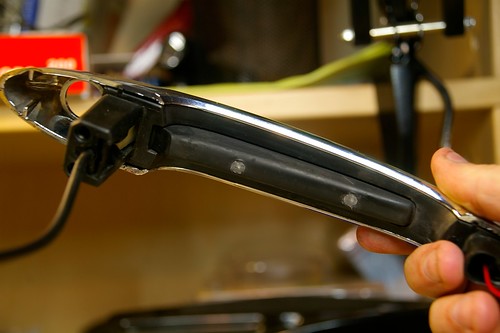
And now you just need to reassemble and wire. There are good directions above for that. If you have an 05+ you can just tap into the puddle lights. (LUCKY)
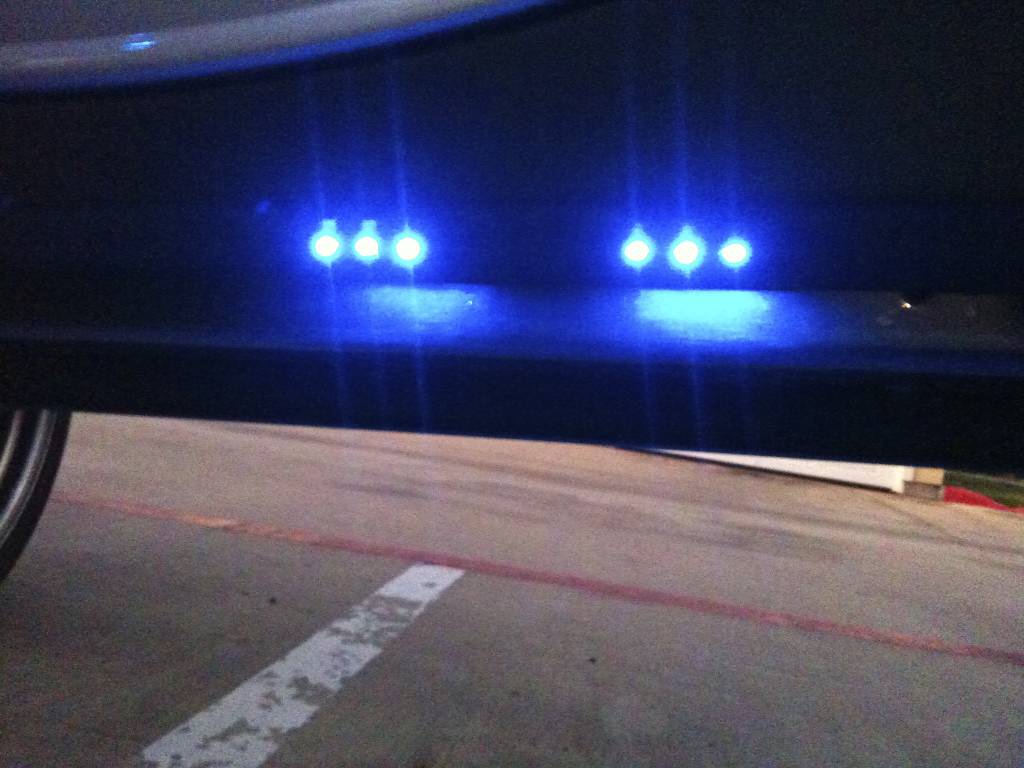
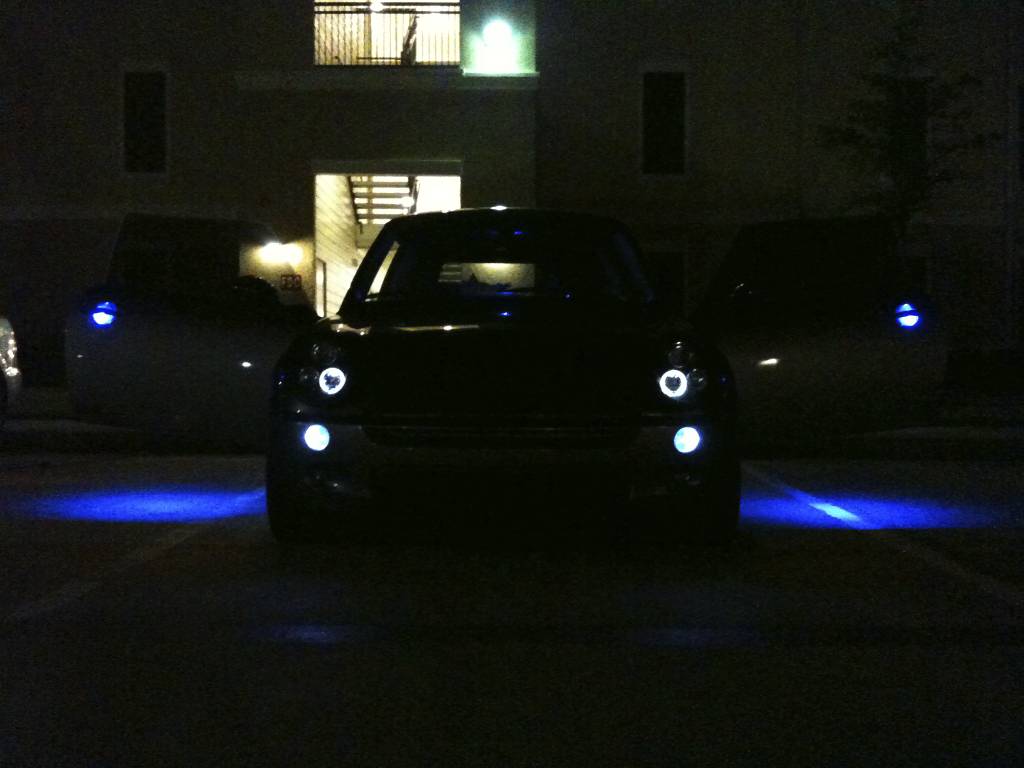
Finale
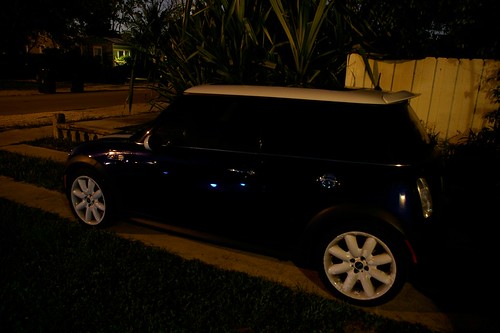
Off
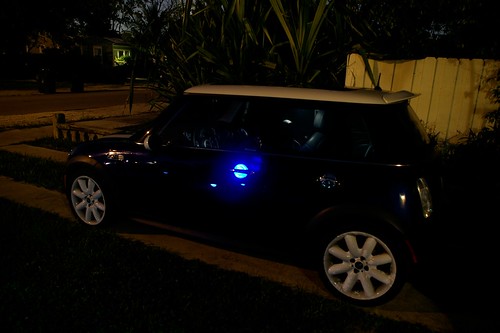
ON (this is brighter then they look, the shutter was open for 20 seconds.
Off
On (more true)
Some other pics of it:

Thanks for reading!!
Addison
I got my beginning info HERE
I posted the same info on both threads...
Here is the handle:
To get to the inside, you need to pry off the chrome (in my case) part. Just use a flat head and work your way around. It has a few clips along with some glue:
Once all the glue is broken off you can simply pull it apart with your hands:
Chrome. A good time to black out if wanted.
Then you need to pull the grab latch out of the black housing. Its very easy. Just pull and twist.
Here is what that looks like:
Be careful not to lose the spring inside, that give the whole handle its resistance.
Inside:
I drilled my hole using the tiniest drill bit I could, to give it a snug fit. This is a 5mm LED in the grab latch.
And from the inside:
I used two LEDs. Plenty of light. Any more would be over kill!
This is one of them partially ground down.
Soldering my leads on to my LEDs.
Glued in from the inside! I used 5 minute plastic epoxy, its OKay. Not great.
Its getting closer!
Both LEDs soldered and glued in place.
I drilled a TINY hole in the mounting bracket, I used telephone wire so everything is smaller scale.
Both ground flush with the grab handle.
SEE!!!
Handle all put back together...
And now you just need to reassemble and wire. There are good directions above for that. If you have an 05+ you can just tap into the puddle lights. (LUCKY)
Finale
Off
ON (this is brighter then they look, the shutter was open for 20 seconds.
Off
On (more true)
Some other pics of it:
Thanks for reading!!
Addison


Where did you draw the power for the lights under the dash? I am doing that to my Brothers xb soon and have no idea where to get the power.

Thread Starter
|
3rd Gear
Joined: Dec 2008
Posts: 197
Likes: 0
From: Greenville, SC
Haven't checked back in awhile, (summer school), but I'm glad everybody started doing their own.
I am ready to start doing some more mods now that I'm finished with class, so I think I'm going to order a few more pre wired LED's to go in the doors. I also still need to order another cathode to replace the messed up one in the passenger footwell.
I'll post pictures when I make any progress.
More lights everyone, more lights!

OK, more seriously: do the LEDs you added do the same fade on/off effect as the stock ones? I would imagine (hope) they would, since it looks like they're just being fed power pulses from an electronic dimmer.

3rd Gear
Joined: Dec 2008
Posts: 186
Likes: 0
From: Monterrey - Mexico

Sweet! Now I just need to find a source for some orange LEDs... the blue looks very cool but I want everything to match 

Neutral
Joined: Apr 2008
Posts: 6
Likes: 0
Quick tip... and question... First of all, I highly recommend getting some spray rubber coating in there while you've got those doors open and exposed. You'll get a big improvement for very minimal cost, in audio quality and muffling road noise.
Question... I've got an 08 MCS and am on a mission to take my mood lighting to another level. However, it's all fiber optics. Basically, I want to extend the fiber optics into the dash board. One of my obstacles is that the fiber optics is not really that bright. Anyone have any tips?
Question... I've got an 08 MCS and am on a mission to take my mood lighting to another level. However, it's all fiber optics. Basically, I want to extend the fiber optics into the dash board. One of my obstacles is that the fiber optics is not really that bright.
Anyone have any tips?
Sorry for the really late response. We pulled apart the whole dash, ran a in-line fused wire from the battery through the firewall, and under the dash. From there it branches out to the switches and lights. Do put an inline fuse in. He bought a set of underbodies, and the fuse was in the wrong spot...It about lit the whole car on fire. The coating completely melted off, and you could barely see inside the car... it wasn't a fun day. Since then, he's been running trouble free
3rd Gear
Joined: Dec 2008
Posts: 186
Likes: 0
From: Monterrey - Mexico
i just bought some pre-wired leds from ebay(waiting for them to arrive), i'll try to illuminate all the mini's floor i'll take pics
i'll take pics
Sorry for the really late response. We pulled apart the whole dash, ran a in-line fused wire from the battery through the firewall, and under the dash. From there it branches out to the switches and lights. Do put an inline fuse in. He bought a set of underbodies, and the fuse was in the wrong spot...It about lit the whole car on fire. The coating completely melted off, and you could barely see inside the car... it wasn't a fun day. Since then, he's been running trouble free
On a similar note, I have a bunch of prewired LED's that I am going to be playing with next week as soon as it stops raining. Think interior door handle, exterior mirrors, and reflector in the door.


So, I want to accomplish this on my '02 R53. Can I do it using the link to the other thread... The Original Handle Lighting Mod. Apparently this was done on an 03 R53....
Any tips from you guys would be appreciated.
I did. I don't have pictures, though. Basically, I used the Oznium SuperFlux LED and drilled a hole into the light cover. Dropped the LED into the hole, used silicone around it, and then used one of the festoon connectors to bring power from the stock bulb holder to the LED. It's pretty simple, and amazingly bright. If you need more help, let me know!
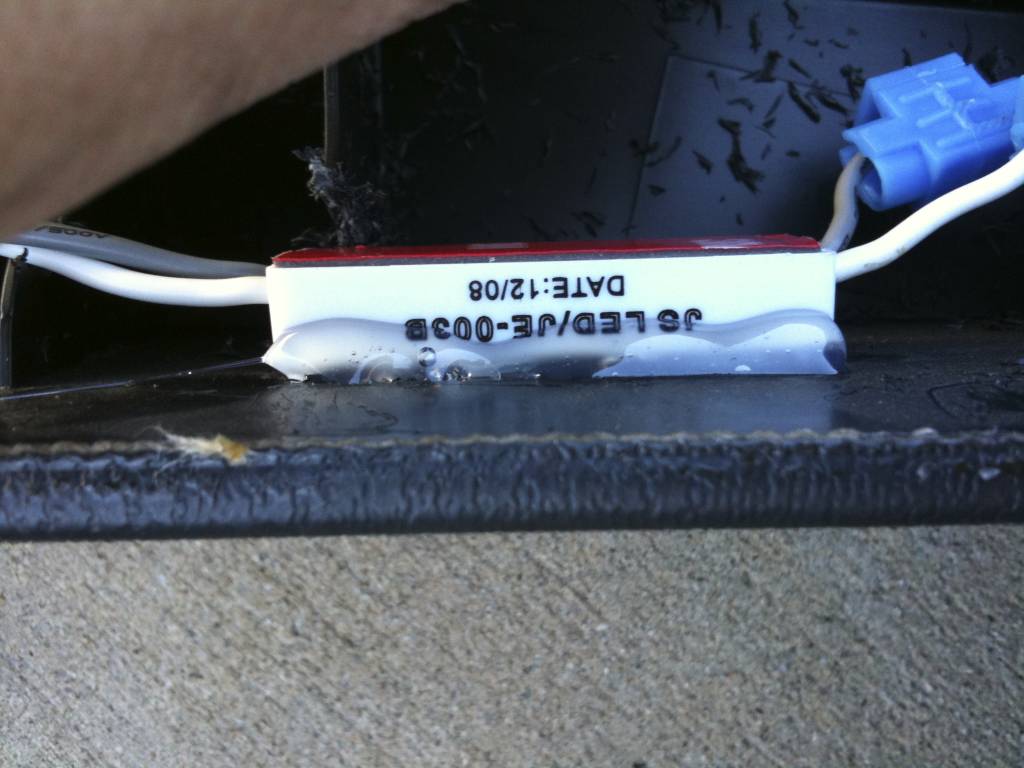
Here's a picture of the festoon connector
Here's a picture of their ultra thin LED dome light (1" x 1.5") in my FX


Here's a picture of the festoon connector
Here's a picture of their ultra thin LED dome light (1" x 1.5") in my FX
I've done a lot of "mood" lighting as well,
Waterfall Lighting from the clock I made, looks legit too!
https://www.northamericanmotoring.co...all-light.html
I couldn't seem to fish the wires through the handle so I ended up taking them apart. I sanded them down and them hot glued them in flush!
Also added Puddle Lights and a LED for inside the door!
Hot Glued!

Also Flush!
And the final product!
Passenger:
Puddle Lights!
Driver:

Just a clean picture!
I need to get some better pictures with my real camera, it's A LOT brighter in person! Especially since I have changed the gauges!
Waterfall Lighting from the clock I made, looks legit too!
https://www.northamericanmotoring.co...all-light.html
I couldn't seem to fish the wires through the handle so I ended up taking them apart. I sanded them down and them hot glued them in flush!
Also added Puddle Lights and a LED for inside the door!
Hot Glued!
Also Flush!
And the final product!
Passenger:
Puddle Lights!
Driver:
Just a clean picture!
I need to get some better pictures with my real camera, it's A LOT brighter in person! Especially since I have changed the gauges!

2nd Gear
Joined: Aug 2008
Posts: 63
Likes: 1
From: Istanbul, Turkey
@ GumbyLara:
The picture quality is horrible but the end result is quite nice.
You could improve the interior part of the door lighting for a better effect though, just my two cents...
@skillet:
The festoon connectors would also work in the licence plate bulbs. That's nice work you have done there...
The picture quality is horrible
but the end result is quite nice. You could improve the interior part of the door lighting for a better effect though, just my two cents...
@skillet:
The festoon connectors would also work in the licence plate bulbs. That's nice work you have done there...
1st Gear
Joined: Jan 2010
Posts: 15
Likes: 0
From: Gainesville, FL
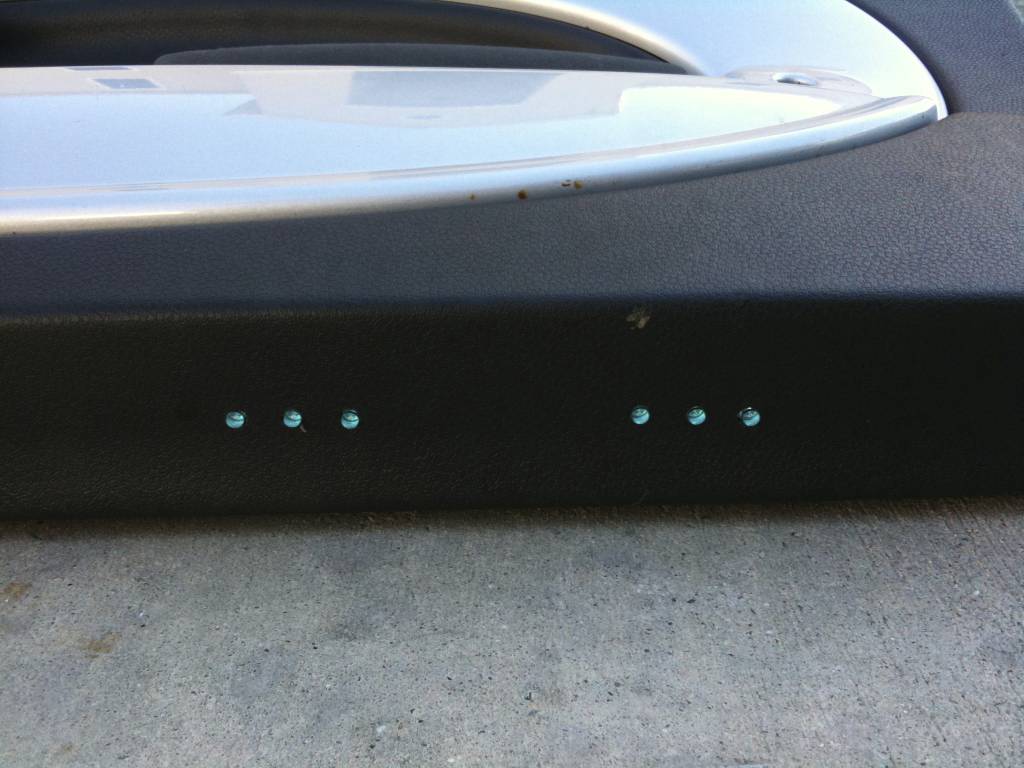
I'm actually working on lighting for my front footwells, cupholders, and map pockets as we speak. I've noticed that most people who put the LEDs in the map holders used 3 of them and I have 6 each so I'm wondering if that might be a bit much...? It's hard to tell because they do show up brighter in the pictures, but I'm thinking I'll cut back to 3 and if it's not enough I can always go back and wire in a few more.
Also, I had the idea to wire some of oznium's superflux LEDs behind the rear speaker grills, but I'm not entirely sure how to get back there. Can I pop the grills off, or will I need to remove the rear panels? Also....has anyone done this/have pictures? I'm very curious as to where exactly I need to put the LED to get the best glow. Anyways, feedback is much appreciated, I will get some pictures up as soon as I'm done. It's my very first mod so I'm documenting the whole process
Just for reference I have an 07 MCS cabrio

2nd Gear
Joined: Feb 2010
Posts: 141
Likes: 0
Super cooper let me know how the Cup holder lights work because I'm interested in doing them.
Has anyone done the map pockets lighting in an 02-04 R53 w/o puddle lights because I'm slightly confused on where to connect the wires for the leds into the dome lights. At the fuse or the acctual light? any information would be greatly appreciated
Has anyone done the map pockets lighting in an 02-04 R53 w/o puddle lights because I'm slightly confused on where to connect the wires for the leds into the dome lights. At the fuse or the acctual light? any information would be greatly appreciated
1st Gear
Joined: Jan 2010
Posts: 15
Likes: 0
From: Gainesville, FL
The cupholders look AWESOME...I just haven't put them back in my car since I installed the LEDs. The only problem I'm running into is that I added a switch box below the toggle panel so I might be limited to midget-sized cups now. Mini Cups for the Mini Cooper, I suppose...