
Interior/Exterior 07+ MINI shift boots and central/door armrests from RedlineGoods!


2nd Gear
Joined: Dec 2007
Posts: 148
Likes: 0
Anything Yet
Hey guys, just talked to RON at AUTO EGO in EAST WINDSOR NJ and he is gonna get together some detailed info for installing boots/armrests for the R56 (2007 MINI) and also cream piping does match interior EXACTLY! black leather does have more grain then the seats but matches the grain of the boots but I think is perfect for those areas. THANX! again to MACIEK at REDLINE GOODS! for a job well done.!!!!!! A+++++ THANX! CHRIS

2nd Gear
Joined: Dec 2007
Posts: 148
Likes: 0
Center Arm Rest & Door Armrest Install Techniques
 Installed both the center and door armrest leather from Redline. I sent some pictures and commentary to Redline yesterday. If they like what I sent hopefully, they will post here.

Joined: Feb 2004
Posts: 1,032
Likes: 0
From: Poland, Central Europe
Redline
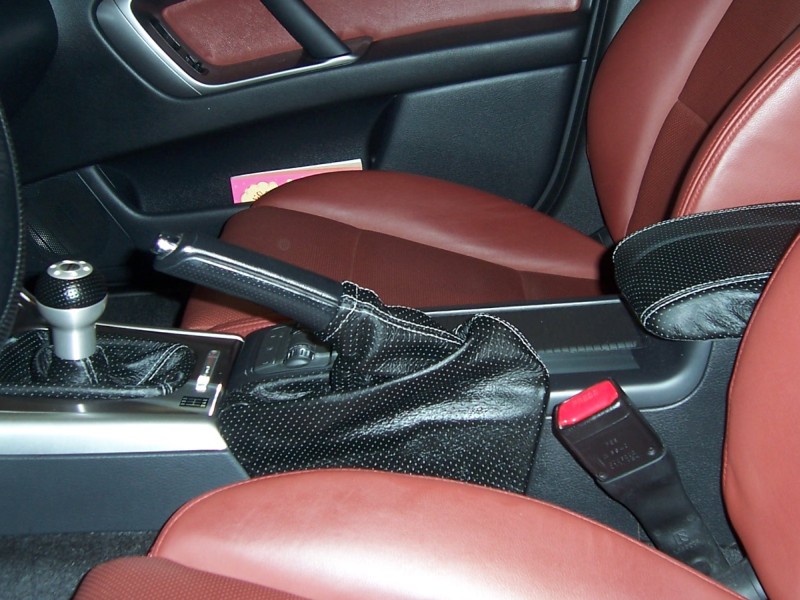
I'm considering ordering shift and parking boots for my Mini. I was thinking of black leather with blue stitching, but I'm having trouble determining which shade of your thread would match the best. My interior is black and Pacific blue and I need to know which thread colour to order. Here is my interior.
I'm considering ordering shift and parking boots for my Mini. I was thinking of black leather with blue stitching, but I'm having trouble determining which shade of your thread would match the best. My interior is black and Pacific blue and I need to know which thread colour to order. Here is my interior.
I believe our medium blue thread should be a great match. I'm guessing that the interior is less bright in reality because sunlight makes it look that way?
Maciek
Joined: Feb 2004
Posts: 1,032
Likes: 0
From: Poland, Central Europe
Hi guys,
I'd like to confirm that I did get edijak's install info and I'll do my best to post it today. So that will take care of the armrests.
Meanwhile Robin Casady promised me an install write-up for the boots. I'm hoping to see one any day now, as soon as the order gets there!
Maciek
I'd like to confirm that I did get edijak's install info and I'll do my best to post it today. So that will take care of the armrests.
Meanwhile Robin Casady promised me an install write-up for the boots. I'm hoping to see one any day now, as soon as the order gets there!
Maciek
Joined: Feb 2004
Posts: 1,032
Likes: 0
From: Poland, Central Europe
Hello!
THIS IS THE LAST DISCOUNT CODE THAT WILL EVER BE POSTED IN THIS THREAD.
In several weeks, we will be starting a whole new advertising campaign. The prices will be the same, there will be a discount code, we just want to refresh our ads as some of them are a few years old... This will tkae us some weeks though and until then, we won't be releasing discount codes anymore.
The last discount code, valid through Wednesday, March 5th is: 5LE6241XNP5
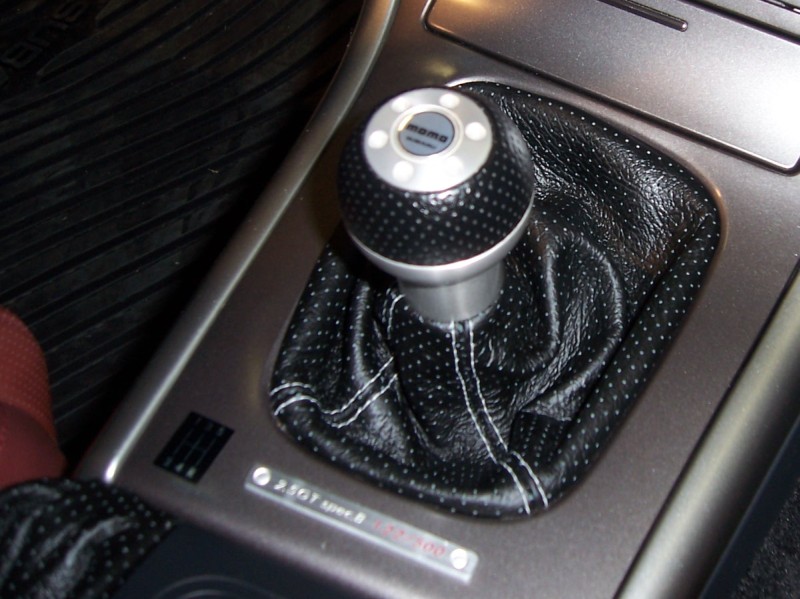
As far as shift boot ideas are concerned, here are our recent favorites. This is black perforated leather with silver thread.

Take care,
Maciek
THIS IS THE LAST DISCOUNT CODE THAT WILL EVER BE POSTED IN THIS THREAD.
In several weeks, we will be starting a whole new advertising campaign. The prices will be the same, there will be a discount code, we just want to refresh our ads as some of them are a few years old... This will tkae us some weeks though and until then, we won't be releasing discount codes anymore.
The last discount code, valid through Wednesday, March 5th is: 5LE6241XNP5
As far as shift boot ideas are concerned, here are our recent favorites. This is black perforated leather with silver thread.
Take care,
Maciek
2nd Gear
Joined: Dec 2007
Posts: 148
Likes: 0
R56 Shift & eBrake Boot Install
Got them in yesterday. I was so caught up in this that I did not take pics along the way but, I found, after much exploration a method. [FONT=Arial]Here is some commentary for the install. Do with it as you will.[/FONT]
[FONT=Arial] [/FONT]
[FONT=Arial]. I did not
 take any pictures along the way but the install is fairly straight forward. I first removed the eBrake boot as per Robin Cassady�s eBrake handle install instructions so as to get a look at the inside of the console. That removal was fairly simple and as Robin suggests, you are bound to break a tab or 2. No problem, however.[/FONT]
[FONT=Arial][/FONT]
[FONT=Arial] There are 2 trim pieces at the back of the center console. Torx screws on the side. These 2 rear trim pieces need to come off. You may also want to remove the center armrest mechanism to get it out of the way. Fairly straight forward removal of torx screws. [/FONT]
[FONT=Arial]Then, remove 3 torx screws, one each in the cup holders. Note that there are three latching mechanisms that hold the center console in place. First, slide the center console backwards slightly, 1/8 to � inch. There is a slide latch on the left side � of the way back on the driver's side. This action gets the console off the slide latch. Do not pull too far back as there are 2 more vertical pins on the console that go into 2 pressure receivers approximately center of the console on either side. Once pulled back slightly, grasp the console on both sides in the middle and pull up until the vertical pins release. This takes a little effort but the console will POP up and off. The console should now be loose but do not try to remove.[/FONT]
[FONT=Arial]Tip the console up from the back forward toward the dash until almost vertical to expose the electrical connections for the lighter and sport/dsc buttons. Both of these connectors are plugs in and very easy to disconnect. I disconnected the lighter plug by lifting up from the driver side as it was easier to get to and off. The sport/dsc connector is a 5 wire plug-in with release catches on either side. I used 2 very small flat screwdrivers to release the catches and then pulled the plug out. Be sure to note which way the plug goes in so as not to reinstall backward. Mine was �purple right�. The console is now totally free to take to your workshop and install the boots. Again, I warmed the leather with a hair dryer to make it easier to handle and stretch[/FONT]
[FONT=Arial]The eBrake boot is the easiest. Simply take a look and compare new boot to old and remove old from tabs. You are bound to break a tab or 2 as they are very flimsy. I had to trim excess leather so as to get the eBrake boot to snap back in. [/FONT]
[FONT=Arial]The shift boot is another matter. You will note double sets of tabs and a plastic retainer piece. The small chrome tabs hold the retainer and, on mine, broke very easily. These tabs hold the retainer plastic but in the end are not really necessary. I marked front and back on the old boot and the inside of the new when comparing the 2 of them. Off with the old by using gentle pressure with flat screw drivers and on with the new. You will find, as on the eBrake boot, tiny slits in the leather that match up fairly well with larger tabs of your trim ring. I had to cut 1 slit as it was not there. This was easily done with a razor knife. Carefully slide these slits over the tabs and the boot is installed. Because I broke almost all of the smaller tabs and the leather is thicker than the vinyl, I did not reinstall the plastic retainer. The boot holds very well on just the large tabs without the retainer. [/FONT]
[FONT=Arial]I installed the shift boot now attached to the snaps back on the center console and then the console to the car in reverse order. [/FONT]
[FONT=Arial] That is, first make electrical connections, set the console back slightly and slid slightly forward to catch the slide latch, press it down on both sides in the middle to catch the vertical latches, reinstalled the eBrake boot assembly and the 2 trim pieces at the rear of the console. I found I had to trim about an 1/8 to 1/4 � of leather, razor knife, around the edges of the eBrake retainer to get it to snap back in place properly. [/FONT]
[FONT=Arial]If you have any questions feel free to ask.[/FONT]


6th Gear
Joined: Jul 2008
Posts: 1,589
Likes: 0
From: St. Louis
Anyone who is removing the console to change the shift and handbrake boots is just making it excessively hard on themselves. I did both in less than 20 minutes without touching the console. I just used two credit cards to separate the plastic boot frames enough from the console to pull them out.
Easy-peasy. Now I have the JCW CF and Alcantara shifter, e-brake handles and boots on my JCW.
Easy-peasy. Now I have the JCW CF and Alcantara shifter, e-brake handles and boots on my JCW.

Thread
Thread Starter
Forum
Replies
Last Post
igzekyativ
MINIs & Minis for Sale
34
Jul 16, 2020 12:54 PM
minicoclub
MINIs & Minis for Sale
8
Nov 11, 2015 07:25 AM
Colt45Magnus
R56 :: Hatch Talk (2007+)
21
Aug 12, 2015 06:43 AM
nismo4life
Stock Problems/Issues
3
Aug 5, 2015 08:31 AM