
Interior/Exterior Venting the Bonnet - A Unique Design


Venting the Bonnet - A Unique Design
I've been wanting to vent the bonnet for some time now and had toyed around with multiple ideas. The M7 scoop came to mind as a way to exit hot air from the DFIC, but that would mean I'd be married to the DFIC. I also didn't like the way it didn't sit flush. Then I started thinking of other vehicles with vented hoods. I really like the GT40 type nostrils and commissioned some sketches. They look rather interesting so working with my body guy we fabed up a few templates. They didn't work, there is just not enough space under hood to make them fit. The short bonnet length and stress bar didn't lend themselves for a graceful curve. One evening while surfing around looking at various solution while enjoying a few adult drinks I gave some serious thought to TVR Sagaris type vents. Good think I sobered up before pulling out a hack saw.
Louvers looked to be the solution. I spend hours looking at various panels one could attach but nothing really caught my eye. That was until I saw an M3 at a DE. Molded into the hood was a set of louvers that called to me. Close together, shallow depth and not sticking up leaving a clean and purposeful look. Working with my body man we spent hours trying to find just the right ones. 50 years ago this would have been a non-issue, many respectable Hot-Rod shops had louver punches, now a shop with a punch is hard to find.
This project was all talk until the bonnet actually arrived at the shop. I had ordered one about 4 months previously from my favorite parts dude. We were looking for that elusive damaged in transit version that could be had for a song. Just so happens the day before I ordered a new bumper cover a bonnet in it's shipping crate fell over when being unloaded. Not much damage but too much for resale. So long as I was willing to pay the same as the scrap yard per pound I could ahve this one. My search over I now had a bonnet.
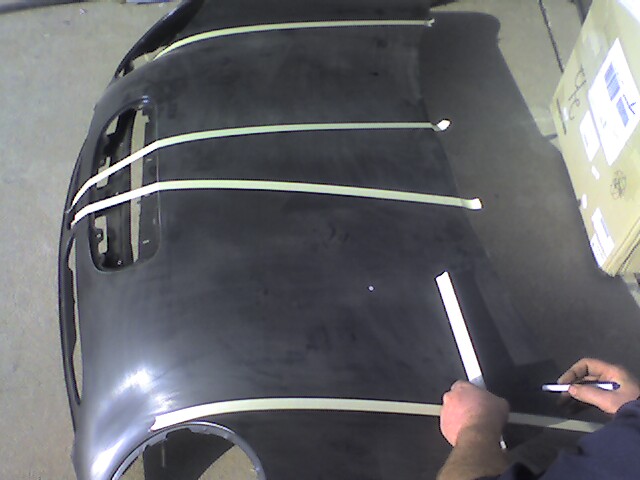
Standing there, looking over the new slightly dented bonnet with MM.orgs favorite tech we both happened to notice a bonnet of a small 70's era British Sports car. It had louvers. They were the right size? Quickly I made a template of cardboard from the bonnet in question and started fiddling around with placement. Hmmm...this could work.
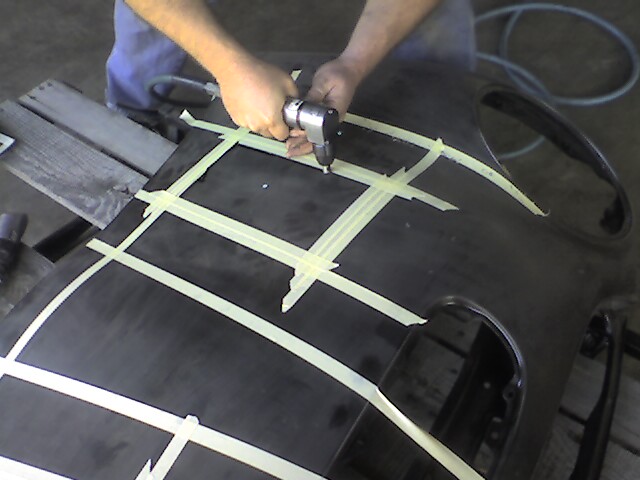
Measure 20 times, cut once, not a lot of room for error
Nibble, nibble, cutting out the holes.
Holey Bonnet Batman, you can see the floor through there
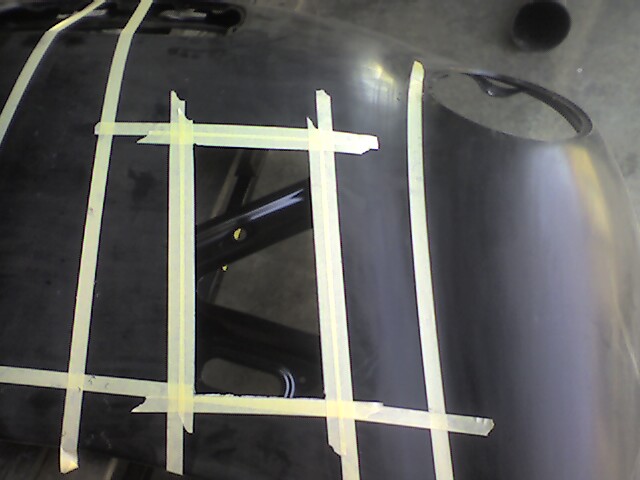
After cutting and grinding we took a flange tool and made flanges so they will sit nice and flush. A bit of grinding and fitting later and it was time to call it a day. Put the louver sections in some stripper to remove the old paint and we'll pick up there tomorrow.
Louvers looked to be the solution. I spend hours looking at various panels one could attach but nothing really caught my eye. That was until I saw an M3 at a DE. Molded into the hood was a set of louvers that called to me. Close together, shallow depth and not sticking up leaving a clean and purposeful look. Working with my body man we spent hours trying to find just the right ones. 50 years ago this would have been a non-issue, many respectable Hot-Rod shops had louver punches, now a shop with a punch is hard to find.
This project was all talk until the bonnet actually arrived at the shop. I had ordered one about 4 months previously from my favorite parts dude. We were looking for that elusive damaged in transit version that could be had for a song. Just so happens the day before I ordered a new bumper cover a bonnet in it's shipping crate fell over when being unloaded. Not much damage but too much for resale. So long as I was willing to pay the same as the scrap yard per pound I could ahve this one. My search over I now had a bonnet.
Standing there, looking over the new slightly dented bonnet with MM.orgs favorite tech we both happened to notice a bonnet of a small 70's era British Sports car. It had louvers. They were the right size? Quickly I made a template of cardboard from the bonnet in question and started fiddling around with placement. Hmmm...this could work.
Measure 20 times, cut once, not a lot of room for error
Nibble, nibble, cutting out the holes.
Holey Bonnet Batman, you can see the floor through there
After cutting and grinding we took a flange tool and made flanges so they will sit nice and flush. A bit of grinding and fitting later and it was time to call it a day. Put the louver sections in some stripper to remove the old paint and we'll pick up there tomorrow.


I look forward to seeing what the final product will be.
Last edited by nabeshin; Nov 8, 2007 at 01:30 AM.

Welcome to the bonnet mod club (Founding father here on NAM is MISFITOY).
Looking forward to seeing your hood progress.
Looking forward to seeing your hood progress.
Trending Topics

Figured it was time for an update.
Somehow I managed to put a deep scratch in the diverter plate. Today I was taught how to fix that. Starting with 180grit paper I sanded the area of the scratch to minimize it. Fortunately the gel coat is fairly thick. After the 180 the entire piece was scuffed with 420 grit and then a scratch pad. After I finished the prep work I handed the part off to the painter. He had other plans. After fitting me for a mask he had me wipe the piece with with acetone to remove any oil and grease. Then a quick wipe with tack rag. We mixed a clear coat with some thinner adding some fisheye remover and antifog. Then I got to paint the part. A quick light tack coat, wait for it to flash off and then a thicker coat. Wait 5 min and one more coat. Here is the result, my first ever experience painting...
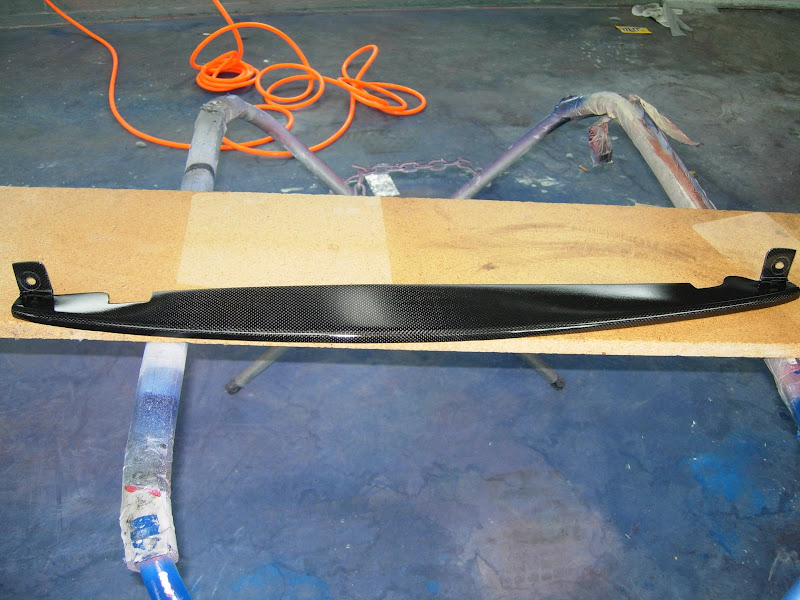
Not a bad result, after it cures overnight I'll be buffing it out. I must say I was quite pleased.
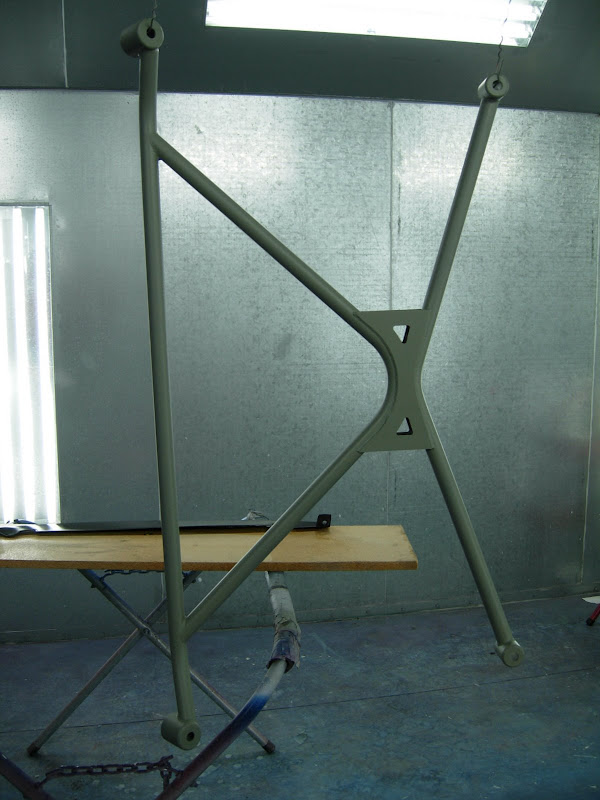
From there it was off to prep the TSW XBrace. I picked up the one production piece that was not sent off for powdercoating. First a light sanding, then sprayed with acid. let that sit for 10 min and rinse well with lots of water. A little rust flashed over, cleaned that up with a scratch pad. Hung the brace in the paint booth. wiped down with acetone. I got to paint this too using an acid etching primer. Painting tubes is not easy. Came out rather well. Tomorrow I get to shoot it with a color coat.
But enough of that...you want to see how the hood ios coming along...
I've been torn, should I show the progress or just wait until the job is complete. I figured I'd show how things are going.
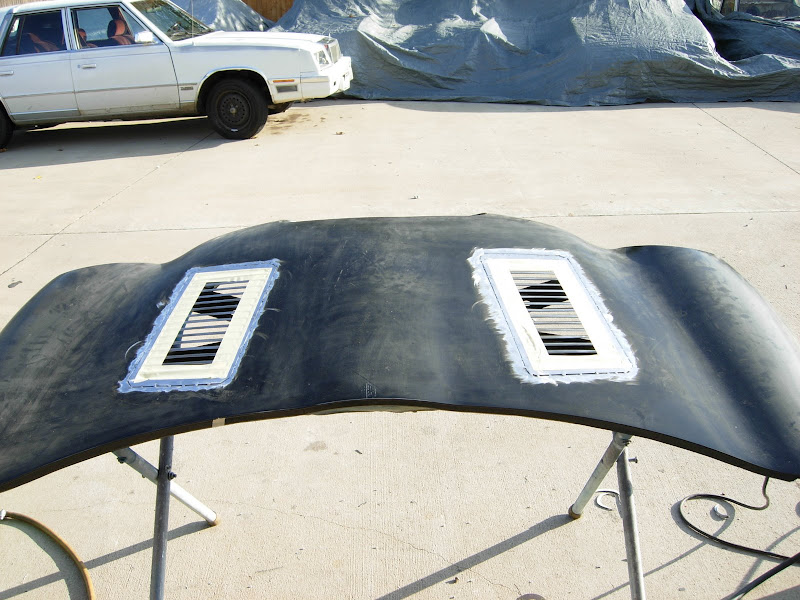
The louvers are from the hood of an early 70's TR-7. I spend two days stripping the paint from these after they cut from the donor hood. Only one small cut too..
Finally today we welded the louvers in place.
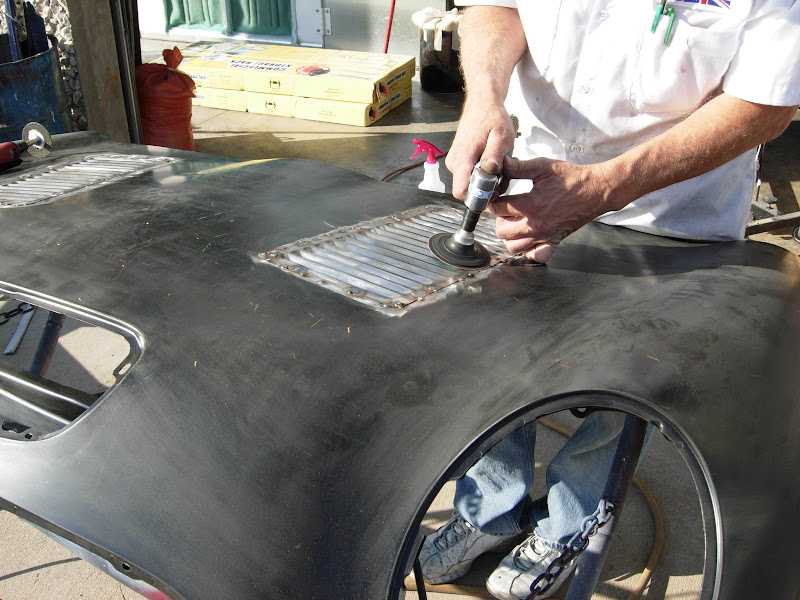
Grinding being demo'ed to me...
After all the welds were ground smooth and prepped for the panel bonding adhesive.
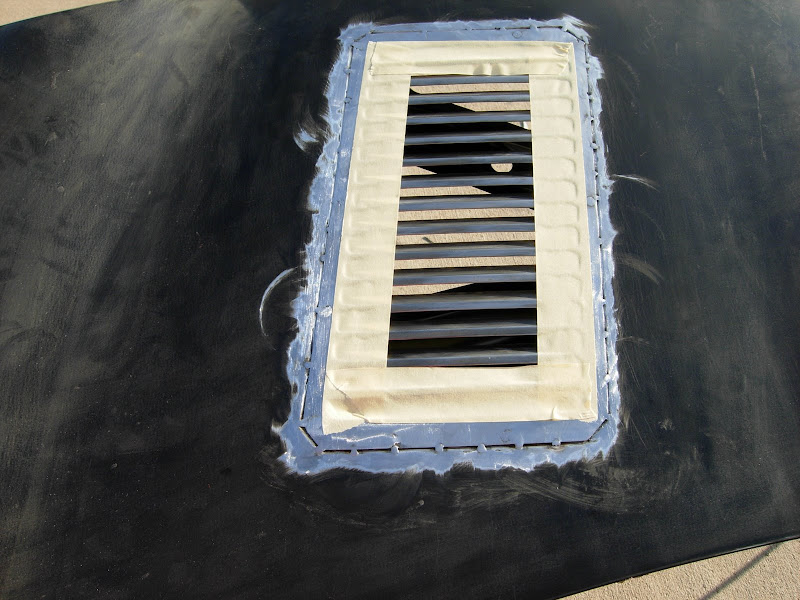
Mixed up the adhesive and forced it into all the gaps. We set aside the hood to cure overnight and tomorrow I'll start sanding to out section and take a grinder to the inside to clean that up. The plan is to have it look like the hood was made with the louvers when complete.
Somehow I managed to put a deep scratch in the diverter plate. Today I was taught how to fix that. Starting with 180grit paper I sanded the area of the scratch to minimize it. Fortunately the gel coat is fairly thick. After the 180 the entire piece was scuffed with 420 grit and then a scratch pad. After I finished the prep work I handed the part off to the painter. He had other plans. After fitting me for a mask he had me wipe the piece with with acetone to remove any oil and grease. Then a quick wipe with tack rag. We mixed a clear coat with some thinner adding some fisheye remover and antifog. Then I got to paint the part. A quick light tack coat, wait for it to flash off and then a thicker coat. Wait 5 min and one more coat. Here is the result, my first ever experience painting...
Not a bad result, after it cures overnight I'll be buffing it out. I must say I was quite pleased.
From there it was off to prep the TSW XBrace. I picked up the one production piece that was not sent off for powdercoating. First a light sanding, then sprayed with acid. let that sit for 10 min and rinse well with lots of water. A little rust flashed over, cleaned that up with a scratch pad. Hung the brace in the paint booth. wiped down with acetone. I got to paint this too using an acid etching primer. Painting tubes is not easy. Came out rather well. Tomorrow I get to shoot it with a color coat.
But enough of that...you want to see how the hood ios coming along...
I've been torn, should I show the progress or just wait until the job is complete. I figured I'd show how things are going.
The louvers are from the hood of an early 70's TR-7. I spend two days stripping the paint from these after they cut from the donor hood. Only one small cut too..
Finally today we welded the louvers in place.
Grinding being demo'ed to me...
After all the welds were ground smooth and prepped for the panel bonding adhesive.
Mixed up the adhesive and forced it into all the gaps. We set aside the hood to cure overnight and tomorrow I'll start sanding to out section and take a grinder to the inside to clean that up. The plan is to have it look like the hood was made with the louvers when complete.


It's a commercial PPG product.


Wow - I used to own a TR-7...
I thought I was ballsy just putting a British Leyland badge on my MINI... to actually put PARTS of a TR-7 on your MINI... to interbreed the two... wow... cause, like, the TR-7 was the "Hills Have Eyes" inbred Triumph... so I hope you end up with some of the extremely rare "good" genetic material from that beast.
Nice work - that's gonna rock.

3rd Gear
Joined: Oct 2004
Posts: 158
Likes: 0
From: Toronto
 What a way of putting it!
That being said, the louvers on definately on my list of dream mods. And with gnatster's car being what it is (a pinup R53, imo), it's about time!

Last edited by phaedrus; Nov 13, 2007 at 05:02 AM.


Ummm..I have no DFIC's now. GP IC going on this week.