
How To Maintenance :: Changing REAR Brake Pads for Beginners!


HF is that way--they have sales all the time--sometimes you win some, sometimes you lose...but that tool is one of the rare HF tools that won't break the first time you use it, lol.
Yesterday I heard an awful scraping sound, pulled over, and realized that the sound was coming from the rear rotors. I pulled the wheel and found that the passenger side pad was worn down to the backing plate. The inner pad was fine--wasn't even worn down to the sensor.
Took me about 30 minutes to replace the pads and get back on the road. The HF tool worked great! It's not perfect--you have to align the pins, tighten the tool, crank the piston in a bit--it gets loose again--align the pins--tighten the tool, and crank it some more--making sure the piston boot doesn't get tweaked or torn.
Richard

Thanks! Certainly will!
Not that I'm aware of. Of course if you're aren't confident in your ability to change your pads, you probably shouldn't be doing it. I've given as much detail as necessary for any 1st gen MINI owner to change their pads.

Neutral
Joined: Sep 2007
Posts: 1
Likes: 0
Great write up! Just finished my break job on the wife's Mini, I get a "thumping" that comes from both front wheels... I did all the rotors and pads...Brembo with the easy check dots on them and Hawk HPS... my thought is that the easy check dots are causing the noise...
Does anyone have an thoughts?
Thanks for the write-ups and any thoughts on this new issue (search didn't turn up anything anyway).
Does anyone have an thoughts?
Thanks for the write-ups and any thoughts on this new issue (search didn't turn up anything anyway).

1st Gear
Joined: Oct 2006
Posts: 30
Likes: 0
Axxis Deluxe
dood, Octane man, you are my Mini hero!! any write ups on brake fluid flushing? Oh and I just scored front/rear axxis deluxe pads for one hell of a deal. check out http://www.r1concepts.com/

Neutral
Joined: Aug 2006
Posts: 4
Likes: 0
Brake pd sensor
Just in case you ever wanted to know, the brake pad sensor is nothing more than a loop of wire. Hence when it is contacted by the rotor and is worn through the ckt opens and the light comes on. If you do not want or cannot accommodate the sensor, you can take an old one cut it off at the connector end with about four inches of wire exposed, strip and connect the ends together. A little heat shrink looks nice as well.
Simple enough. Don't forget to turn on the ignition for around a min. to reset the dash indicator.
Marty de
Simple enough. Don't forget to turn on the ignition for around a min. to reset the dash indicator.
Marty de

Neutral
Joined: Oct 2008
Posts: 7
Likes: 1
From: Oakland County, Michigan
Thanks for the great writeup! It was a big help. I have a 2003 Mini.
Here are a few things I found while doing it:
If you are removing the rotor, the torx bolt holding the rotor is a T50. If you try to loosen it but the rotor spins, take the lug wrench and wedge it between the caliper bracket and a couple of lug bolts that you reinserted. I had to use some penetrating oil and an impact wrench to get it loose.
The bolts securing the caliper bracket are 13 mm.
My local Murrays automotive let me borrow their brake tool set for free. (You need to pay for it, but they will give you a full refund when you bring it back.)
When I had done a rear brake job on a VW I used to own, I could spin the piston back in using needlenose pliars like one of the replies mentioned. I had no luck doing this on the Mini and had to use the tool.
 the rightup is still verry goooood..Thanks
MC 2

1st Gear
Joined: Aug 2007
Posts: 14
Likes: 0
Three cheers for OctaneGuy.
Just finished the rear pads on my 05 MCS.
This post made my entire life super easy.
All I did in addition to the article was use some brakecleen - to clean the entire caliper assembly - and used some anti-seize on all contact surfaces.
Also - if you dont want to buy the brake tool - you can get one on a loaner program from Autozone - for free. You pay for the loaner (full price $55) and they refund you($55) when you return the tool - within 90 days.
Great to hear!!! Thanks for the feedback!! 
Richard
Richard
Three cheers for OctaneGuy.
Just finished the rear pads on my 05 MCS.
This post made my entire life super easy.
All I did in addition to the article was use some brakecleen - to clean the entire caliper assembly - and used some anti-seize on all contact surfaces.
Also - if you dont want to buy the brake tool - you can get one on a loaner program from Autozone - for free. You pay for the loaner (full price $55) and they refund you($55) when you return the tool - within 90 days.
Just finished the rear pads on my 05 MCS.
This post made my entire life super easy.
All I did in addition to the article was use some brakecleen - to clean the entire caliper assembly - and used some anti-seize on all contact surfaces.
Also - if you dont want to buy the brake tool - you can get one on a loaner program from Autozone - for free. You pay for the loaner (full price $55) and they refund you($55) when you return the tool - within 90 days.

2nd Gear
Joined: Mar 2006
Posts: 111
Likes: 11
From: Boston
I was upgrading rotors as well as pads, so The first thing I did was spray penetrating oil on the torx bolt front and back (you can get the back of the bolt by spraying inside the rear of the rotor). It sat for 20-30 minutes while I prepped everything else. I losened the torx screw just a little, tightened it back, losened again a little more, tightened it back. About 20 times and they come out like butter. Don't rush it. The rust that's the worst is on the back side of the bolt sticking out of the rear of the hub.

2nd Gear
Joined: Apr 2008
Posts: 71
Likes: 0
From: Hillsboro, OR
great write up! I just did all four rotors and pads yesterday, and like many others got stuck on the right rear for around 3 hours trying to compress the piston with the HF tool. I wonder why that one is so difficult? Other 3 took less than an hour.

3rd Gear
Joined: Apr 2009
Posts: 176
Likes: 1
From: Burke, VA
I, too, have one of the HF kits but I have a disc brake piston tool by KD Tools of Lancaster PA which is designed fofr both domestic and import cars. When I installed CT's 3 weeks ago, I used this tool and was able to rotate and reseat the rear pistons with ease. I think you can find the tool at an auto parts store. My recollection is that I paid $12 or so in the mid-1990s. It fits on a 3/8" drive.

5th Gear
Joined: Aug 2008
Posts: 1,100
Likes: 13
From: Inman, SC
just a heads up, the harbor freight tool wouldnt work for me. it wasnt strong enough to compress that piston down. (i guess its possible my piston is jammed a little bit) so i bought a SIR tools air powered brake tool. Its what the head mechanic at the mini dealer suggested, and he says its probably the best on the market (and no i didnt buy it through mini, so he was not just saying that. he bought the one at the dealer for himself) Its ~$165 for the complete kit (model # ST9020), which still pays for itself. after 2 axel brake changes. Ill post my results when i change my brakes this weekend.

2nd Gear
Joined: Dec 2007
Posts: 61
Likes: 0
Hello..
I found this tool: http://www.canadiantire.ca/AST/brows...per%2BTool.jsp
It has 1-1/2", 1-5/8" and some more bigger ones. I think 1-5/8" is too big for mini' rear caliper piston. I'm not sure if 1-1/2" would fit.
Could anyone confirm the size, please? Will 1-1/2" fit to the mini's rear caliper piston?
If you want to prevent any potential for squealing, then use it.
Richard
Richard

1st Gear
Joined: Sep 2009
Posts: 12
Likes: 0
From: Oslo, Norway
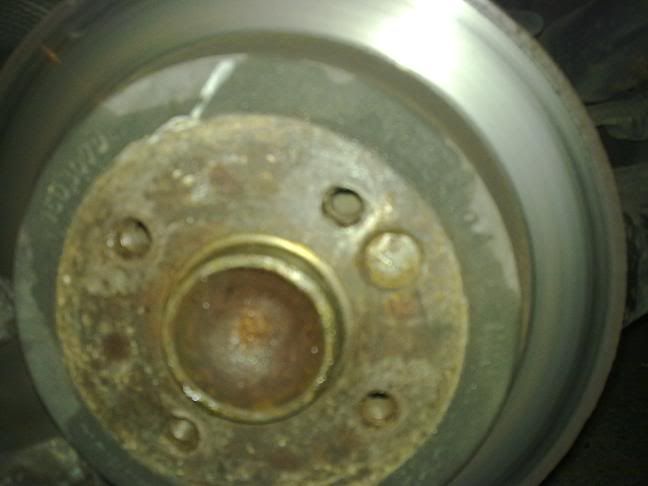
But can I use copper grease or engine grease instead of plastilube and any tips to how on earth to loosen this screw (from some reason there is a straight slot instead of a torx who I imagine will be quite the challenge)

sorry for louse pic-quality
I've never seen a slotted screw instead of a torx for this. Was there a previous owner on this MINI? I'll have to defer removal of this to somebody with more experience.
Thanks for the kind words.
As for substituting the with grease..I'm not sure you want to get grease anywhere near your brake pads, but then again I've never tried...will have to wait for other opinions.
Richard
Thanks for the kind words.
As for substituting the with grease..I'm not sure you want to get grease anywhere near your brake pads, but then again I've never tried...will have to wait for other opinions.
Richard
Thanks for super-fast response btw and the best "DYI-guide" i have ever seen.
But can I use copper grease or engine grease instead of plastilube and any tips to how on earth to loosen this screw (from some reason there is a straight slot instead of a torx who I imagine will be quite the challenge)
sorry for louse pic-quality
But can I use copper grease or engine grease instead of plastilube and any tips to how on earth to loosen this screw (from some reason there is a straight slot instead of a torx who I imagine will be quite the challenge)
sorry for louse pic-quality
1st Gear
Joined: Sep 2009
Posts: 12
Likes: 0
From: Oslo, Norway
Thank you...
Took of the other rear wheel to check and woah nothing there no screw at all, just a gaping hole and to think i've driven around with that (is that safe at all) But the screw is kind of odd the crack where you're supposed to put the screwdriver very very thin maybe i should take it to a shop to see if they had some fancy equipment to loosen it with.
Took of the other rear wheel to check and woah nothing there no screw at all, just a gaping hole and to think i've driven around with that (is that safe at all) But the screw is kind of odd the crack where you're supposed to put the screwdriver very very thin maybe i should take it to a shop to see if they had some fancy equipment to loosen it with.

6th Gear
Joined: Sep 2003
Posts: 2,268
Likes: 4
From: Always curious ...
Thank you...
Took of the other rear wheel to check and woah nothing there no screw at all, just a gaping hole and to think i've driven around with that (is that safe at all) But the screw is kind of odd the crack where you're supposed to put the screwdriver very very thin maybe i should take it to a shop to see if they had some fancy equipment to loosen it with.
Took of the other rear wheel to check and woah nothing there no screw at all, just a gaping hole and to think i've driven around with that (is that safe at all) But the screw is kind of odd the crack where you're supposed to put the screwdriver very very thin maybe i should take it to a shop to see if they had some fancy equipment to loosen it with.
Good luck with removing that strange bolt!

6th Gear
Joined: Sep 2002
Posts: 3,343
Likes: 4
From: South Bend Indiana
But the screw is kind of odd the crack where you're supposed to put the screwdriver very very thin maybe i should take it to a shop to see if they had some fancy equipment to loosen it with.
I'd hit it with PB blaster 2 days before, then again 1 day before removal. I'd use an old fashioned impact driver, the kind you hit with a hammer for removal.
Alex
1st Gear
Joined: Sep 2009
Posts: 12
Likes: 0
From: Oslo, Norway
Lol i Actually managed it and it was ridicolusly easy (easier than changing bulbs on newer cars).. and it was so easy i was just waiting for something to go wrong.. and then *crack* the last 7mm Allen screw broke off inside the "brake shoe (the thing the hole shabang is secrued to that sits on the disc)".. ****...
Well now off to the store tomorrow to buy one rear right "brake shoe" and a 7mm allen screw
Other than that... this **** was so easy i was constantlig worrying i was doing something wrong
And on a last note.. the rear brake pads were so worn out that they were as smooth as glass
edit: one more thing. There are three bolts on the backside of the mounting bracket.. just wondering if all three of them are attached to the bracket or only the one on top and the one on the bottom
Last edited by WerGis; Sep 16, 2009 at 03:02 PM.