
How To Electrical: Adding Homelink to 2013 base Mini Coupe


Thread Starter
|
1st Gear
Joined: Apr 2009
Posts: 14
Likes: 1
From: Long Island, NY
AS ALWAYS, IF YOU DECIDE TO MODIFY YOUR VEHICLE, YOU WILL DO IT AT YOUR OWN RISK !!!
IF YOU ARE NOT SURE YOU ARE CAPABLE OF FOLLOWING THESE INSTRUCTIONS - DON'T TRY TO RETROFIT YOUR CAR WITH A BMW HOMELINK MIRROR !!!
We have just added a new 2013 Mini Coupe S to our garage - an Eclipse Gray Metallic, 6 speed manual with black headlamp housing, black sport strips, white turn signals, center arm rest, cold weather package, xenon headlamps and 16" 6-Star twin spoke black wheels. I didn't order the car - it was incoming to another dealer and my local dealer (Haberstadt) "intercepted" the car and we took delivery a couple of weeks ago. Had I ordered this car, I would have ordered a Homelink mirror but didn't want to wait until next year for delivery. I was planning on modifying the mirror as I did with our other Mini - a 2012 Mini Cooper S - (check this thread https://www.northamericanmotoring.co...-to-08-mc.html) but it turns out that the mirror that comes with the coupe is windshield-mounted and is not connected to the roof like the one in the Cooper so.. here is what I did:
1. Purchased a BMW auto-dimming and Homelink mirror that came off a 2003 BMW 745iL on ebay - about $100
2. Removed the Coupe mirror side-plastic panels by gently separating them.
3. Unplugged the power connector that is hidden inside the mirror by pressing both sides of the connector and pulling gently.
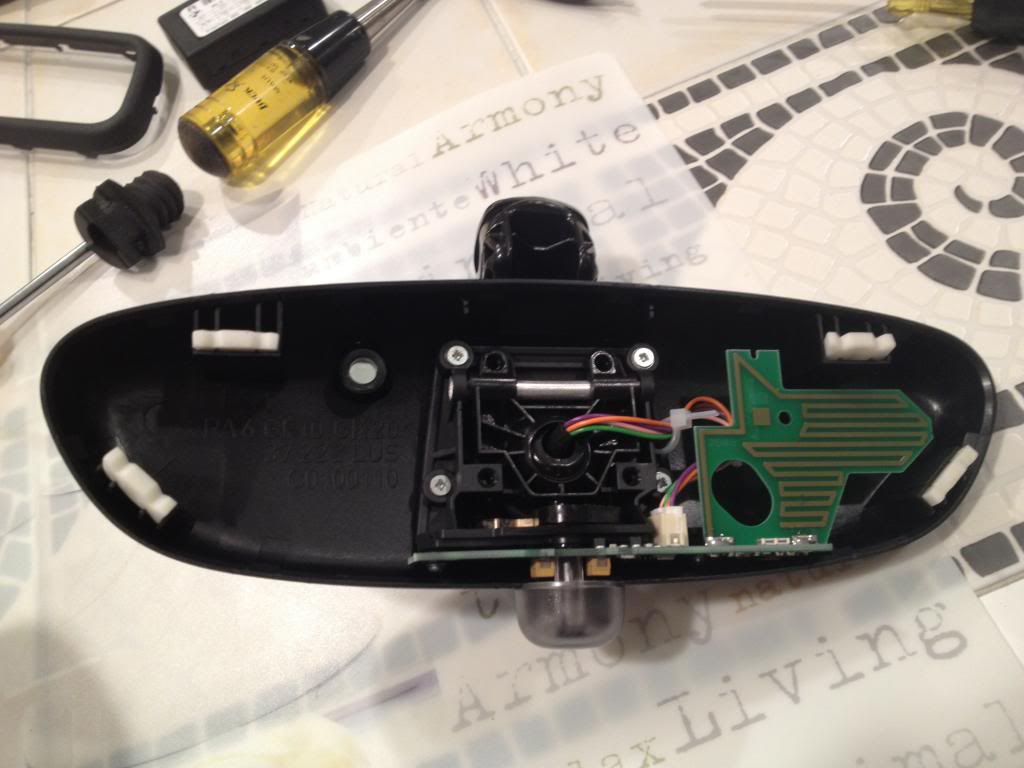
Now that I had the Coupe's mirror in my hands I separated the front trim of the mirror (it holds the actual mirror to the base/housing) by inserting a couple of screwdrivers between these parts. Remember, the front trim has to be "pushed-in" to allow the tabs to be released from the housing. Don't apply too much force as you will break the tabs (I did break one) so take your time and you should be able to achieve this task with little force and a lot of patience.
At this point, this is what you will see:
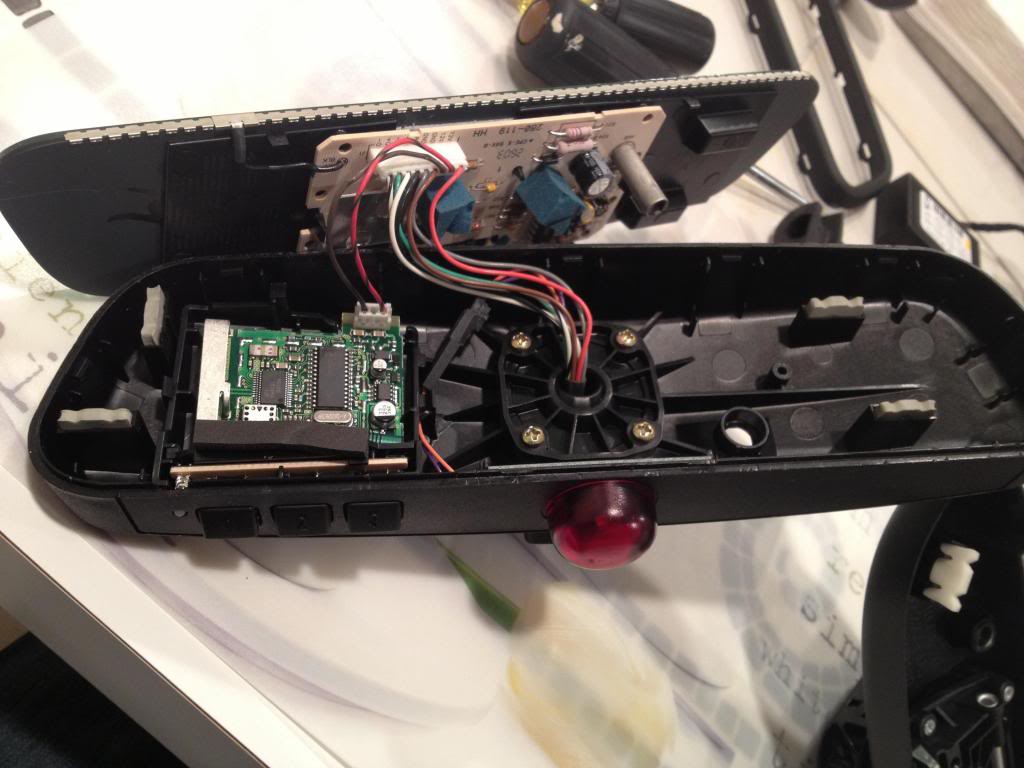
At this point I took the BMW mirror and did the same thing. It was harder to open the trim and I did break a couple of tabs but the mirror is 10 years old and I believe the plastic was dry so... here is the picture of the BMW homelink-equipped mirror:
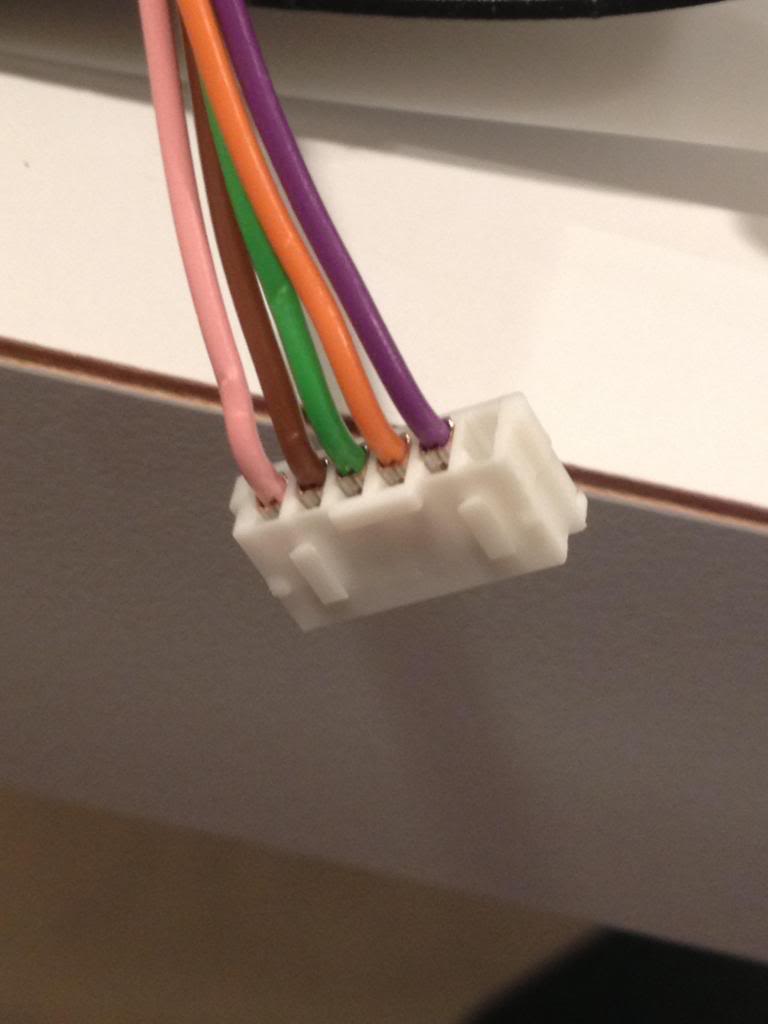
As you can see, the BMW had many more wires - I don't have a clue how to connect them so I can enjoy the auto dimming function so I have decided to forget the auto dimming and concentrate on getting my homelink function to work. The original mirror has the circuitry for the doors remote open/close function so I had to remove the circuit from the original Coupe's mirror. I had to unplug the connector and "squeeze it" so it will be able to be removed from this mirror and get reinstalled in the new/old BMW mirror. Be careful not to break any wires from the plug:
I did the same thing on the BMW mirror.
Now that the wires were out, I had to use "mini torx" drivers to remove the circuitry from the Coupe's mirror. The biggest problem was removing the normal/night clear button but I managed to remove it too. The truth is that you can break it as it will never be used again but I didn't think about this option and spent a good 30 minutes removing this button from the mirror housing.
Next, I inserted the wiring harness from the Coupe's mirror to the BMW mirror and have installed the circuitry (fits right-in, like a glove and you can add a screw from the Coupe's mirror to hold the circuit board in its place.
Now, wiring the homelink to power was easy. Since the original remote circuitry has constant power, I traced the wires and found out that:
Brown = Ground
Orange = 12V
Here's a pictures of the wiring and the BMW mirror just before I taped the wires with electrical tape:
Now, all you have to do is close the mirror (insert the front trim to the mirror housing) and if you broke a few tabs, you can glue the trim to the housing too. Now reinstall the modified BMW mirror to the factory Mini "button" on the windshield, program the homelink and enjoy the homelink function.
Remember that unlike the factory installation in the BMW, your mirror will not auto dim and the homelink function will work at all times, even when you don't have ignition / accessory power turned on. I know that these issues will be missed but I hate remote controls that are hanging off the visor etc...
Good luck !!!
Ron
IF YOU ARE NOT SURE YOU ARE CAPABLE OF FOLLOWING THESE INSTRUCTIONS - DON'T TRY TO RETROFIT YOUR CAR WITH A BMW HOMELINK MIRROR !!!
We have just added a new 2013 Mini Coupe S to our garage - an Eclipse Gray Metallic, 6 speed manual with black headlamp housing, black sport strips, white turn signals, center arm rest, cold weather package, xenon headlamps and 16" 6-Star twin spoke black wheels. I didn't order the car - it was incoming to another dealer and my local dealer (Haberstadt) "intercepted" the car and we took delivery a couple of weeks ago. Had I ordered this car, I would have ordered a Homelink mirror but didn't want to wait until next year for delivery. I was planning on modifying the mirror as I did with our other Mini - a 2012 Mini Cooper S - (check this thread https://www.northamericanmotoring.co...-to-08-mc.html) but it turns out that the mirror that comes with the coupe is windshield-mounted and is not connected to the roof like the one in the Cooper so.. here is what I did:
1. Purchased a BMW auto-dimming and Homelink mirror that came off a 2003 BMW 745iL on ebay - about $100
2. Removed the Coupe mirror side-plastic panels by gently separating them.
3. Unplugged the power connector that is hidden inside the mirror by pressing both sides of the connector and pulling gently.
Now that I had the Coupe's mirror in my hands I separated the front trim of the mirror (it holds the actual mirror to the base/housing) by inserting a couple of screwdrivers between these parts. Remember, the front trim has to be "pushed-in" to allow the tabs to be released from the housing. Don't apply too much force as you will break the tabs (I did break one) so take your time and you should be able to achieve this task with little force and a lot of patience.
At this point, this is what you will see:
At this point I took the BMW mirror and did the same thing. It was harder to open the trim and I did break a couple of tabs but the mirror is 10 years old and I believe the plastic was dry so... here is the picture of the BMW homelink-equipped mirror:
As you can see, the BMW had many more wires - I don't have a clue how to connect them so I can enjoy the auto dimming function so I have decided to forget the auto dimming and concentrate on getting my homelink function to work. The original mirror has the circuitry for the doors remote open/close function so I had to remove the circuit from the original Coupe's mirror. I had to unplug the connector and "squeeze it" so it will be able to be removed from this mirror and get reinstalled in the new/old BMW mirror. Be careful not to break any wires from the plug:
I did the same thing on the BMW mirror.
Now that the wires were out, I had to use "mini torx" drivers to remove the circuitry from the Coupe's mirror. The biggest problem was removing the normal/night clear button but I managed to remove it too. The truth is that you can break it as it will never be used again but I didn't think about this option and spent a good 30 minutes removing this button from the mirror housing.
Next, I inserted the wiring harness from the Coupe's mirror to the BMW mirror and have installed the circuitry (fits right-in, like a glove and you can add a screw from the Coupe's mirror to hold the circuit board in its place.
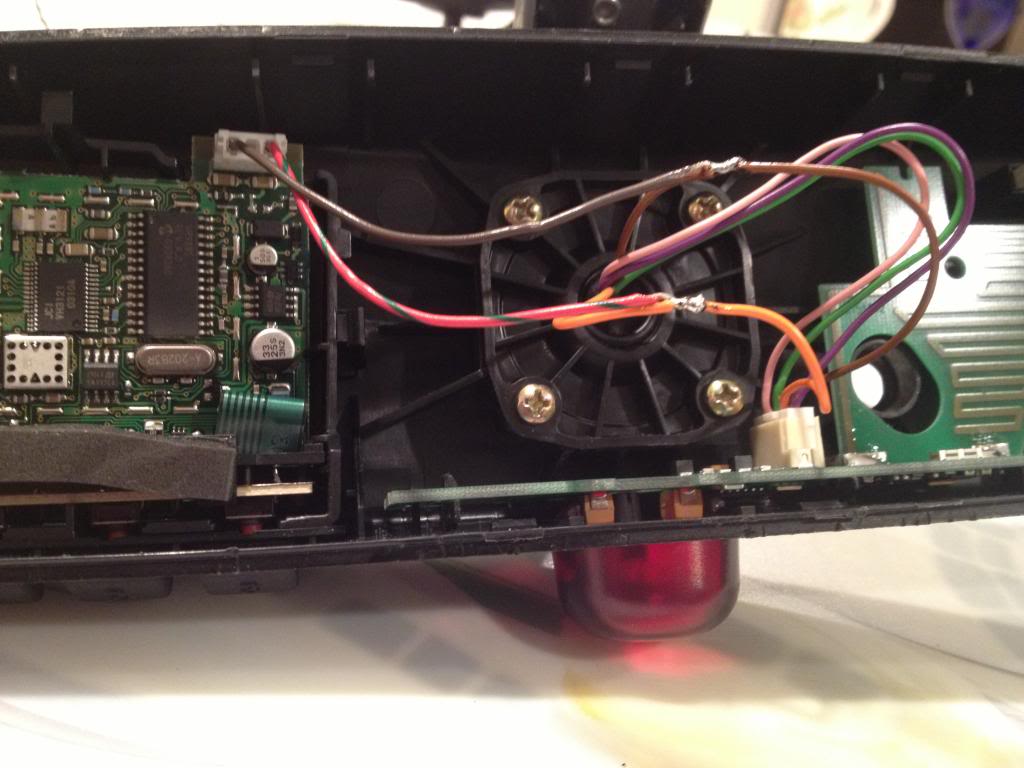
Now, wiring the homelink to power was easy. Since the original remote circuitry has constant power, I traced the wires and found out that:
Brown = Ground
Orange = 12V
Here's a pictures of the wiring and the BMW mirror just before I taped the wires with electrical tape:
Now, all you have to do is close the mirror (insert the front trim to the mirror housing) and if you broke a few tabs, you can glue the trim to the housing too. Now reinstall the modified BMW mirror to the factory Mini "button" on the windshield, program the homelink and enjoy the homelink function.
Remember that unlike the factory installation in the BMW, your mirror will not auto dim and the homelink function will work at all times, even when you don't have ignition / accessory power turned on. I know that these issues will be missed but I hate remote controls that are hanging off the visor etc...
Good luck !!!
Ron

Thread
Thread Starter
Forum
Replies
Last Post
igzekyativ
MINIs & Minis for Sale
28
Dec 23, 2015 10:36 AM
SosoMINI
MINI Parts for Sale
30
Nov 22, 2015 03:17 PM
phrza81
MINIs & Minis for Sale
9
Oct 10, 2015 11:37 PM